In this guide, we will see how we can verify a Facebook Ads domain through the FRAMEWORK360 platform.
Step 1: Add the Facebook Pixel through the “Web Tracking” section
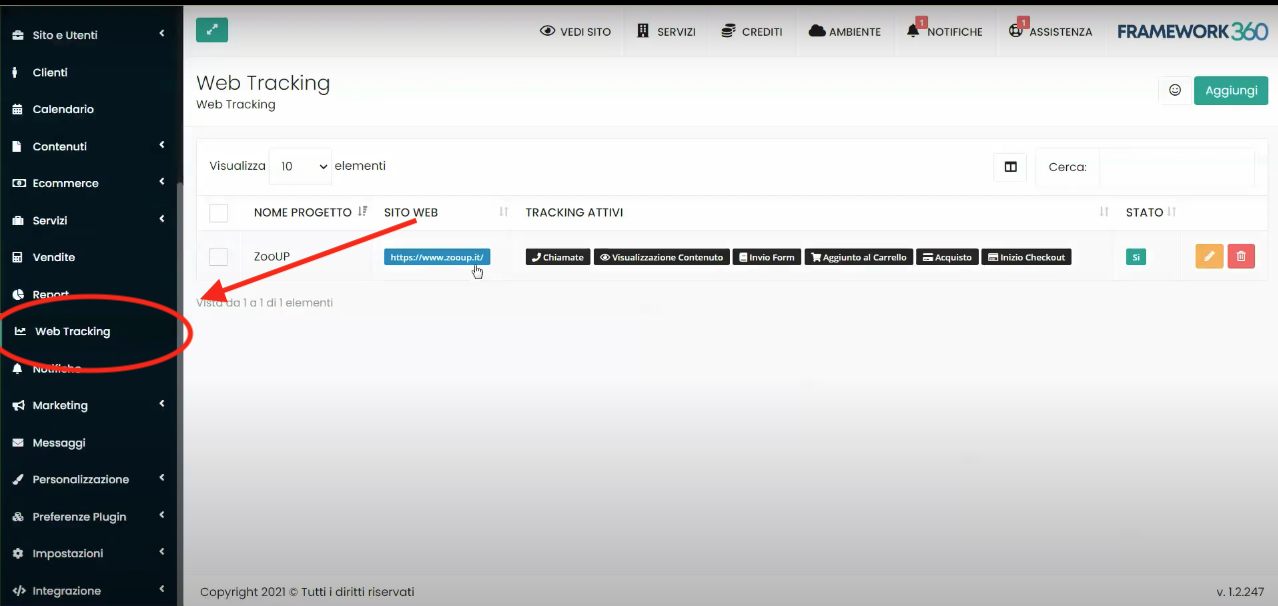
Alright, the first step to verify the domain via Facebook's Business Manager is to enter the Framework360 platform and go to the Web Tracking option found in the dropdown menu on the left, as shown in the figure:
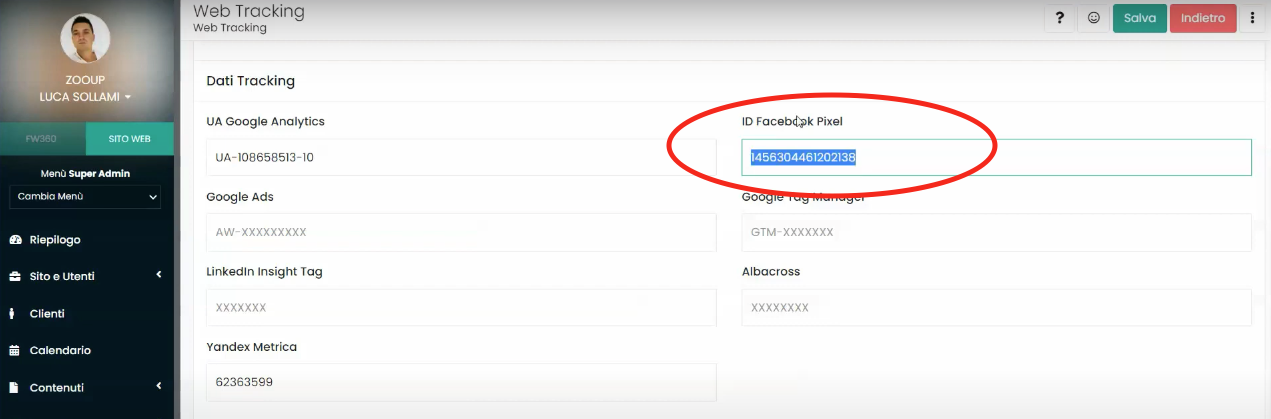
Once inside, we open the previously created project and insert the Facebook Pixel in the right section ID Facebook Pixel, as shown in the following figure. This insertion will allow Facebook to track conversions that occur on our site.
Step 2: Add the domain to Facebook's Business Manager
We now move over to Facebook's Business Manager to add our domain.
Navigate through the dropdown menu located on the left, first to the item Brand safety and then to the sub-item Domains.
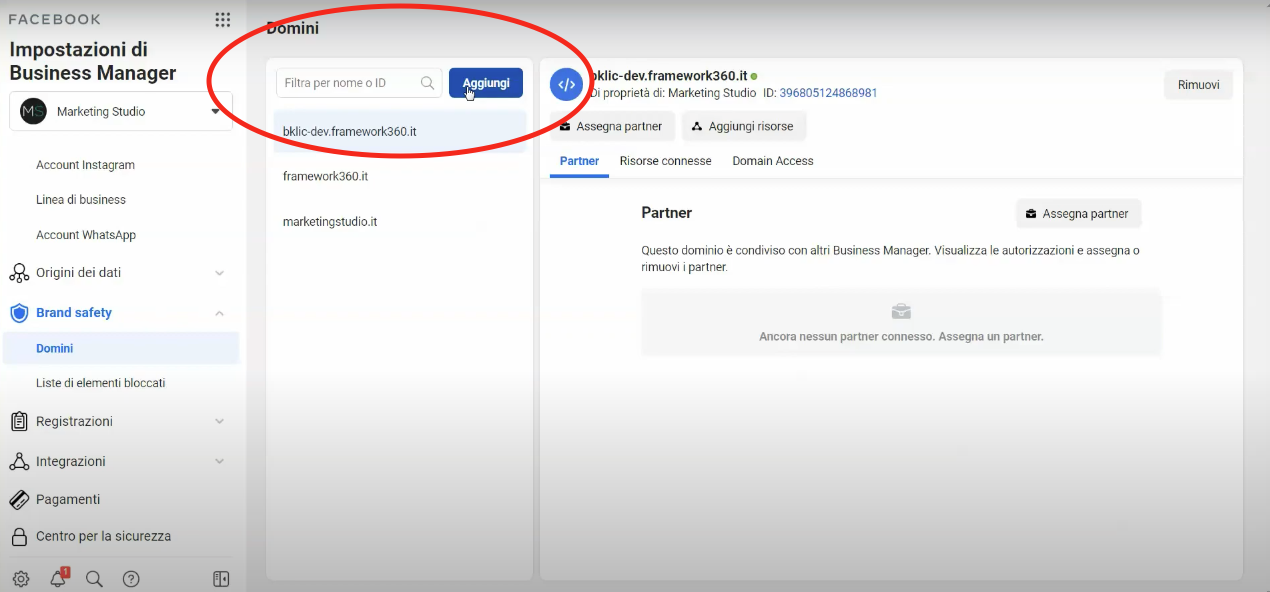
At this point, we will proceed to add our domain using the Add button as shown in the previous figure.
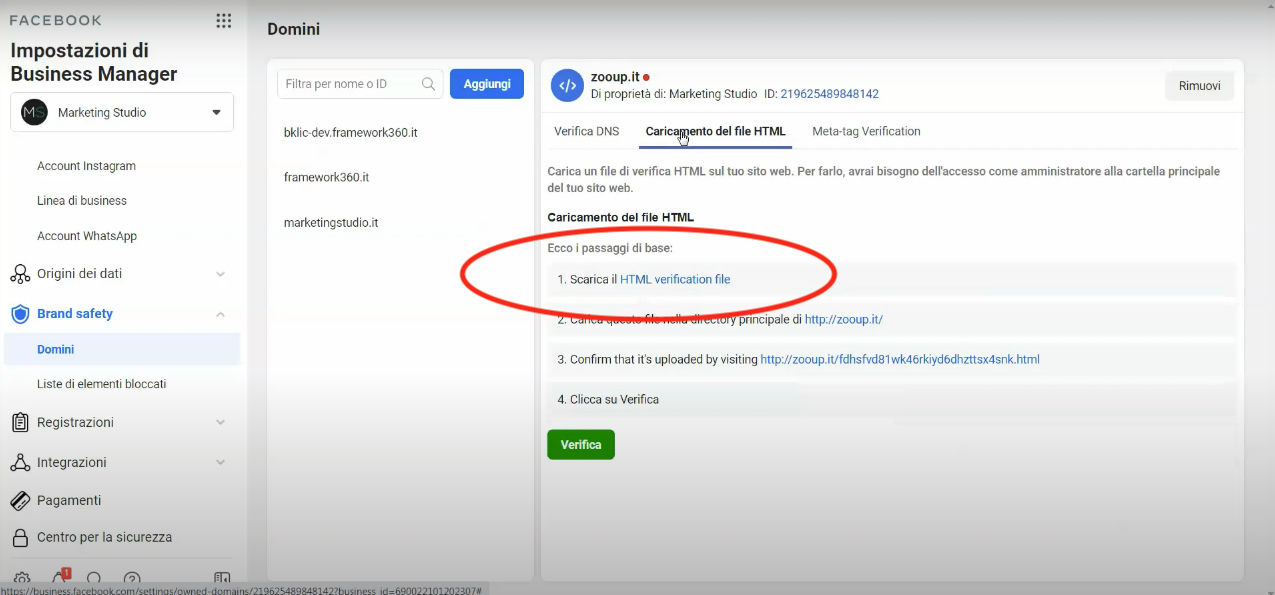
Step 3: Download the Domain Verification Code
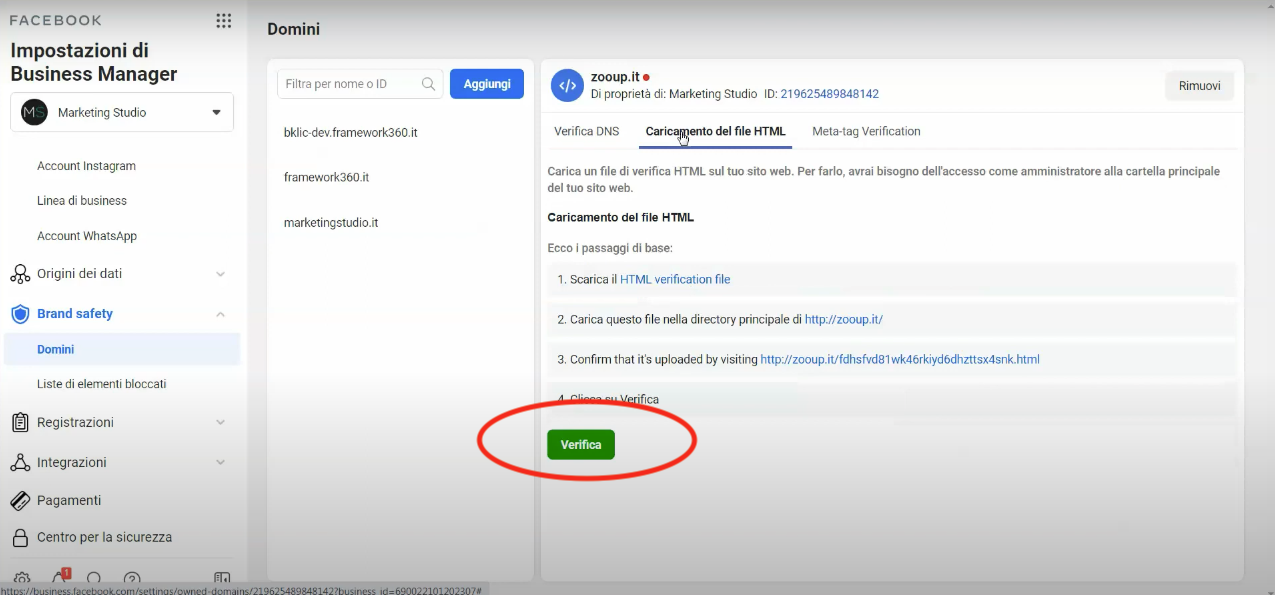
Once the domain is added, Facebook gives us 3 options to verify it. We will choose to verify it by Uploading an HTML File.
This type of verification simply generates a code that we will insert on the server where the domain is pointed. Once inserted, Facebook will be able to verify the presence of the code on the server.
Let's take it step by step!
The first thing we need to do is to download the code using the appropriate link as shown in the figure:
Step 4: Insert the Verification Code on Framework360
At this point, we return to the Web Tracking project and insert the verification code (downloaded at step 3) through the option Upload Verification File.
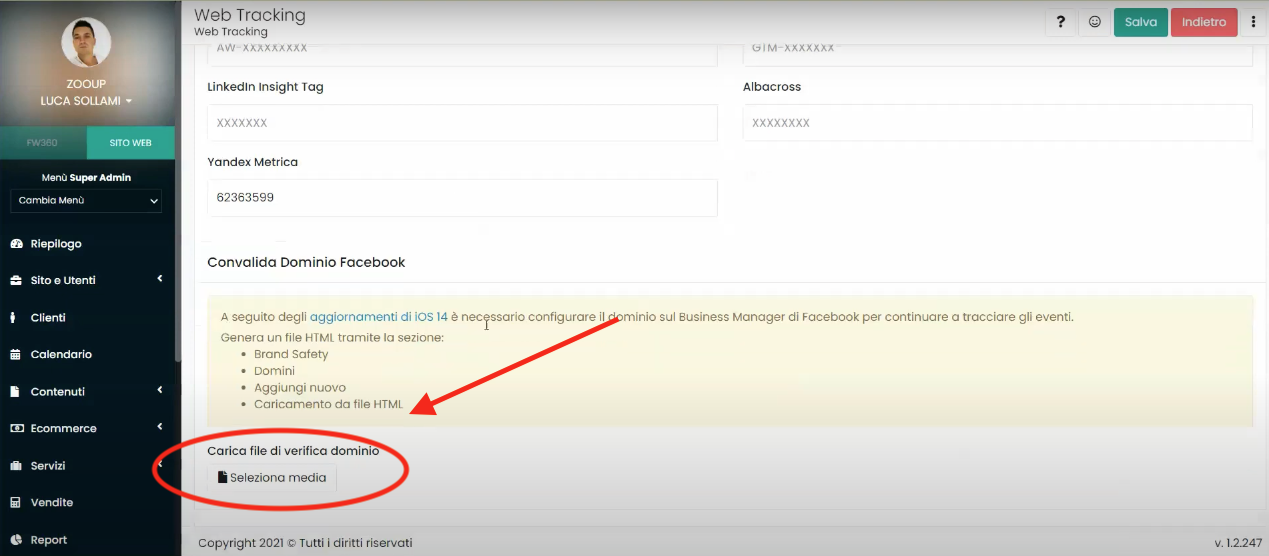
Once the file is uploaded, we click on Save and return to the Facebook Business Manager to complete the verification.
Step 5: Complete the verification on Facebook Business Manager
To finish the modification, let's go to the Facebook Business Manager page from where we downloaded the verification file and click on the Verify option as shown in the figure: