In this guide, we're going to see how tracking links work.
What are tracking links?
Tracking links allow us to use UTMs, a UTM is a variable that is added to the URL to understand where the traffic received on the website comes from.
To better understand the use of UTMs, let's try an example: assuming we've created a Facebook campaign that brings customers to a specific page on our website, without UTMs we wouldn't be able to understand which visitors have arrived at that particular page from the Facebook campaign and which ones have come from Google or elsewhere, and furthermore, we would not be able to comprehend the actions taken on the web page by those who arrive from the Facebook campaign. As anticipated, to solve this problem, UTMs come to our rescue; they are additional codes that are inserted at the end of the URL of the interested page. Through them, we would be able to distinguish from which source our visitors are coming and what visitors from each source do on our website.
Now let's understand in a few simple steps how to create a UTM with Framework360 and how to comprehend the actions of customers who entered through our UTM.
Step 1: Set up a UTM
First, let's go to the submenu under Framework360's main menu Tracking Links by following these steps:
Tracking > Tracking Links
Within this section, we will find a list of all the tracking links that have been created, and we can create a new one by clicking on the button at the top right Add.
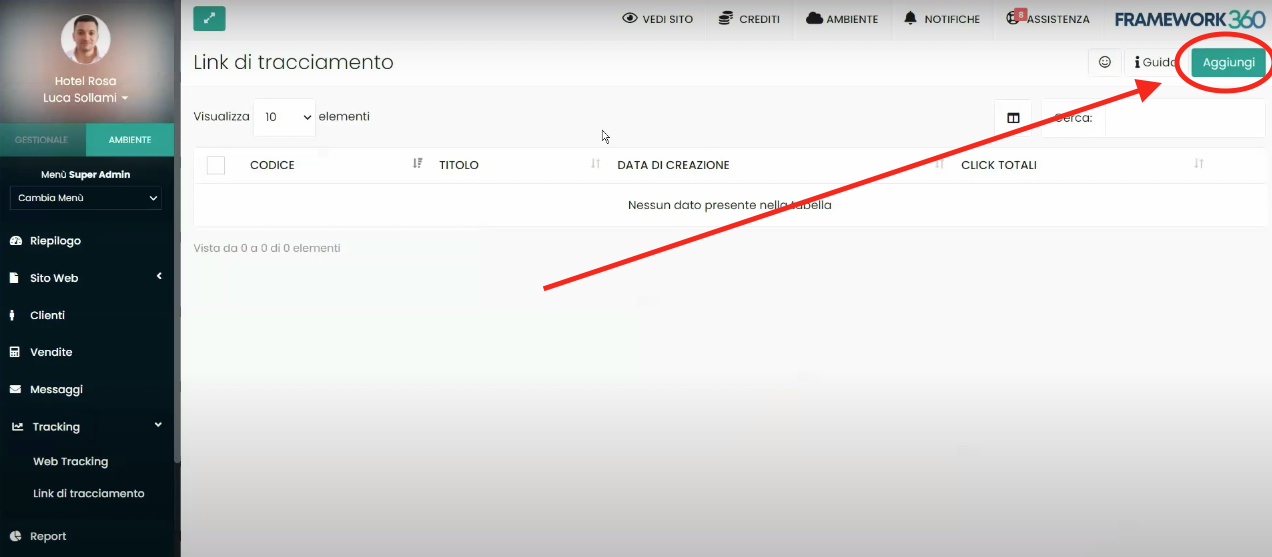
We are now going to create one, during the creation phase of our tracking link we will be faced with the following screen:

Where we will insert the Title we want to give to our tracking link and the corresponding UTM Code.
Once these two parameters are inserted, Framework360 under the heading Usage will illustrate the tracking link we have created.

We should do nothing else but copy the tracking link and
paste it at the end of the URL we wish to track.In our example, the tracking link is ?utm=campagnanatale, let's imagine we want to track visitors to the Framework360 home page coming from a Facebook campaign and the home page URL is as follows: https://framework360.it/. All we would need to do is add the tracking link to the end of the URL; the final link will be as follows: https://framework360.it/?utm=campagnanatale. Well, the newly created link will be the one that we will add in the Facebook campaign in order to track customers who arrive on the home page from the campaign.
Step 2: Set Up a Tracking Project
Once we have created the tracking link, we need to tell Framework360 what user behaviors should be tracked. To do this, we must create a new Tracking project through Framework360's main menu section Web Tracking. To analytically understand what the functionalities of the Web Tracking module are and to know how to create a new Tracking project I have developed a dedicated guide which you can consult by clicking here.
Once we have created the Tracking project and defined within it the goal we want to track (for example, all users who click on the telephone number present on the page), we can check how many users have achieved this goal by going through the tracking link we created by visiting the tracking link project created in step 1 and checking the Statistics section.
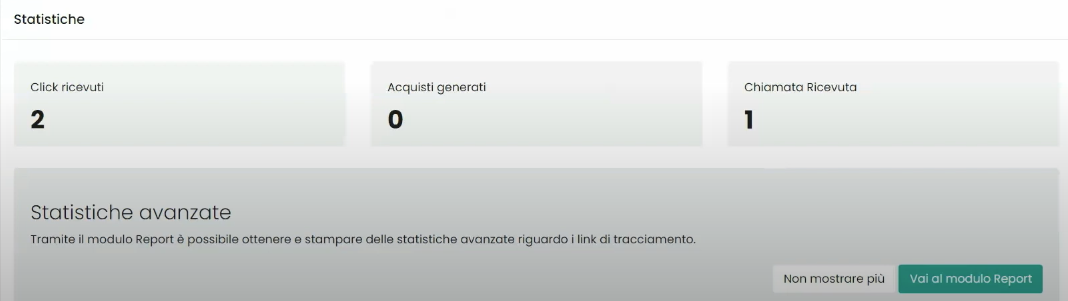
We can notice that in the example screenshot shown above, it indicates that there have been two clicks and one call attempt made through that specific tracking link.
Step 3: Assign a Label
Framework360 also gives us the ability to assign Labels to customers who come through the tracking link.
To do this, we need to go to the submenu of Framework360's main menu Tracking Links by following these steps:
Tracking > Tracking Links
Once inside, we click on the tracking link we intend to modify and assign the label through the Label Assignment option present in the Customer Profiling area.

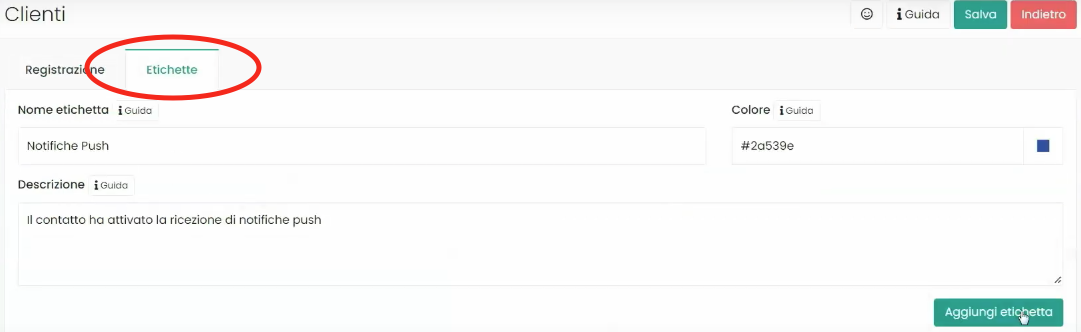
At this stage, we could assign one of the already created labels to customers. If we wanted to create a label instead, we would need to go to the Customers submenu in the main menu of Framework360 by following these steps:
Settings > Customers
Once inside the Customers area, we should head over to the Labels section, as shown in the figure, to manage and create new labels.
Step 4: Assign a List
Framework360 also gives us the possibility to include all customers who come through the tracking link into a specific list.
To do this, as seen in the previous step for Label assignment, we should go to the submenu of Framework360's main menu Tracking Links by following these steps:
Tracking > Tracking Links
Once inside, we click on the tracking link we intend to modify and assign the list through the List Assignment option present in the Customer Profiling area.

To manage lists we should go to the submenu of Framework360's main menu Lists by following these steps:
Marketing > Recipients > Lists


