In this tutorial, we will see how to track the scroll of a web page using Framework360. By the scroll of a web page, we mean the action that visitors take when they scroll through the page to read its content.
To track the scroll action on a page with Framework360, it is not mandatory to have a site built on Framework 360, as it can be integrated with third-party platforms, such as WordPress. However, tracking is much more accurate if we use the same platform.
Step 1: Create a tracking project
Firstly, we need to access the back office of Framework360 and go to the left sidebar under "Tracking" and then "Web tracking".
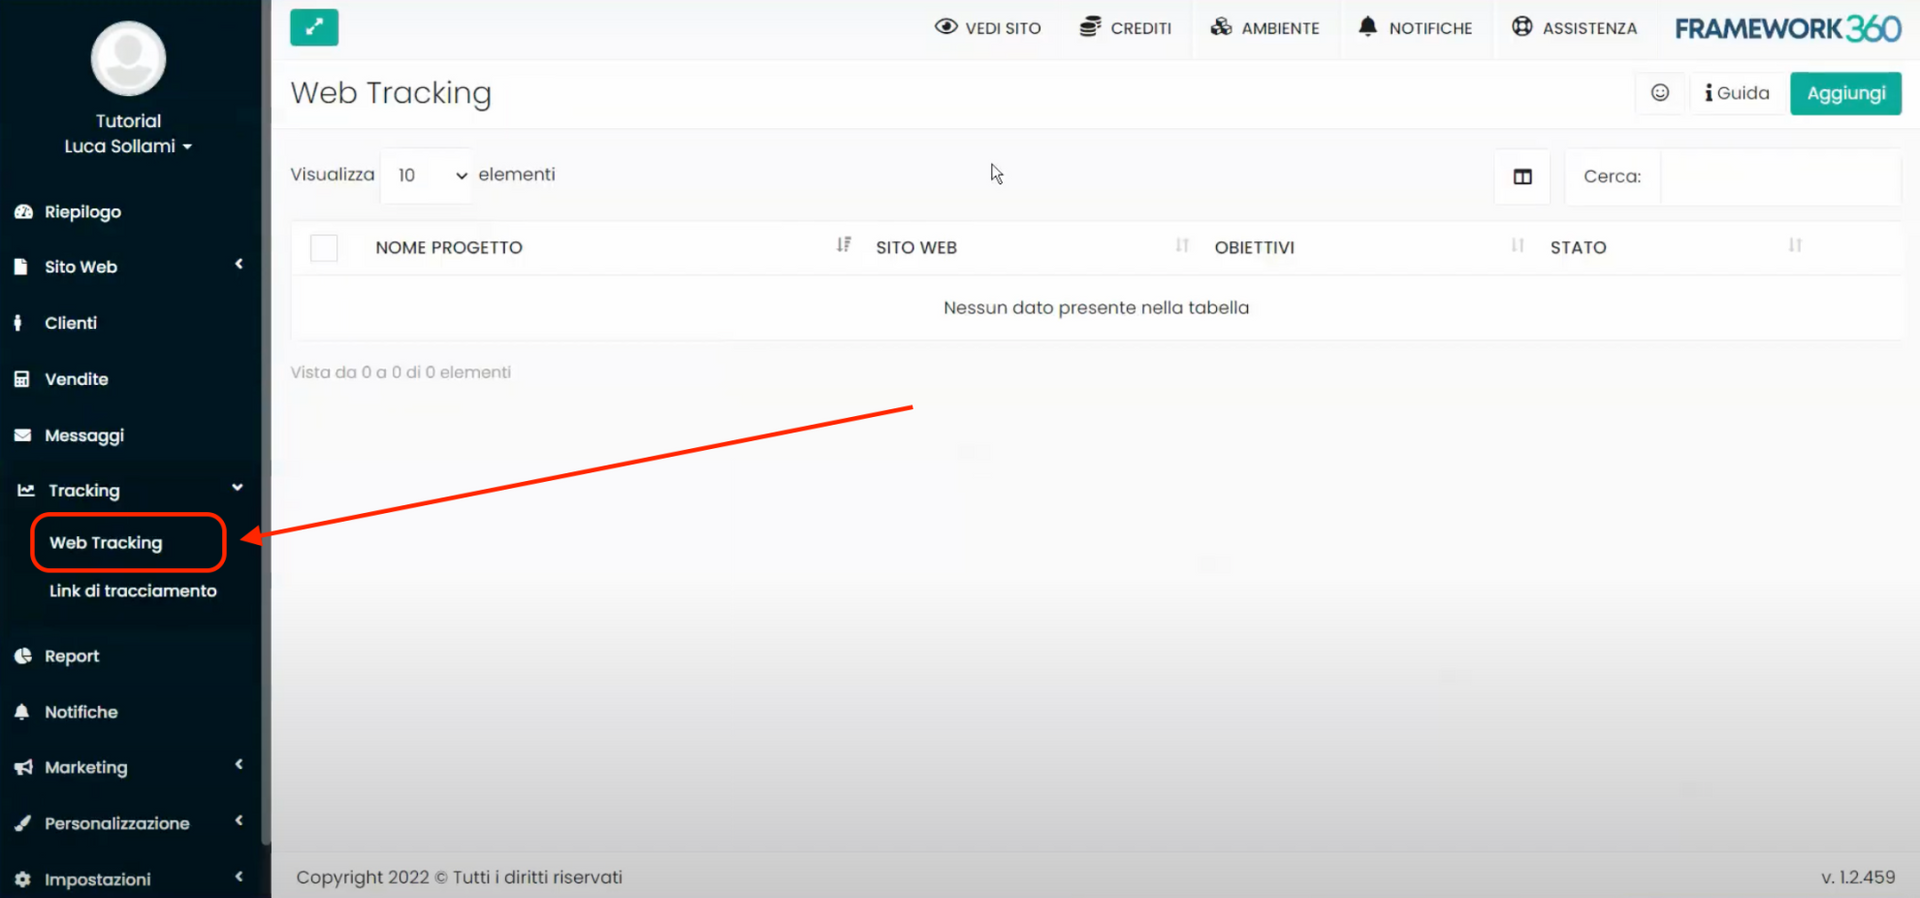
At this point, by clicking on the top right button "Add", we will create a new tracking project.
Once inside the project editing screen within the "Project Data" section, we will enter the name of the tracking project, such as the name of the website we wish to track, and under "Enabled Domains", the domain of the site we want to track. If we wanted to use an external domain, we should select the option "Enter an external domain" and then insert that domain.
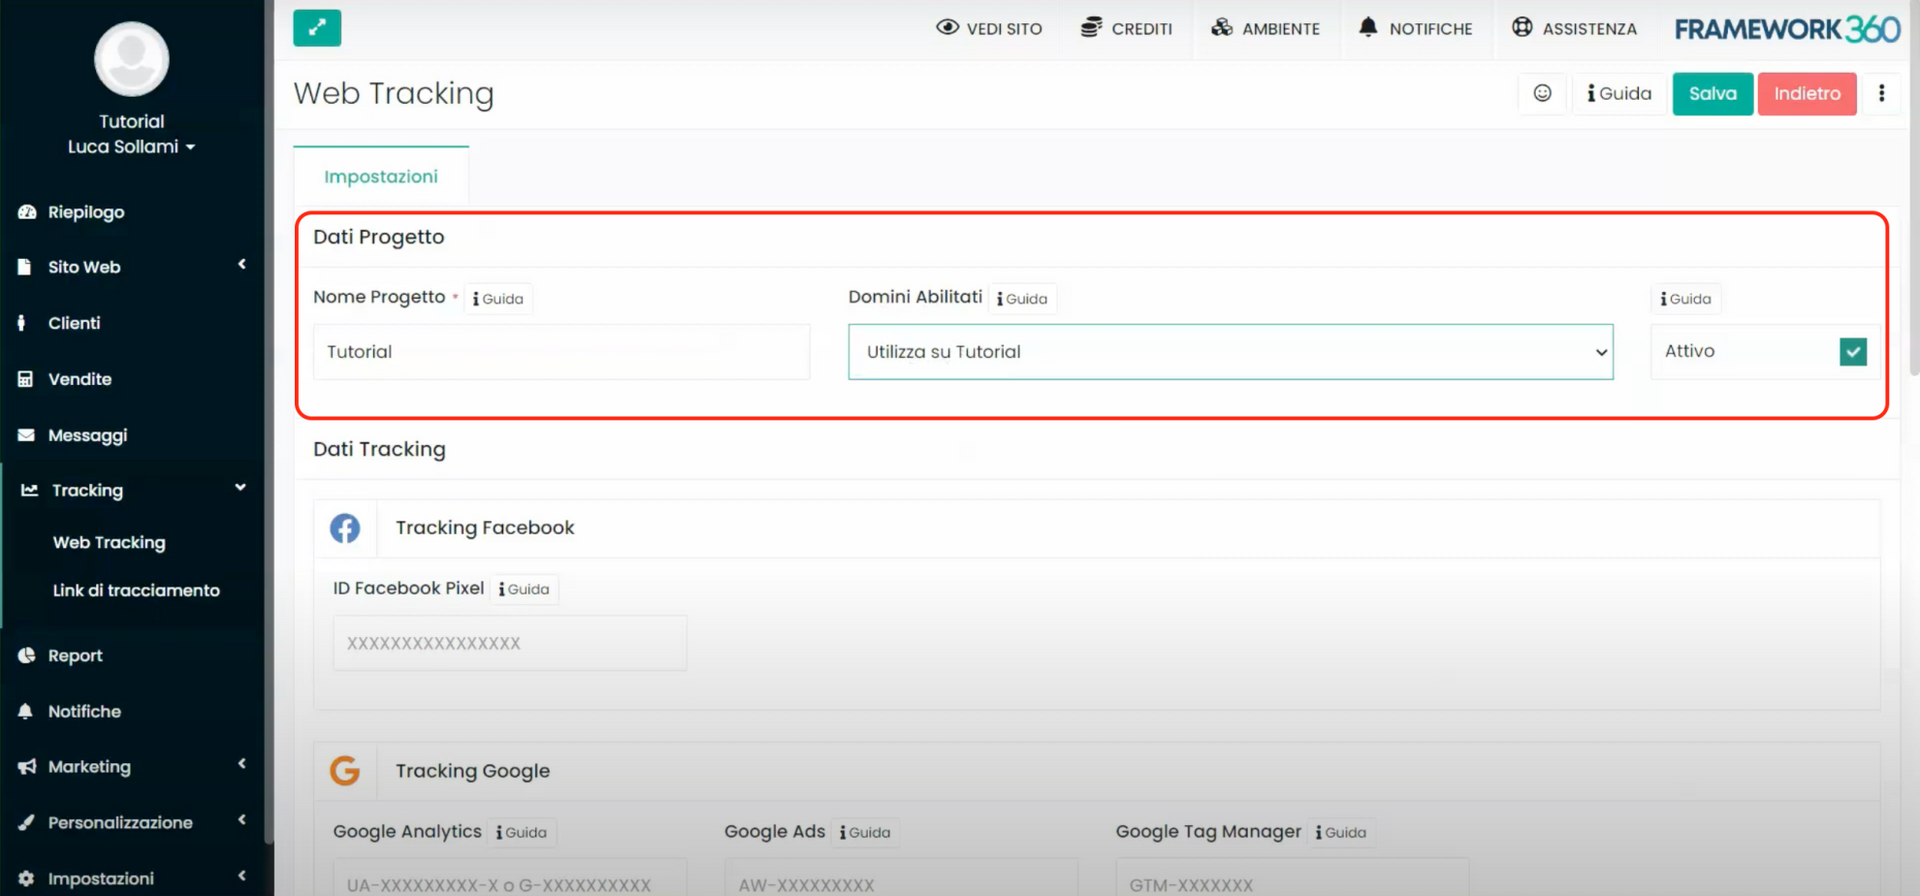
Within the "Tracking Data" section, however, Framework360 gives us the possibility to link tracking software from various advertising platforms, such as Facebook Pixel for example.
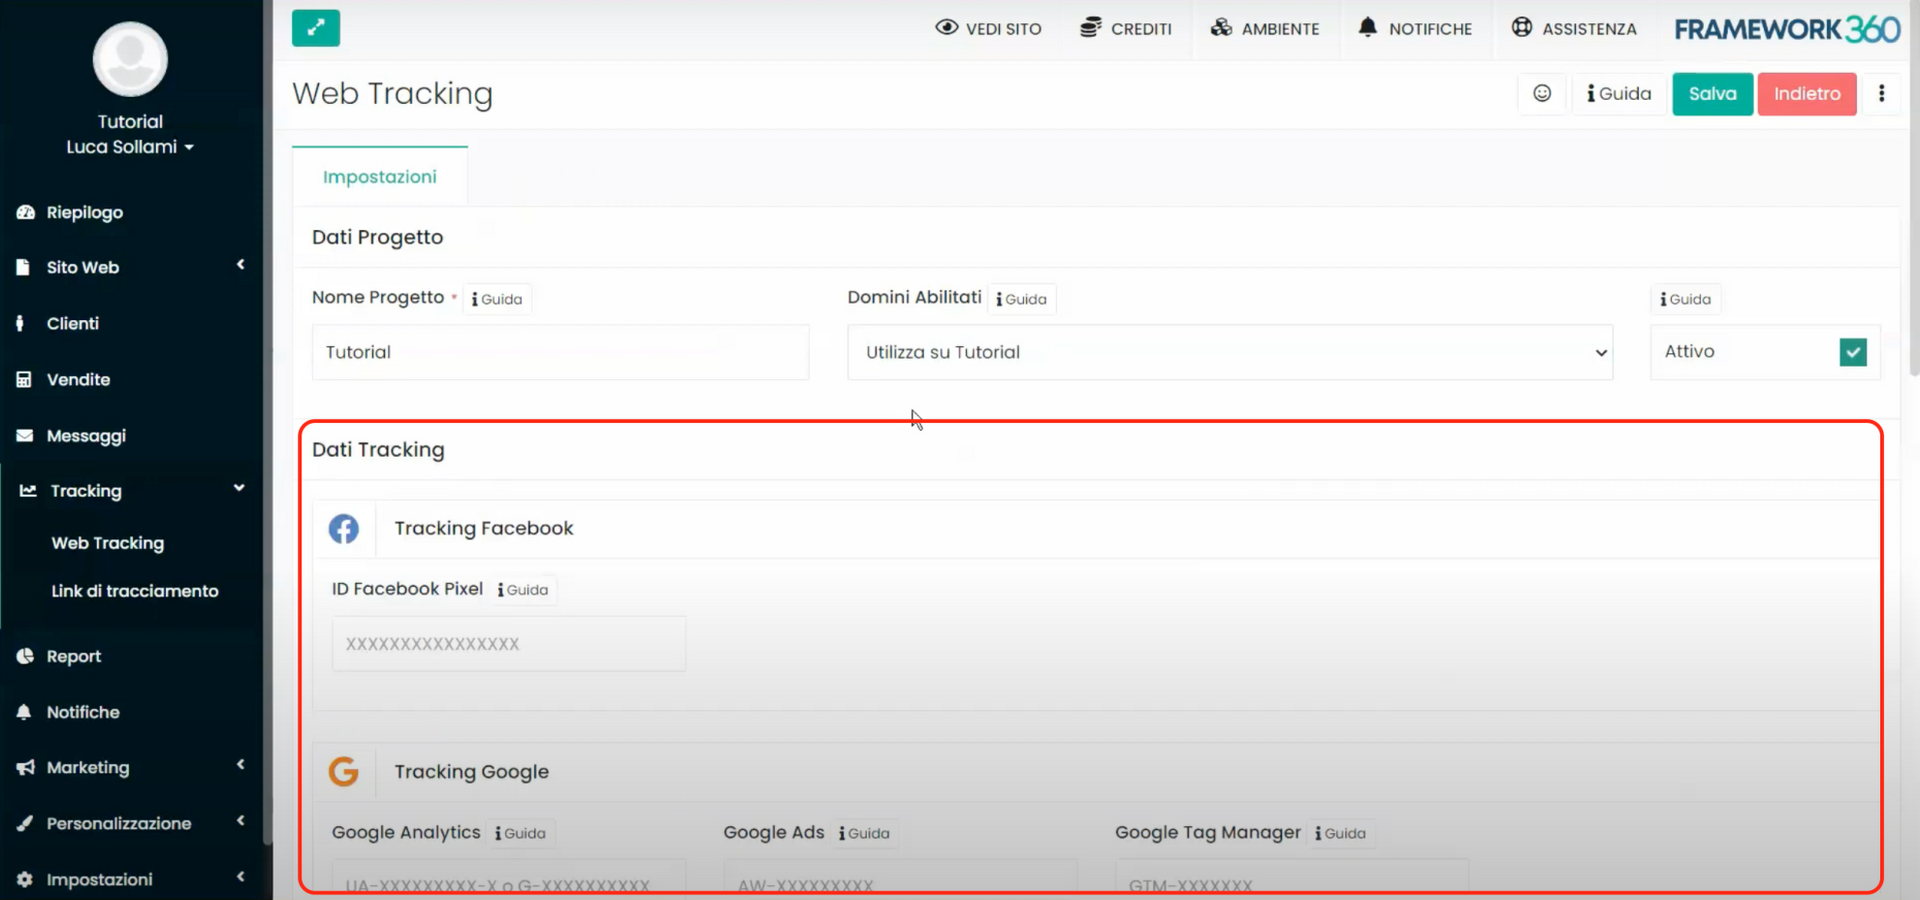
Once the tracking software is connected, saving the project will open two additional tabs within the project editing screen: Goals and Statistics.
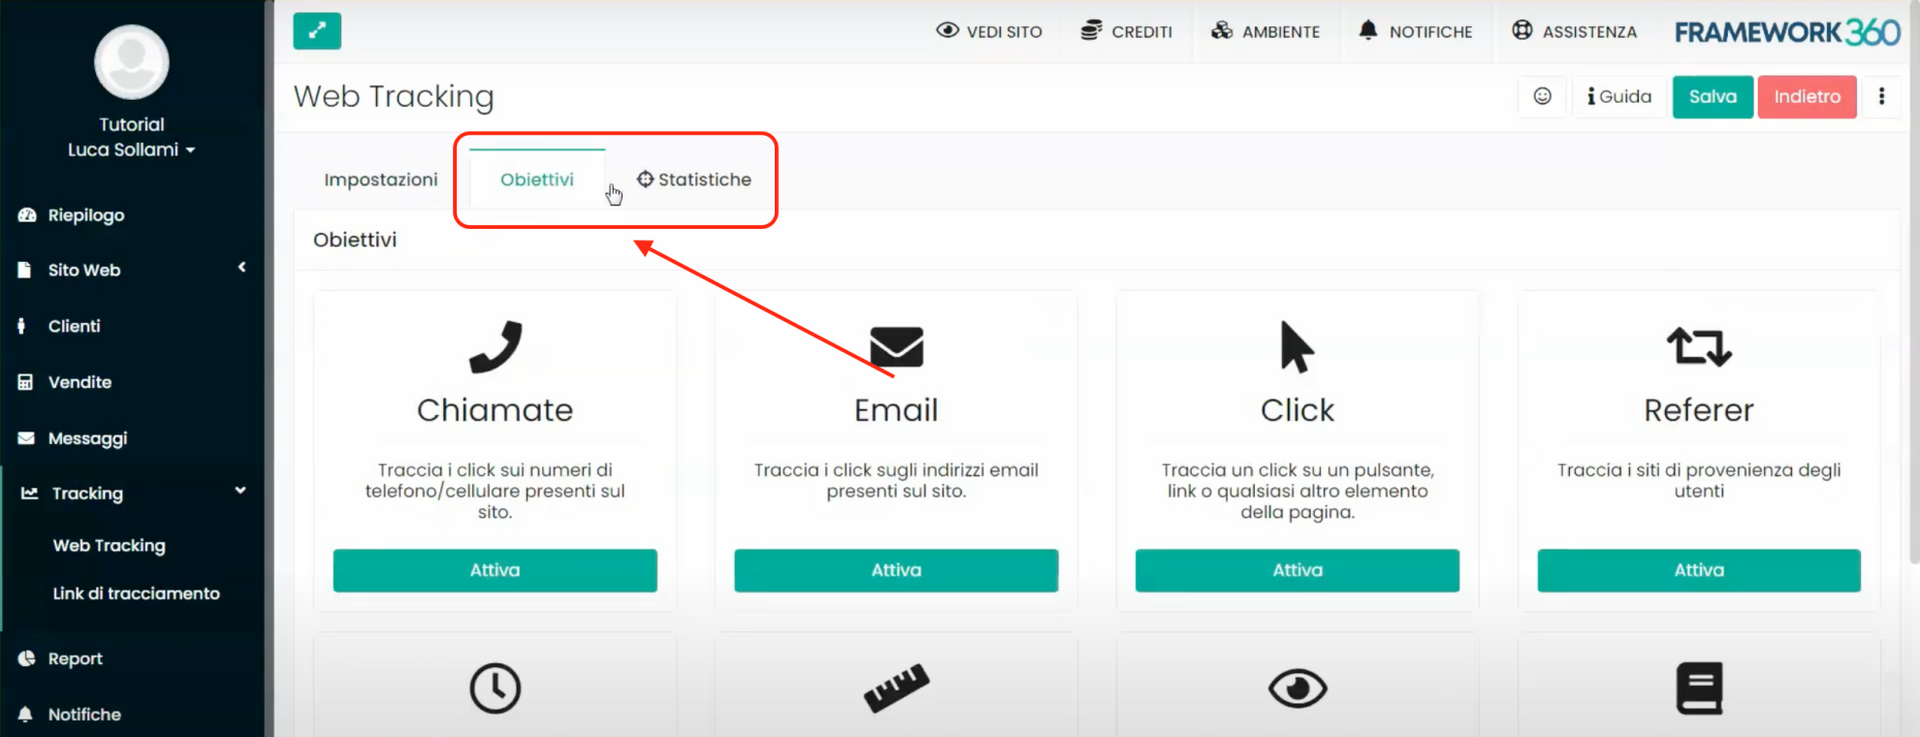
Within the "Goals" tab we will find the different tracking actions that the platform offers us, in this tutorial we will focus on the "Page Scroll" action. In the "Statistics" tab, instead, we can view the data related to the events we are tracking, with information updating in real time as events occur.
If you want to specifically know all the features of the "Web tracking" module of Framework360, you can consult the dedicated tutorial by clicking here. As mentioned earlier, in this tutorial we will focus on how the "Scroll page" goal works.
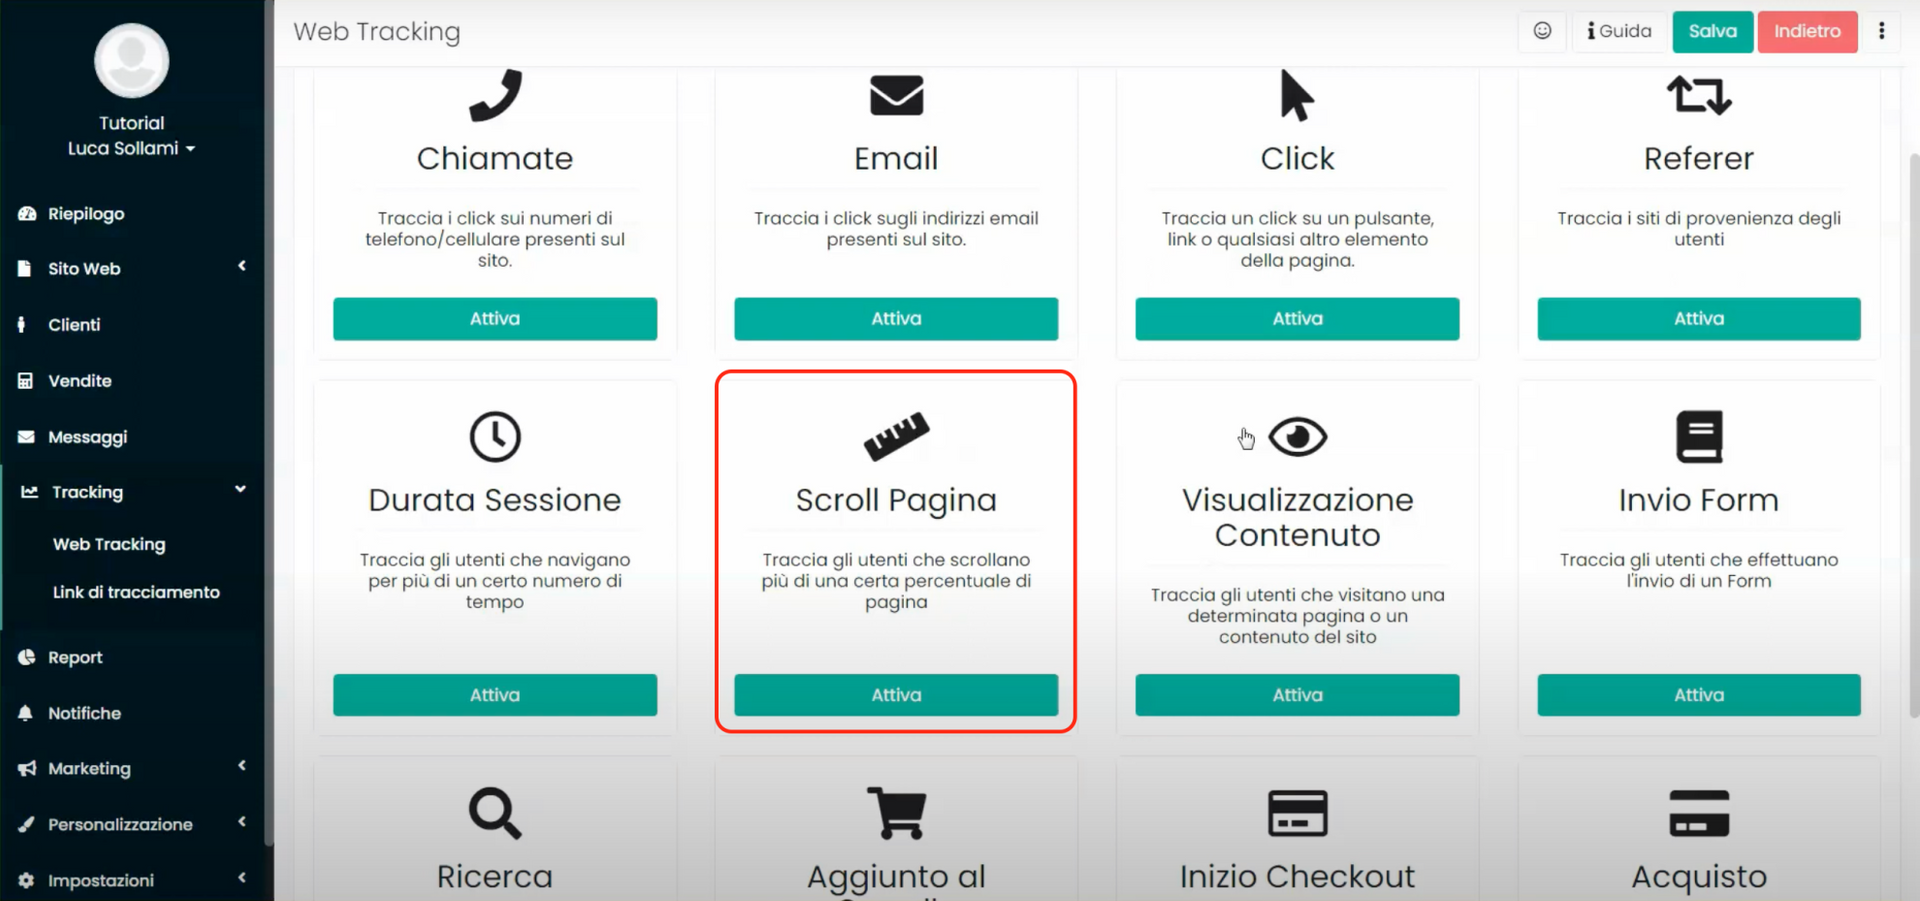
Step 2: Enable the "Scroll page" action
To enable the action that allows us to track the scrolling of pages on our website, let's go to the "Goals" tab and click on the "Activate" button related to the "Scroll page" action, as shown in the following figure:
At this point, a box will open where we can set the goal's settings.
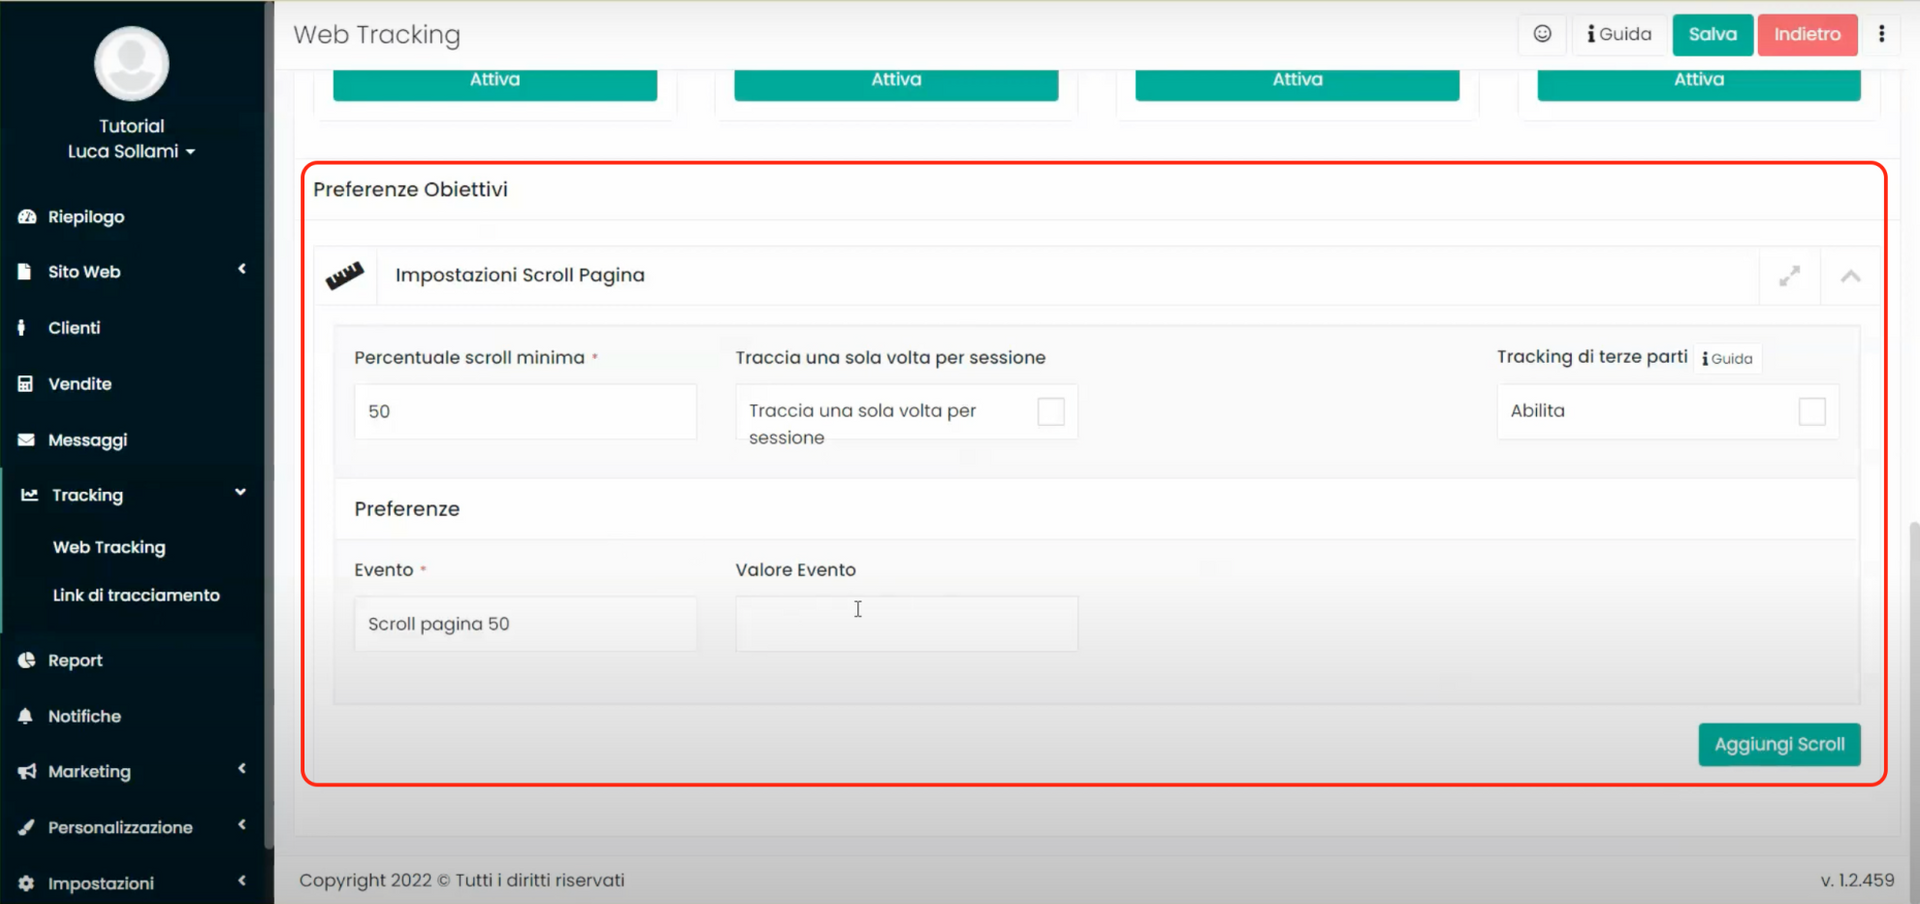
Within the item "Minimum scroll percentage" we will enter the percentage of page scroll that the user must perform for the action to be tracked. Next to it, we can enable the "Track only once per session" option which will allow tracking only the scroll of the first page that the visitor sees; thus, if they visit additional pages on our site these will not be tracked.
Within the items "Event" and Event Value” we will enter the name we want to give to the page scroll event and any custom value that will be assigned to the event. The insertion of a custom value is not mandatory.
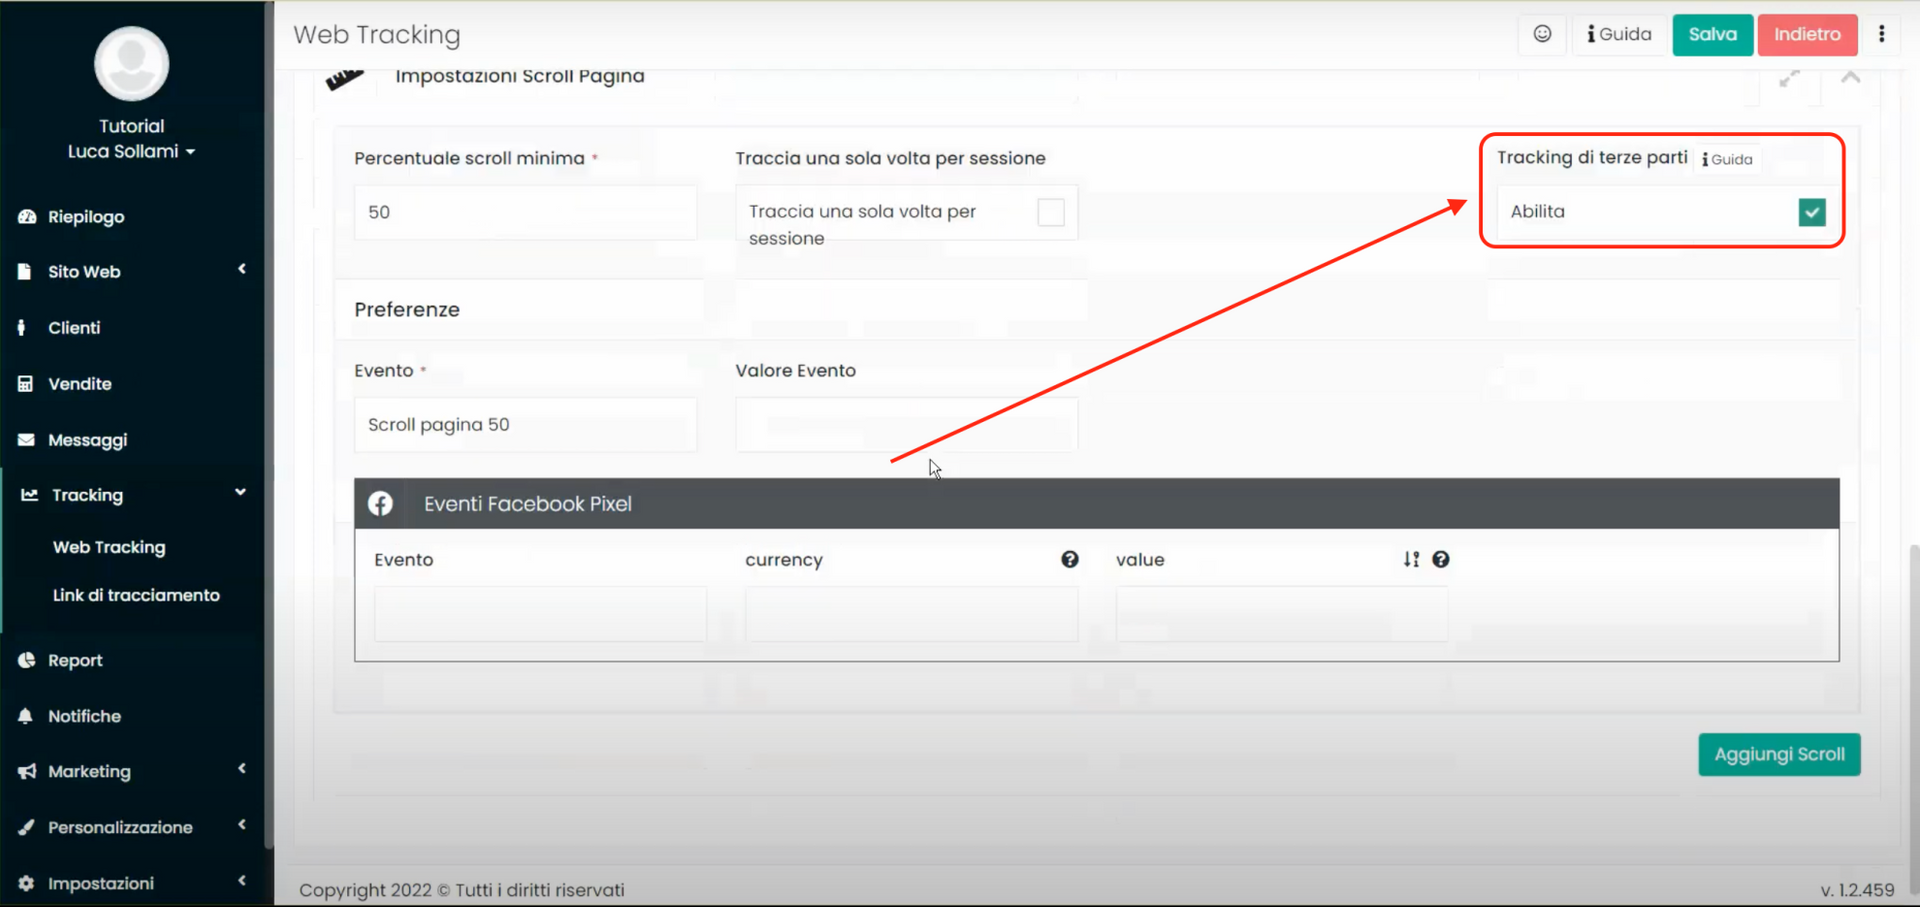
By enabling the “Third-Party Tracking” feature, we will allow the system to send the tracked event also to the tracking software of various advertising platforms that we have entered into the project, such as Facebook Pixel; once the “Third-Party Tracking” feature is enabled, a box will open allowing us to choose which platforms, among those included in the project, to send the event to and what name and possible value to assign to the event.
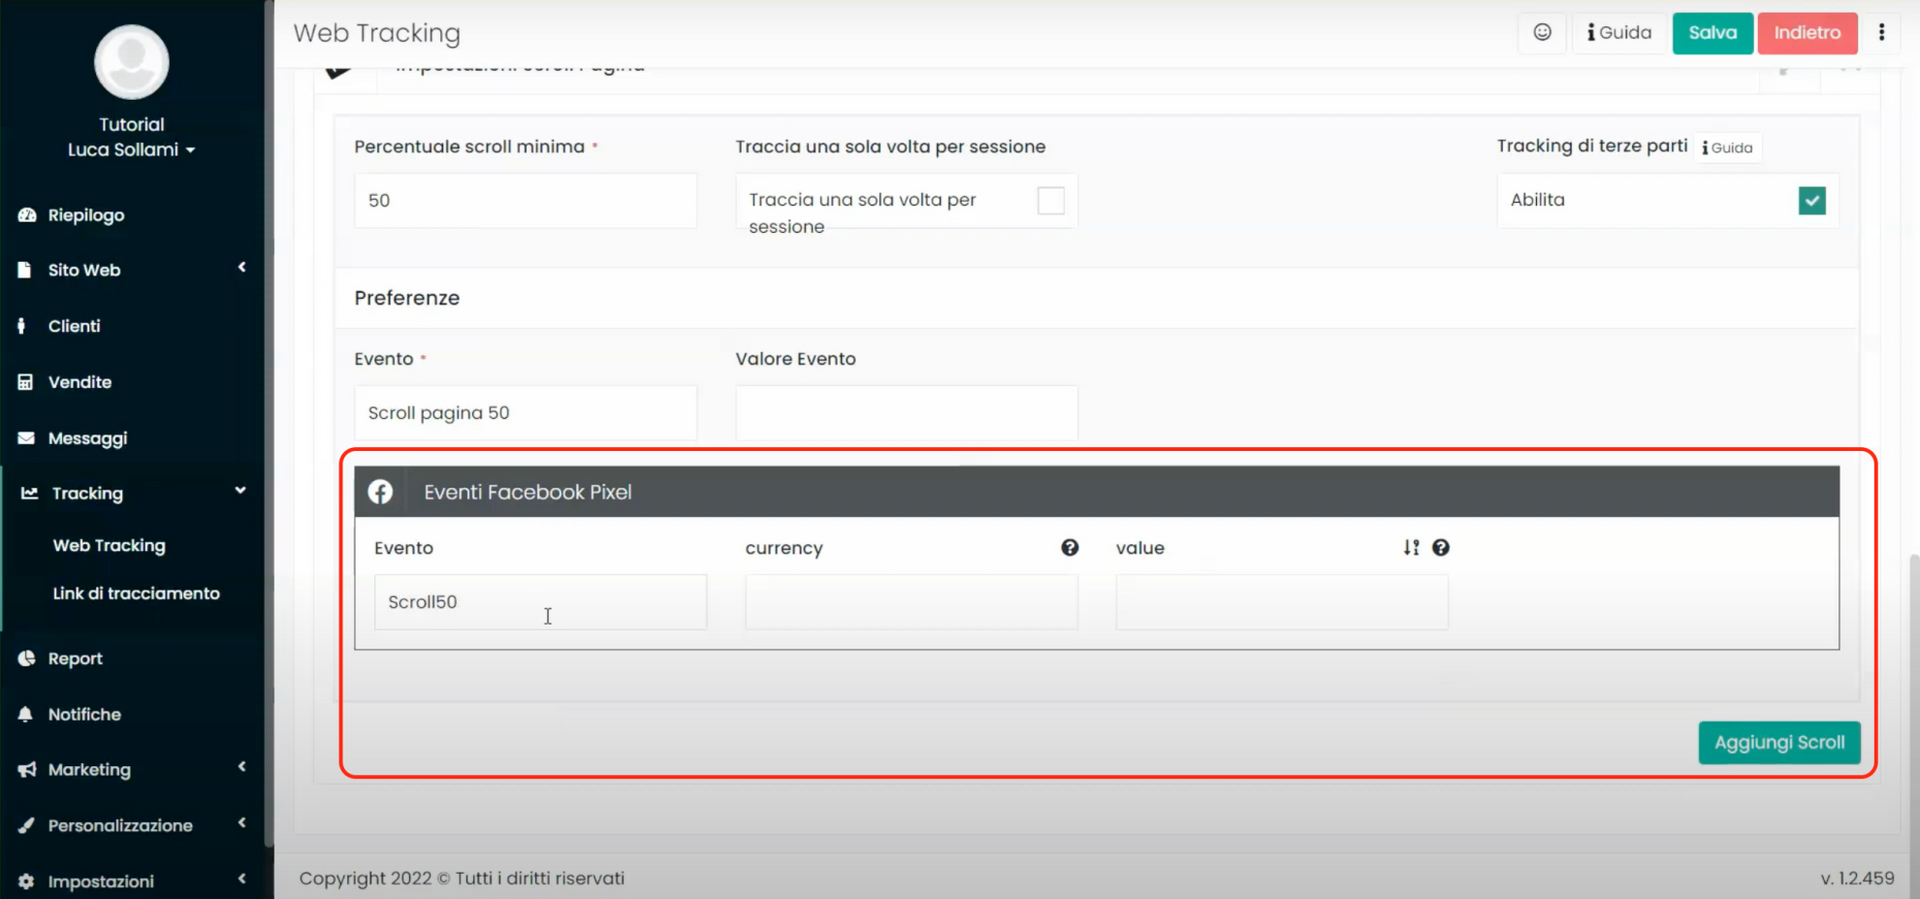
After completing the settings configuration, we can click on the "Save" button at the top right to save the project changes.
Step 3: Data Tracking
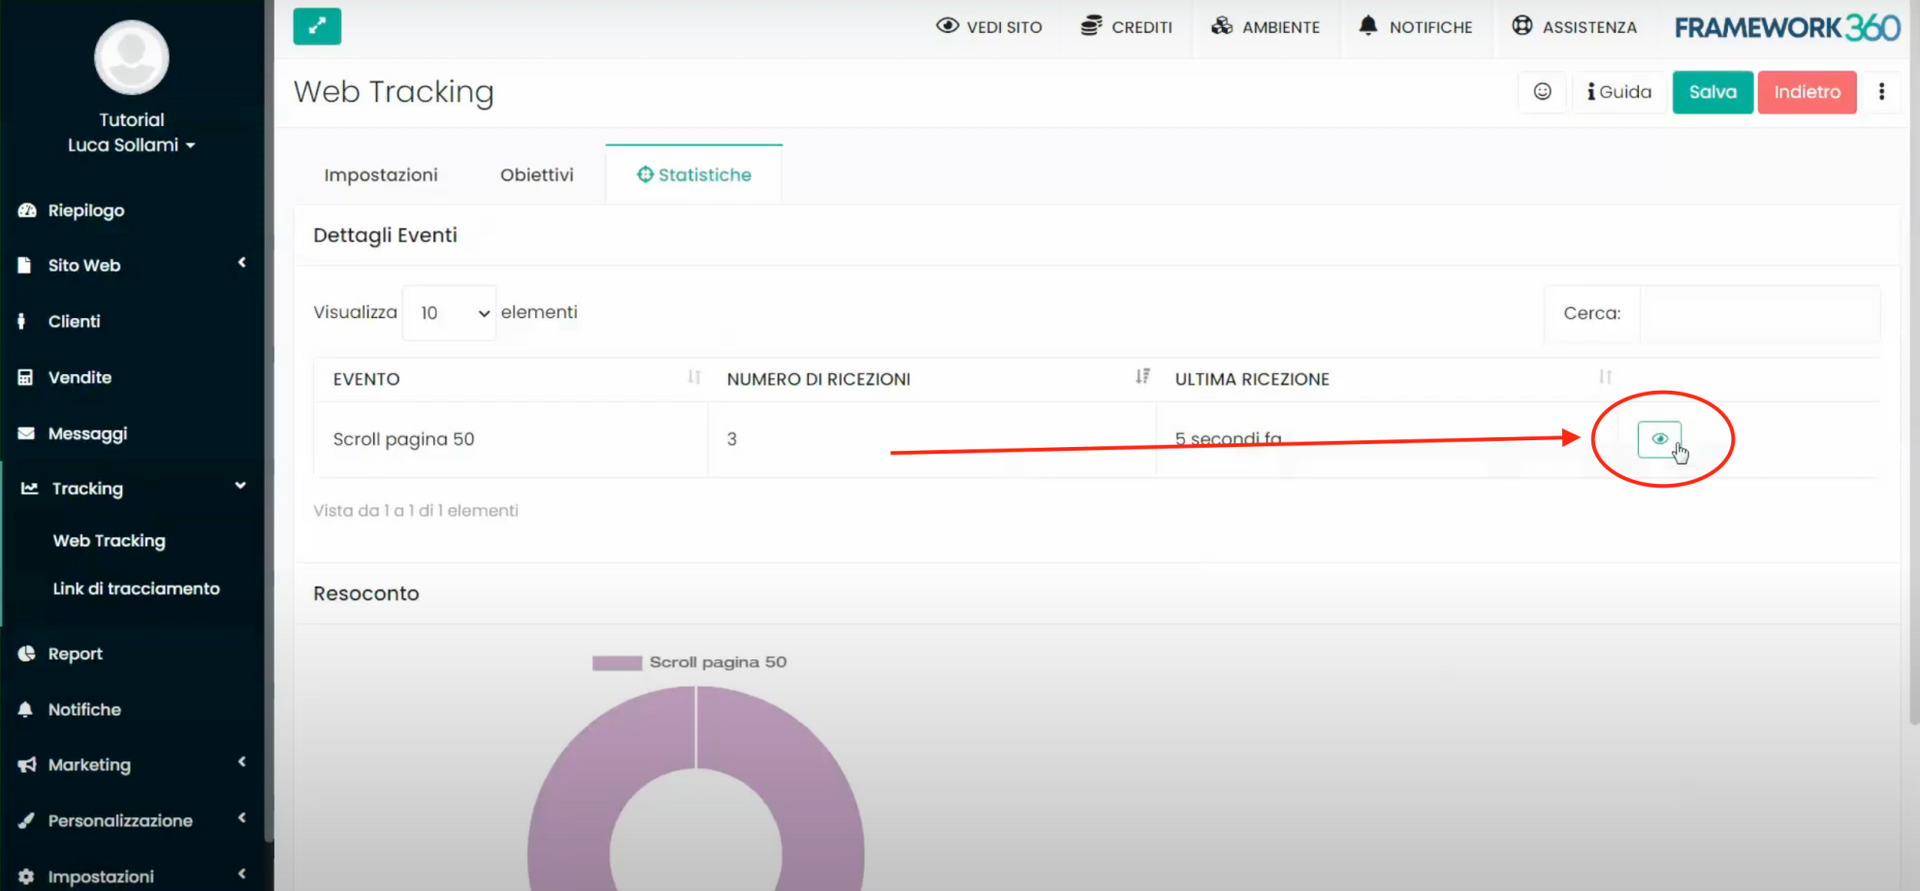
Once we have enabled the "Page Scroll" action, as explained in the previous step, every time a user scrolls through the pages of our website, the system will send the action to the advertising platforms we have set up and will report the action inside the "Statistics" tab of our tracking project.
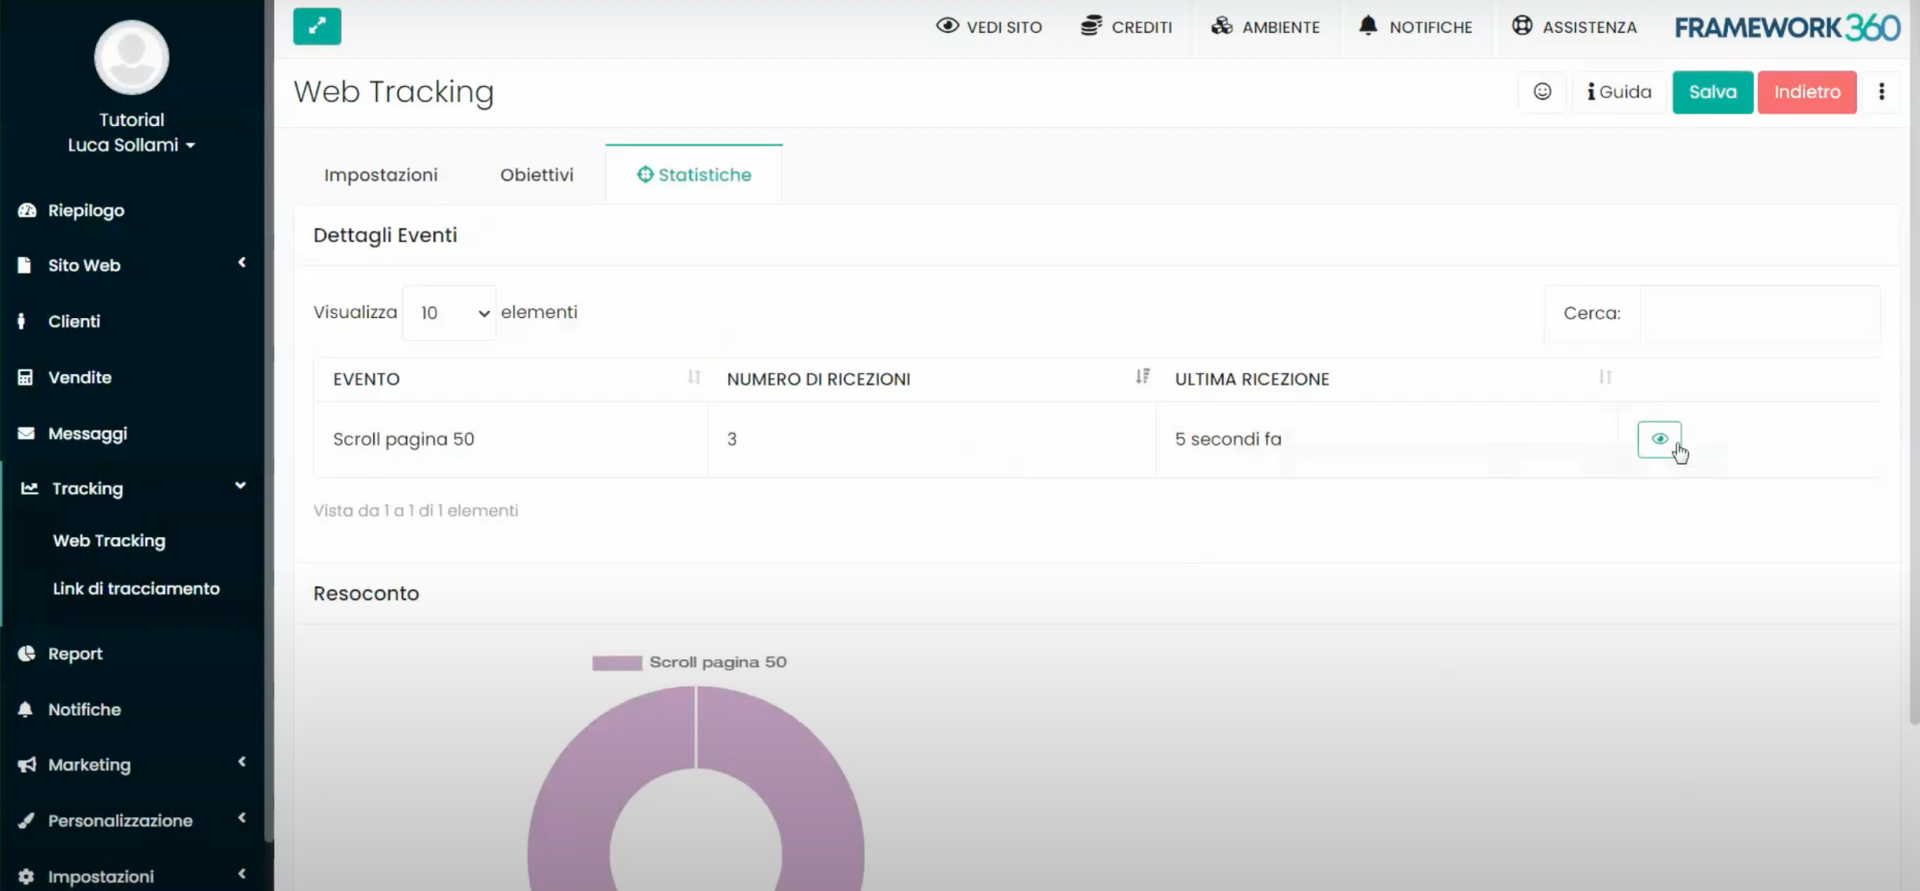
Furthermore, by clicking on the eye icon to the right of the event, as shown in the following figure, we will also have the opportunity to view additional analytical data about the event, including the browser that was used by the visitor, the device (desktop, tablet or smartphone), the operating system (Windows, Apple or Android), the time of conversion, and so on.