Within this guide, we will see how to track phone calls coming to the website thanks to the Web Tracking module of Framework360.
Step 1: Add the phone number to the page
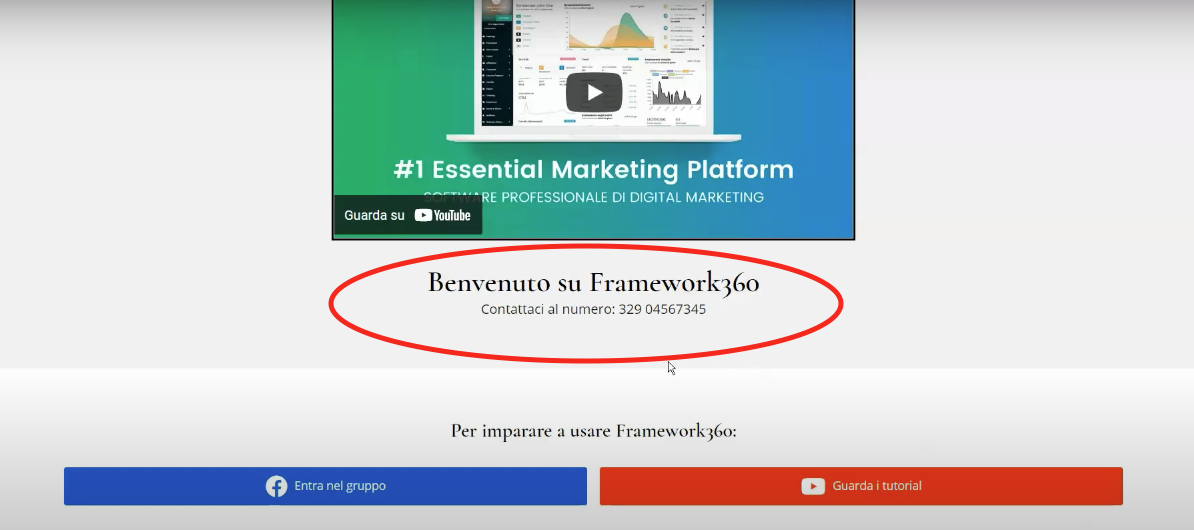
First, let's add the phone number we want to receive our calls on to the page that interests us.
Therefore, we should go to the Pages item in the main menu of Framework360, click on the page that interests us and add a text block through Framework360's Visual Builder where we will report the phone number as shown in the figure:
If you want to know specifically how to edit a page through the Framework360 platform I created some time ago a specific guide that you can consult clicking here.
Step 2: Let's Create a New Tracking Project
Once the phone number has been added to the page, we can now create a new tracking project to be able to track how many calls we have received. We will create this project through the Web Tracking module provided by the Framework360 platform.
The Web Tracking is one of the many exclusive features that Framework360 offers you. With this feature, we can precisely track what people do on our website.
In this video, we will specifically look at how to perform call tracking, if you want to know all the tracking possibilities that Framework360 offers you through the Web Tracking module I have created a specific guide that you can consult clicking here.
Good for creating our tracking project, we should first go to the main menu item of Framework360 Web Tracking and click on the top right button Add.
Once inside, we will find ourselves in the screen where we will set up the information for our project.
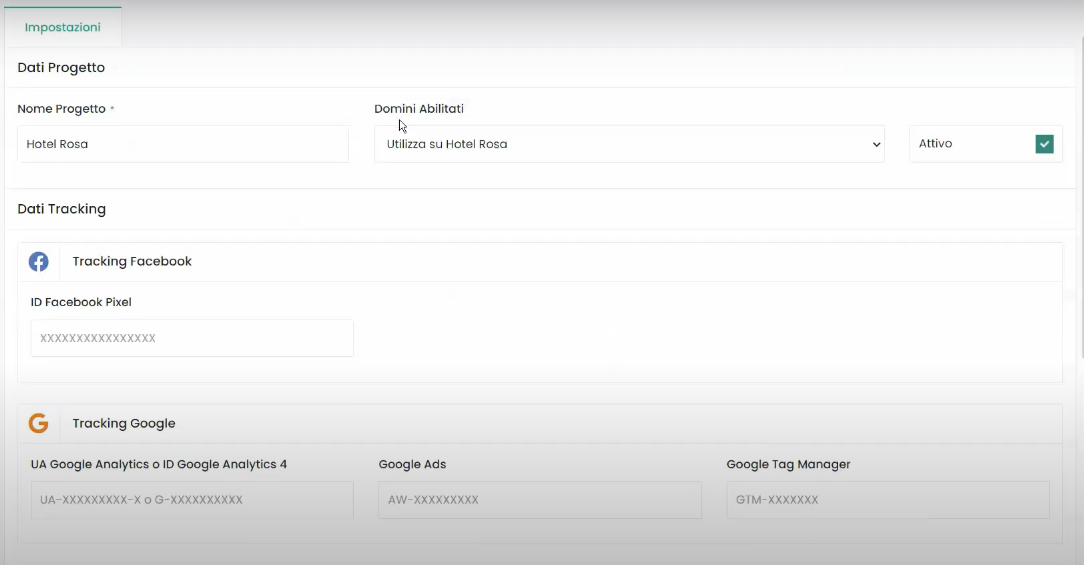
In this screen, we will enter the following information:
- We will define a Name for our project
- We will indicate what is the domain on which we want to perform the tracking, that is, if we want to track our website or another external website (for setting up the tracking code on an external website, I recommend seeking technical assistance)
- We will insert the Tracking Data of the advertising platform we are using.
For example, if we were advertising on Facebook, we would insert the Facebook Pixel ID so that our site will communicate to Facebook when our user clicks on the phone number on the page. This will allow Facebook's algorithm to optimize campaigns towards an audience much more likely to take the action of calling.
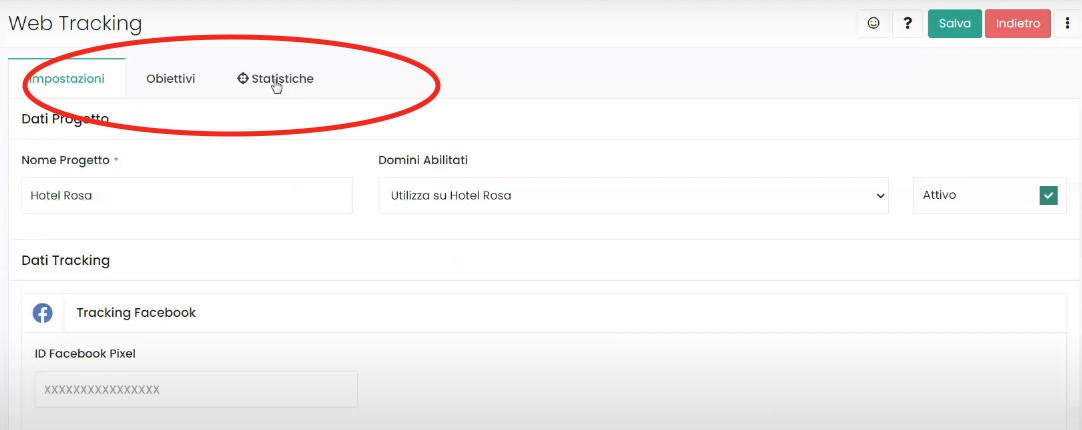
Once we have set up our project, we will click on the Save button at the top right corner. At this point, next to the Settings tab, two other tabs will have been created:
- Goals
- Statistics
Let's now see how to best configure these two tabs.
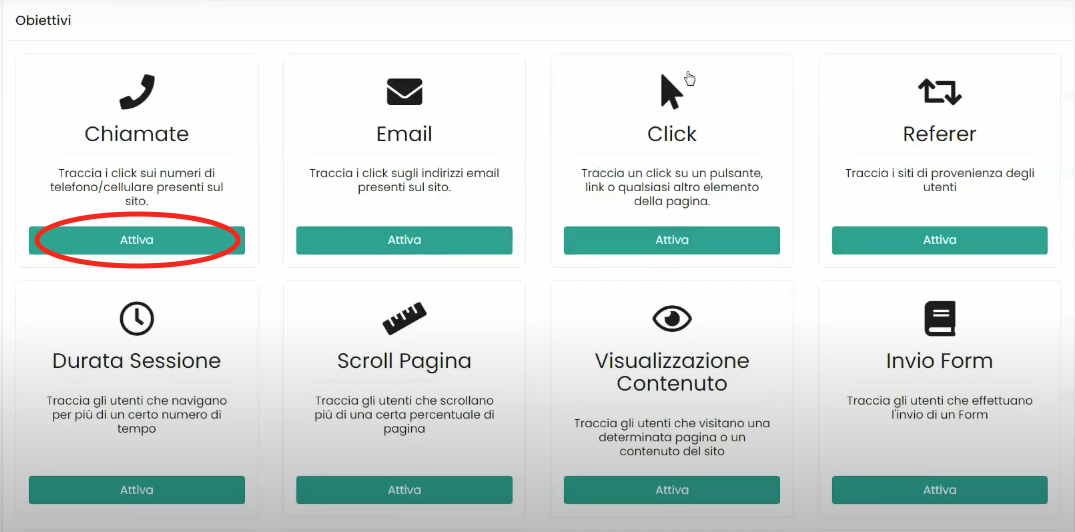
Step 3: Setting the Goals tab
The goals tab gives us the ability to easily select the actions we want to enable on our website. In this guide, we will see how to enable the Calls action. Therefore, we will click on the Activate option next to the Calls action as indicated in the following figure:
Once we enter the configuration screen for the Calls action, we will be presented with a settings tab that we need to set up in order to track clicks on phone numbers.
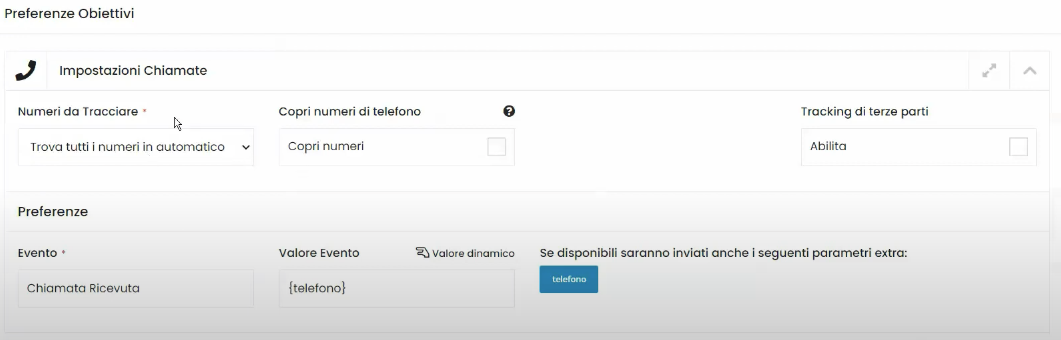
With the option Numbers to Track, we could decide whether to track all numbers on the site or only certain numbers.
With the option Hide phone numbers, we could decide whether to display the phone number immediately on our site, or to cover the phone number with a string and give users the possibility to view the phone number only if they click on the string.
With the option Preferences, we could set the Event and the Event Value; by default, Framework360 will set the event as Received Call and the value as Phone.
Step 4: Let's analyze the tab Statistics
In the Statistics tab, all the results obtained in the tracking module will be summarized. In our case, inside this tab we will look at the list of clients who have potentially called us.


