Within this guide, we will see how to set up a checkout with Framework360.
What is a checkout?
A checkout is the final part of an e-commerce website that allows the customer to purchase the products they have previously added to the cart or that they are intending to buy.
Let's now understand how, in a few simple steps, to set up a checkout.
Step 1: Create our checkout
The first thing we need to do is go to the main menu item of Framework360 Checkout following these steps:
Website > Checkout
At this point, we could modify the checkout that Framework360 created during the installation of the environment or create a new checkout. To modify the checkout created by Framework360, we would only need to click on the checkout.
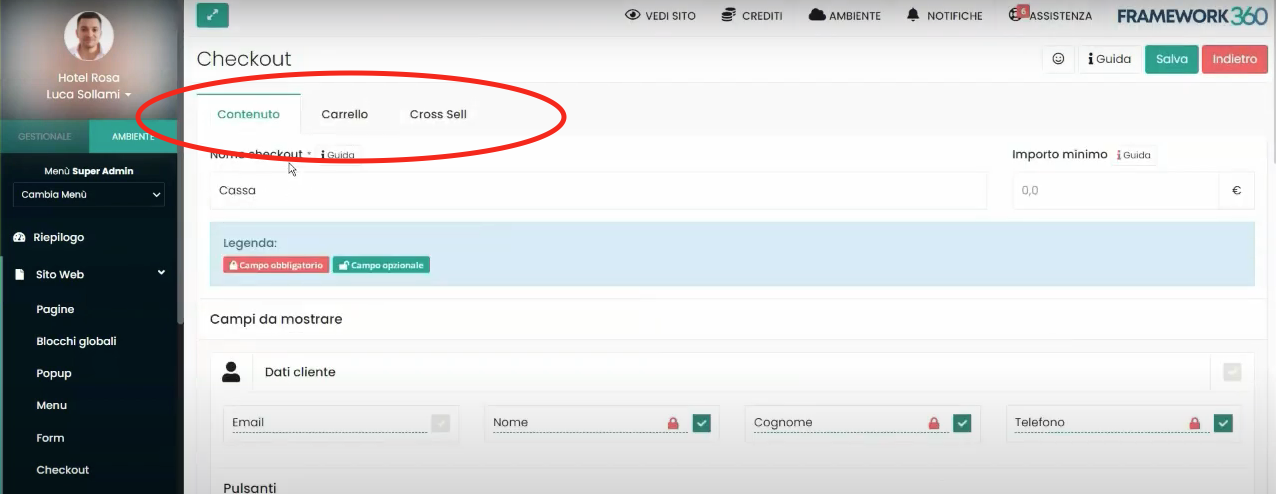
Once inside the edit screen of our checkout, we can notice that Framework360 divides the customization features into three areas:
- Content
- Cart
- Cross Sell
Let's now analyze what we can set in each of these areas.
Step 2: Content Area
Within the Content area, we can first set the name we want to give to our checkout and the minimum tax, that is, the minimum amount that the customer must add to the cart in order to proceed with payment. This field is usually left free so as to allow customers to purchase any amount of products.
Subsequently, by scrolling through the Content area page we will have the opportunity to set each of the sections that will appear to our user once they have accessed the checkout, namely:
- Customer data
- Billing information
- Shipping details
- Quantity selection
- Shipping method
- Payment
- Order summary
For each of the listed sections, Framework360 gives us the ability to select which fields should be visible for the customer to fill out and which of them must be mandatory and which optional.
To select a field we need to click on the checkbox next to it, while to decide whether to make a field mandatory or not we just need to click on the padlock icon, also located next to the field, either closed (the padlock will turn red) or open (the padlock will turn green).
As we can see in the following figure, all four depicted fields are selected, therefore, the customer will see all the fields that need to be filled out. However, only the first three are mandatory to complete, while the Phone field is left optional.

Furthermore, in addition to deciding which fields are present within the sections that our customer will be able to view, we might also choose which sections the customer will or will not see. This can be done, similarly to how it is for fields, by selecting or deselecting the checkbox next to the section name as shown in the figure:

Now let's take a specific look at what the above-listed sections refer to.
SECTION CUSTOMER DATA
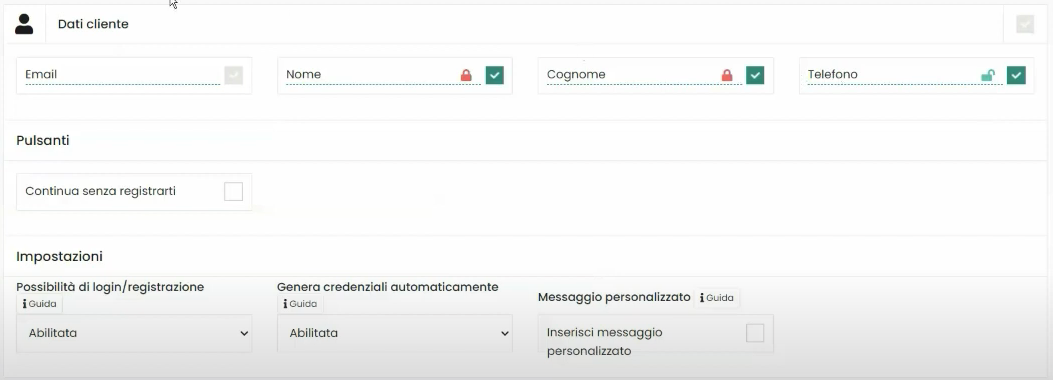
The customer data section is the first section to be displayed by our user, within this section will appear the personal data that our user must enter.
As we can see from the previous figure Framework360, in addition to letting us decide which fields to show to the customer and how many of them should be mandatory, it also gives us the possibility to decide if the user can continue their purchase as a guest without the need to register on the site, to enable this possibility we should select the button Continue without registering.
Furthermore, within the Customer Data section through the option settings we can enable the functionality that will allow customers, in the event that they have previously registered on the site, to perform a login, or, if they have not yet registered, to proceed with registration; we can also decide whether Framework360, in case of registration, should automatically generate credentials, namely, send an email to the customer with the password they will need to enter to access the website.
Last but not least, still within the Settings menu, we could select a message that the customer will be able to automatically see (an example of such a message could be "You will receive the password to access your account via email").
SECTION BILLING DATA
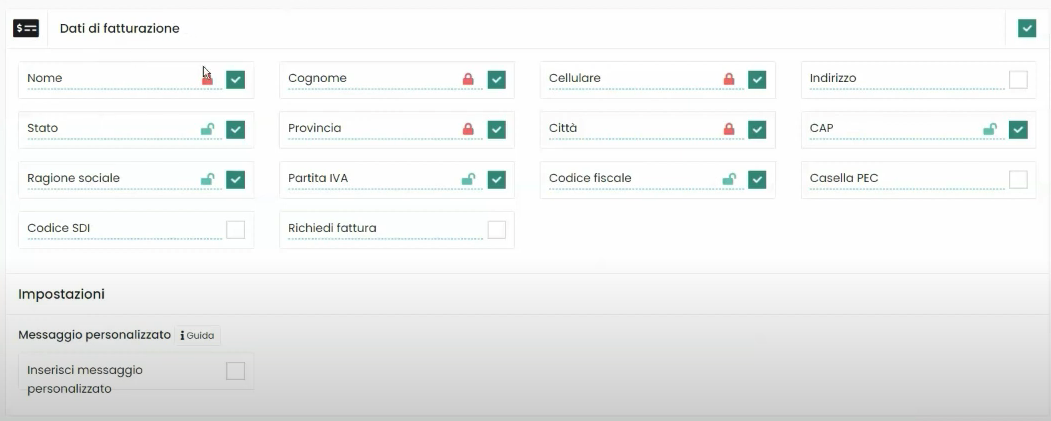
The Billing Data section allows the customer to enter their details that will be included in the invoice.
In this section too, through the settings option, we can define a message that the customer will automatically see.
SECTION SHIPPING DATA
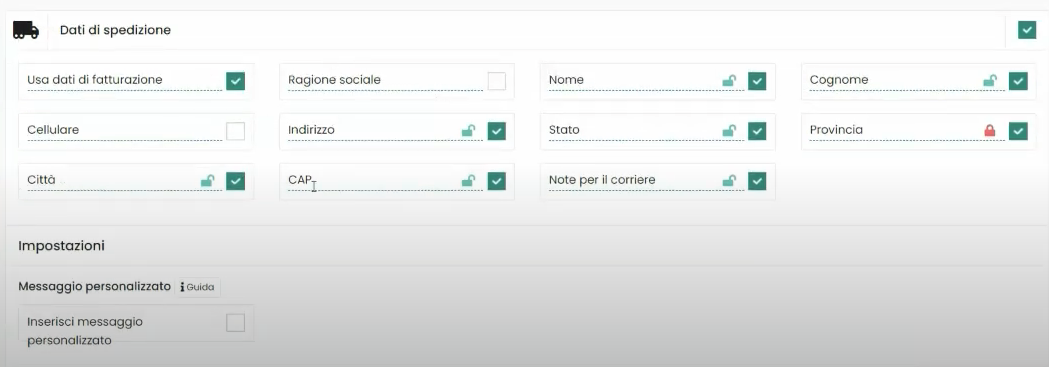
Within the Shipping Data section, the customer can enter the address where they actually want the package to be shipped if it is different from the Billing Data.
SECTION QUANTITY SELECTION

Through this section, the customer will have the opportunity to select the quantities of products added to the cart.
SECTION SHIPPING METHOD
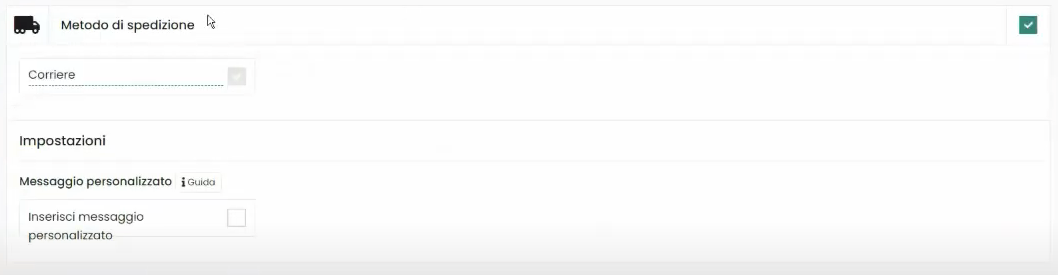
Within the Shipping Method section there will be the possibility to enter a shipping method.
To manage shipping methods, we will only need to go to the Shipping item in the main menu of Framework360 by following these steps:
Settings > Sales > Shipping
Inside the Shipping item, we will find all the shipments we have created. In this section, we will also have the possibility to modify existing shipments or create new ones.
SECTION PAYMENT
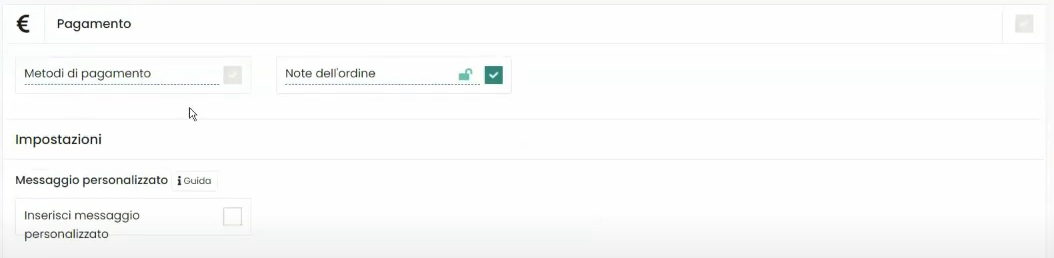
Within the Payment section, there is the possibility to choose the payment method and to enter order notes.
To manage payment methods, we should go to the Payments item in the main menu of Framework360 by following these steps:
Settings > Sales > Payments
Within the Payments item, we could decide to add Physical Payments, if we wanted to use Framework360 as a cash register, or Web Payments and decide which web payment to include (e.g., Stripe or PayPal).
SECTION ORDER SUMMARY
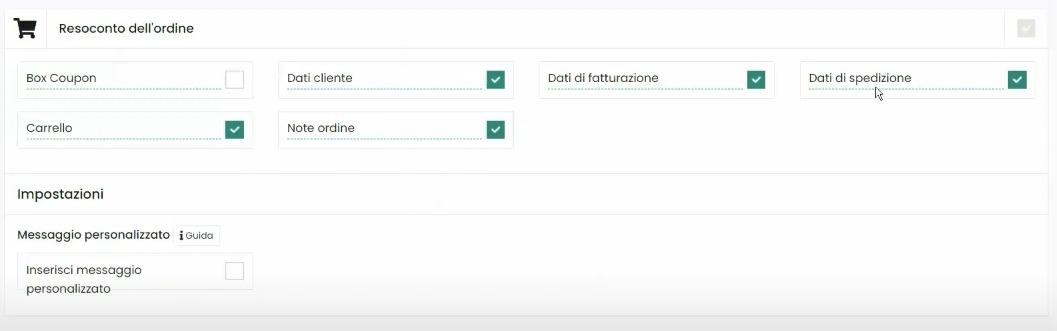
In the Order Summary section, customers will see a recap of all entered information.
Step 3: Cart Area
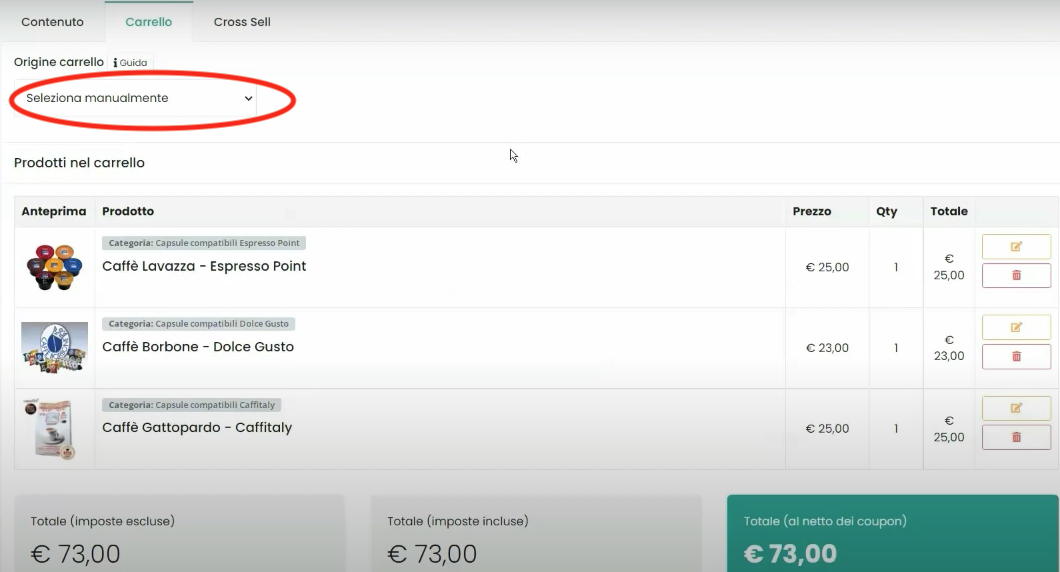
Within the Cart area we can choose whether products should be taken from the session or selected manually.
The option to take products from the session can only be used if the website is an e-commerce site, as this feature allows products to be added through the usual Add to Cart button. Thus, when a user arrives at the checkout, they will find all the products they have added to their cart during navigation on our website.
While, when we enable the select manually function, we would be the ones during the checkout configuration phase to insert the products that should appear in the checkout.
We could choose whether to use the Pick from session or Manual selection feature through the Cart Source option.

Step 4: Cross Sell Area
In the Cross Sell area, we can set up an additional checkout screen where we recommend to the customer further products related to the ones they intend to purchase.
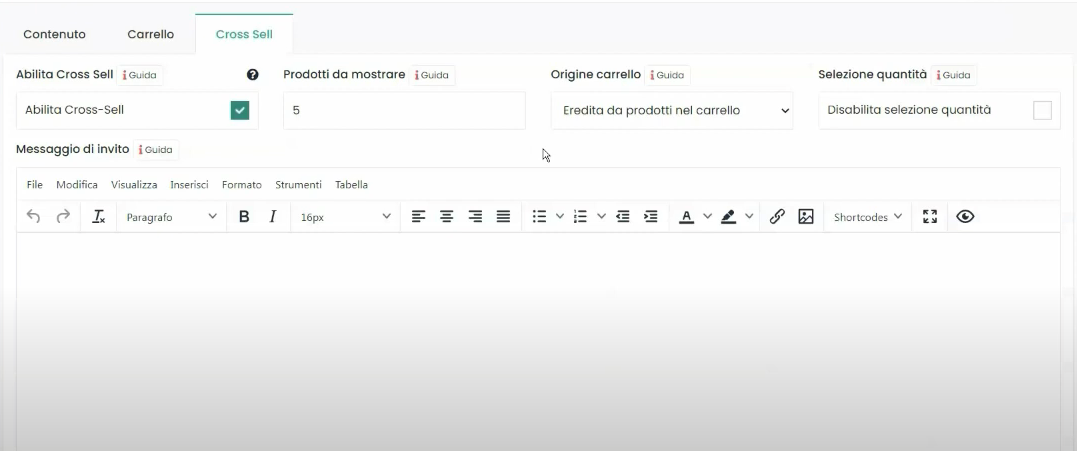
To insert products, as anticipated by the Cart Source option, we can decide whether to select the products manually or inherit them from the cart.
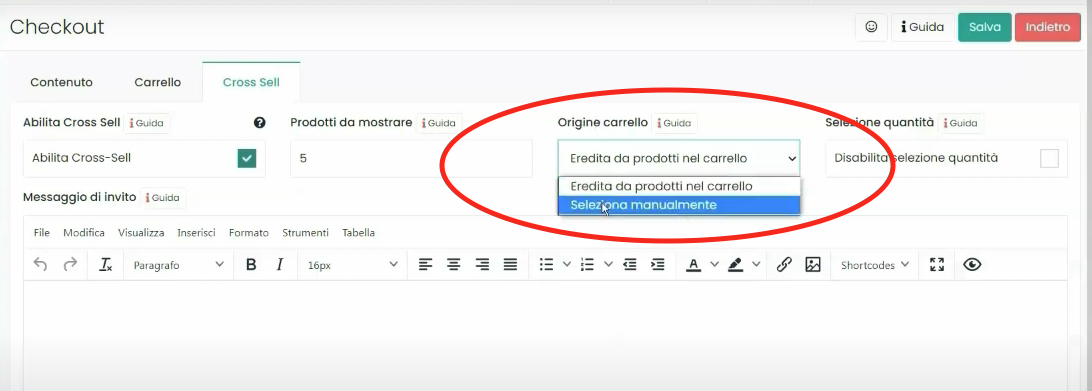
If we decide to use the Select Manually function, we will be the ones to decide which products the customer will see.
Whereas, if we use the Inherit from Products in Cart function, products must be inserted into the e-commerce plugin. After installing the plugin, we should go to the Products section in the main menu of Framework360 by following these steps:
Ecommerce > Products
At this point, we should select each product and then enter the Related Items area, once inside we should insert the products that we want to show in the Cross Sell to customers who have decided to buy the product we selected; it is specified that all products must have been previously added to the site through the e-commerce plugin as well.
As I mentioned before, the e-commerce plugin is not present from the start on the site and must be installed by going from the main menu of Framework360 to the Plugins section by following these steps:
Customization > Plugins
Once inside, we search for the Ecommerce plugin and install it.
When is it necessary to install the e-commerce plugin?
Often customers ask me this question, the e-commerce plugin makes managing products much more convenient, so I recommend installing it when you need to add many products to your site.
Step 5: Insert the checkout into our website's page
The last step to take is to go through Framework360's main menu under the item Pages following these steps:
Website > Pages
At this point we create a new page, then click on the Add a row button and proceed to modify the row with the Visual Builder.
Within the Visual Builder, we go to Payments and select the Form checkout which we will need to drag into the newly created row as shown in the figure:
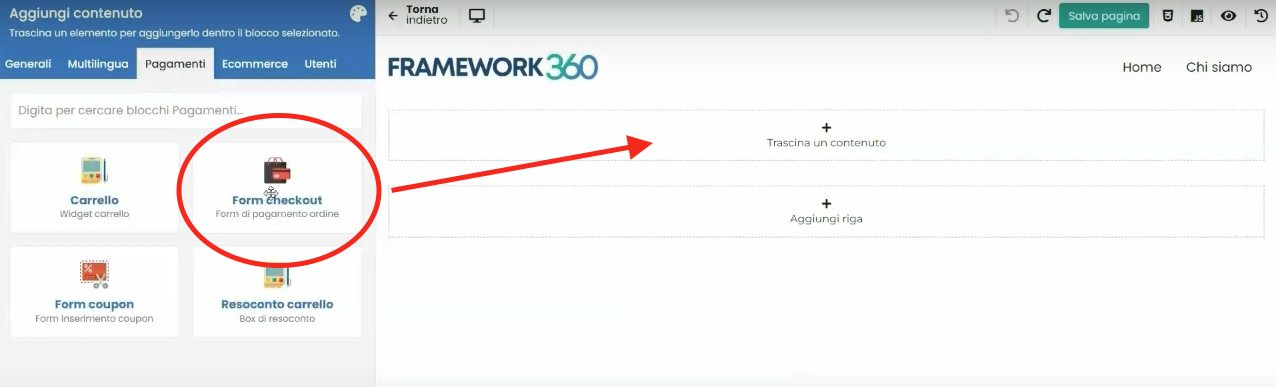
Once the Form checkout is inserted, Framework360 gives us the possibility to select one of the checkouts created, we will go on to insert the checkout that we have created. At this point, all that's left to do is click on Save page and our checkout is completed and inserted into the website page!


