In this guide, we will see how to send conversion actions to Facebook's advertising platform to track conversions that occur on our website.
Let's now look at how, in a few simple steps, to set up the automation for sending actions to Facebook with Framework360.
Step 1: Turn on our Web Tracking project
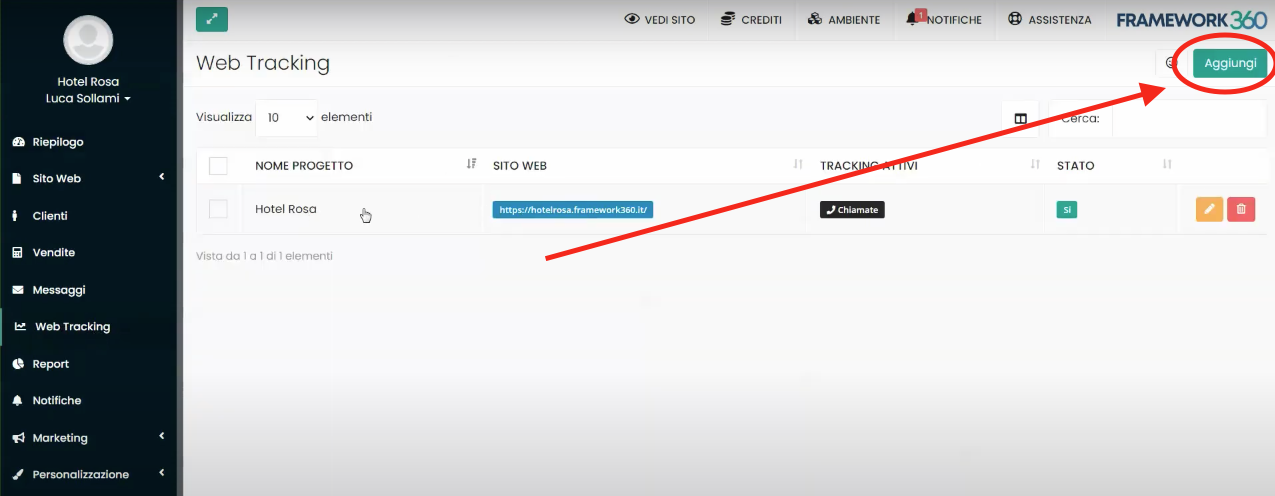
First, we need to go inside the main menu item of Framework360 Web Tracking, once there access our project or create a new one using the Add button located at the top right.
To understand how to create a Web Tracking project I have created a dedicated guide that you can find by clicking here.
Step 2: Insert Facebook Tracking Data
Once inside our project, by going to the section Settings, through the Settings button located at the top left, we can insert third-party tracking data.
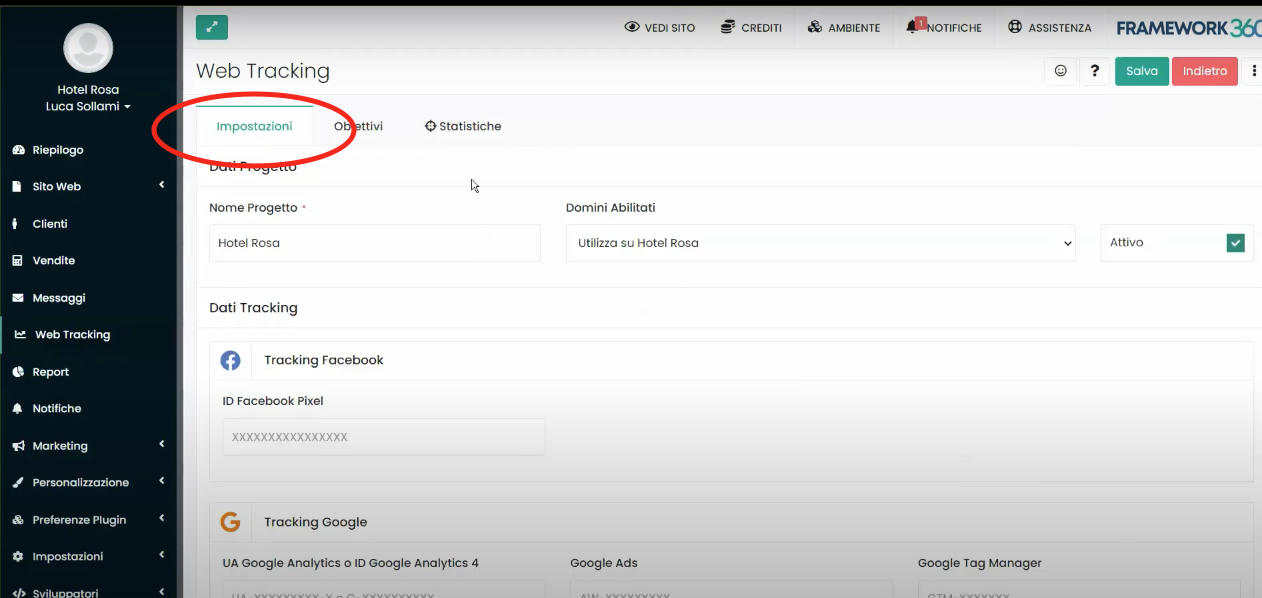
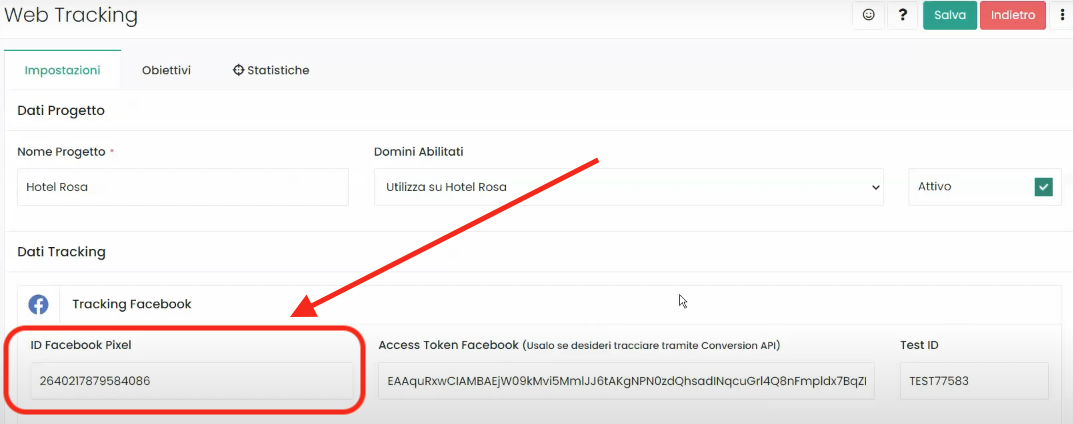
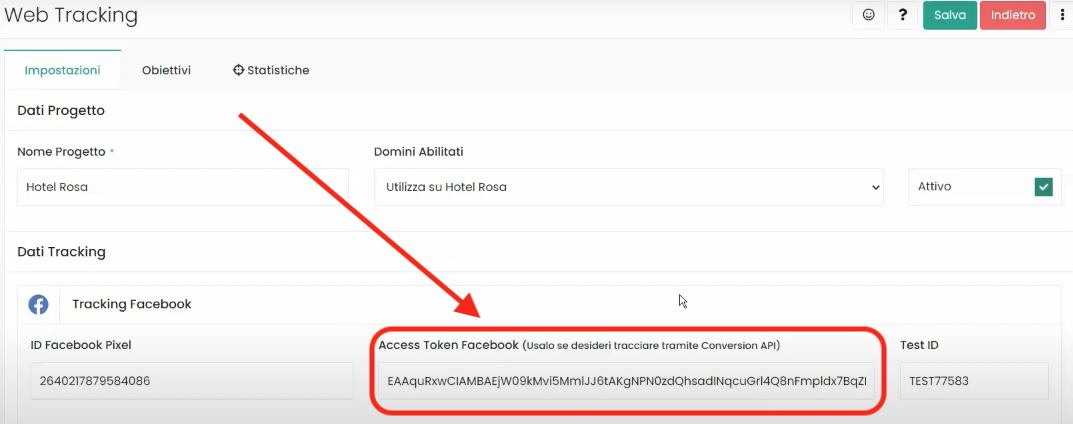
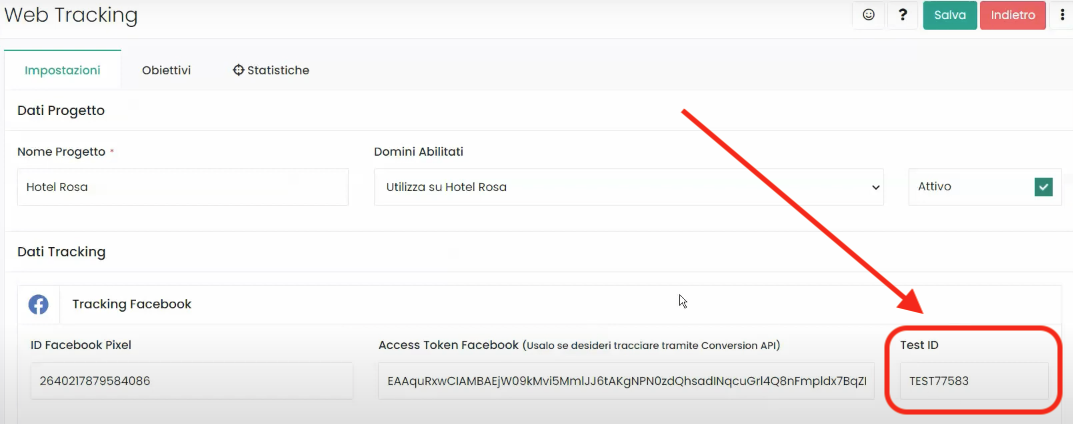
In this guide, we will see how to set up Facebook Tracking, which can be found under the Tracking Data section, as highlighted in the box of the figure below:

We notice that Framework360 requires us to enter three parameters to set up Facebook Tracking:
- Facebook Pixel ID
- Facebook Access Token
- Test ID
Step 3: Enter the Facebook Pixel ID
In order to insert the Facebook Pixel ID, we must first create our Pixel through Facebook's platform.
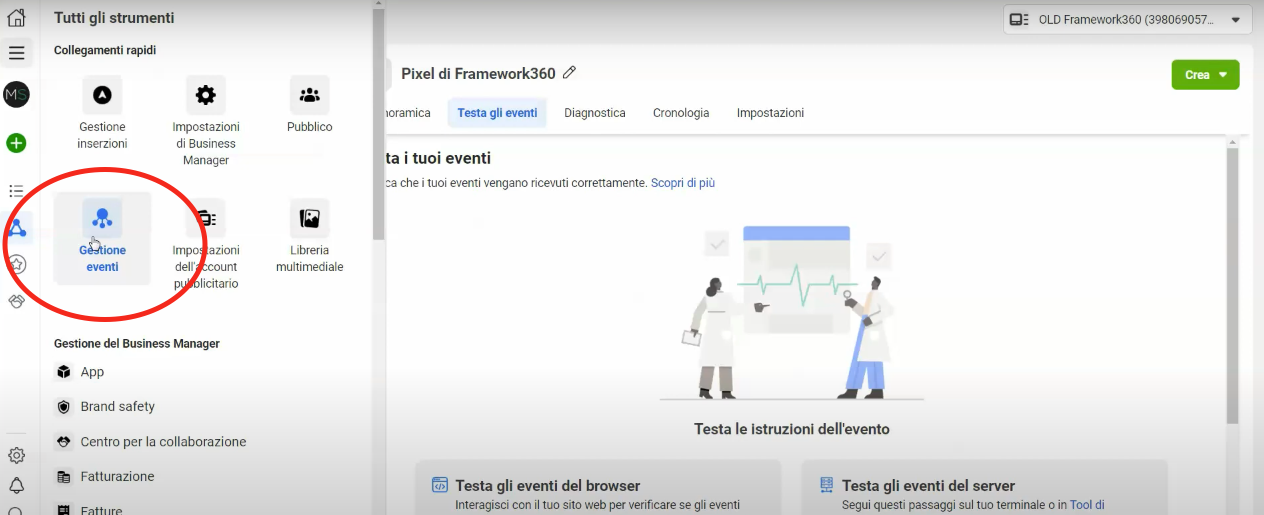
We access the Facebook Business Manager and through the Events Manager, we go to create the Facebook Pixel.
Once the pixel is created, we go to the Settings and copy the Pixel ID.
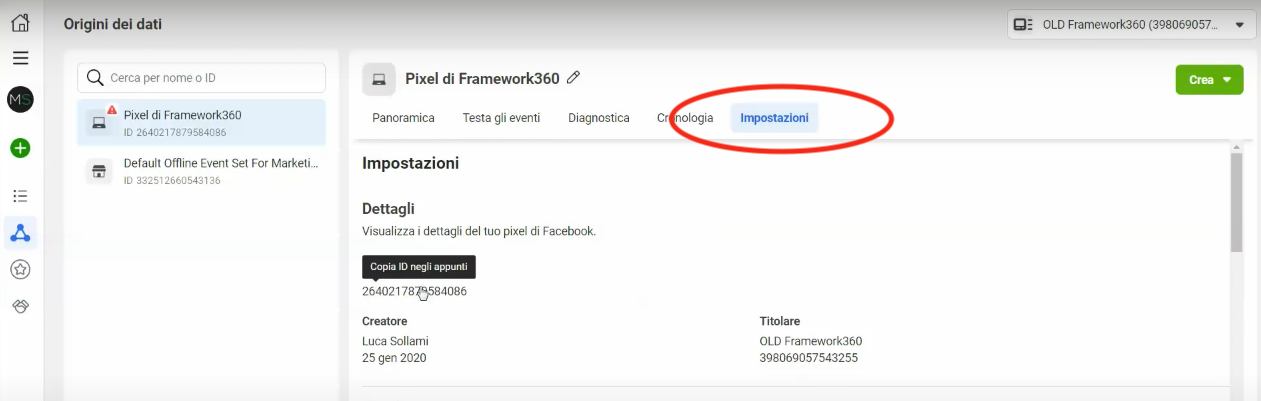
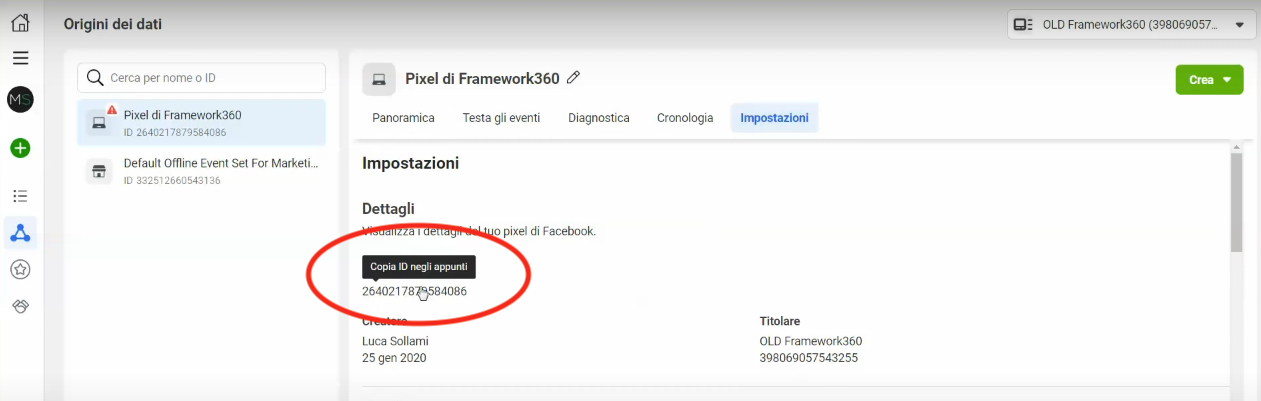
Now you just need to enter the copied ID on Framework360 in our Tracking project entry Facebook Pixel ID.
Step 4: Inserting the Facebook Access Token
Once we have entered the Facebook Pixel ID, Framework360 also gives us the possibility to insert an Access Token if we want to use the API.
After the IOS 14.5 update, Facebook has a much harder time tracking conversions with Java Script, which is why I recommend using the APIs.
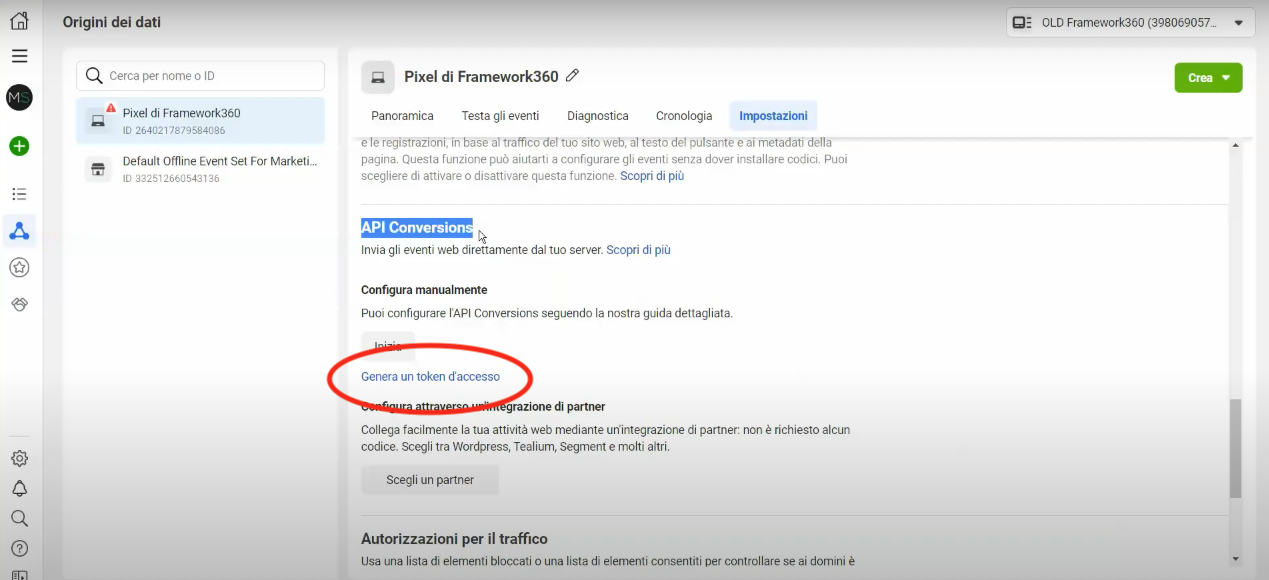
To configure the Access Token, we must always go to Facebook in the Pixel's Settings section, where we will find the item Api Conversions.
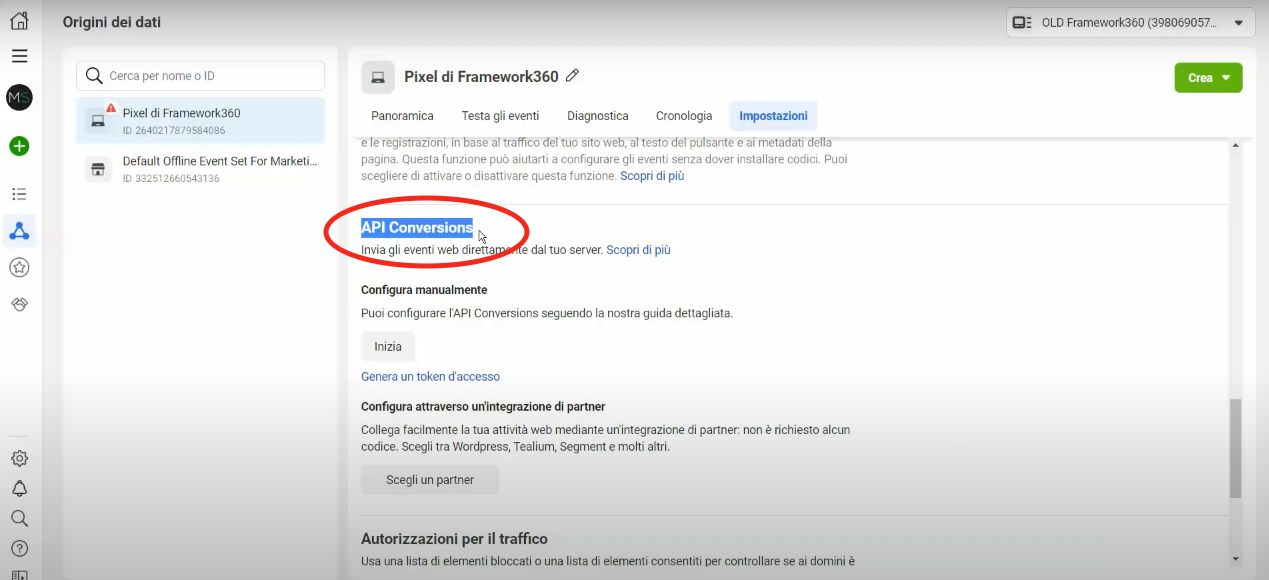
At this point we click on Generate an access token.
Once the Token is generated, all we need to do is copy it and paste it into the dedicated field of our Tracking project on Framework360.
Step 4: Enter the Test ID
The last step to complete the configuration of Facebook Tracking is to enter the Test ID.
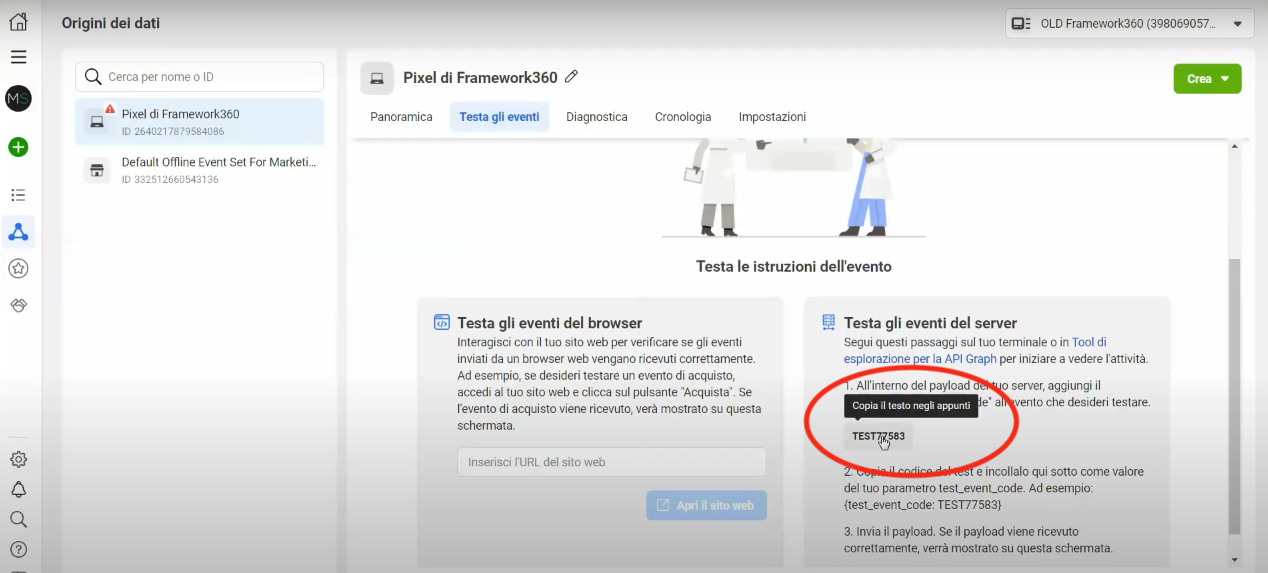
To insert the Test ID, let's go to Facebook in the Pixel section Test Events.
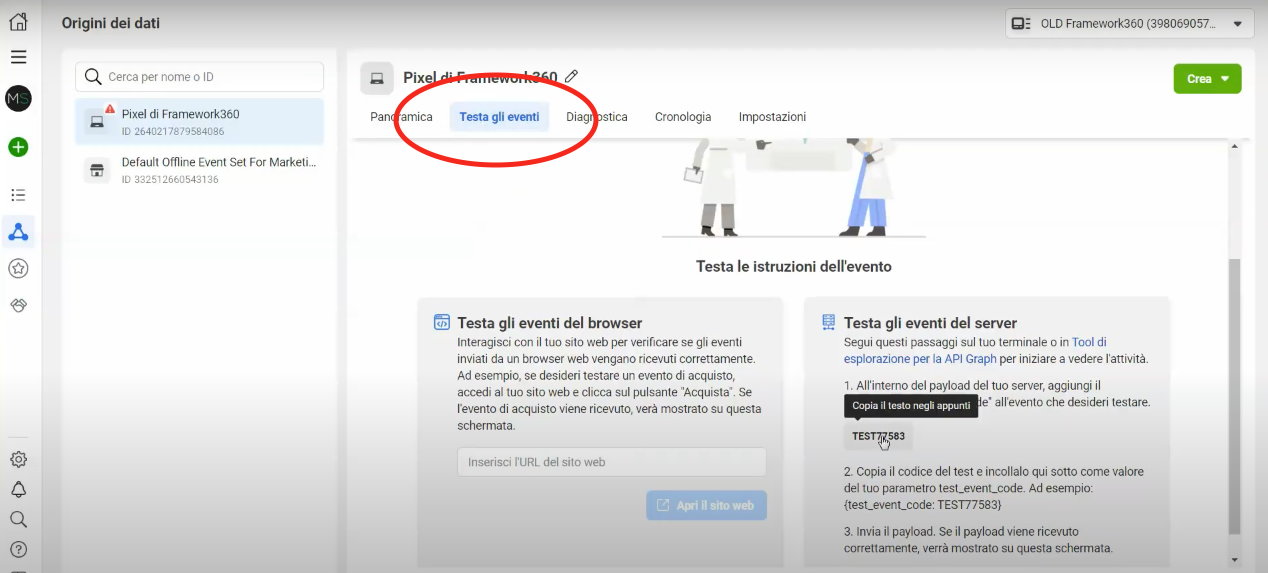
Now let's copy the test code.
And finally, let's paste it into the dedicated field of our Tracking project on Framework360.
Step 5: Set the Goal to Track
At this point, we have set up conversion tracking to be sent to Facebook.
To complete the job, there is one last simple operation to do: go and configure the goal that Framework360 needs to track for us.
Firstly, we must return to our Tracking project and move to the Goals section.
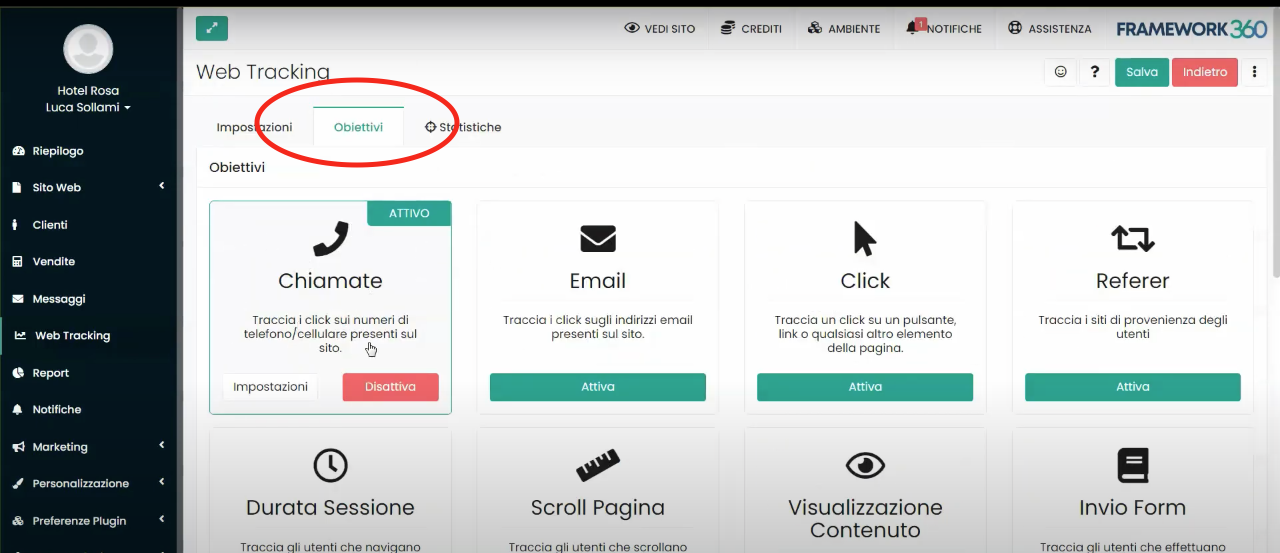
Once inside, we should go and Activate the goal we want to track (I remind you that in order to understand how to create a Tracking project I have prepared a specific guide that you can consult by clicking here).
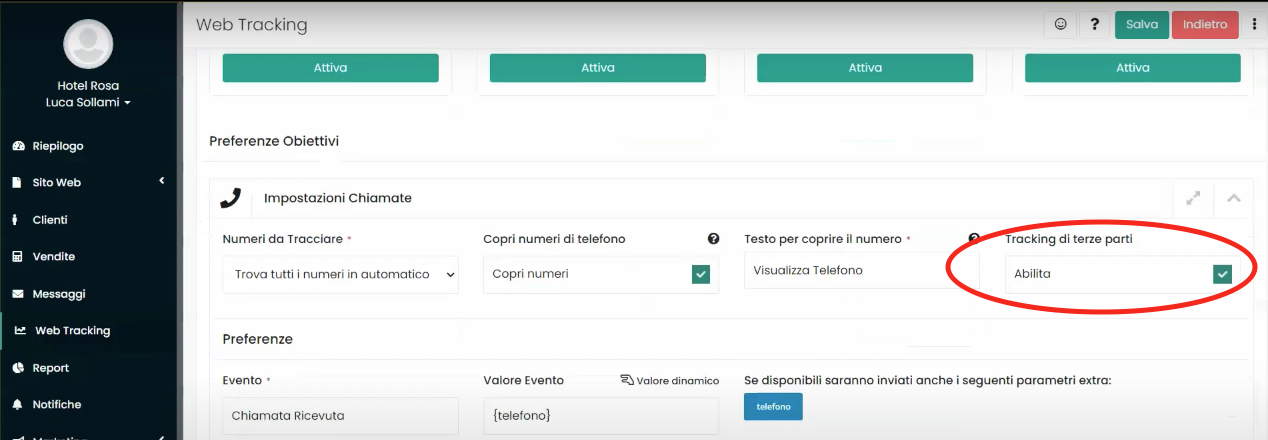
After activating the goal at the bottom of the page, a Goal Preferences box will appear, within which Framework360 will give us the option to enable Third-party Tracking. To enable this feature, you must check the Enable option as shown in the figure: