In this tutorial, we will see how to send an automatic email to a visitor who fills out a form for registration on our website built on Framework360.
Step 1: Let's create our form
We start by creating the contact form on which, in the next steps, we will implement the action of sending the automatic email. The contact form, also known as a contact module, is a form where website visitors enter their data such as name, surname, email or phone number.
Before we begin, I want to specify that in this tutorial we will look at the essential phases for creating a contact form; if you want to discover all the functionalities of Framework360's "Form" module in depth, we invite you to consult the dedicated tutorial by clicking here.
Let's get started! The first thing you need to do, as shown in the figure below, is go to the menu on the left side of the screen, where you will find the item "Content" within which there will be the "Form" option; let's click on Form”.

Once you enter the main screen of the form module, you will need to click on the “Add” button located at the top right to create a new form.
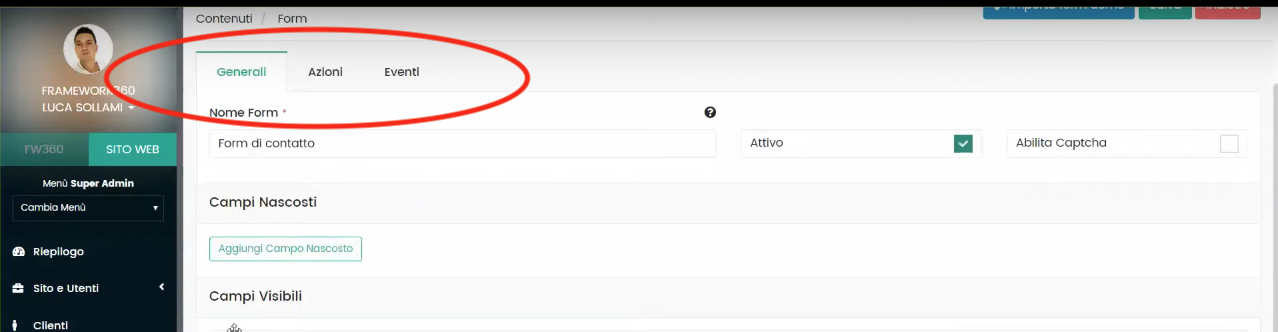
The form creation screen is divided into 3 tabs (as shown in the figure):
- General
- Actions
- Events
In this tutorial, we will only analyze the first two tabs, namely, “General” and “Actions”. (I remind you that if you want to know more details about the “Form” module of Framework360, you can consult the dedicated guide by clicking here).
What can we do in the “General” tab?
In the “General” tab, the first thing we can do is give a name to our form, remember to check that the option for “active” is selected as shown in the figure below.

As we scroll down the page, we will set up the “Visible Fields”.
The “Visible Fields” represent the fields where the visitor will enter the data you wish to request.
Let's understand together the steps you need to take to create your fields using as an example the creation of the “Name” field, where the visitor will enter their name.
First, we will add the name of the field, in our example it will be “Name”. Then we will define the field type, which will be “input”. Finally, in the “Input Type” box we will define what input we need, in our example the input type will be “text” since our visitor will need to type their name.
In the figure below I illustrate how the page will appear once these first three simple parameters have been set:
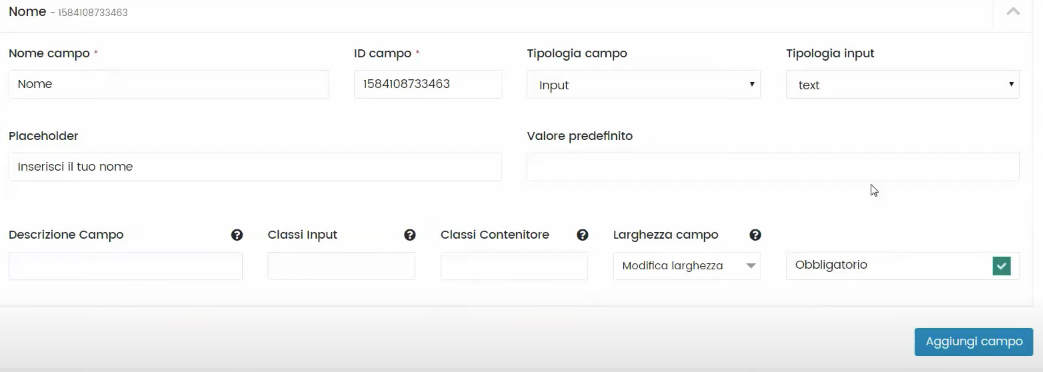
At this point, to complete the configuration of our field we could insert other parameters such as the "Placeholder", that is, the text that appears in transparency where your visitor will need to add their name, or we could make the field mandatory.
Once all the desired parameters are added, we will click on the right-hand option "Add field".
Good, now proceed in a similar way for all the fields you're interested in, such as Surname, Email, Phone number, etc. For the purposes of this tutorial it will be necessary to insert the "Email" field since knowing the customer's email address will be essential for generating the automatic response email.
What can we do in the "Actions" tab?
At this point, let's move to the "Actions" tab. Inside this tab, the system will give us the ability to select different functions:
- Register Customer
- Receive Request
- Subscribe to Newsletter Lists
- Assign Label
- Send Automatic Reply
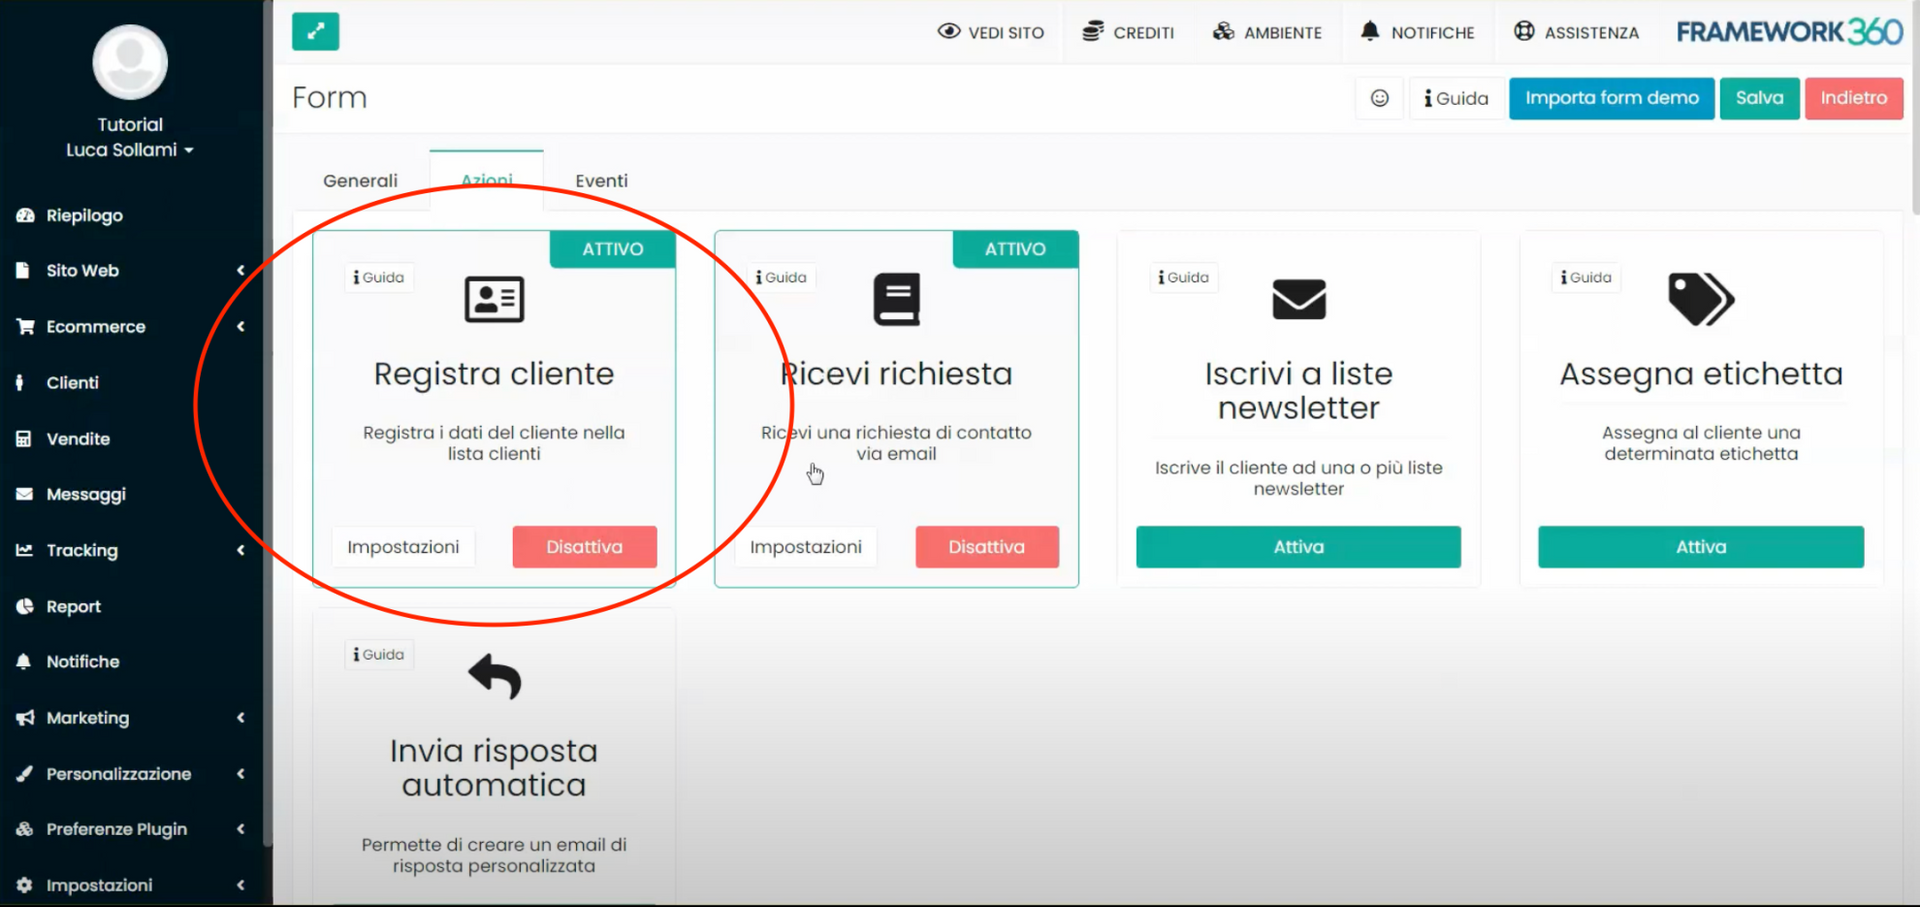
By activating the "Register Customer" function, as highlighted in the image above, you will have the possibility to record the data provided by the visitor into the customer list.
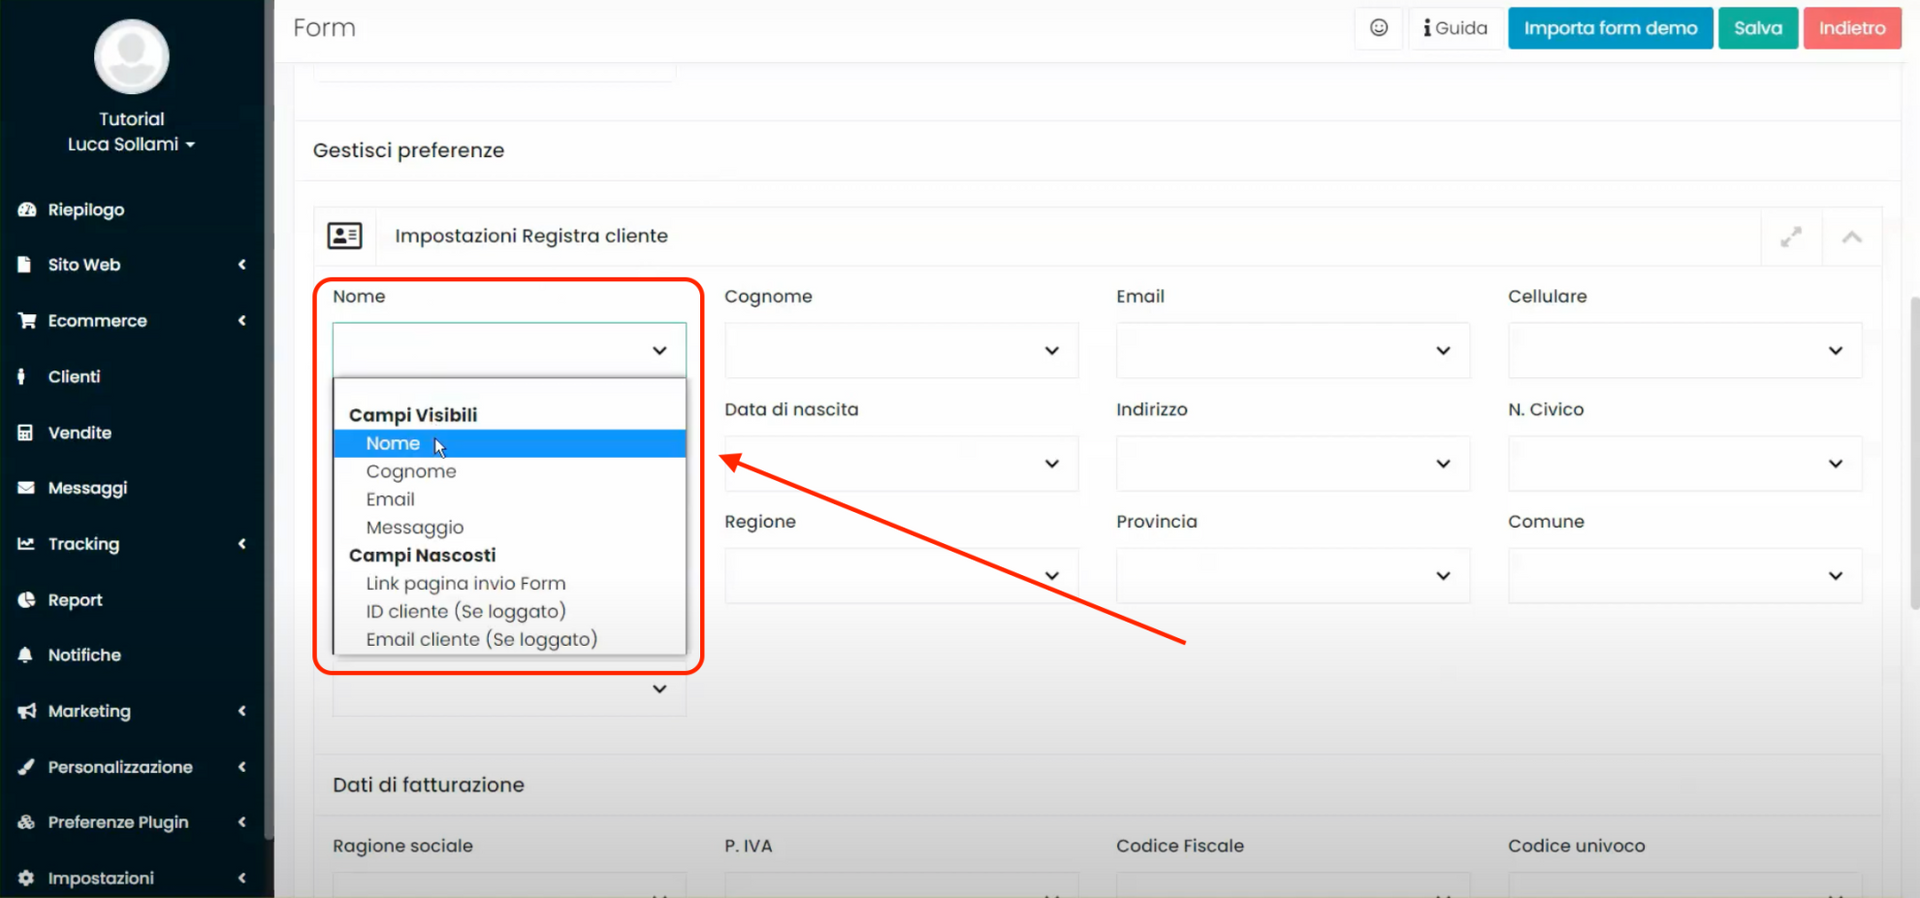
By clicking on “Register Customer”, all you need to do is create a match between the fields previously created in the tab “Generals” with the data requested in this section; to be clearer let's make an example: the software in this area will ask you where to retrieve the visitor's name and through a dropdown menu, where the fields previously created are listed, you will need to select the field “Name”.
By activating the “Receive Request” function, instead, the system will send us an automatic email with the data left by the visitor.
The setup of this action is carried out in a similar way to the previous one, that is, you will need to create a correspondence between the fields set up previously in the "General" tab with the data required in this section.
The only specification that should be made refers to the "Request Body" field. This must be matched with the "Message" field of the form, if such a field was created in the previous tab.
Step 2: Let's create our action for automatically sending an email to our visitor
Staying within the "Actions" tab present in the form creation screen, we need to activate the "Send automatic response" function. This action will allow us to send an automatic email to the visitor who has filled out the contact form.
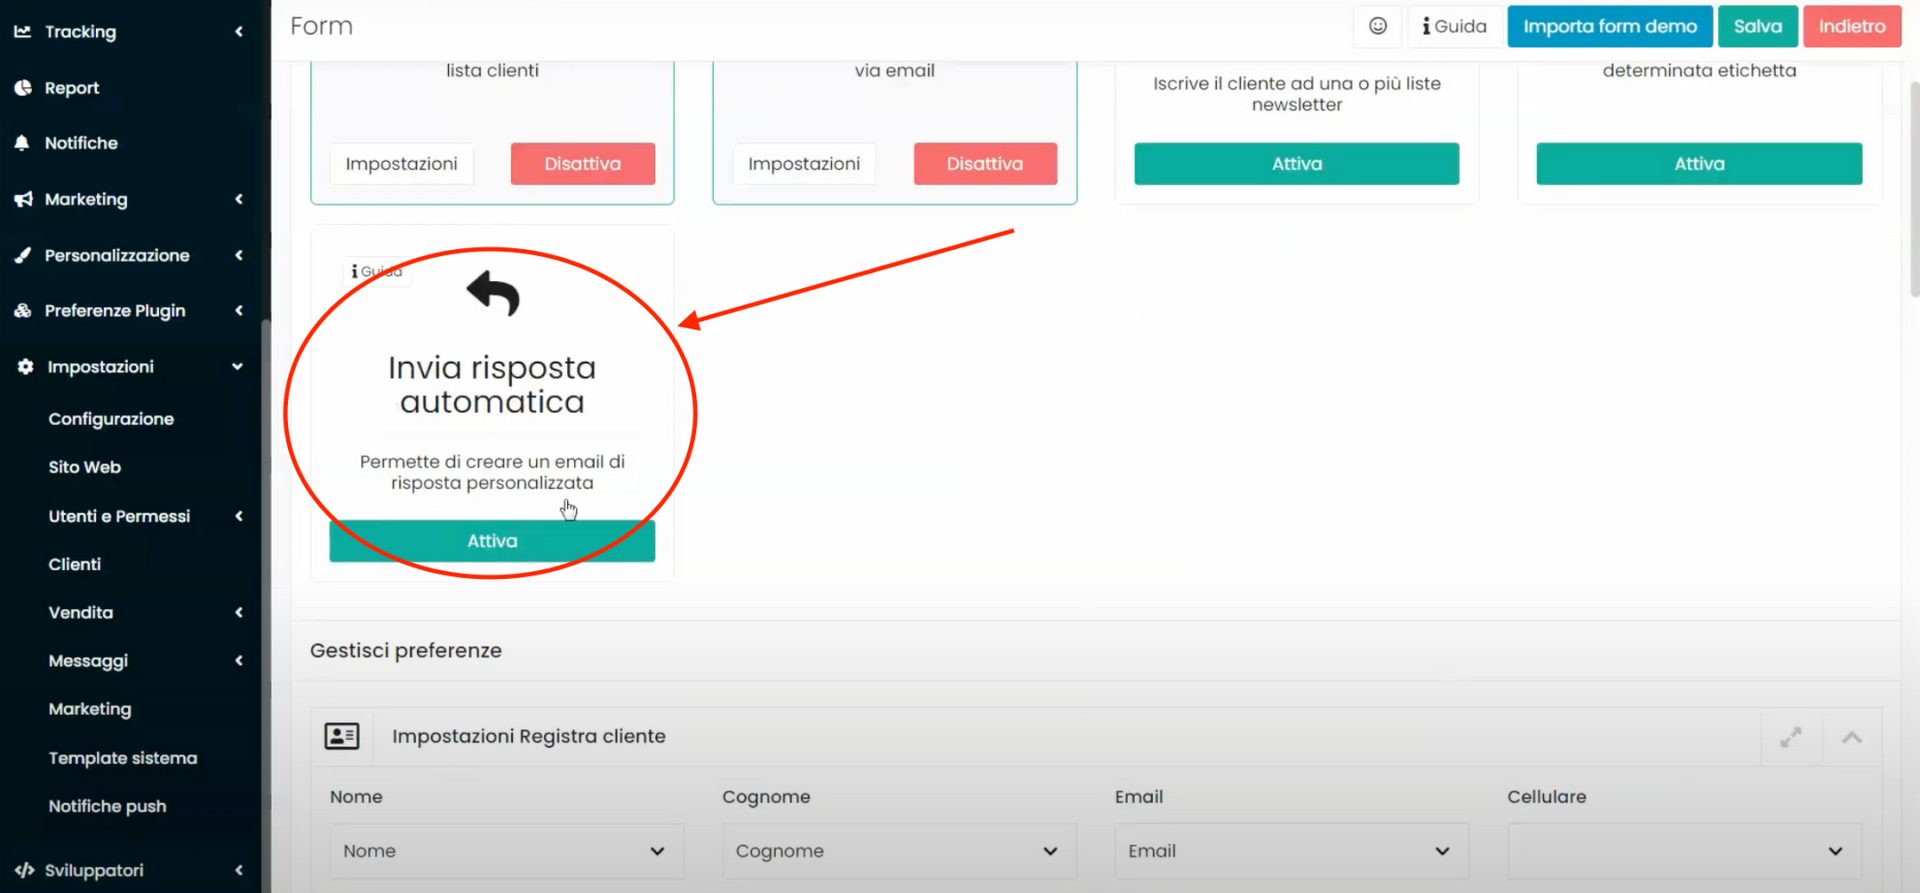
Clicking on the “Activate” button will open, below in the “Actions” tab, the section titled “Auto-Reply Settings”, as shown in the following figure:
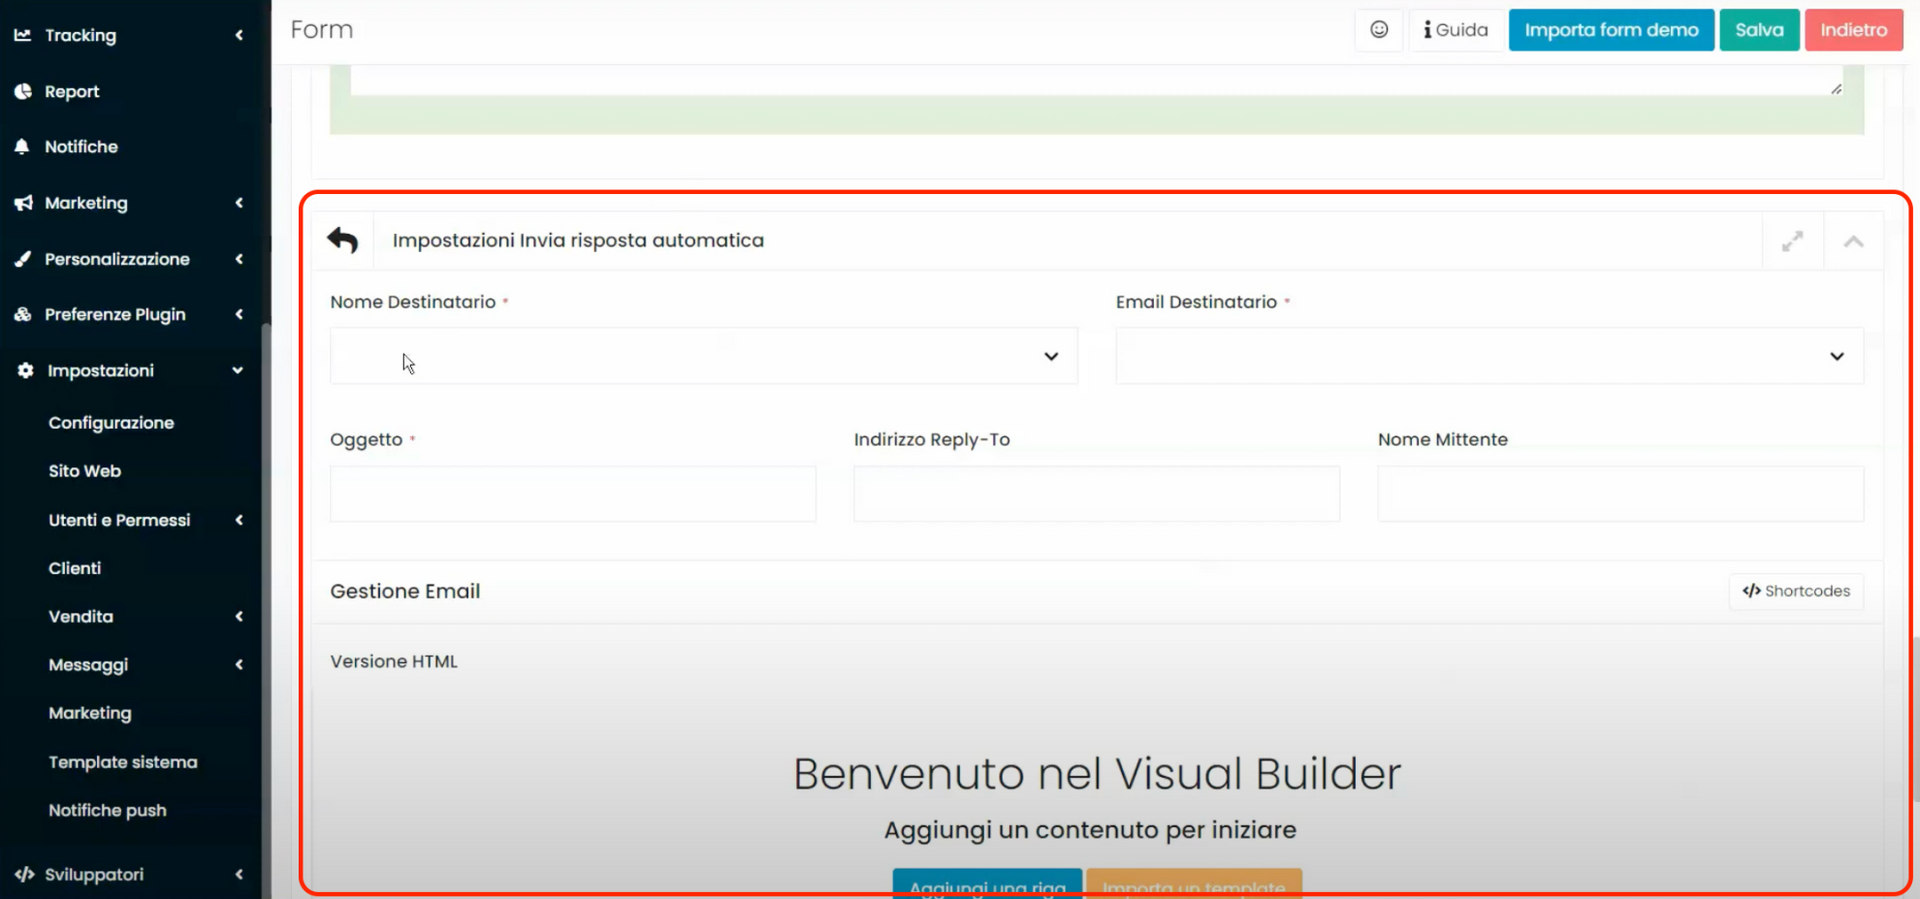
Within this section, you will need to:
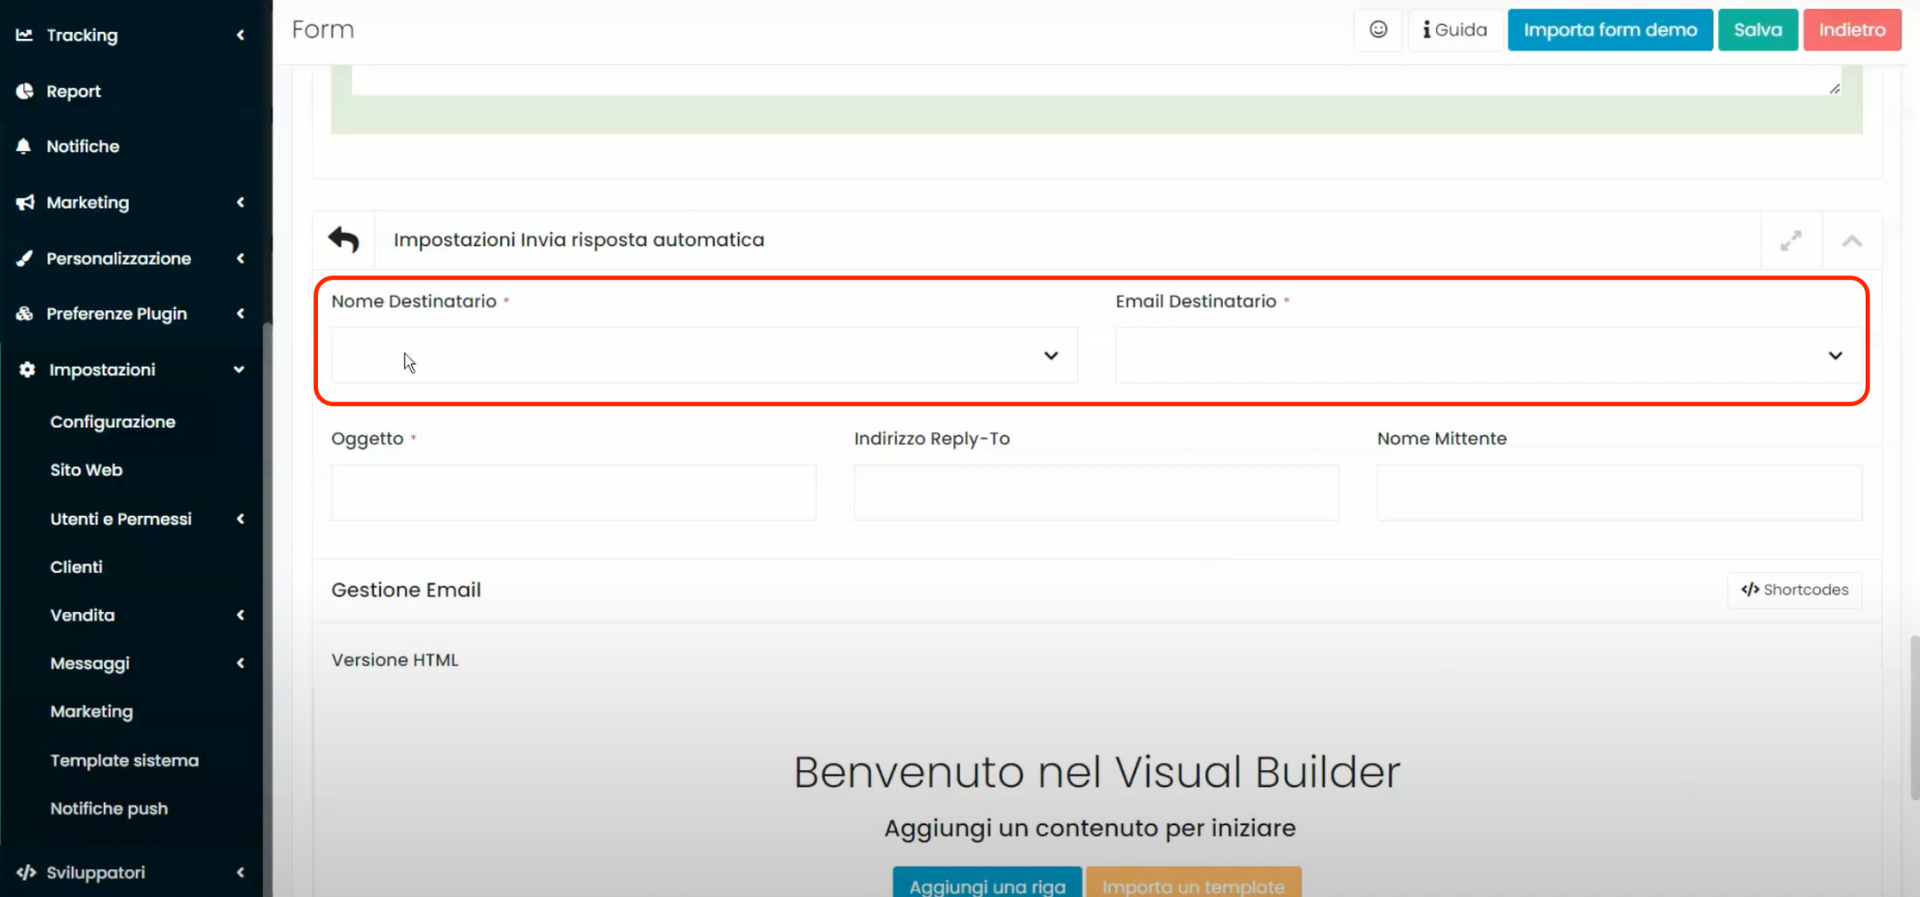
- Create a correspondence, similar to what was done for the actions “Register customer” and “Receive request” at the end of step 1, between the fields created in the “General” tab with the data requested in this section. Specifically, in this section, the only fields to synchronize are just the “Recipient Name” and “ Recipient's Email”, corresponding to the form fields “Name” and “Email”.
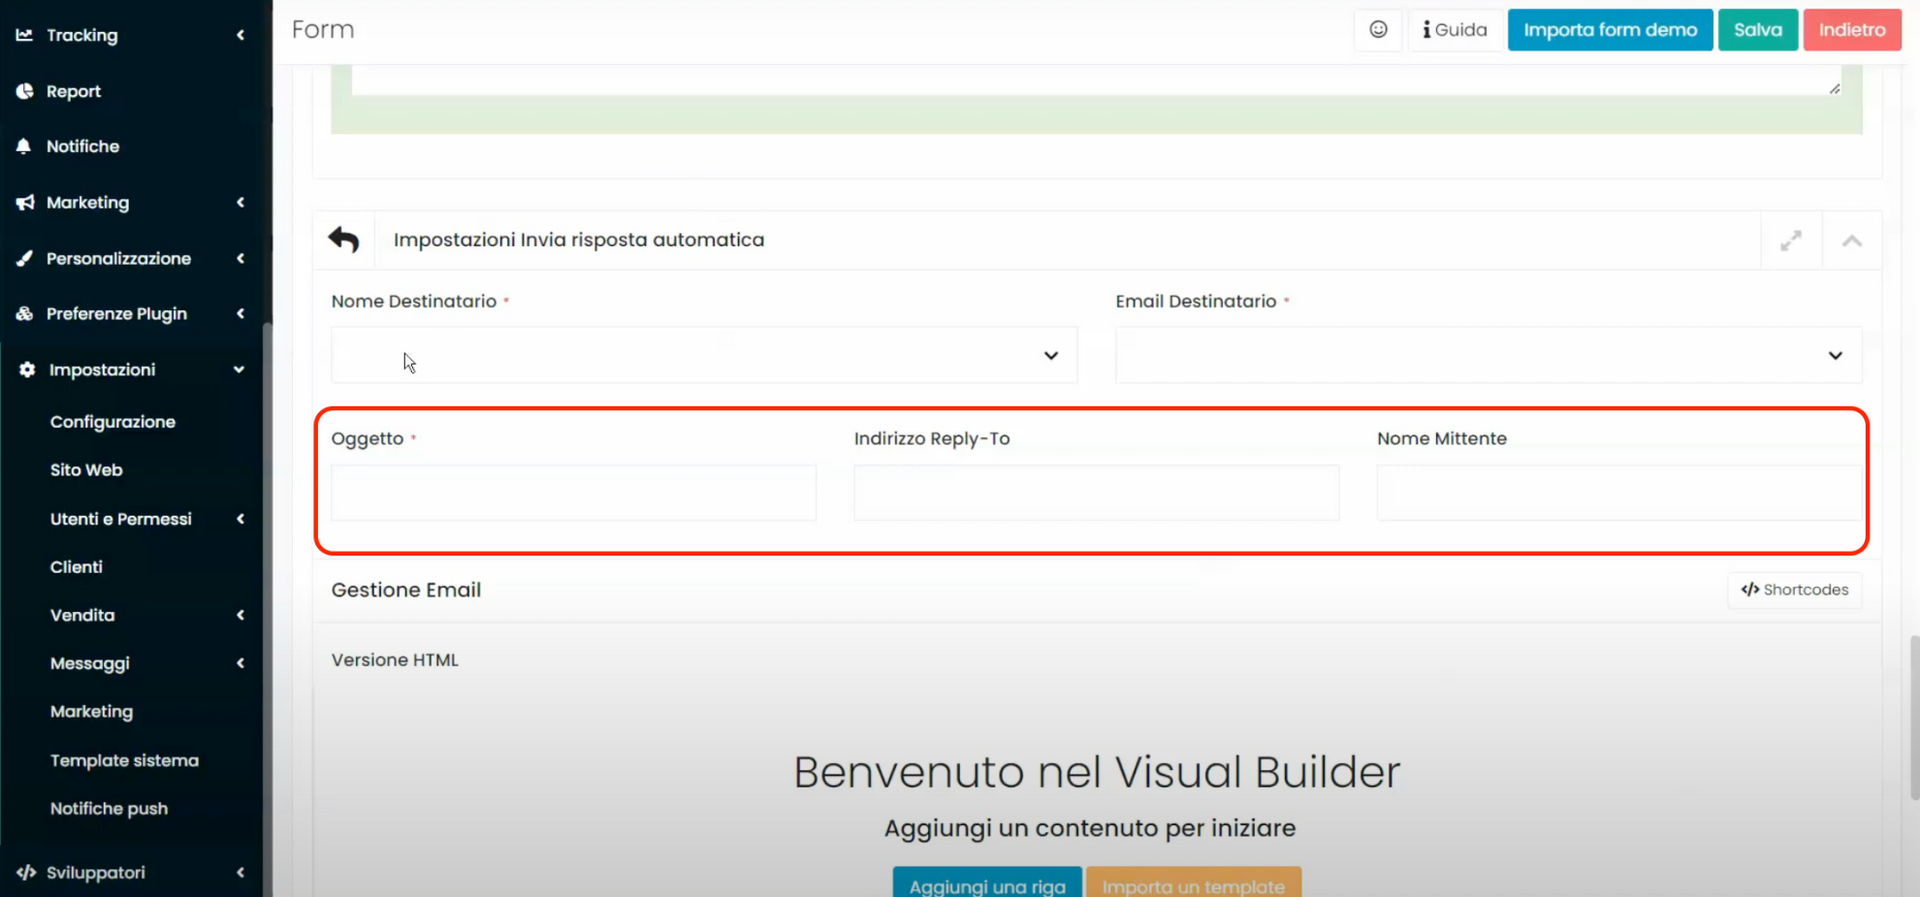
- Enter the subject of the reply email in the field labeled “Subject”.
- Enter an alternate address for the recipient to respond to, if you wish it to be different from the one with which we are sending the mail, in the field labeled “Reply-To Address”.
- Enter the name that should appear as the sender in the email, if you want it to be different from the default set, in the field labeled “Sender Name”.
The email address from which we are sending the mail and the default sender name can be checked by going to the "Configuration" section of the main menu of Framework360.

Now under the heading “Email Management” (highlighted in the following image) you can create the body of the email, using the Framework360 visual builder, by clicking on the blue button “Add a row”.
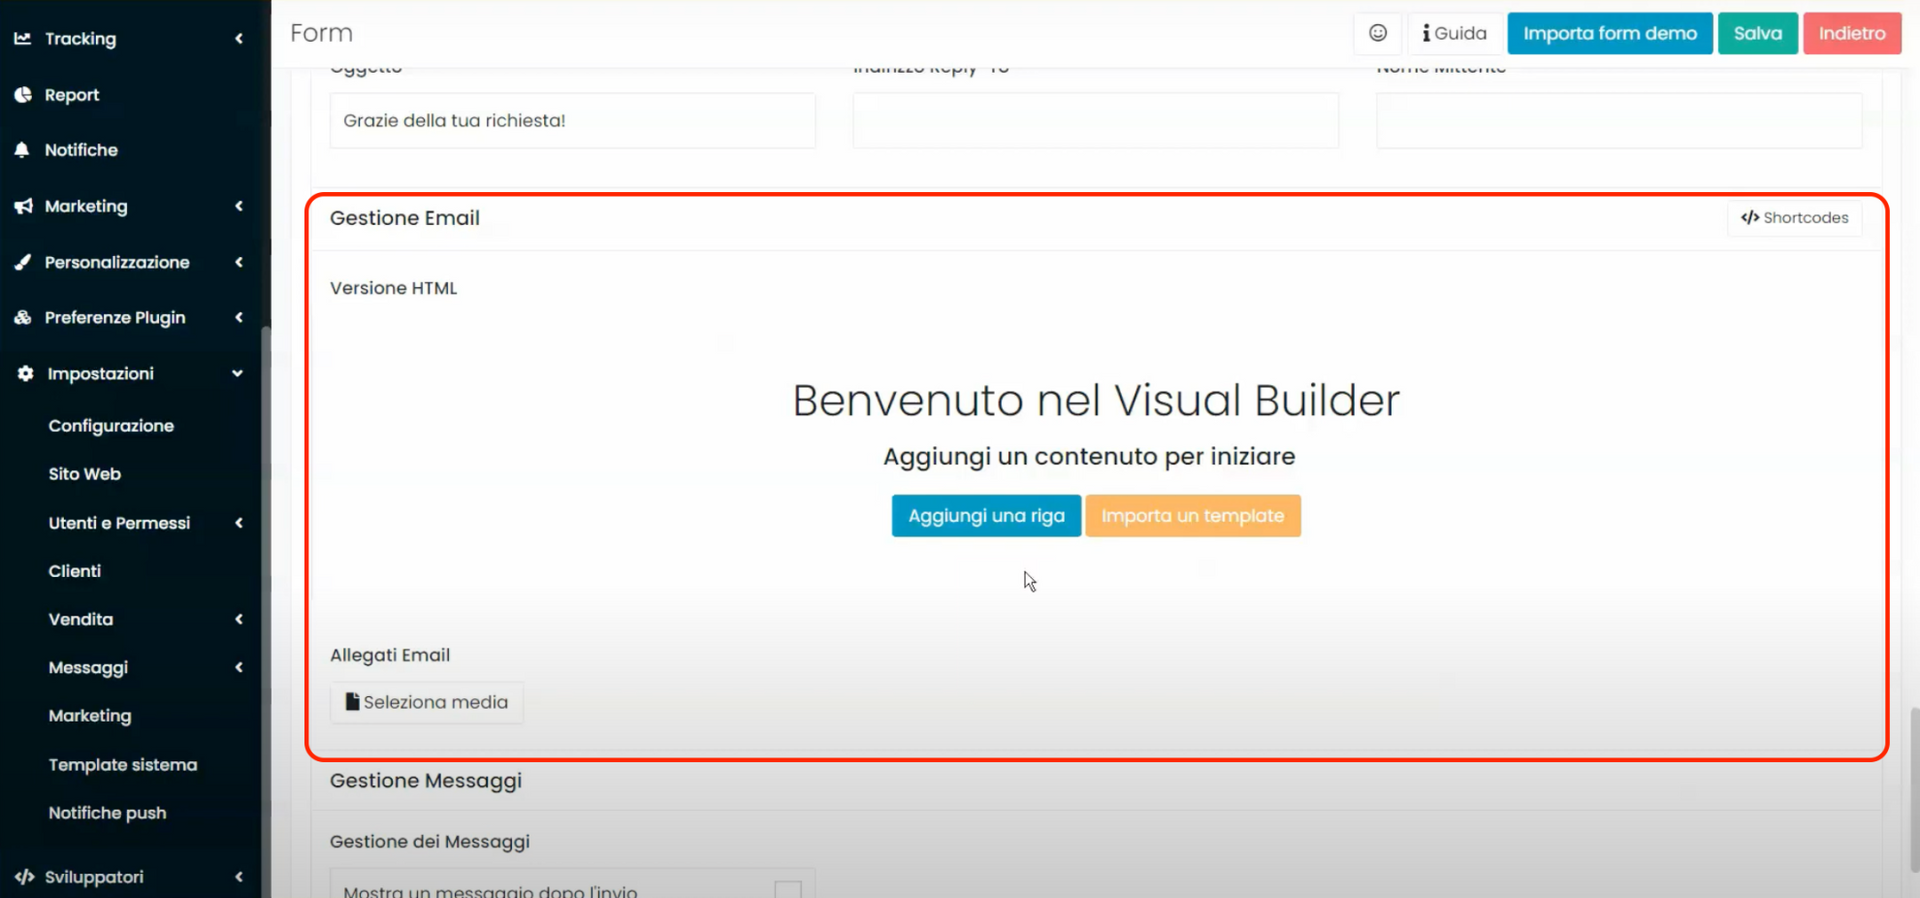
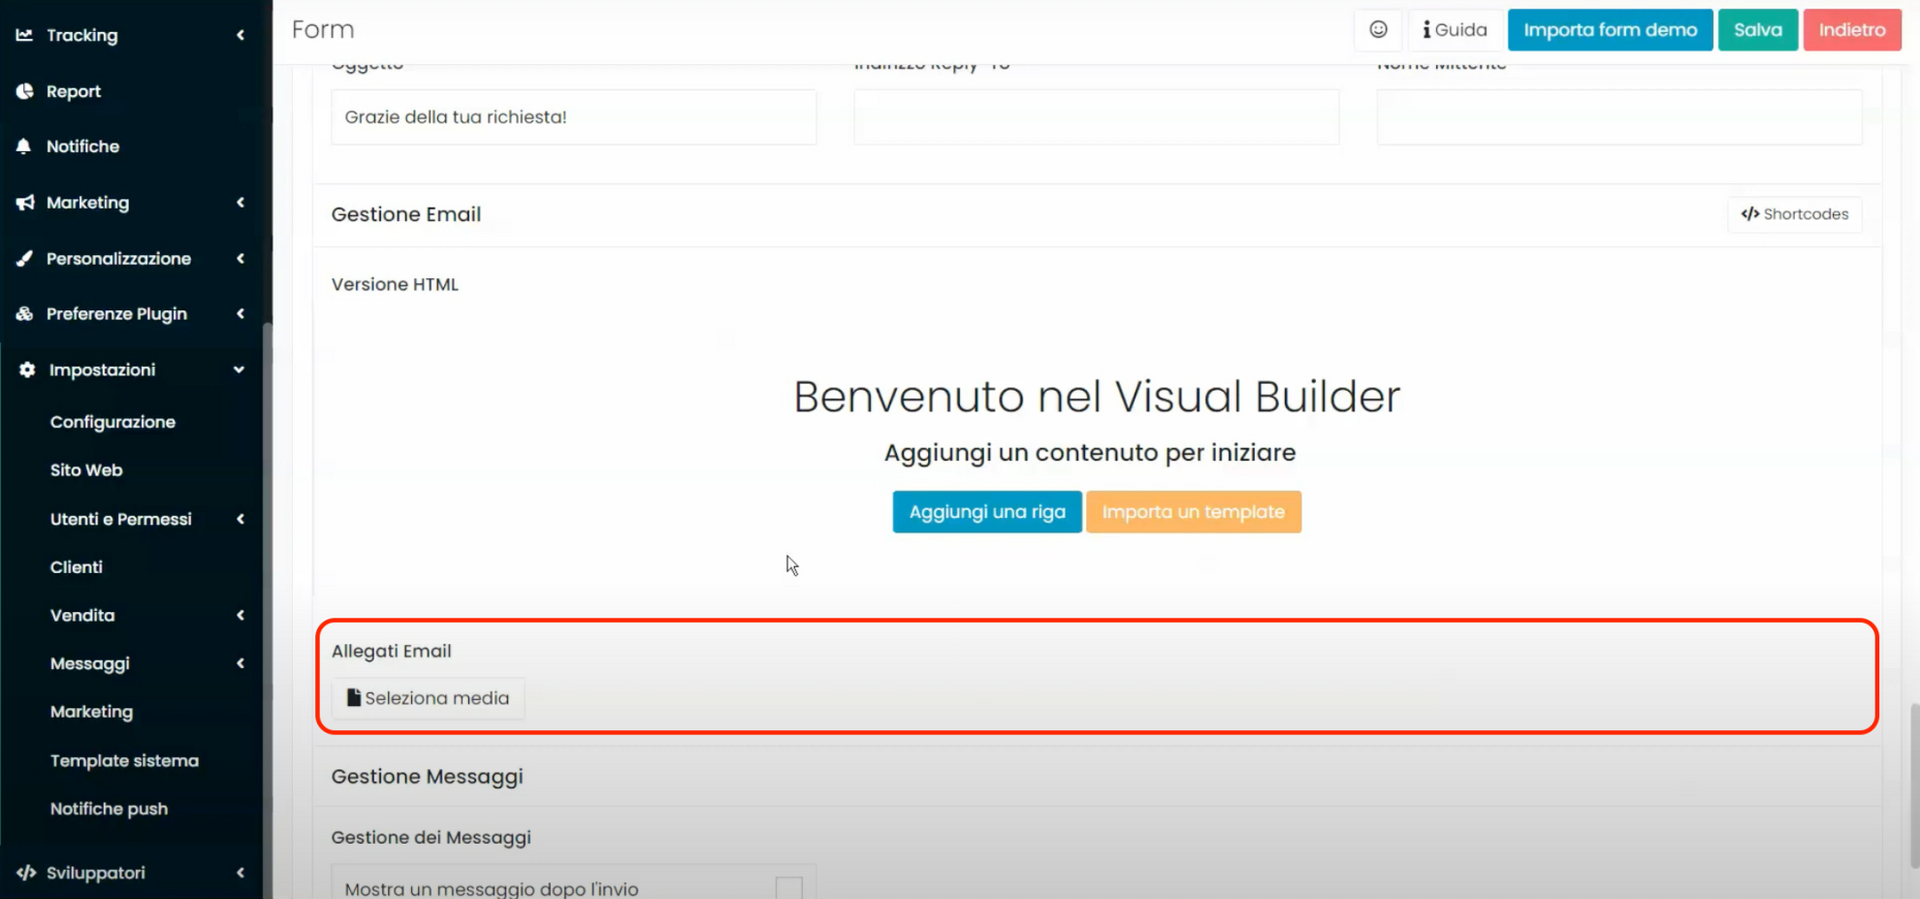
Finally, under the heading “Email Attachments” you can add any attachments to the email.
Step 3: Let's add the created form to the main menu of our website
Once you have created the form, you will need to insert it into the page where you want it to appear. To do this, go to:
Content > Pages
At this point, a list of pages present on the site will appear. By clicking on the green button at the top right "Add", we will create a new page.
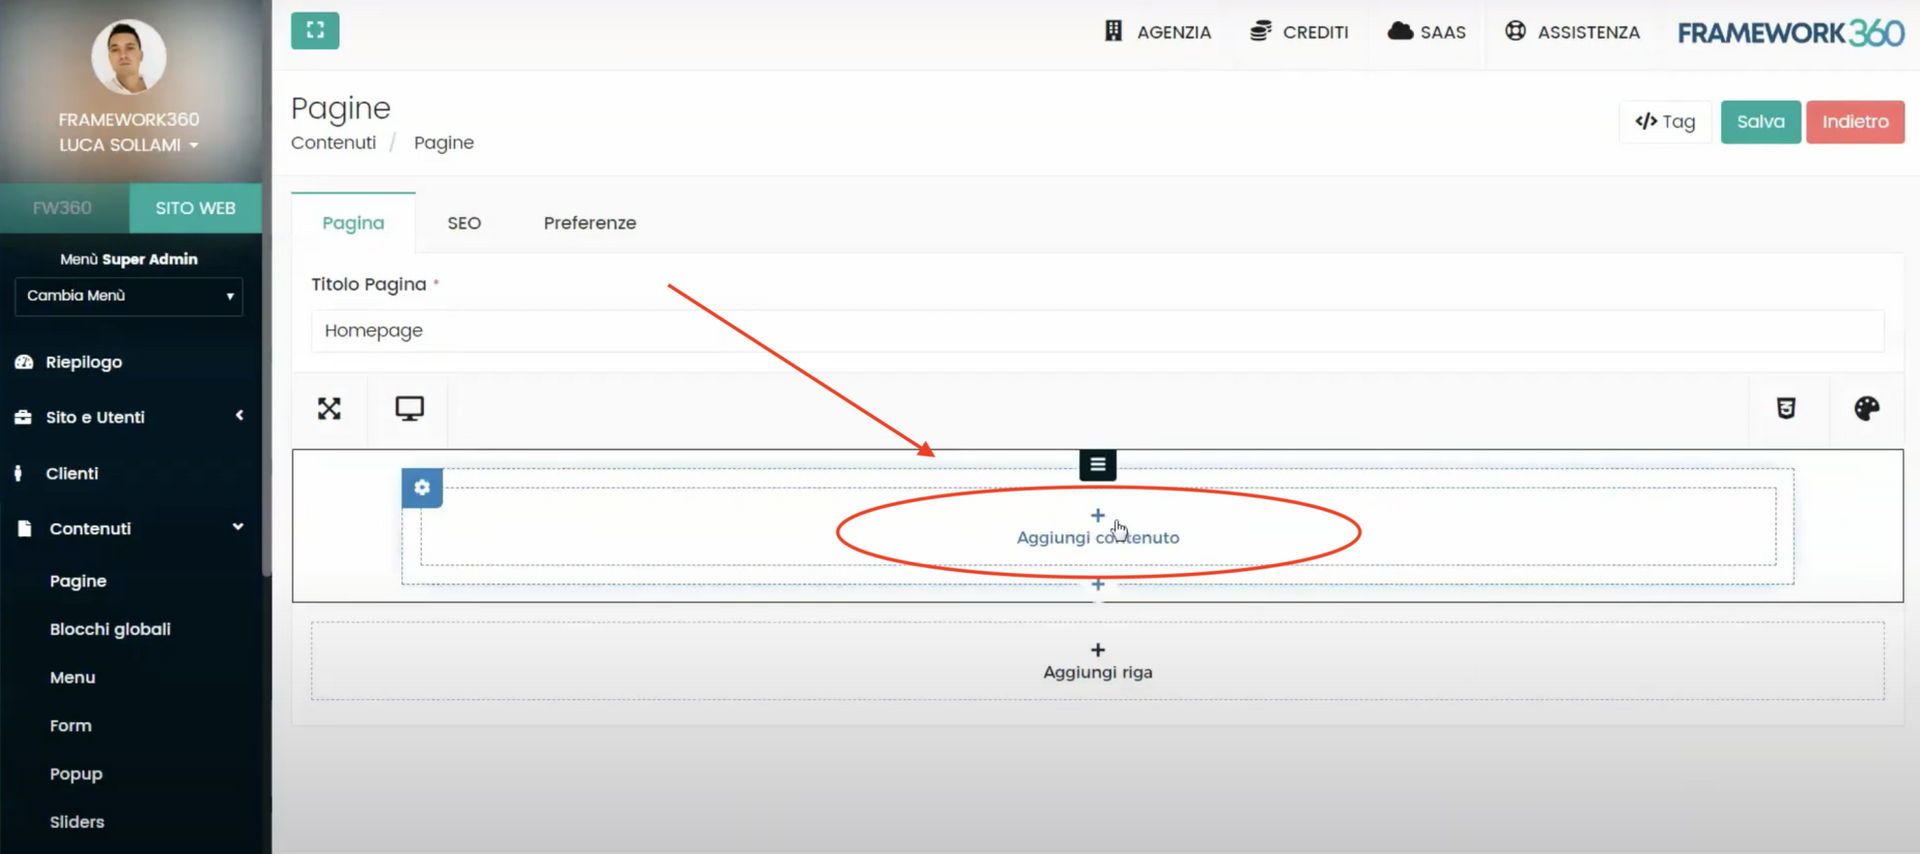
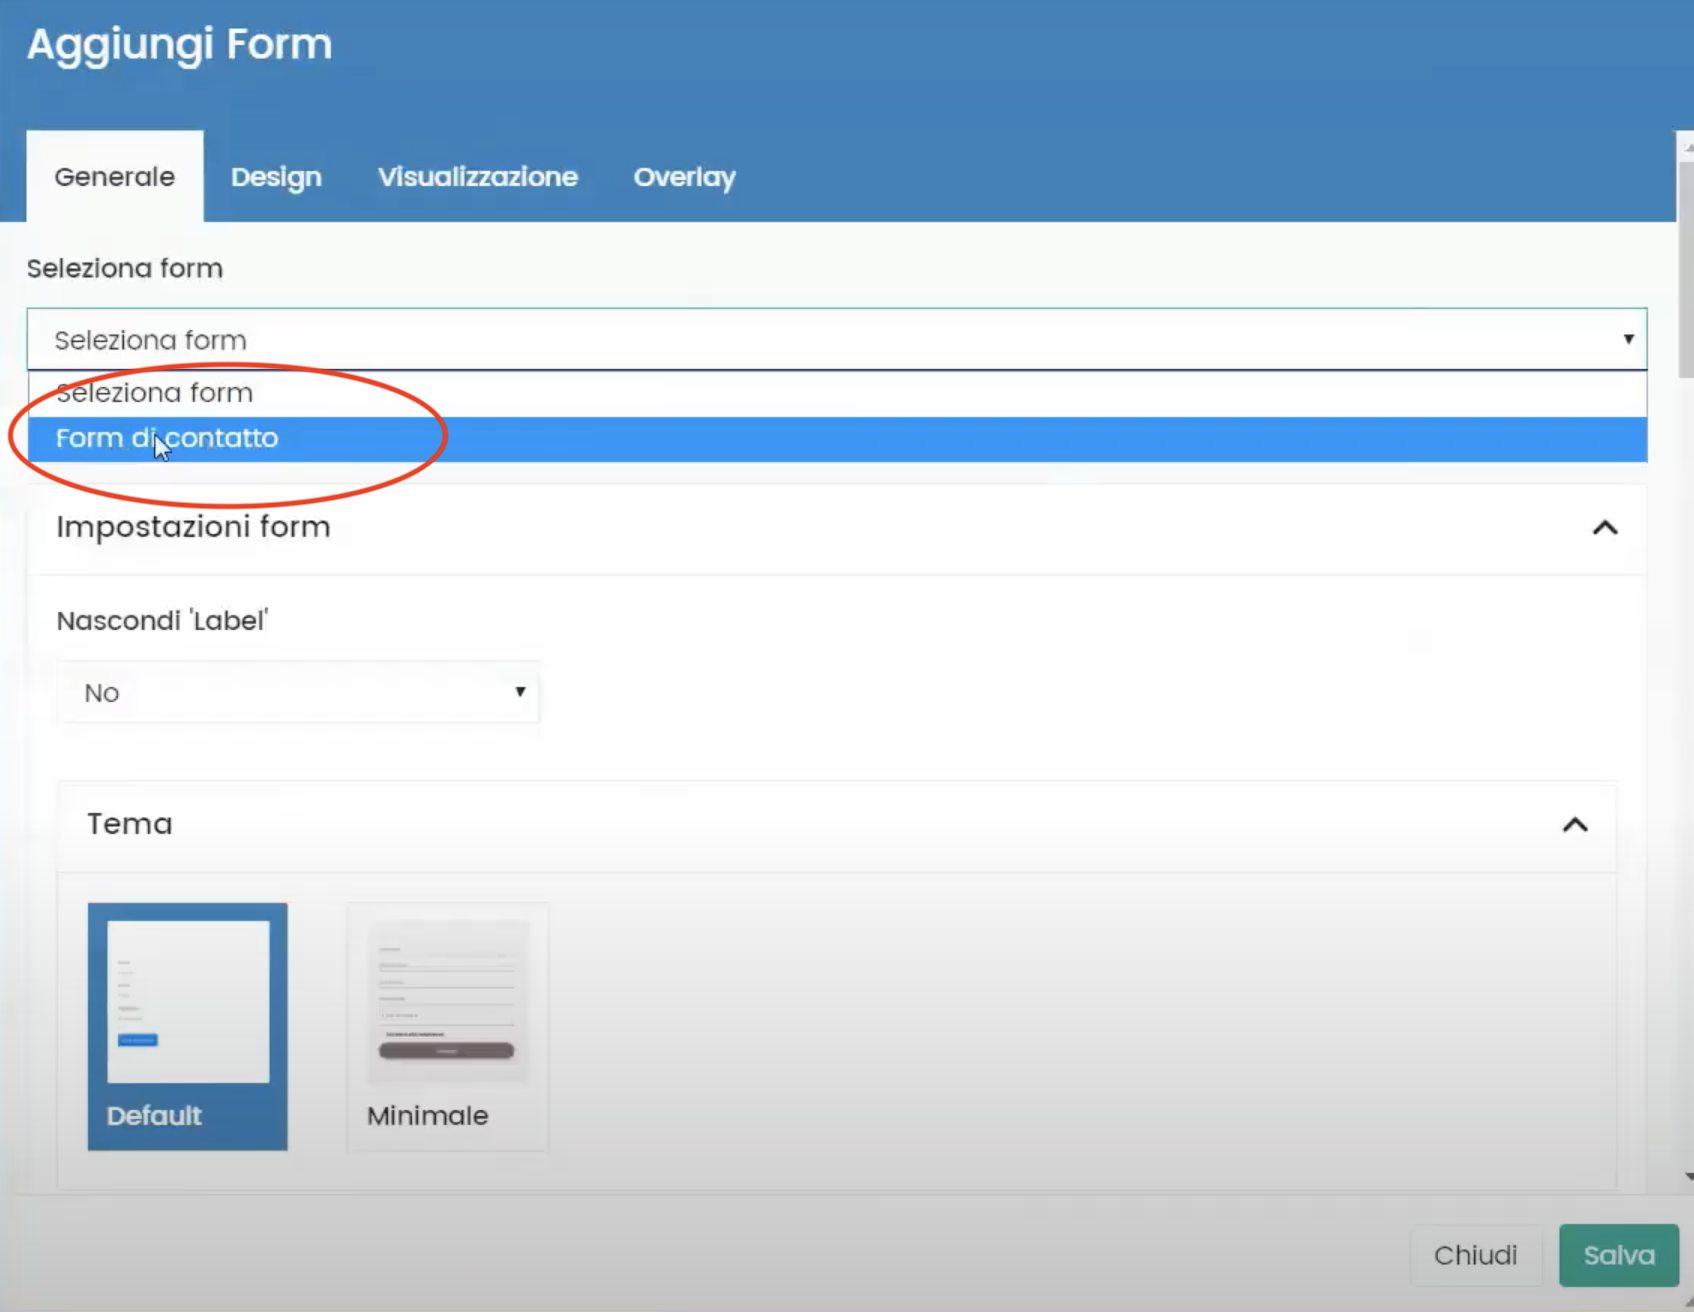
Once you are in the page creation screen, you will need to add content and select the form you previously created by following these steps:
- Click on “Add Row”

- Click on “Add Content”
- Now click on “Form”
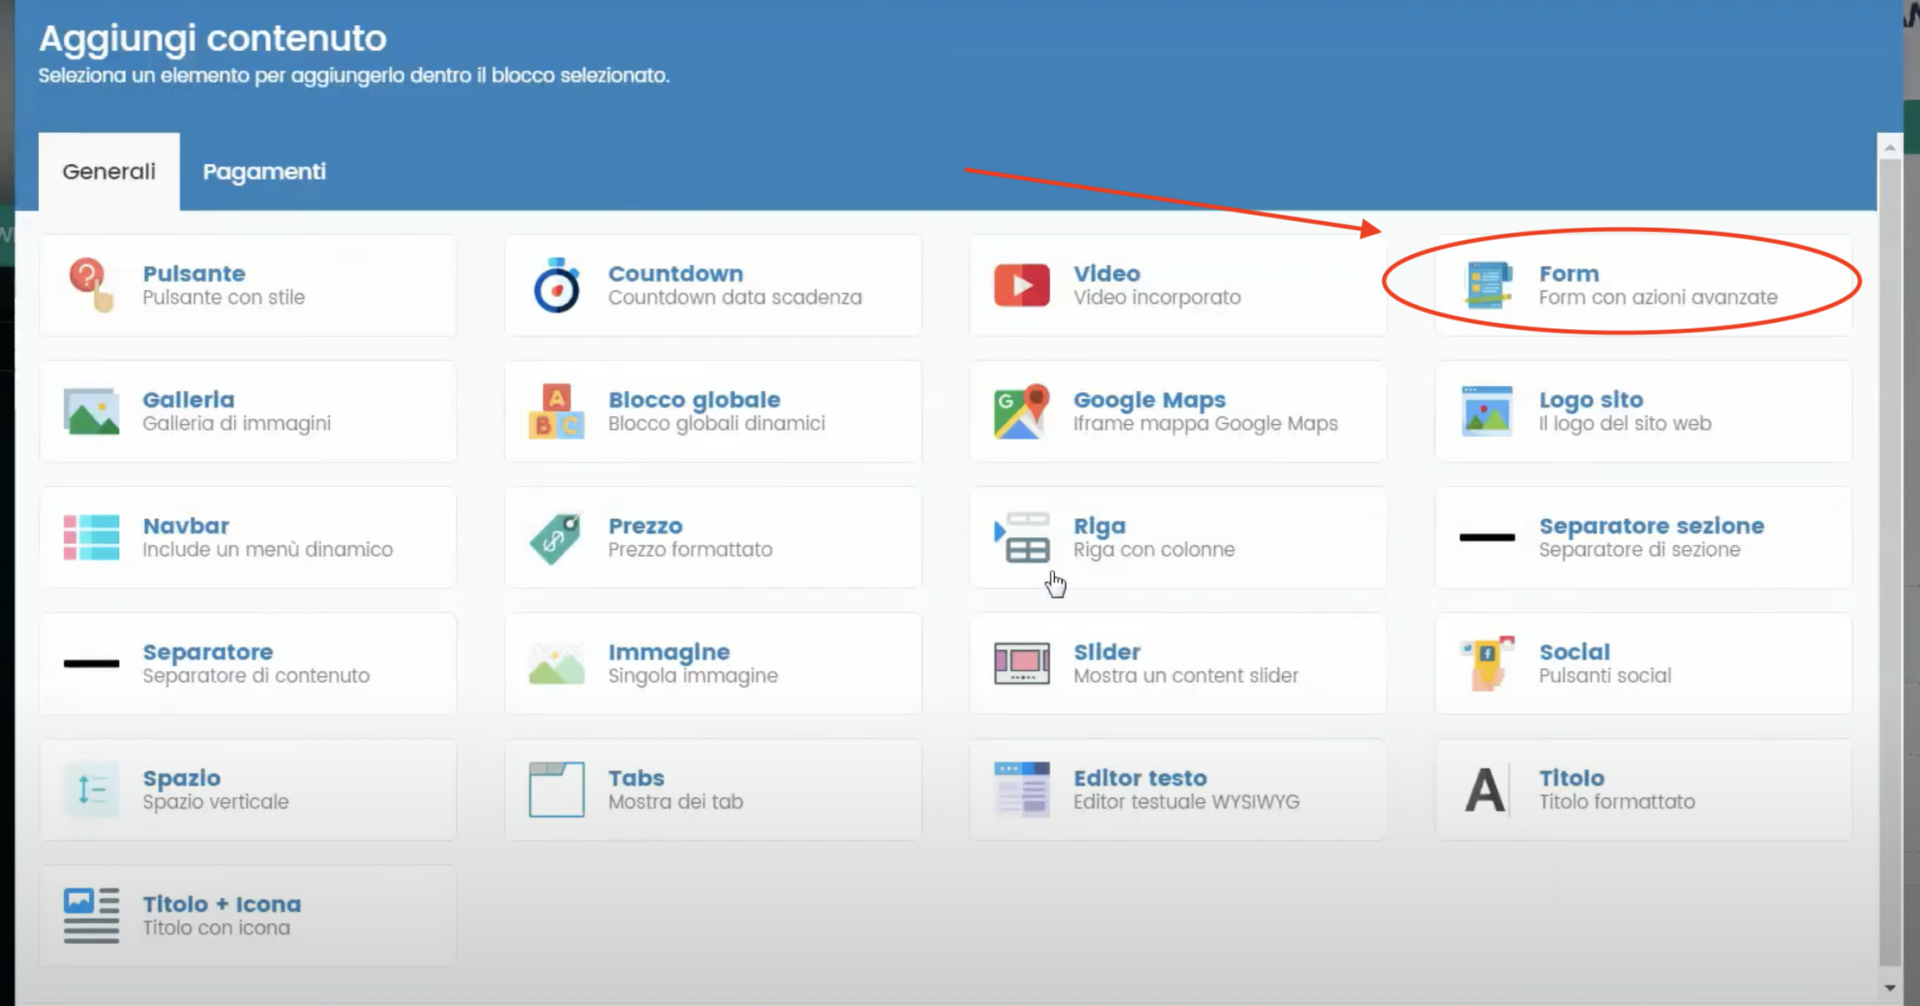
- Select the form you previously created
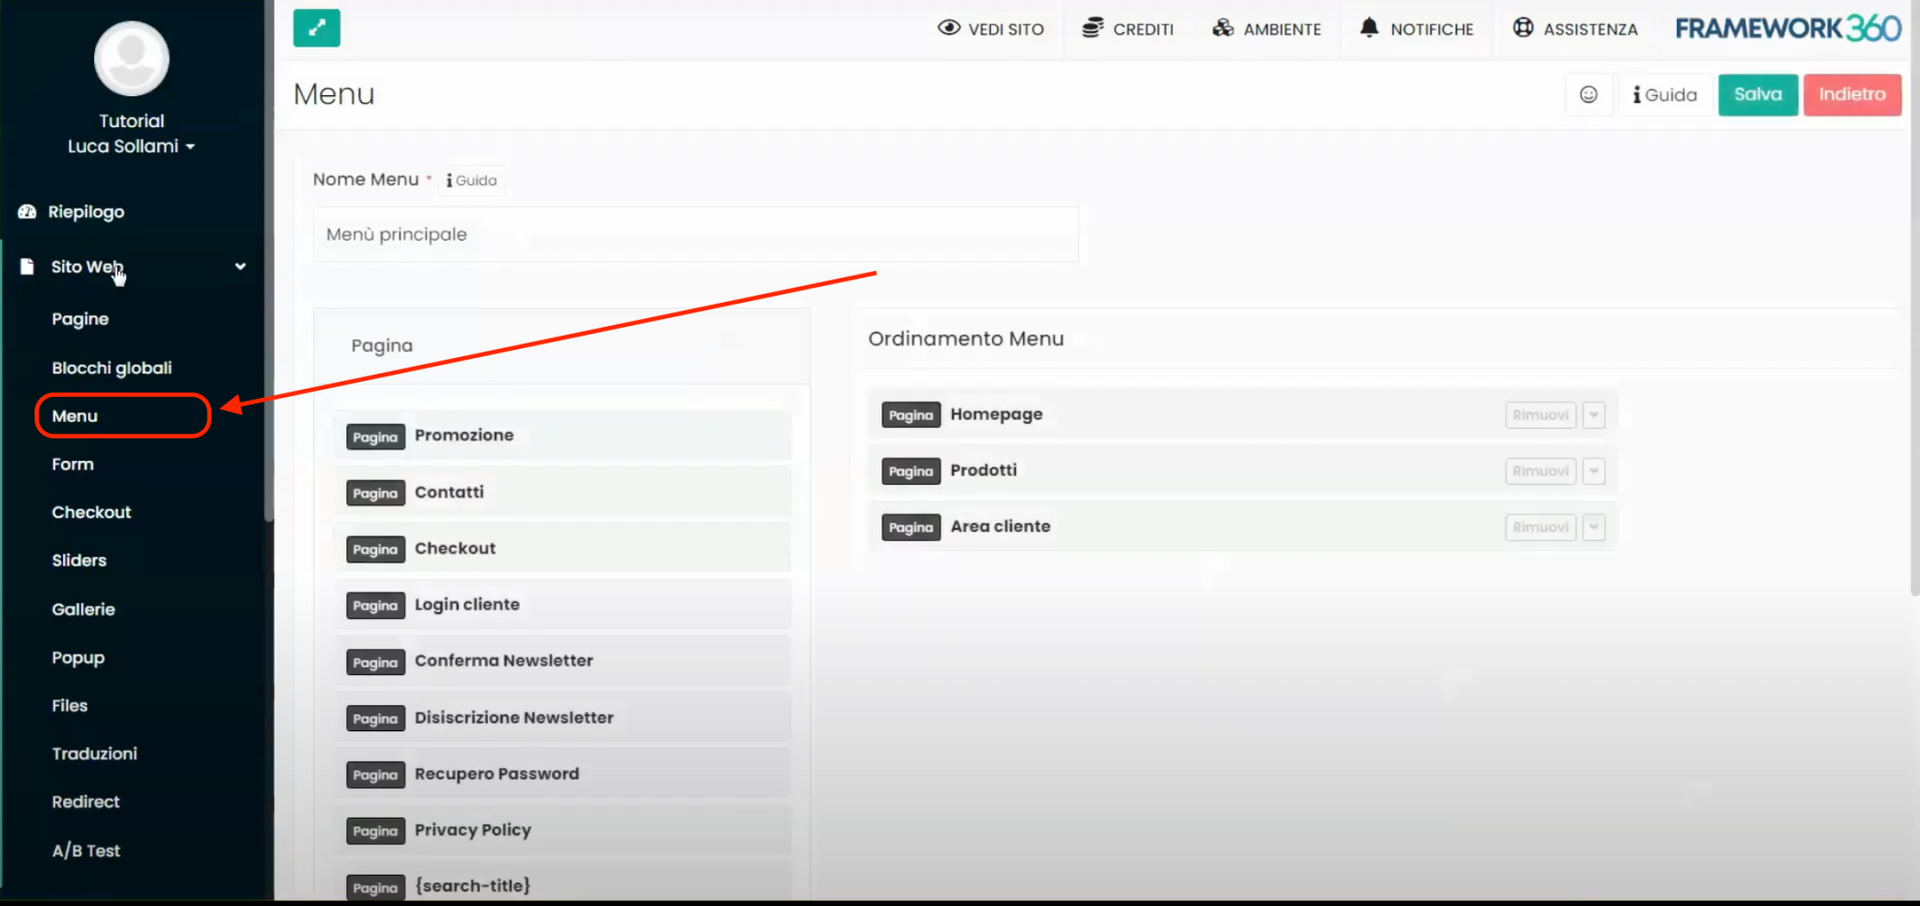
After creating the page with our form inside, you will need to insert the page into the main menu of the site. To do this, click on the "“Menu”" item that you will find in the sidebar on the left under the "Website" section, as shown in the following figure:
Once inside the main site menu editing page, move the "Contacts" page, that is, the page you have just created, from the column "“ Pages” to the “Menu Sorting” column, as shown in the following figure:
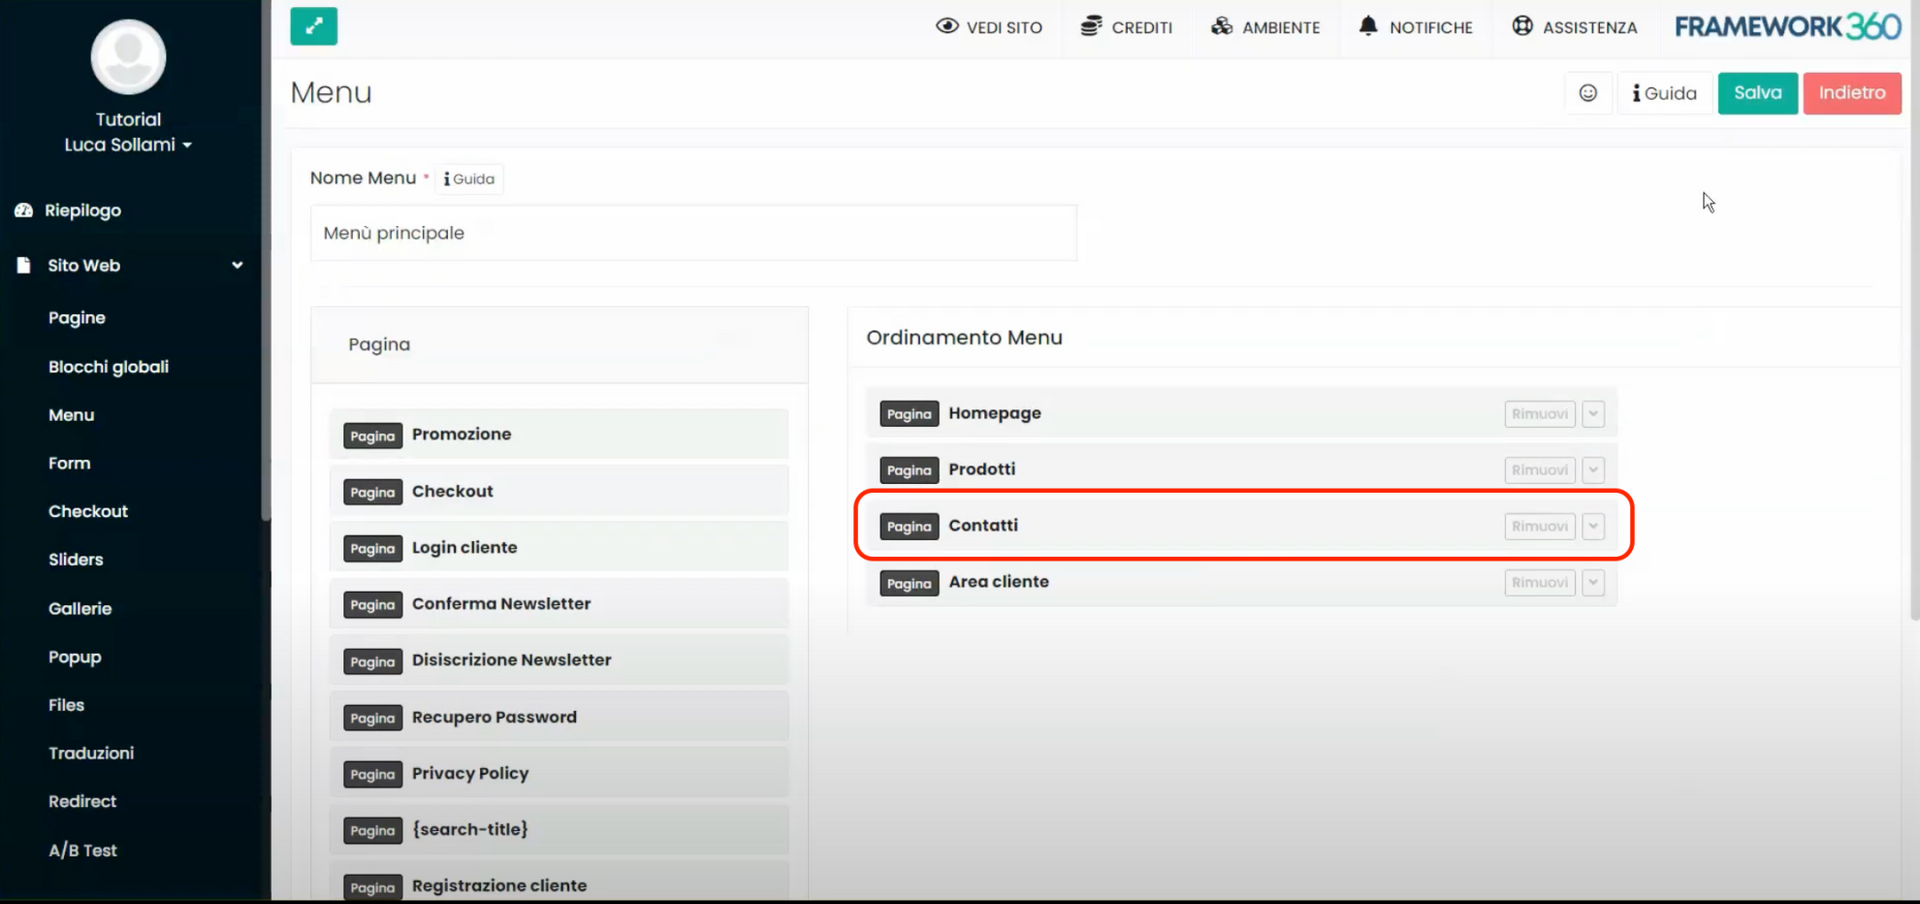
In this way, the page containing the forum will be displayed within the main menu of the website.


