Inside this tutorial we will see how to create a questionnaire or a survey with Framework360, to be sent to our customers to find out, for example, their level of satisfaction during the purchase of our services or products on our website or in the company.
Step 1: Install the “Questionnaires” plugin
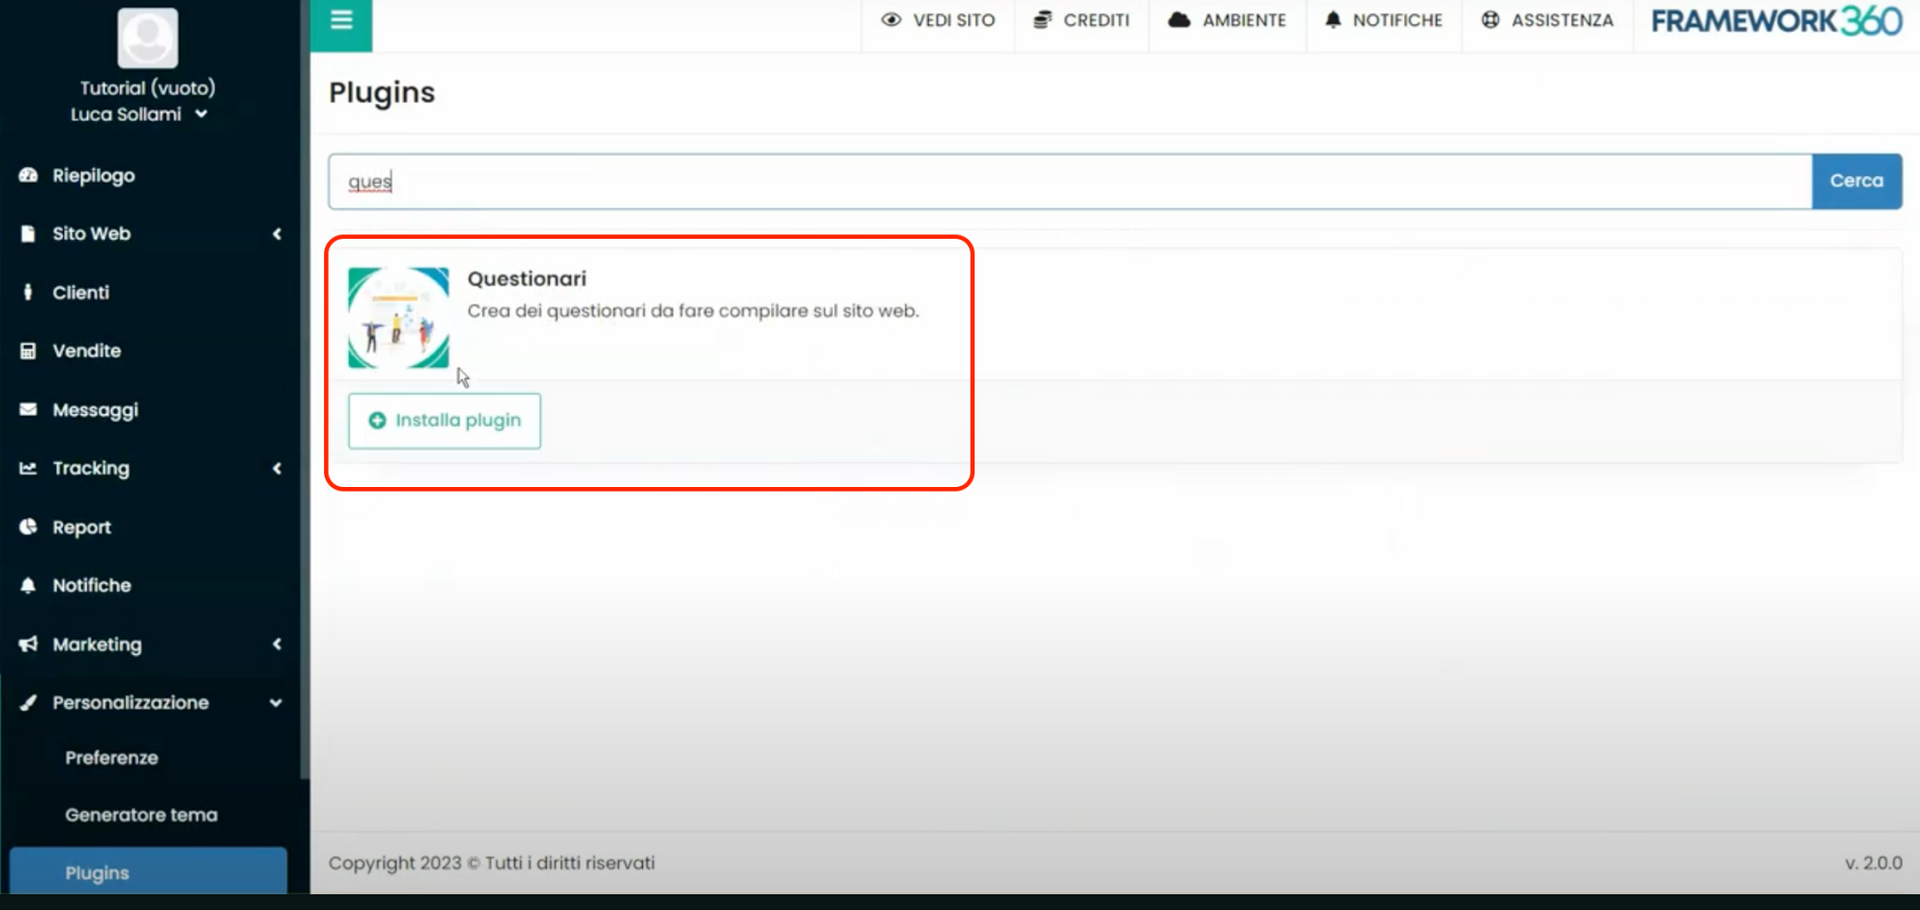
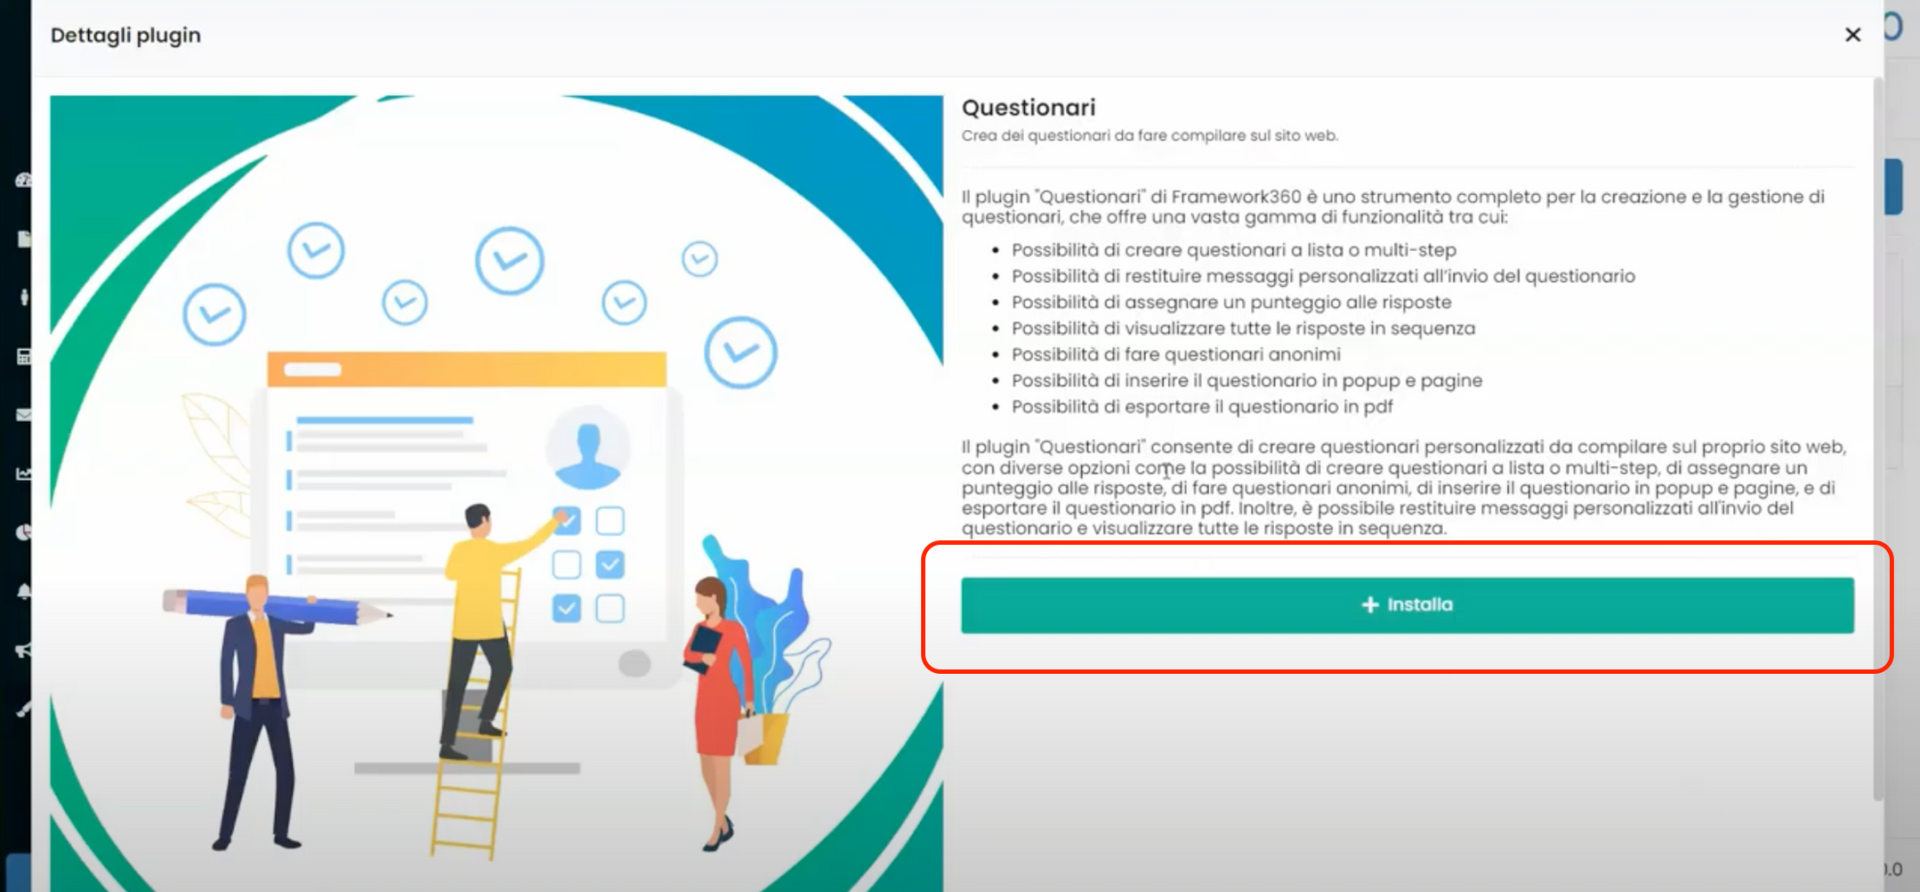
First of all, we need to install the “Questionnaires” plugin in our Framework360 environment. To do this, we must go to the sub-item of the main Framework360 menu “Plugins” following these steps:
Customization > Plugins
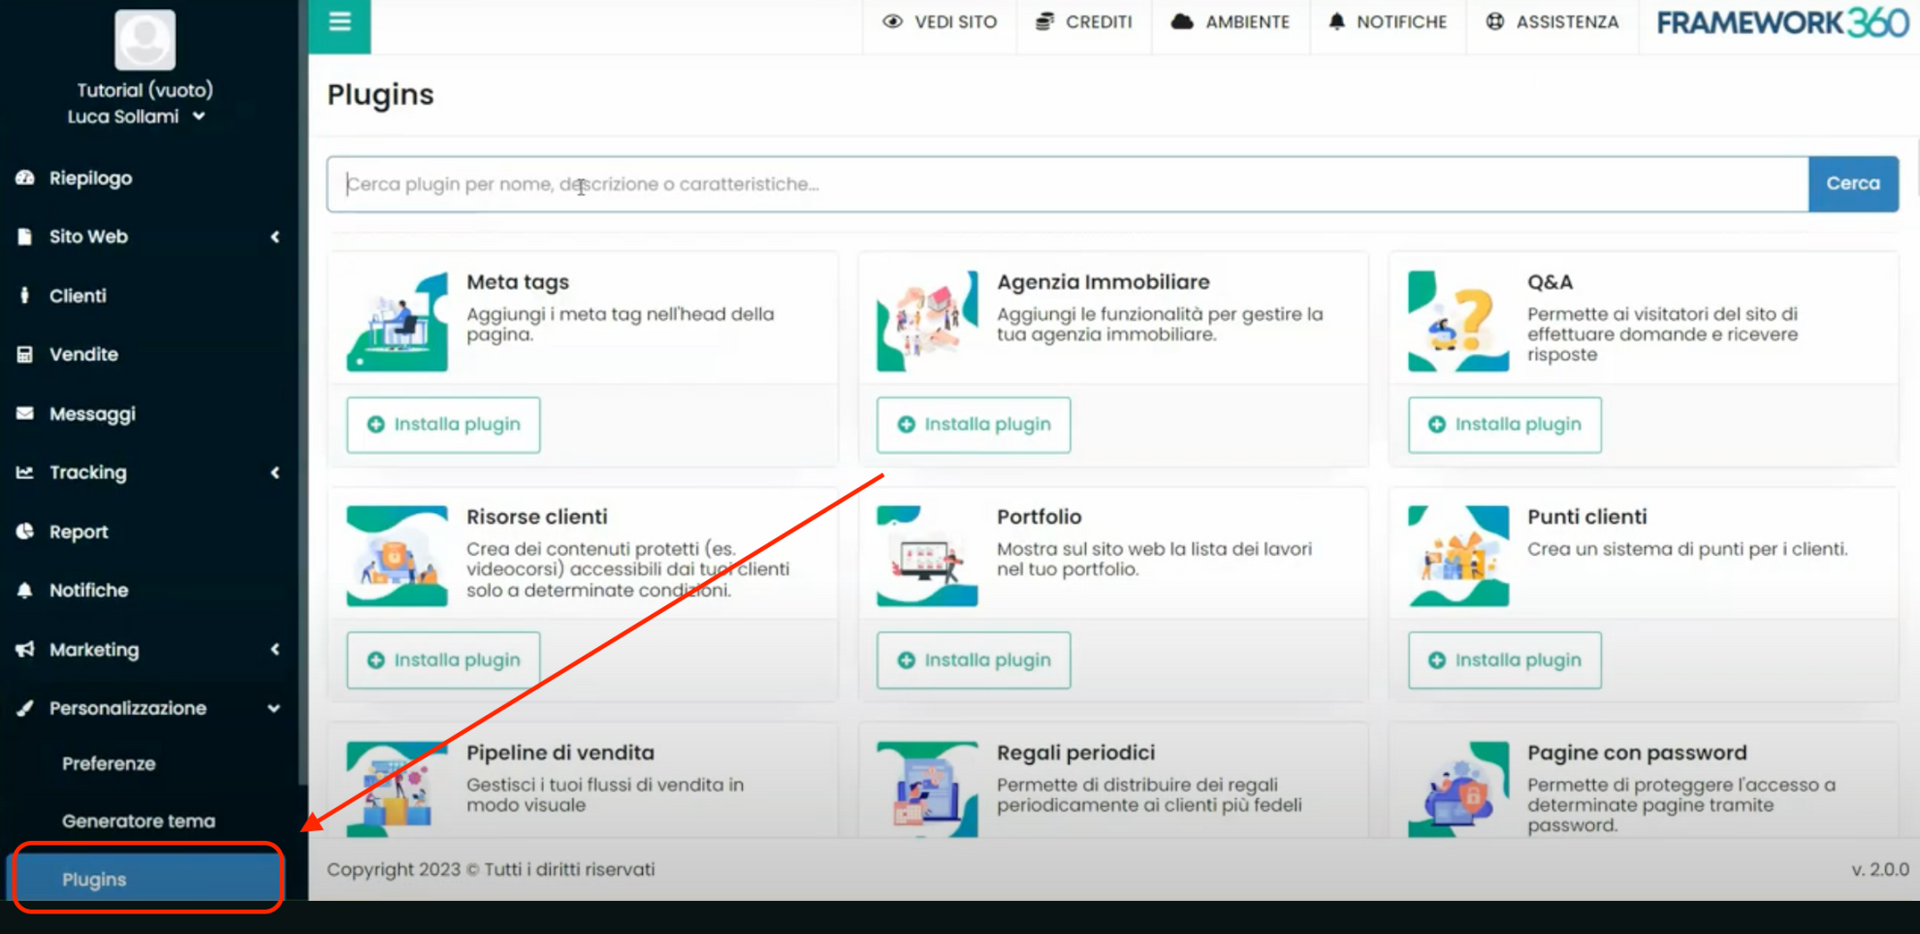
At this point, we search using the search bar for the “Questionnaires” plugin and install it as shown in the following figures.
Step 2: Let's set the main parameters of our questionnaire
After installing the plugin, a dedicated section called “Questionnaires” will have opened in the sidebar on the right, let's access it.
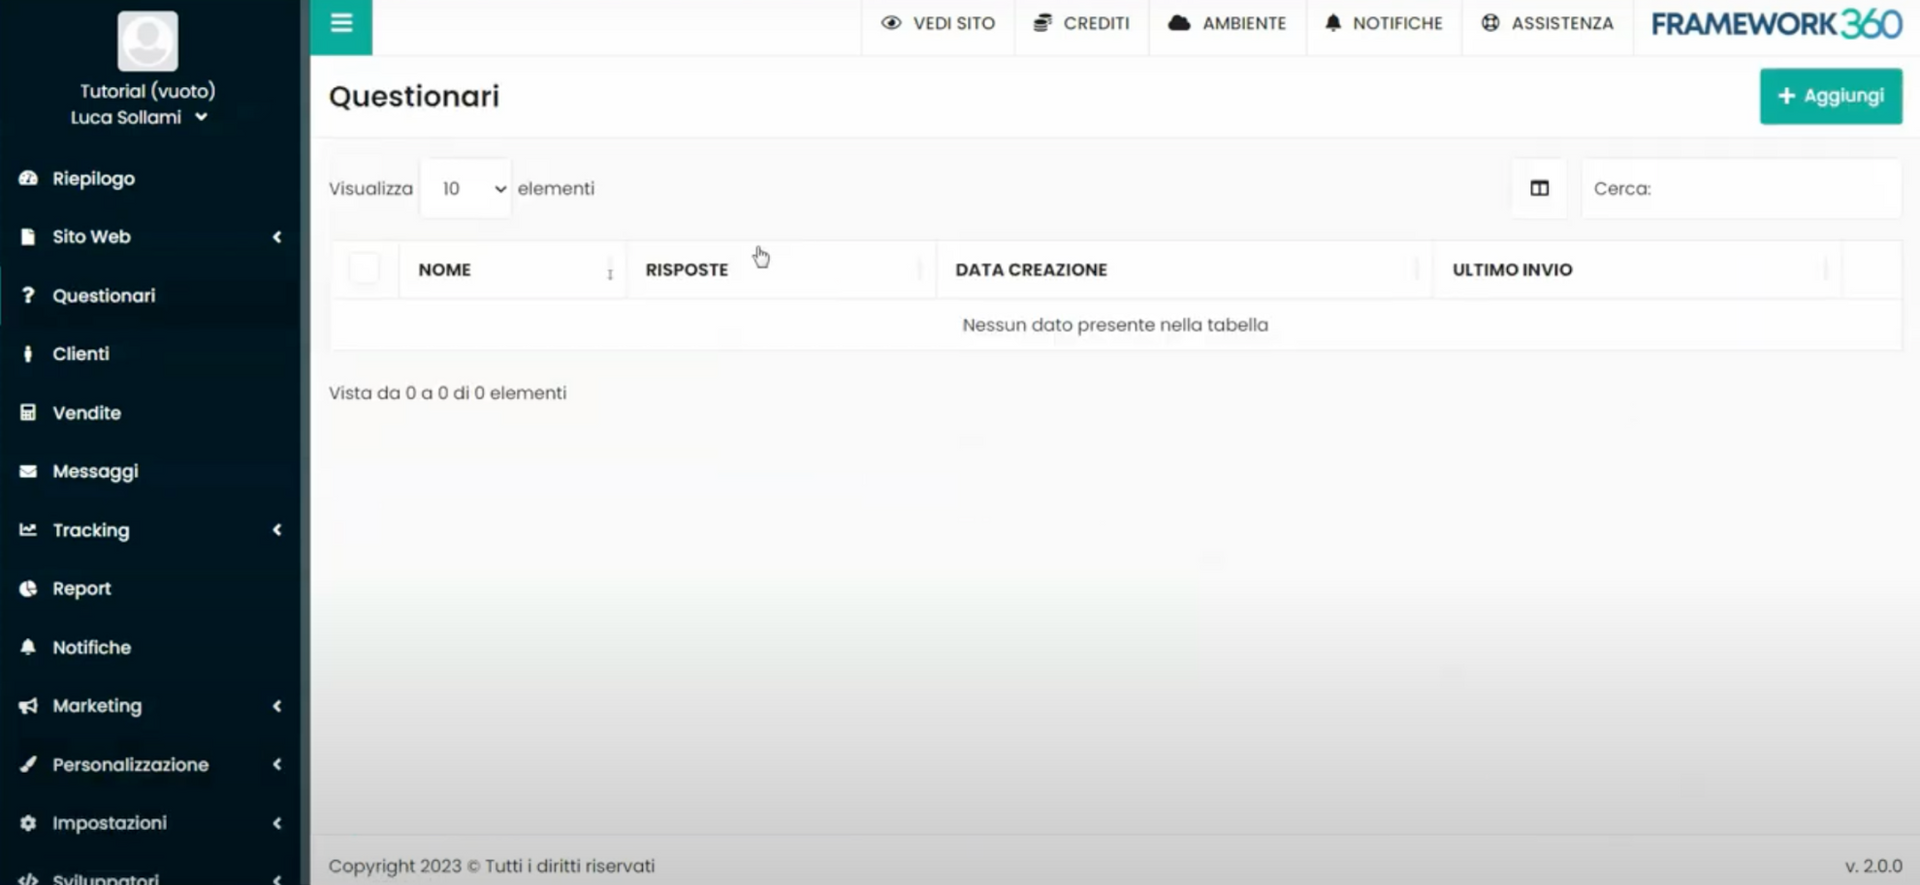
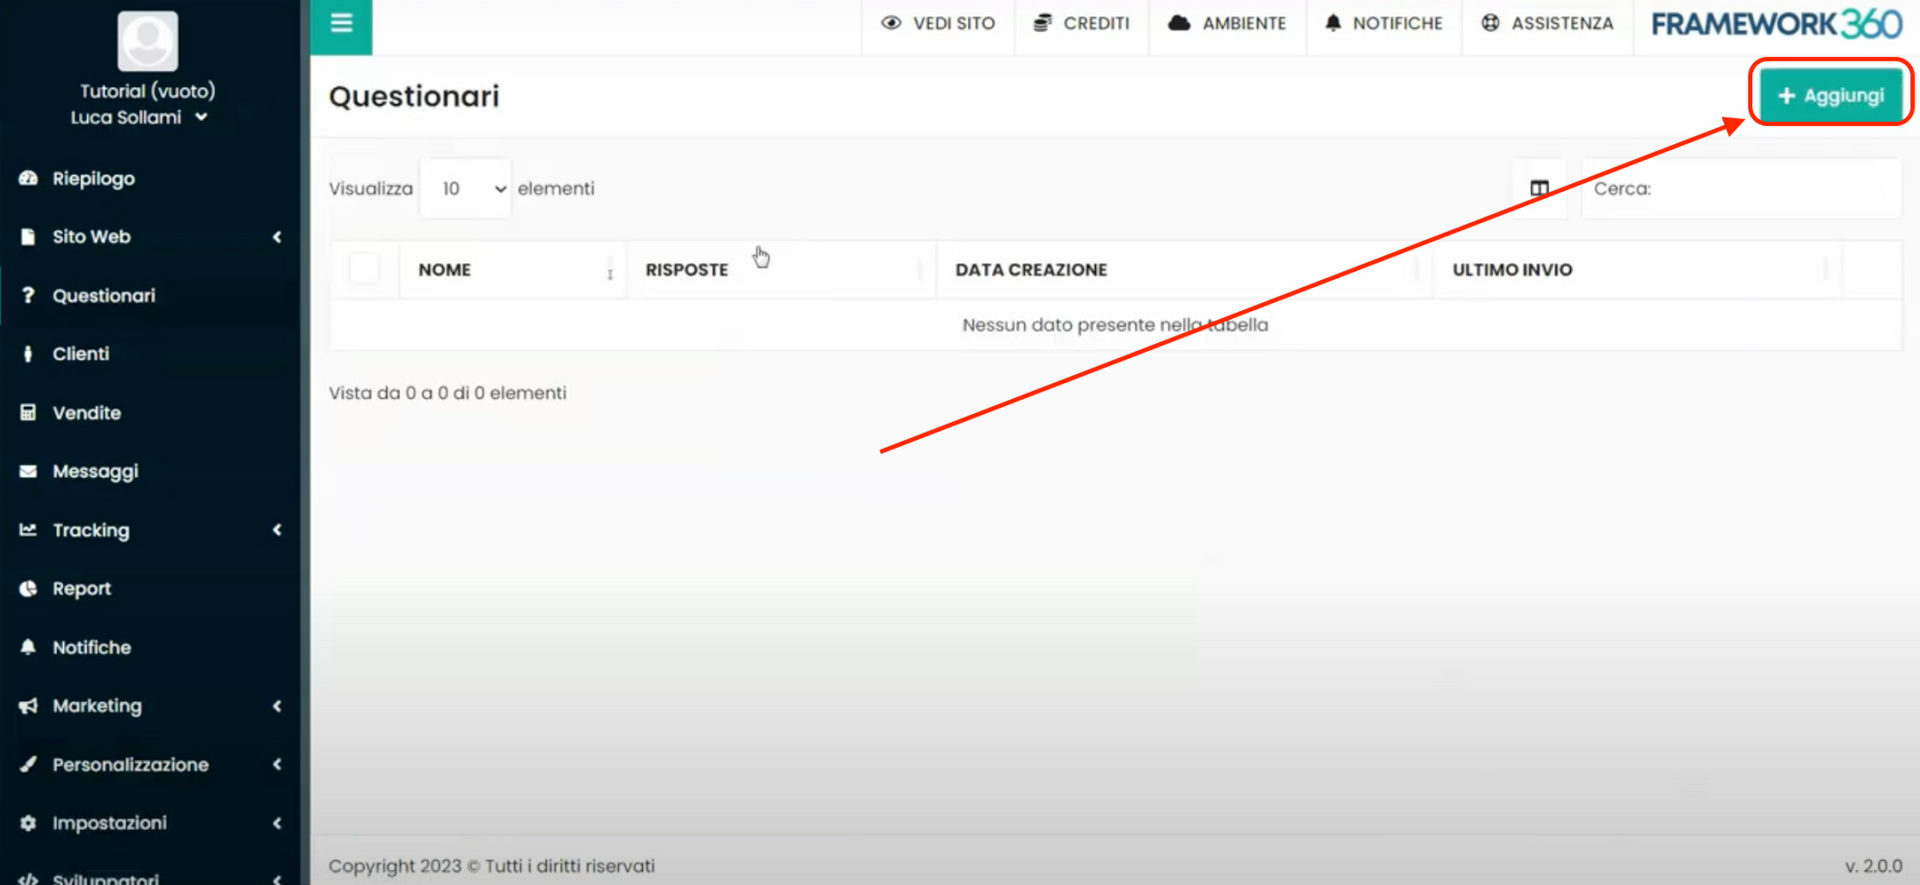
Once inside the questionnaires section, we can create a questionnaire using the green button “Add” located at the top right.
Inside the questionnaire creation screen, we will notice the presence of two tabs:
- Questionnaire data
- Messages.
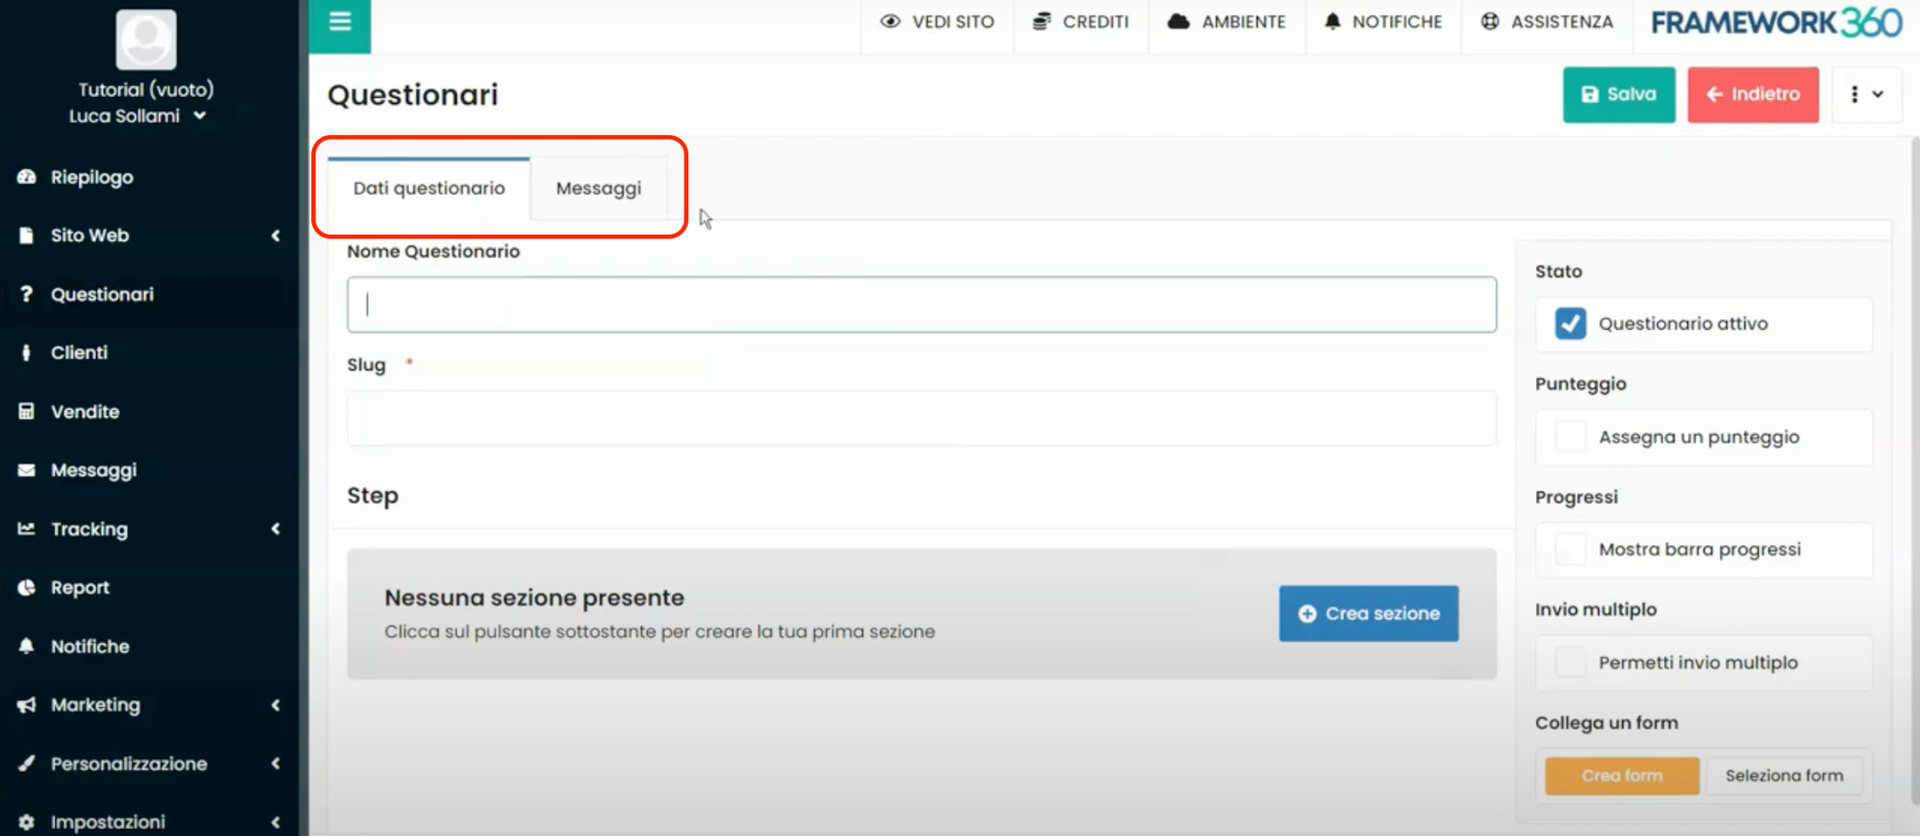
In the first tab, namely the tab “Questionnaire data”, we can enter all the main parameters of the questionnaire and the various steps that will compose it.
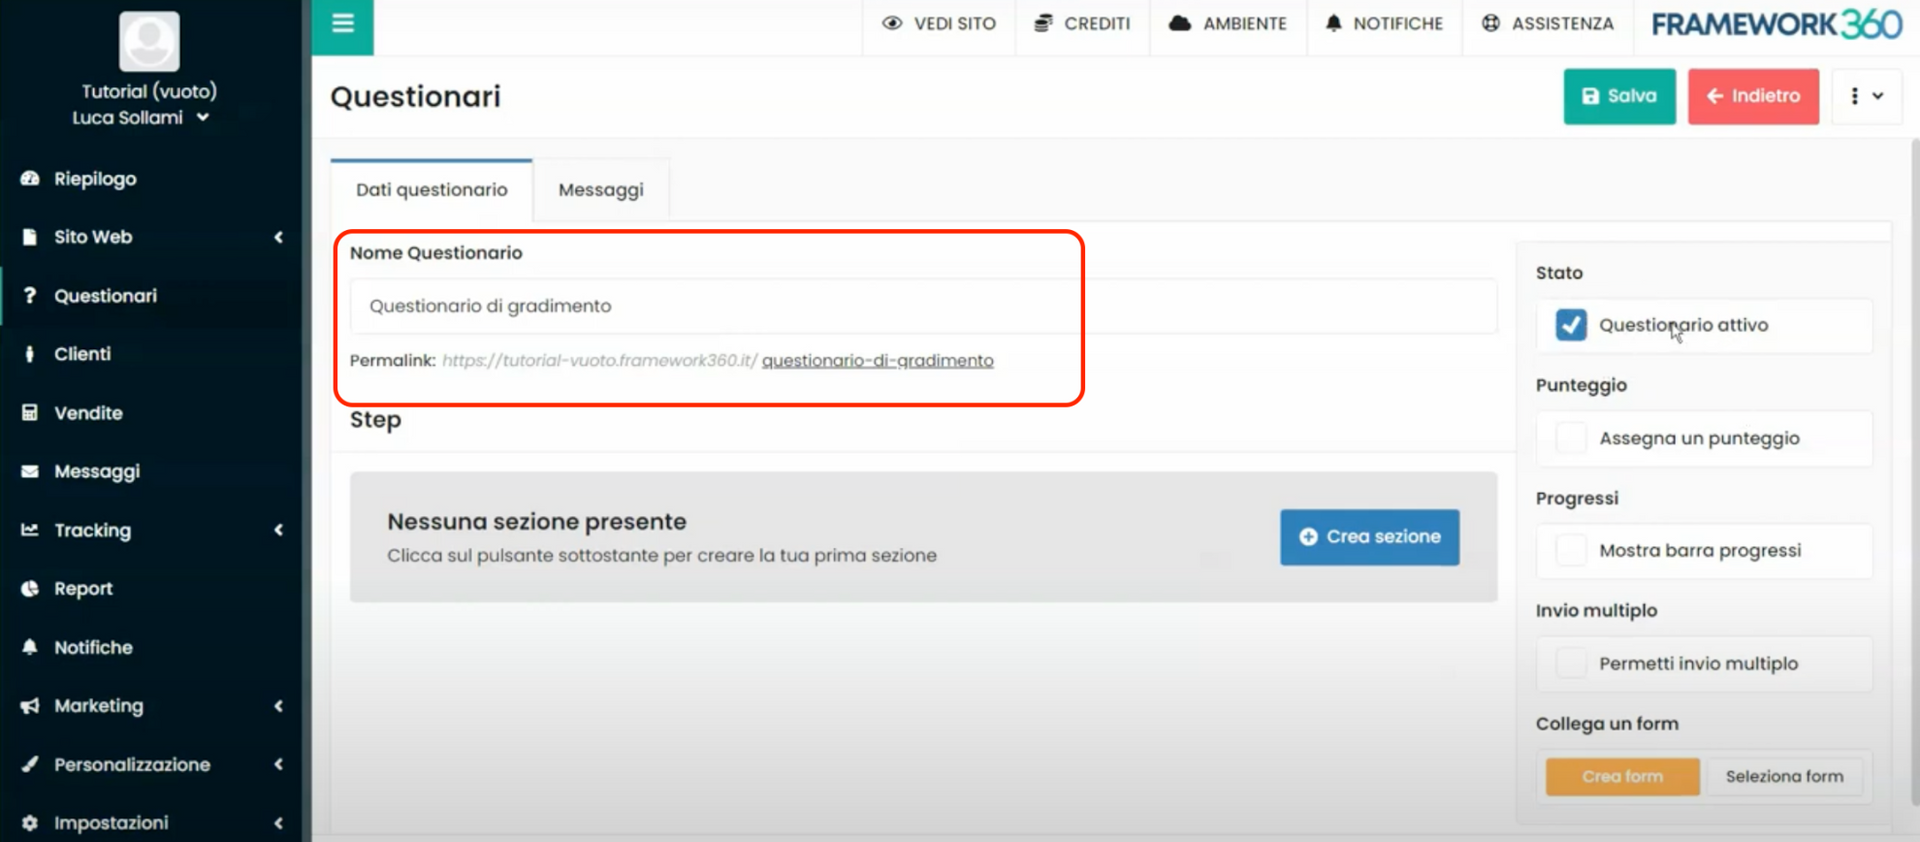
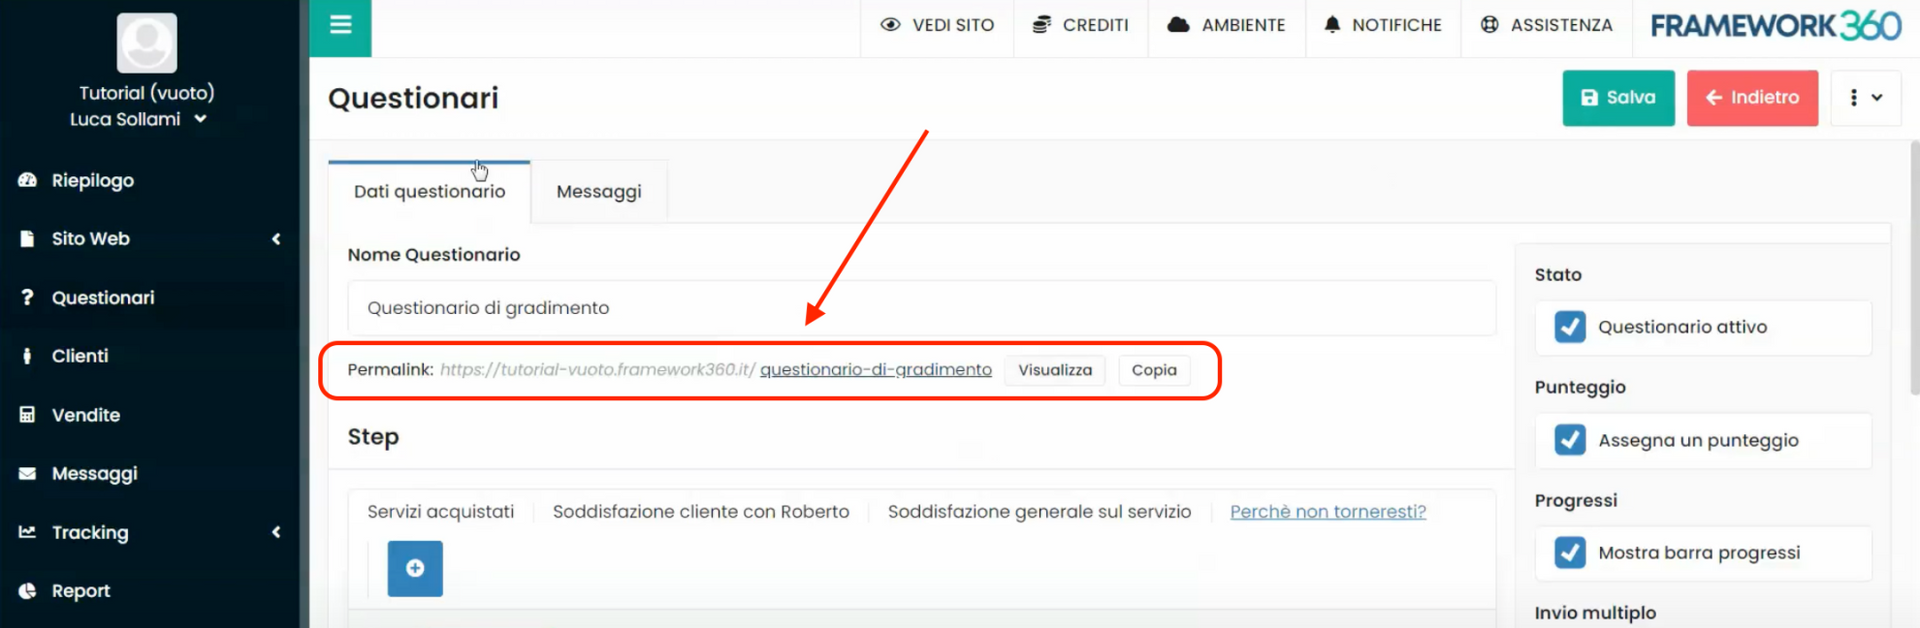
The first item we will find is the item “Questionnaire name” where we can enter the name of our questionnaire. Once the questionnaire name is entered, just below it will appear, as shown in the following figure, a permalink that will allow us to view the questionnaire or send it to our clients.
Let's now analyze the items present on the right side of the screen.
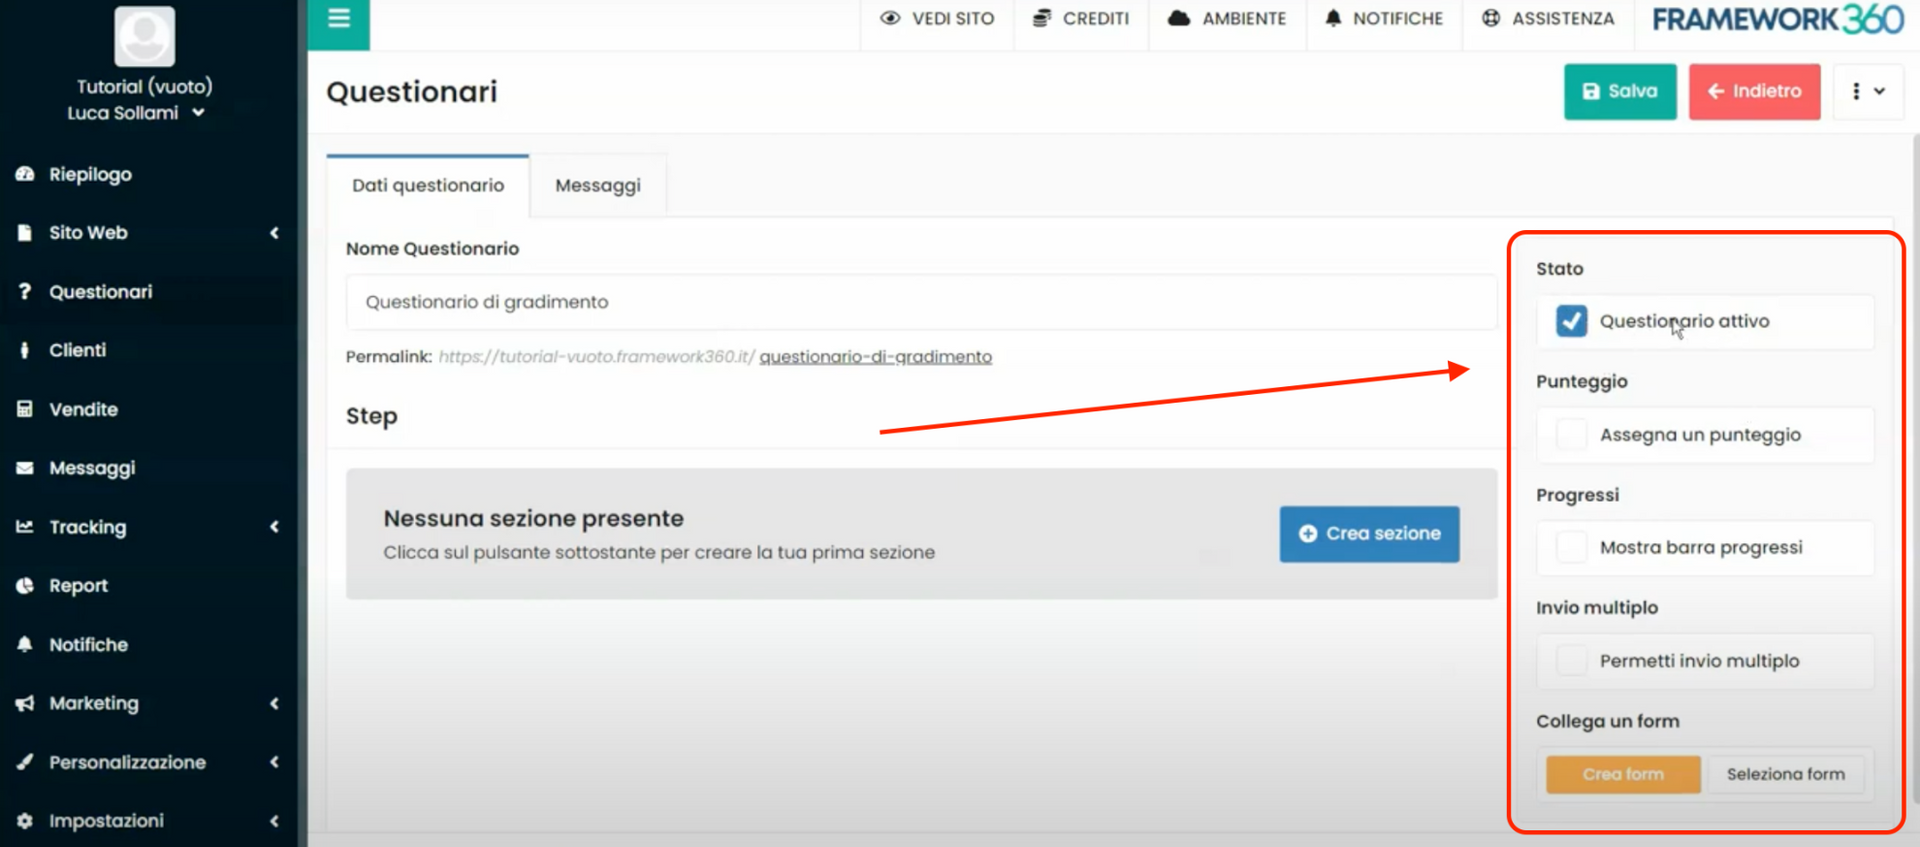
In this section, by checking or not the item “Active questionnaire” we can decide whether to activate the questionnaire or not. Meanwhile, by checking the item “Assign a score” we can enable the feature that allows us to assign a score to each answer of the questionnaire. Instead, by checking the item “Show progress bar” we can show the progress status of the questionnaire during completion, which would allow the customer to know when they will finish the questionnaire, encouraging them to continue filling it out. By checking the item “Multiple submissions” we give the customer the possibility to fill out the questionnaire multiple times. Finally, with the item “ Connect a form” we could connect an existing form or create a new one, which will be displayed upon completion of the questionnaire. For example, by connecting a contact form (if you don't know how to create a contact form, we have created a specific guide that you can consult by clicking here), we will give the customer the possibility to leave us their data.
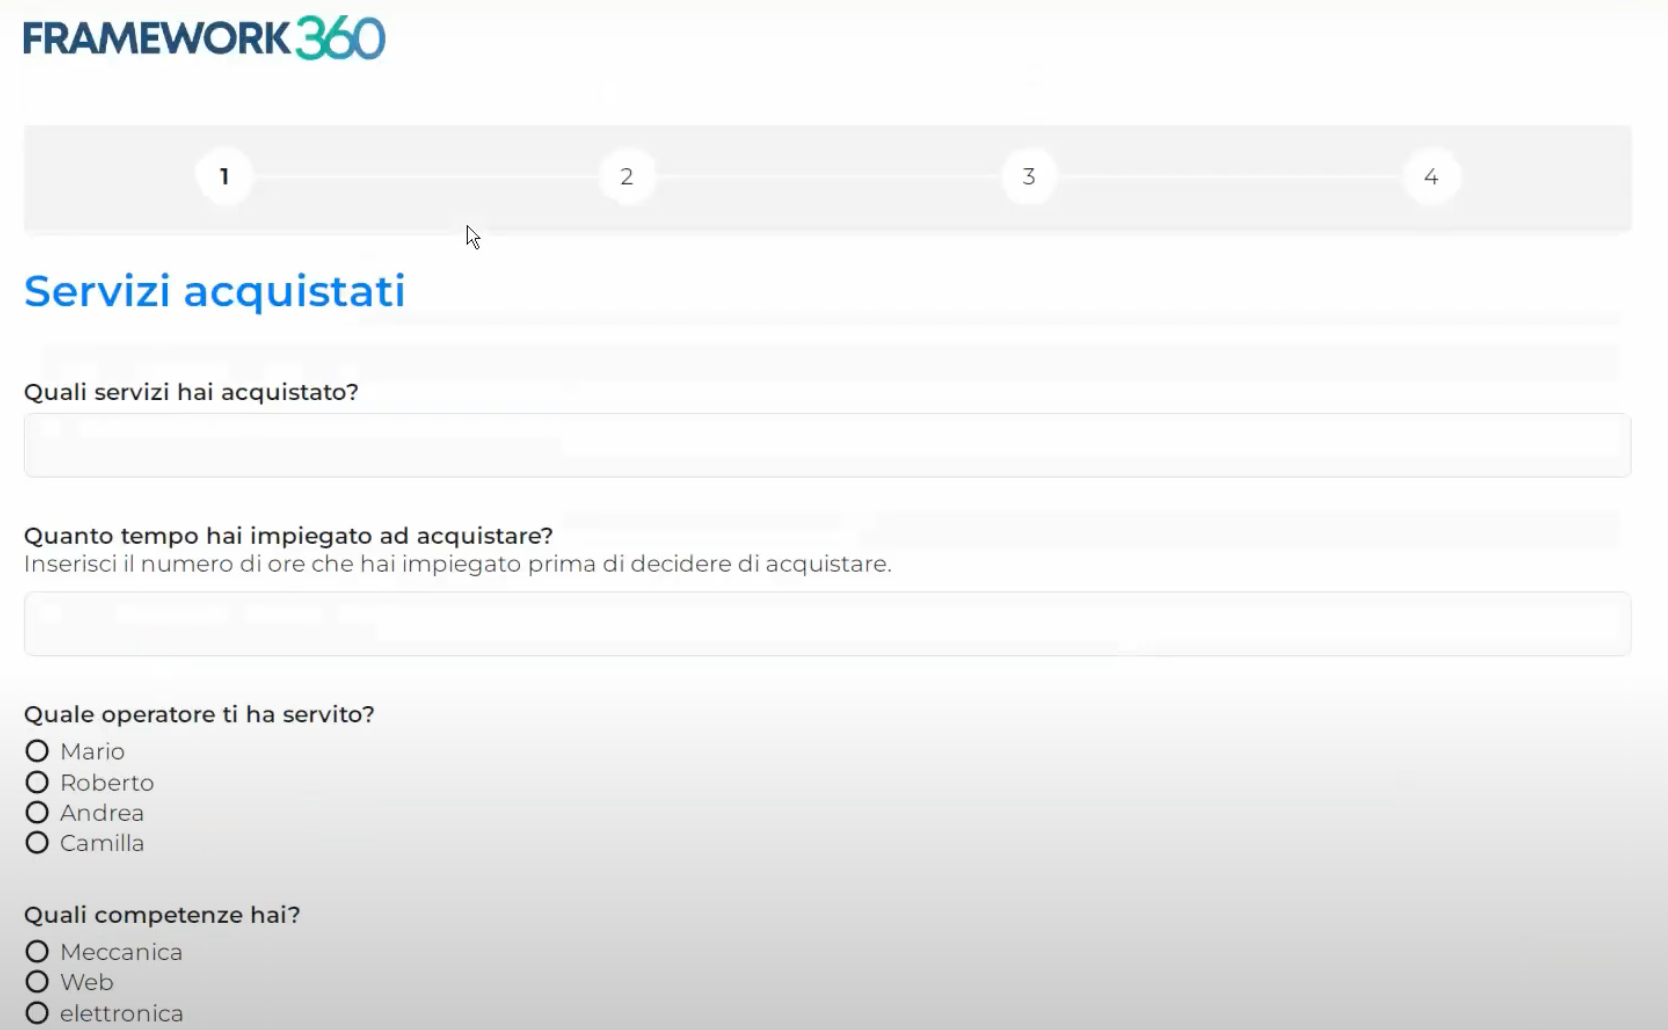
Step 3: Let's create the first section of the questionnaire
After setting the title and main parameters of our questionnaire, still within the "Questionnaire Data" tab of the questionnaire creation screen, in the central section called "Step” highlighted in the following figure, we can create all sections of the questionnaire.
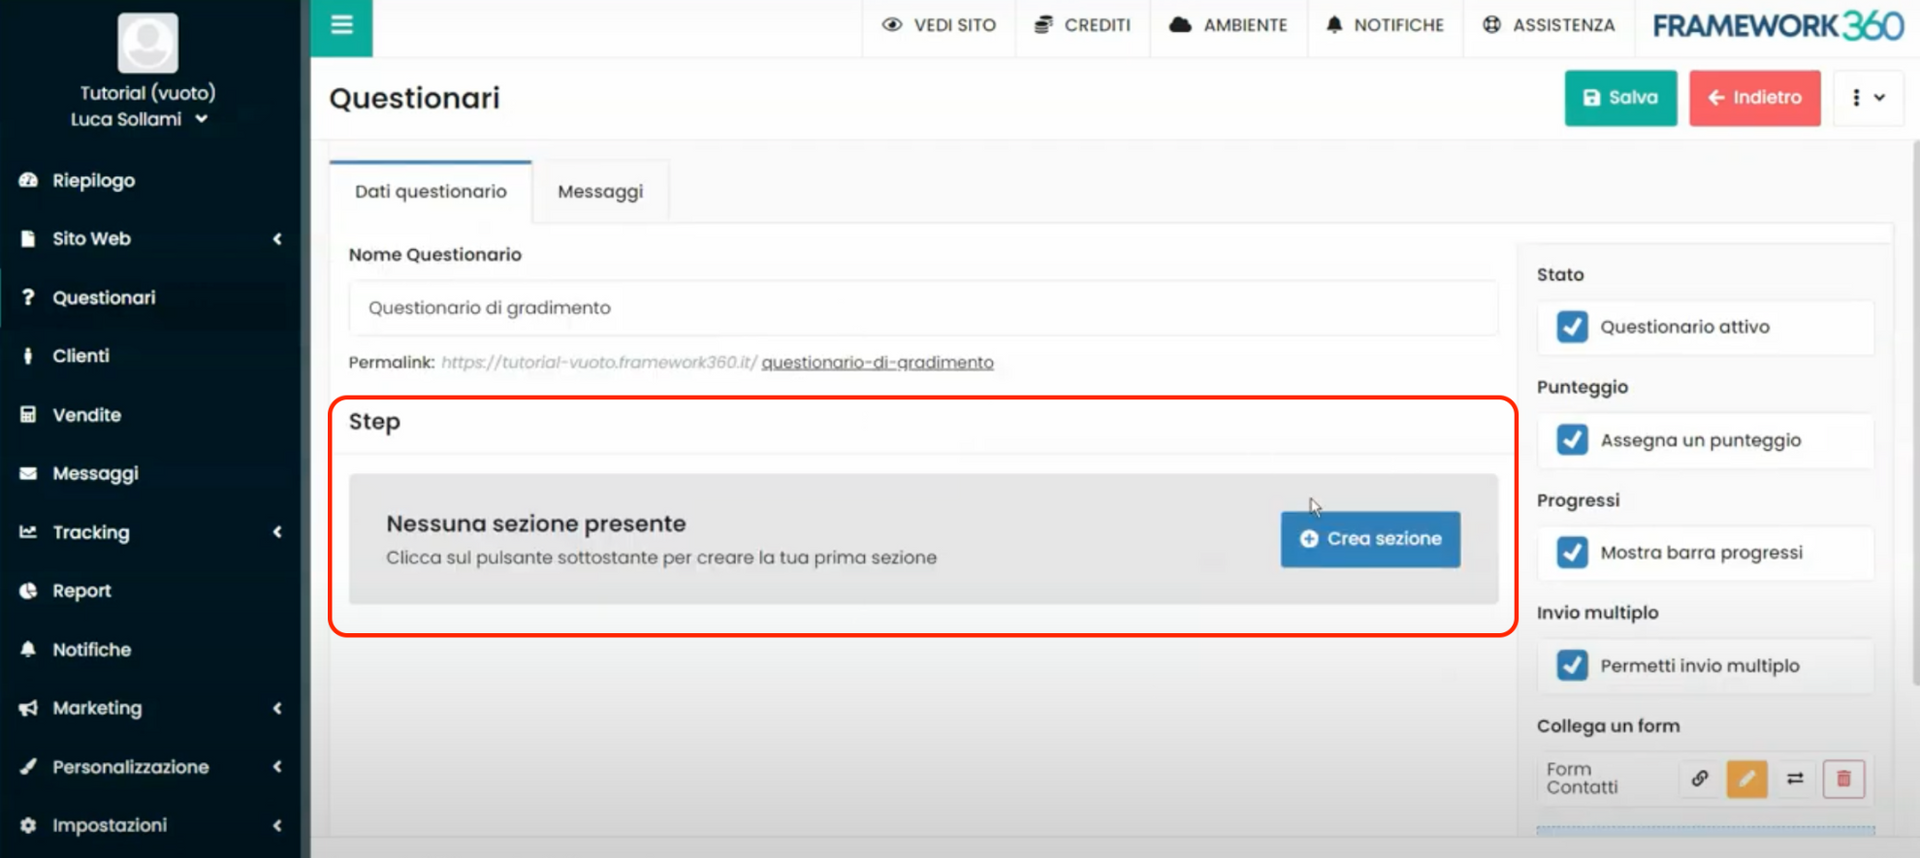
By clicking on the blue button “Create section” we will create the first section of the questionnaire.

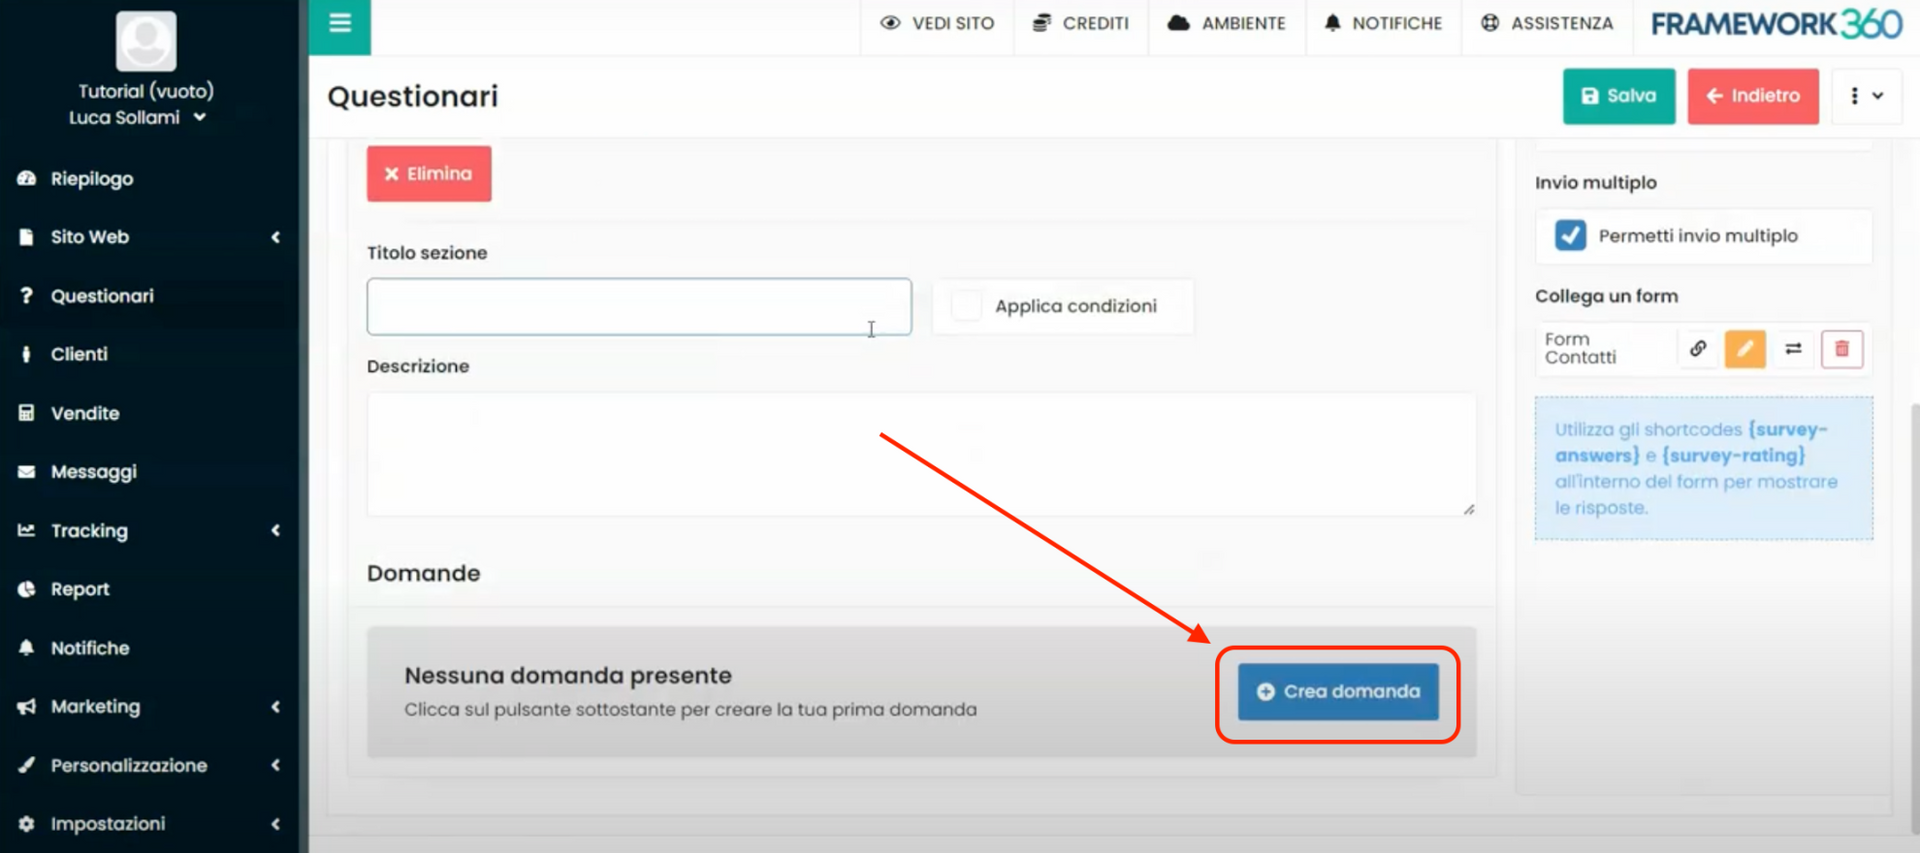
At this point, the system gives us the possibility to enter the section title, for example “Purchased services”, and an optional description of the section.
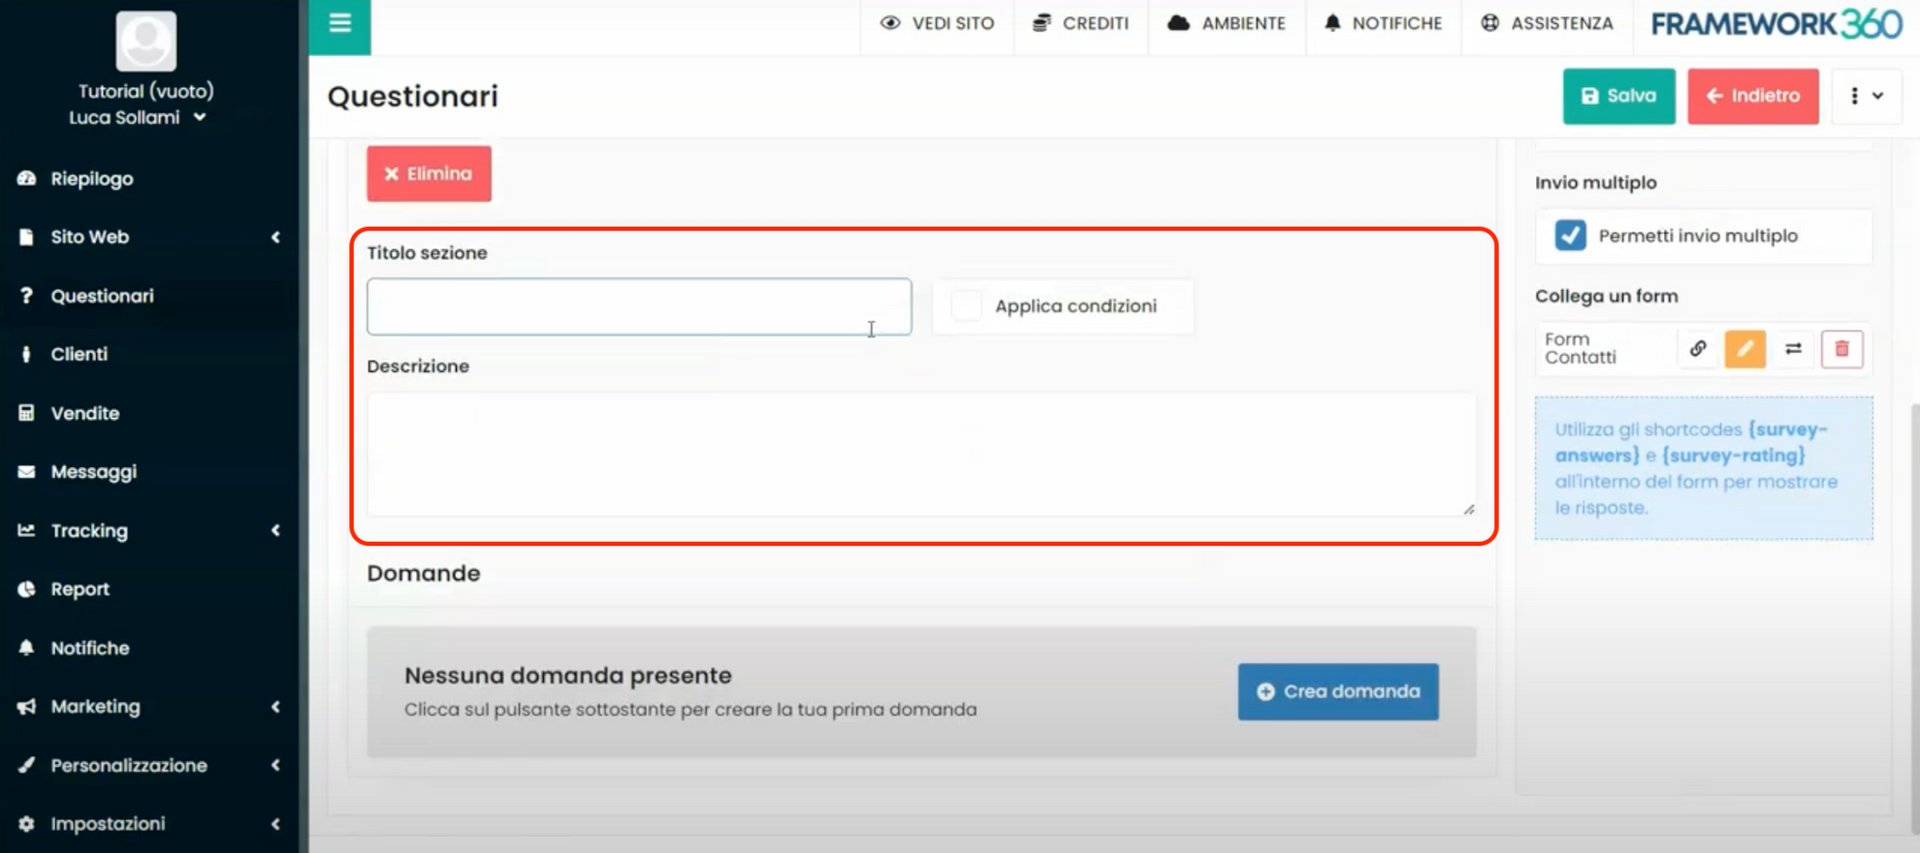
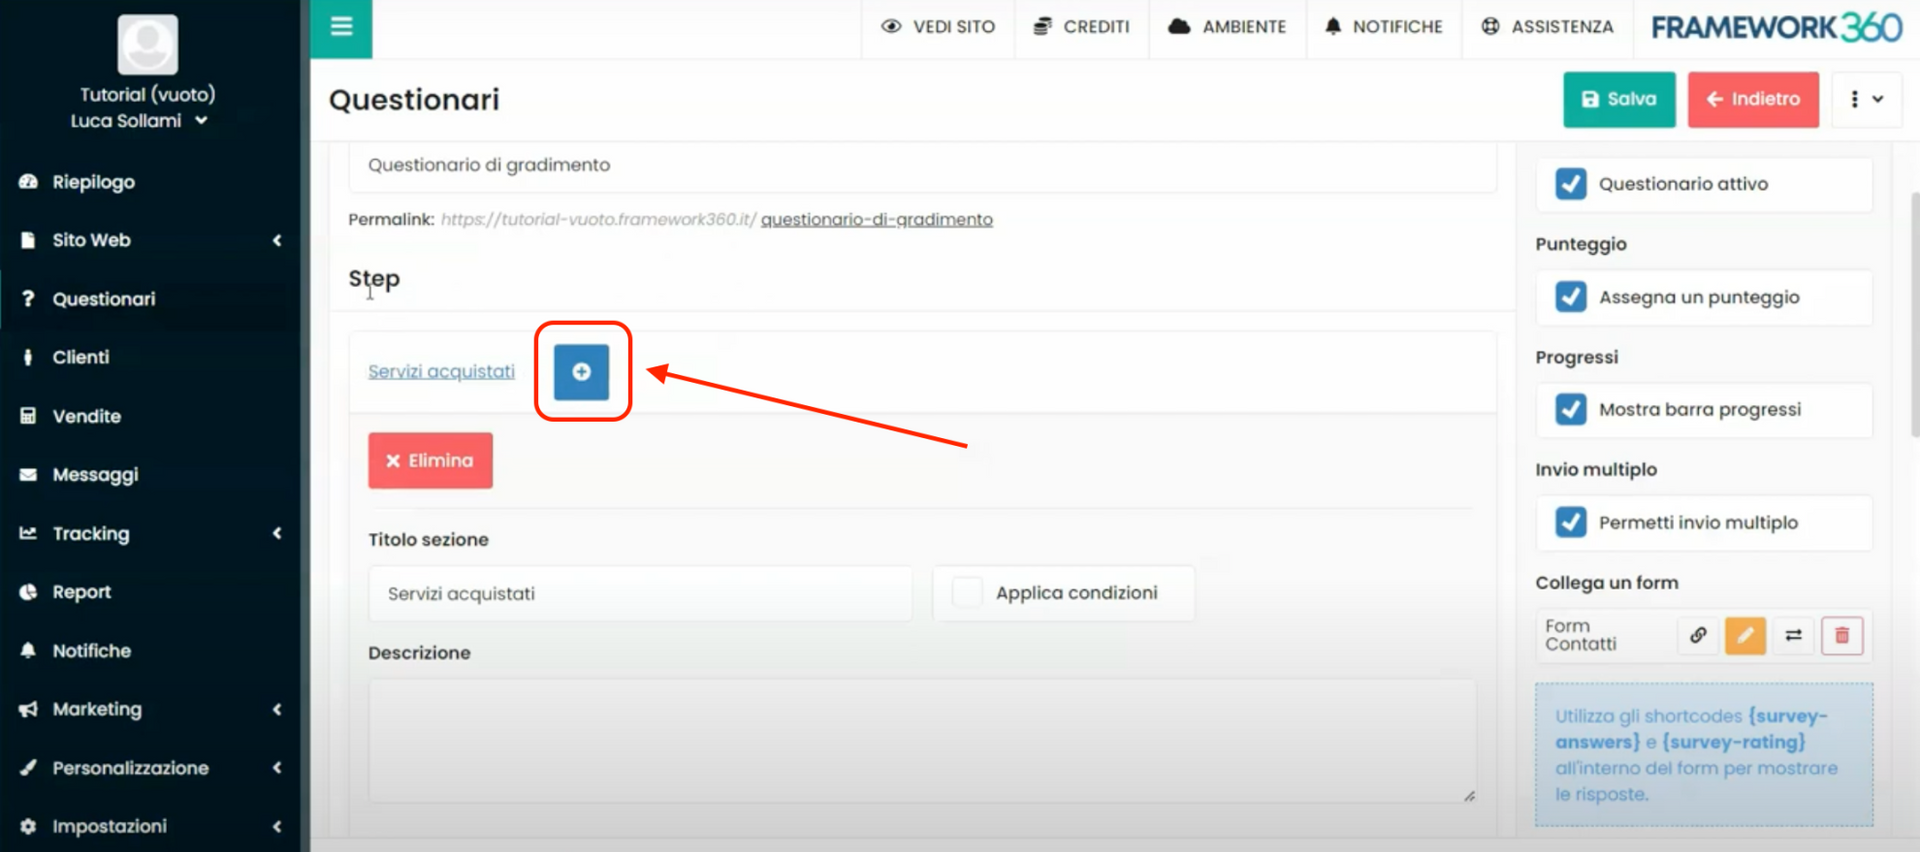
Meanwhile, by clicking on the blue button “Create question”, as highlighted in the following figure, we will create the questions that we want to be present in the section we are creating.
In the question creation box, we can add the question, an optional description of the question. Also, under the heading “Type” we will define, through a dropdown menu, the type of response that our client can enter.
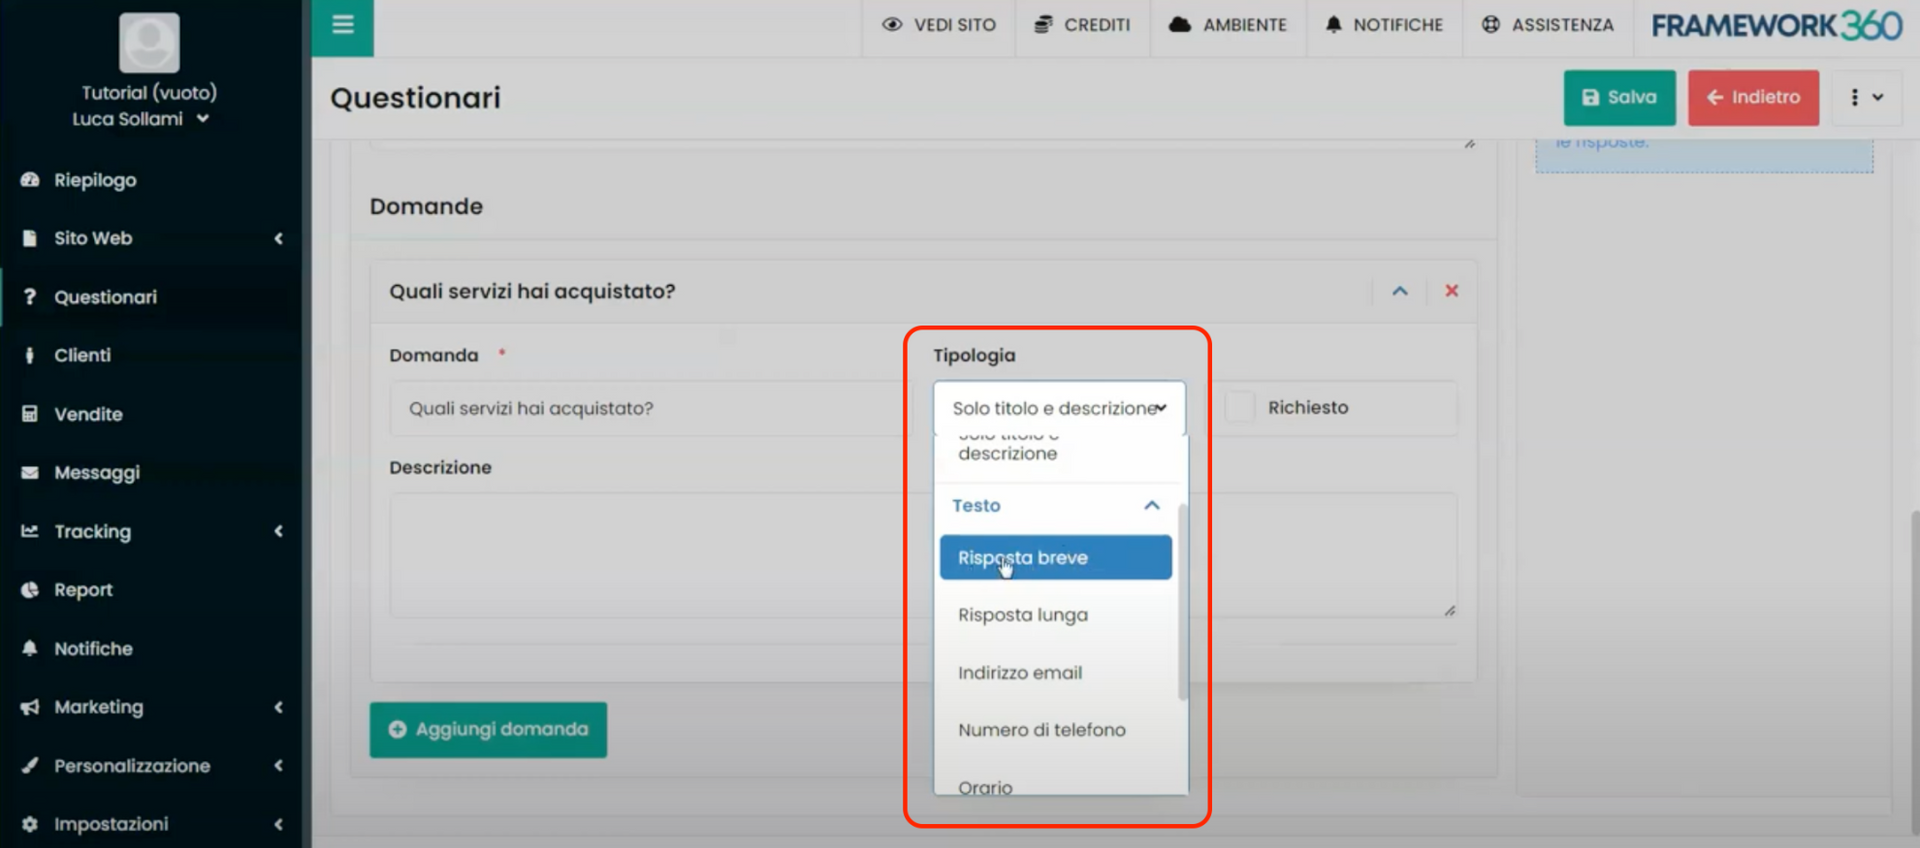
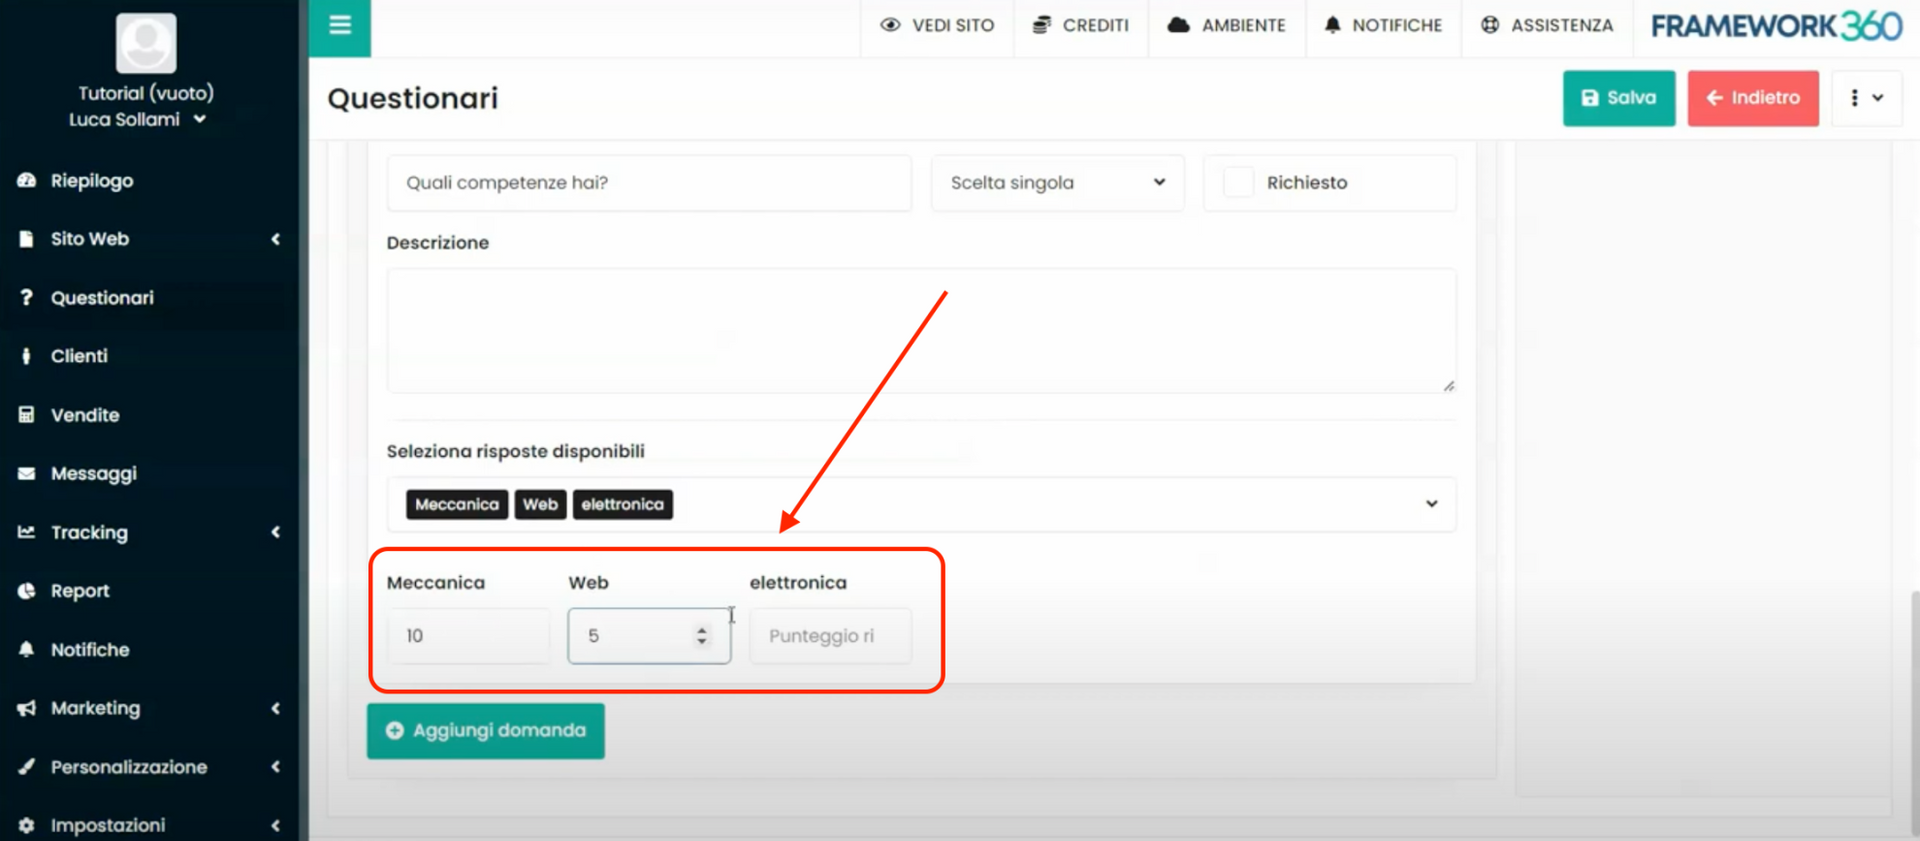
We could choose between different types, for example, short answer, where the customer can respond with a limited number of characters, long answer, where the customer will have a larger number of characters available for their response, or, we can choose email address opinion, or phone number, or time. We can choose the option “numeric value”, with which the customer will be able to enter only a numeric value; this option can be useful, for example, if we ask the customer how many hours they took to choose the purchased product. Furthermore, we can decide whether the customer must choose from a series of selectable answers. In this last case, if we insert the option “ multiple choice”, the customer will be able to choose multiple answers, while, if we insert the option “single choice”, the customer will be able to choose only one of the answers. Furthermore, if we have previously enabled the option “Assign a score” when we go to insert the option “single choice” or “multiple choice” we can assign a score to each answer that we formulate, as shown in the following figure:
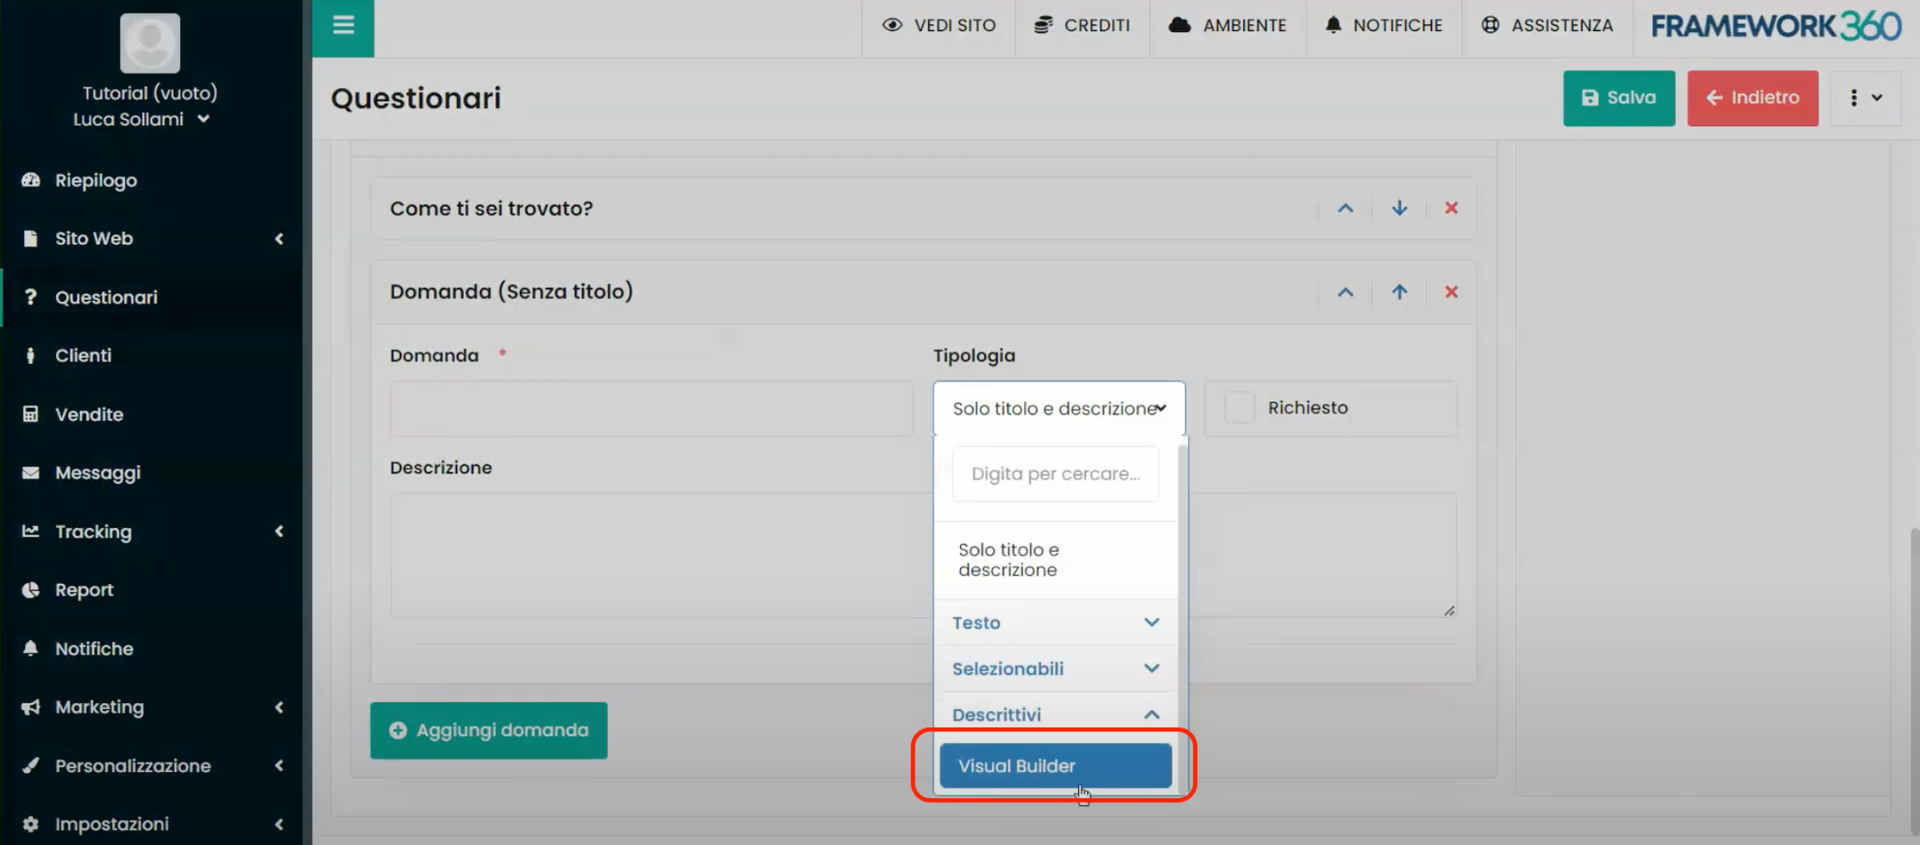
Also within the dropdown menu of the item “Type” we can select the item “Visual Builder” to create highly graphically refined content through, precisely, the visual builder of Framework360, which allows you to create extremely customized content.
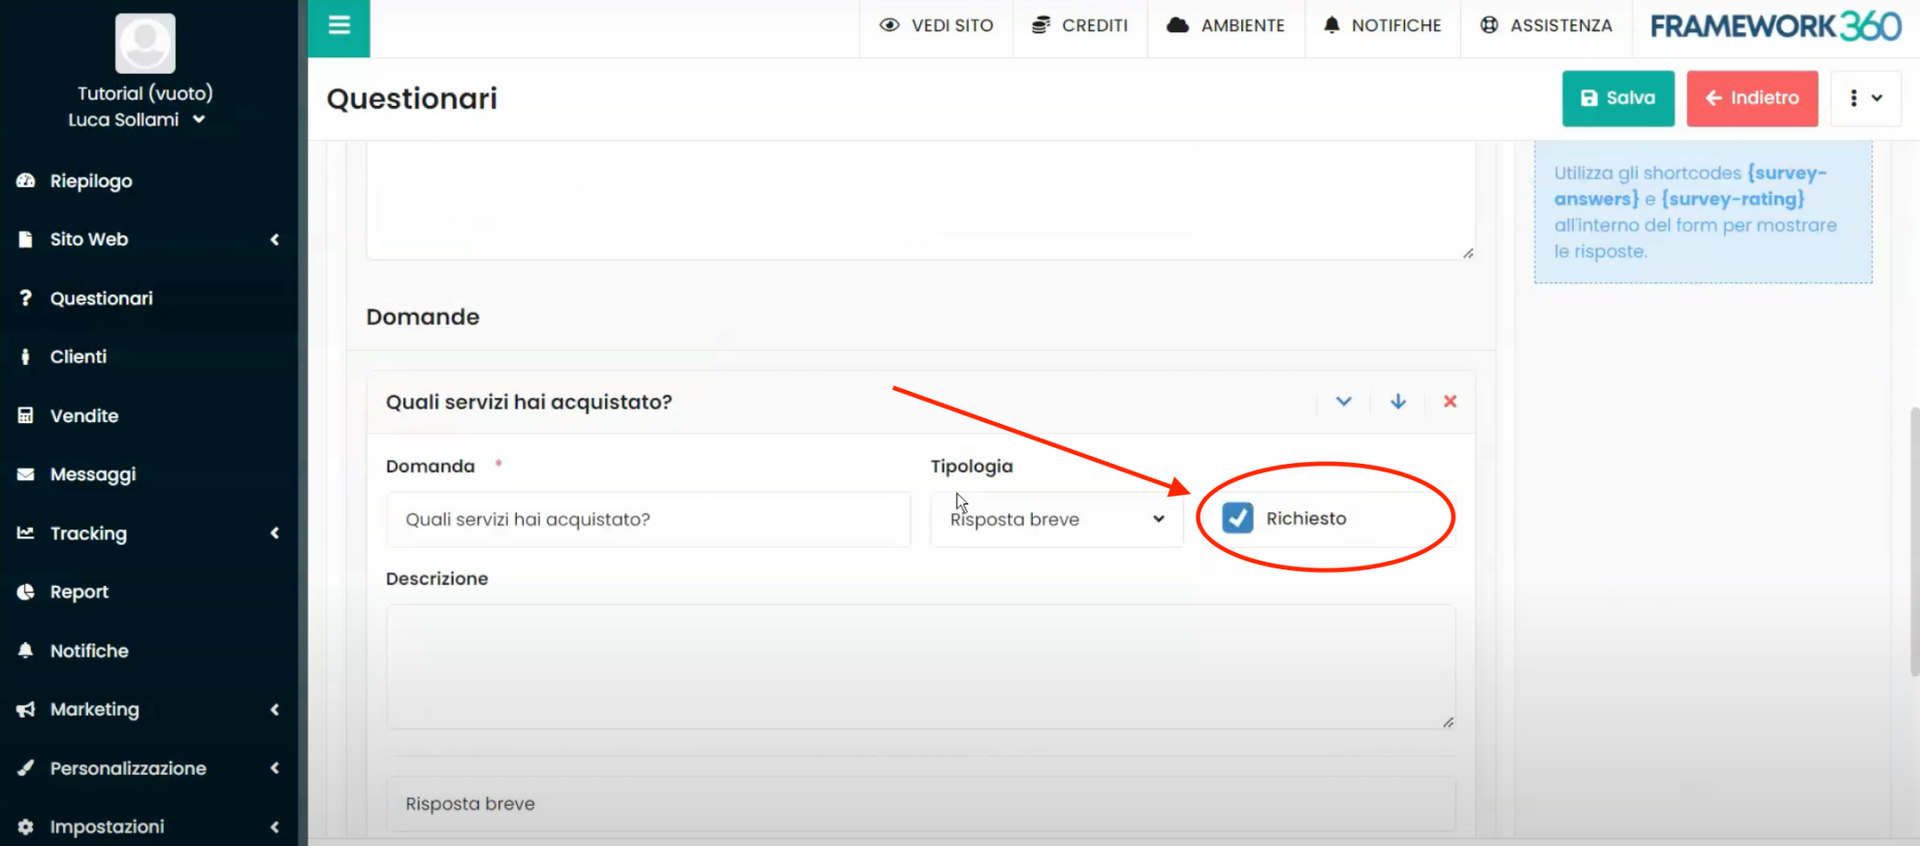
Finally, next to the item “Tipologia”, just analyzed, we find the item “Request”, by checking this last one we would make the response mandatory, so if the customer did not answer the question they could not proceed with the questionnaire.
Step 4: Let's create the following sections of the questionnaire
Once the setup of the first section is complete, if we want to create additional sections of the questionnaire, we should return to the beginning part of the screen and click on the blue button next to the icon of the first section, as highlighted in the following image:
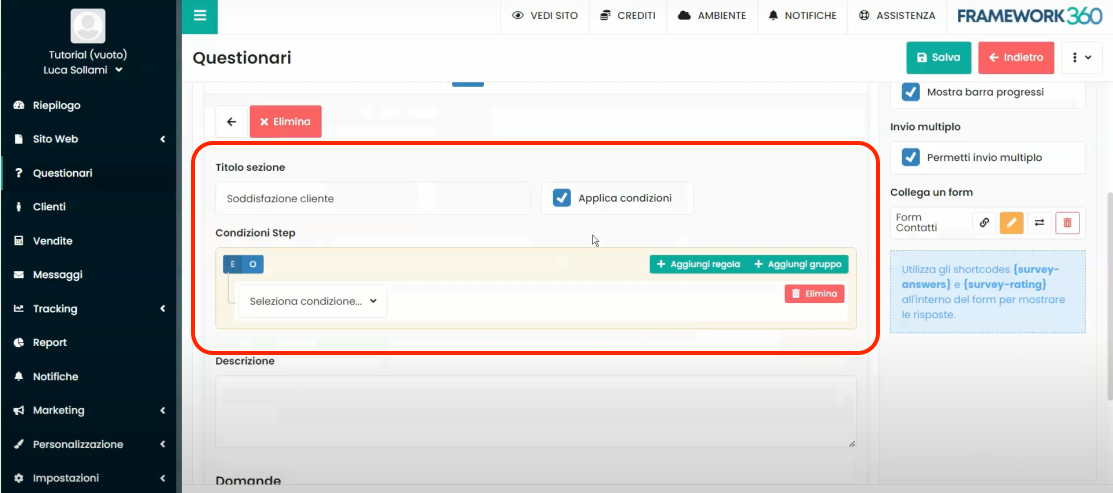
In the creation screen of the second section, we will have the same functionalities already analyzed for the creation of the first section. Additionally, in creating the second section, we can decide to apply conditions that only upon their fulfillment will allow the customer to access filling out said section. For example, we might decide to define that this section will open only if in the previous step our customer has achieved a certain score, or we might decide that the section will open only to customers who among the multiple answers of the previous section have chosen a specific answer.
After defining any conditions for opening the section, we can proceed to create the various questions related to the second section in a manner completely similar to what was seen regarding the first section in the previous step.
After creating the second section, we could proceed, if we wish, to create additional subsequent sections of the questionnaire following the same procedure.
Step 5: let's customize the questionnaire messages
As we anticipated at the beginning of step 2, inside the questionnaire creation screen there are two tabs:
- Questionnaire data
- Messages.
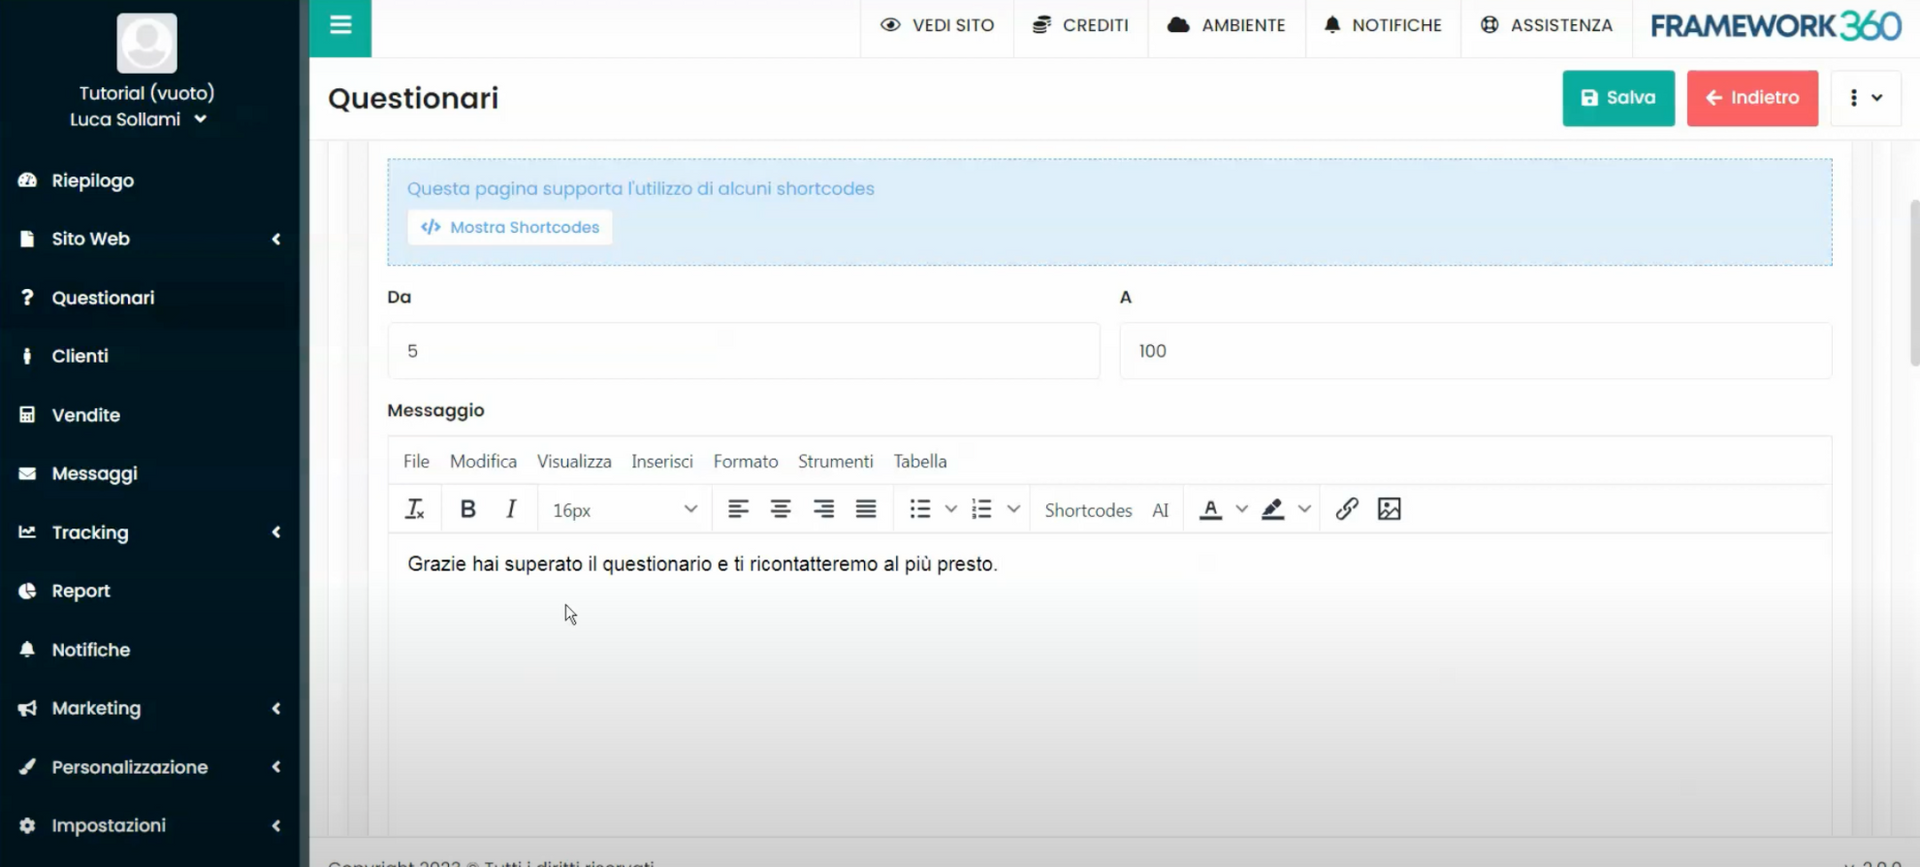
The first tab, as we have seen, allows us to enter all the main parameters and create the various sections of the questionnaire. Meanwhile, the "Messages" tab allows us to customize all messages inserted by default by the system, such as error messages, questionnaire completion messages, or a personalized message that may appear when the questionnaire is passed with a certain score. The following figure illustrates an example of a customized message that will appear if the questionnaire is passed within a score range from 5 to 100:
Once the customization of the messages is complete, we can save our questionnaire by clicking on the green button at the top right "Salva" and view it through the permalink located below the questionnaire name, as we saw in step 2.
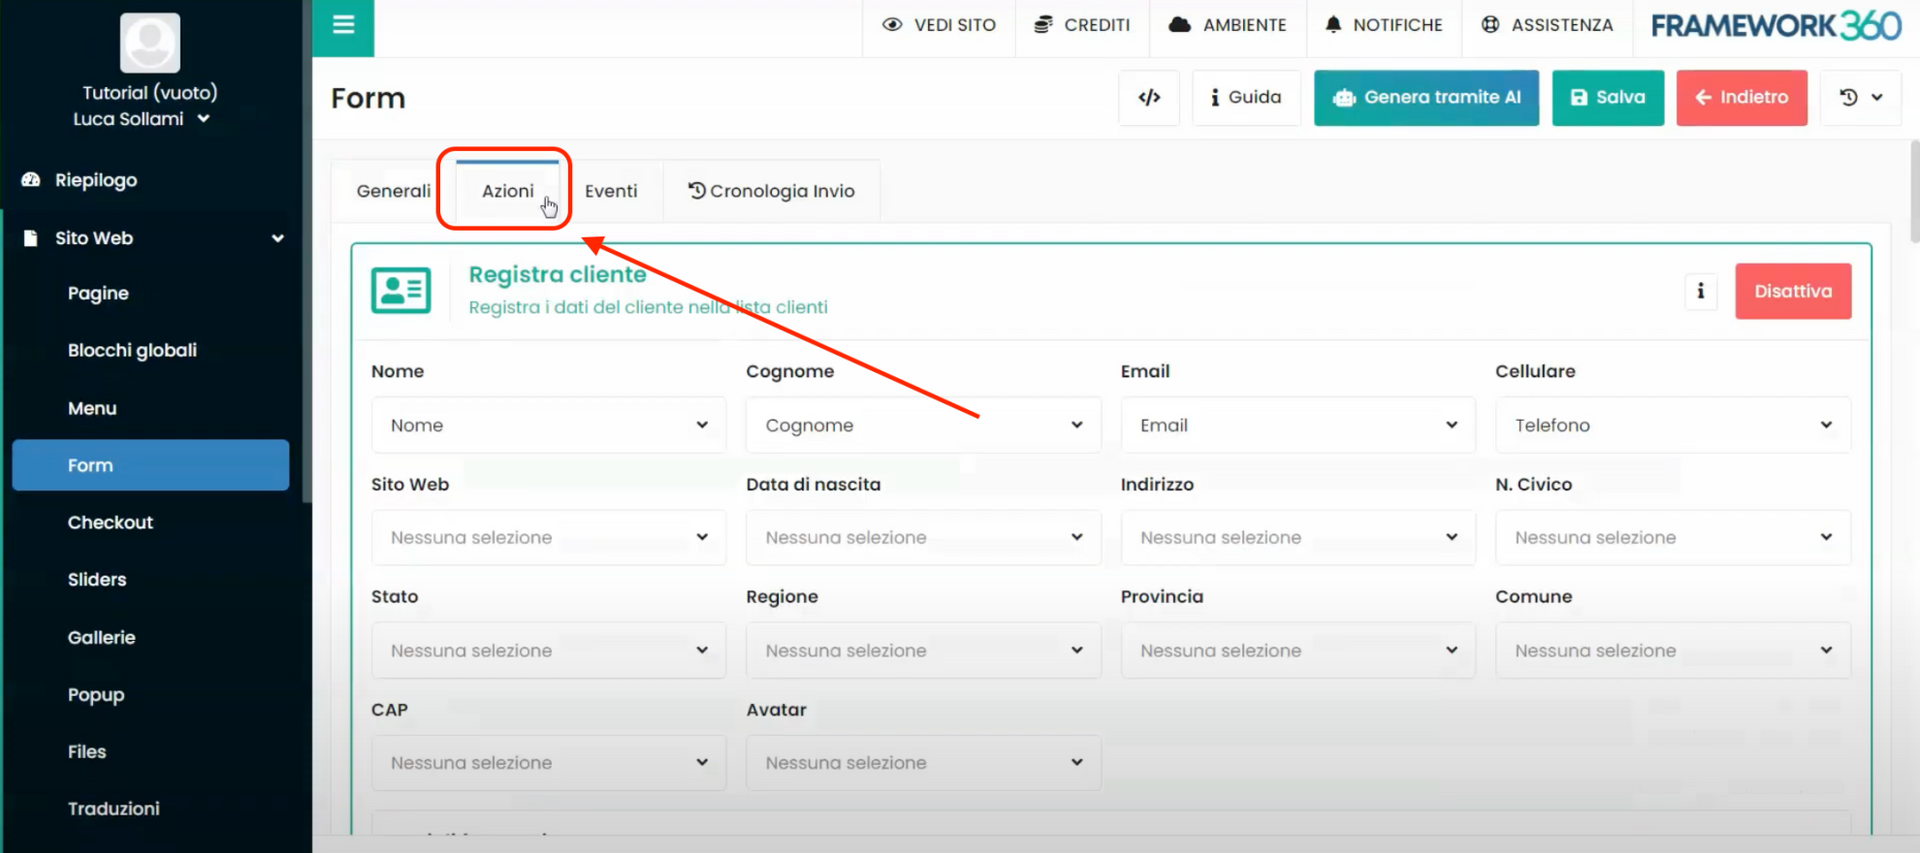
Step 6: let's set up the display of responses to questions and data submitted within the form
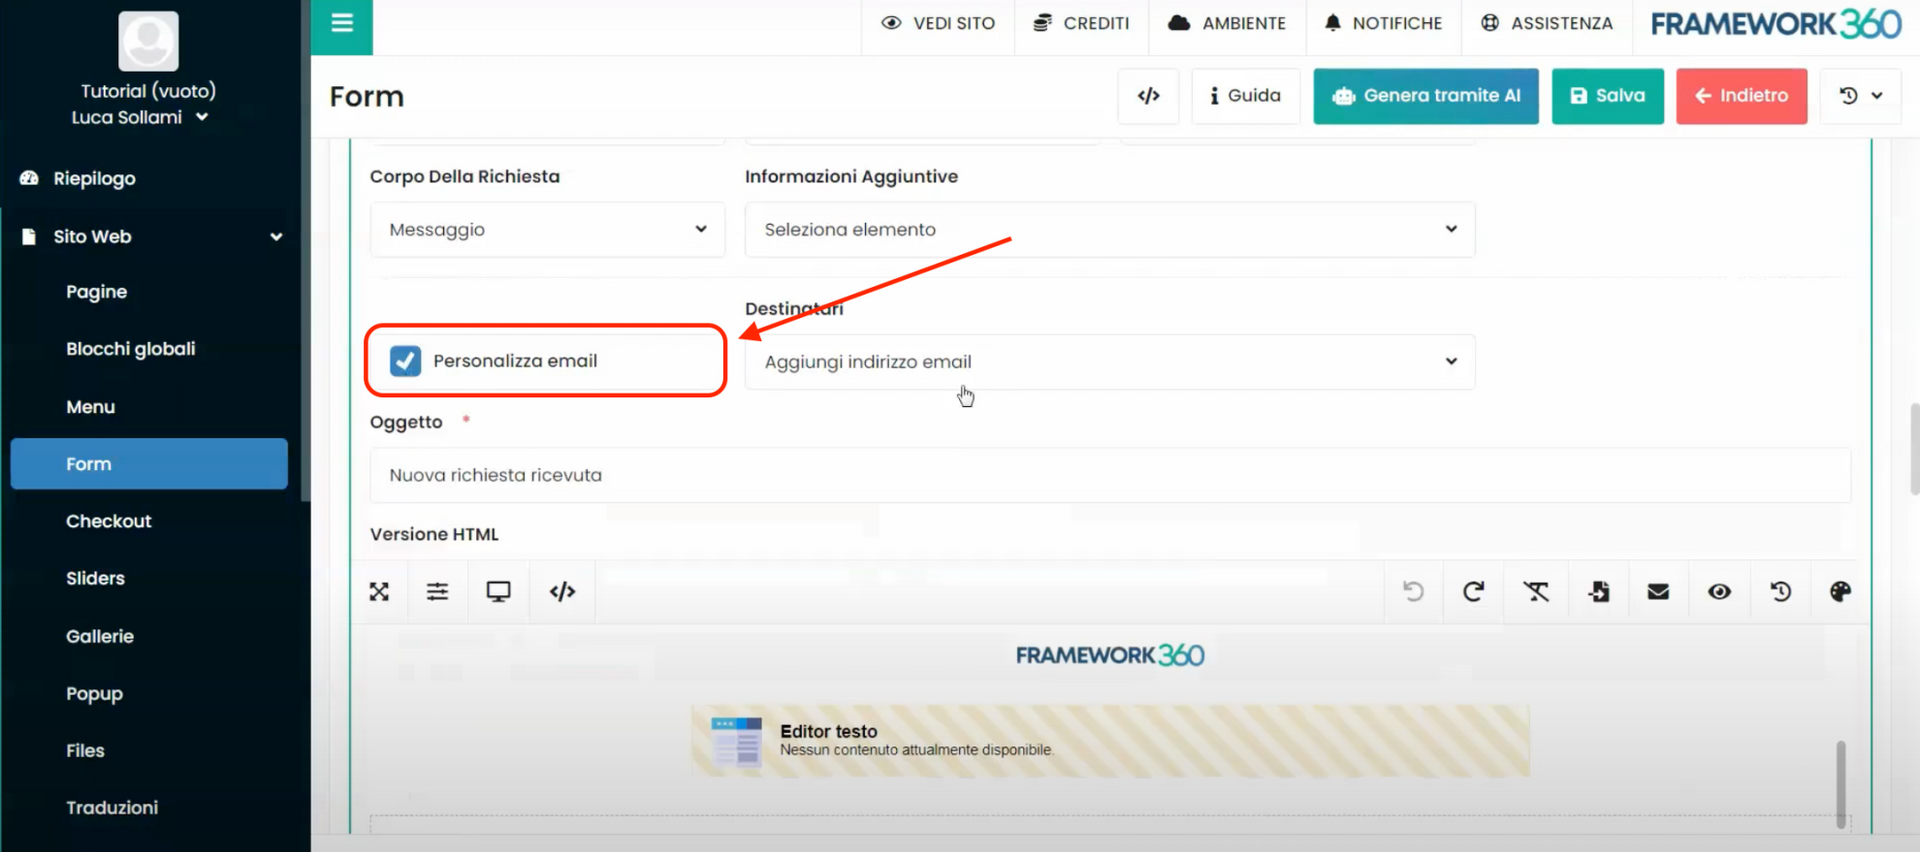
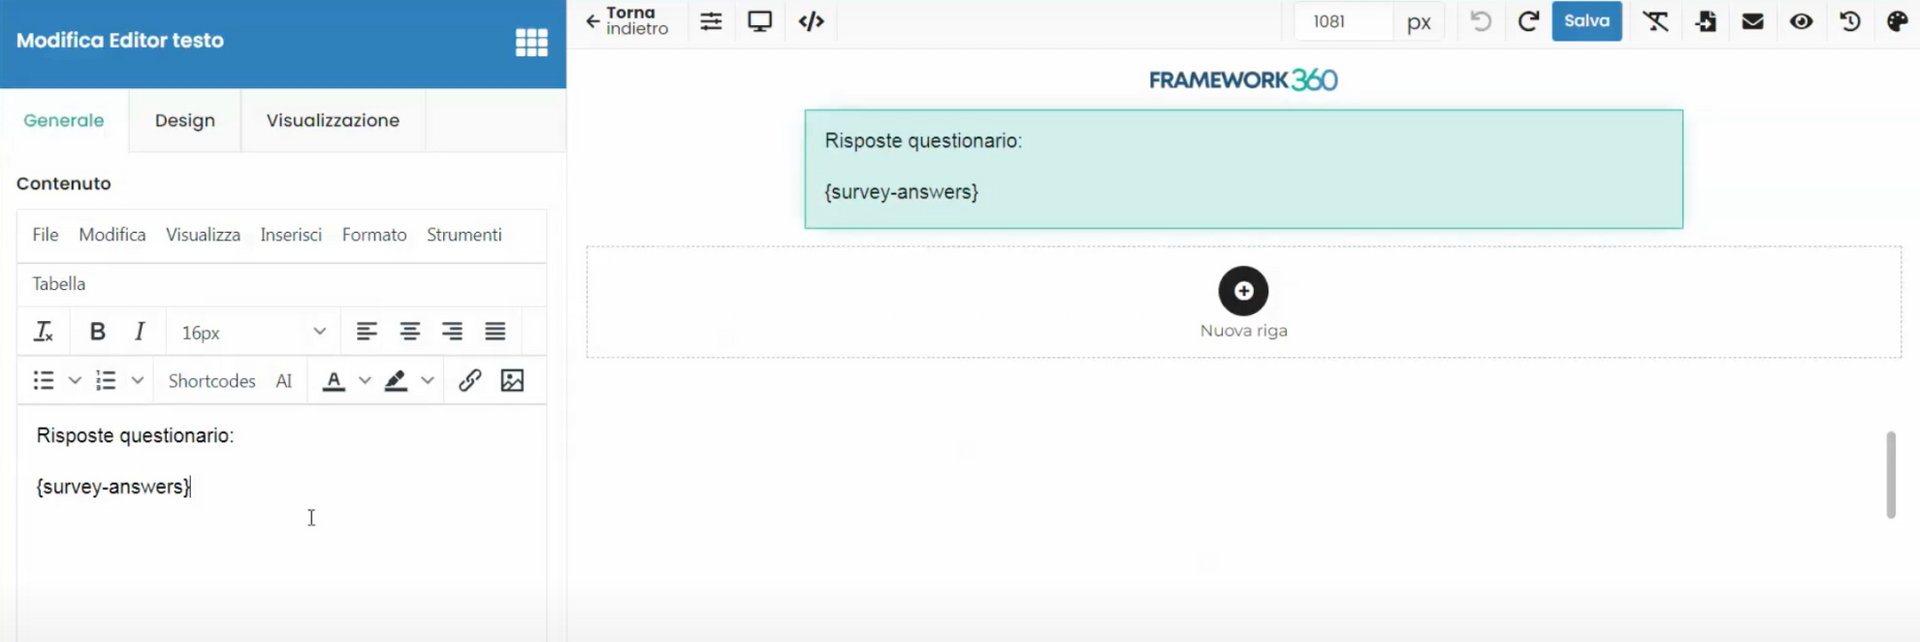
As seen in the third step of this guide, at the end of the questionnaire we can link a form. If we choose to do so, we can include in the body of the email that the system automatically sends after form submission, the shortcodes {survey=answers} and {survey=rating}. These shortcodes will allow displaying the responses and rating of the questionnaire inside the email. The shortcodes I just mentioned are shown on the right side of the "Dati questionario" tab in the questionnaire customization screen.

To customize the form email, you need to go to the submenu “Forms” located in the main sidebar of Framework360 under the “Website” section and enter the edit screen of the form linked to the questionnaire.
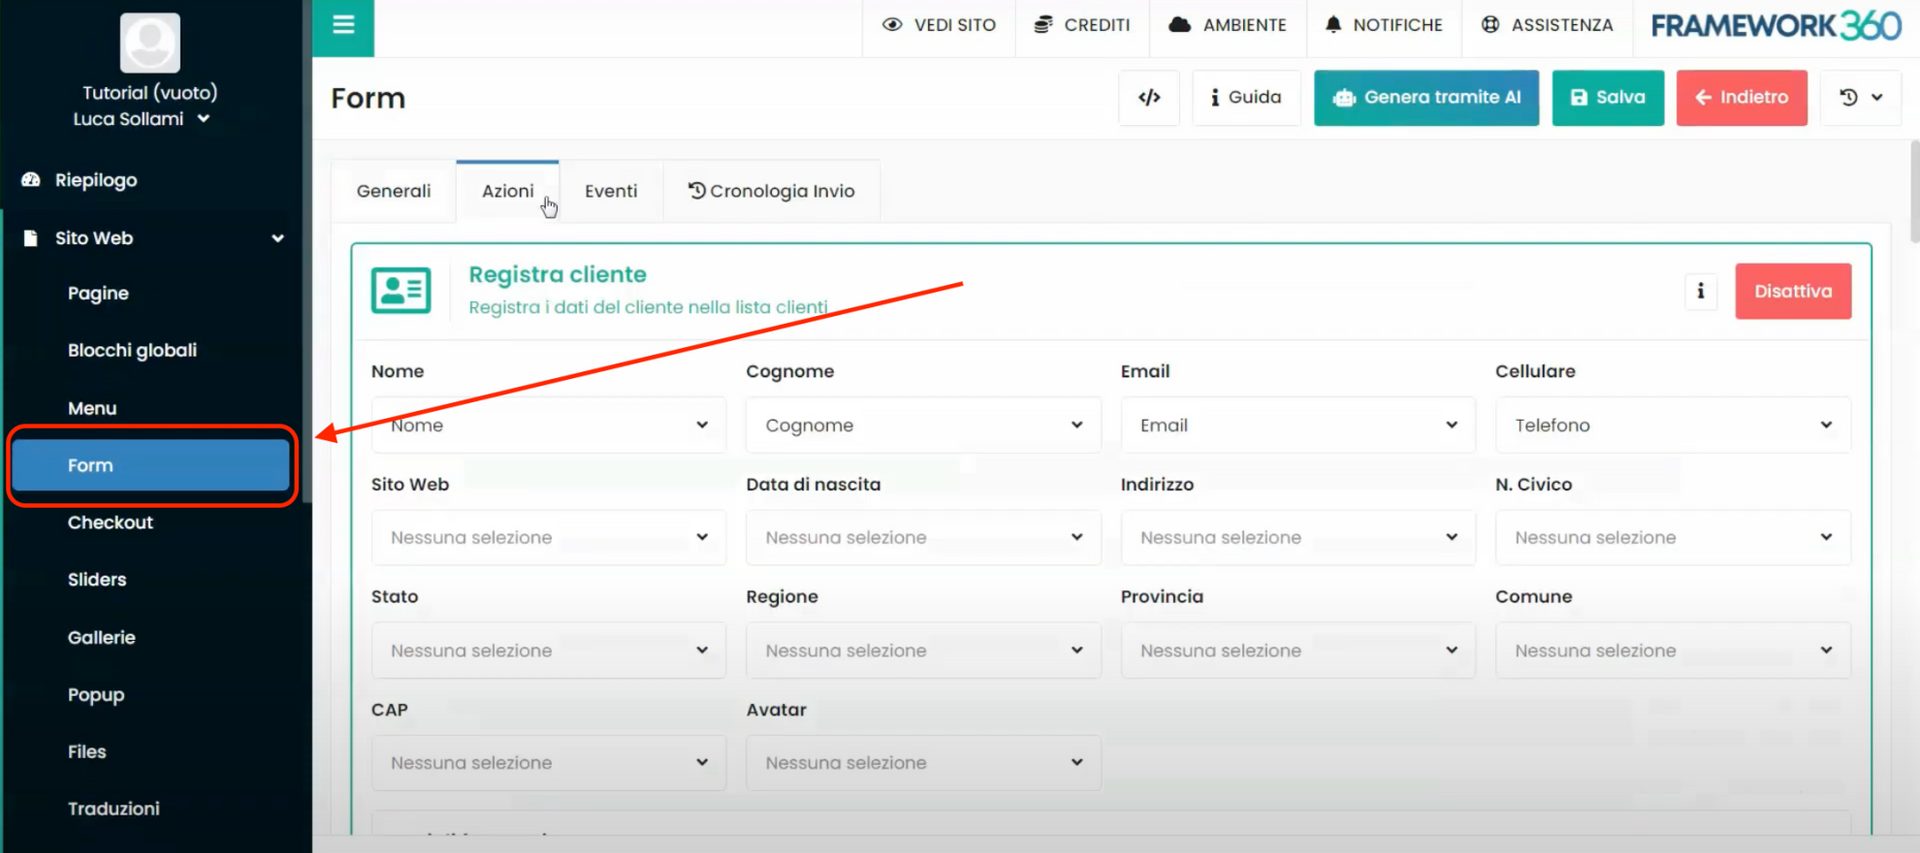
Once inside the edit screen, we should go to the “Actions” tab, enable the “Customize mail” option within the “Send request” section, and use the text editor to insert the shortcodes we are interested in.
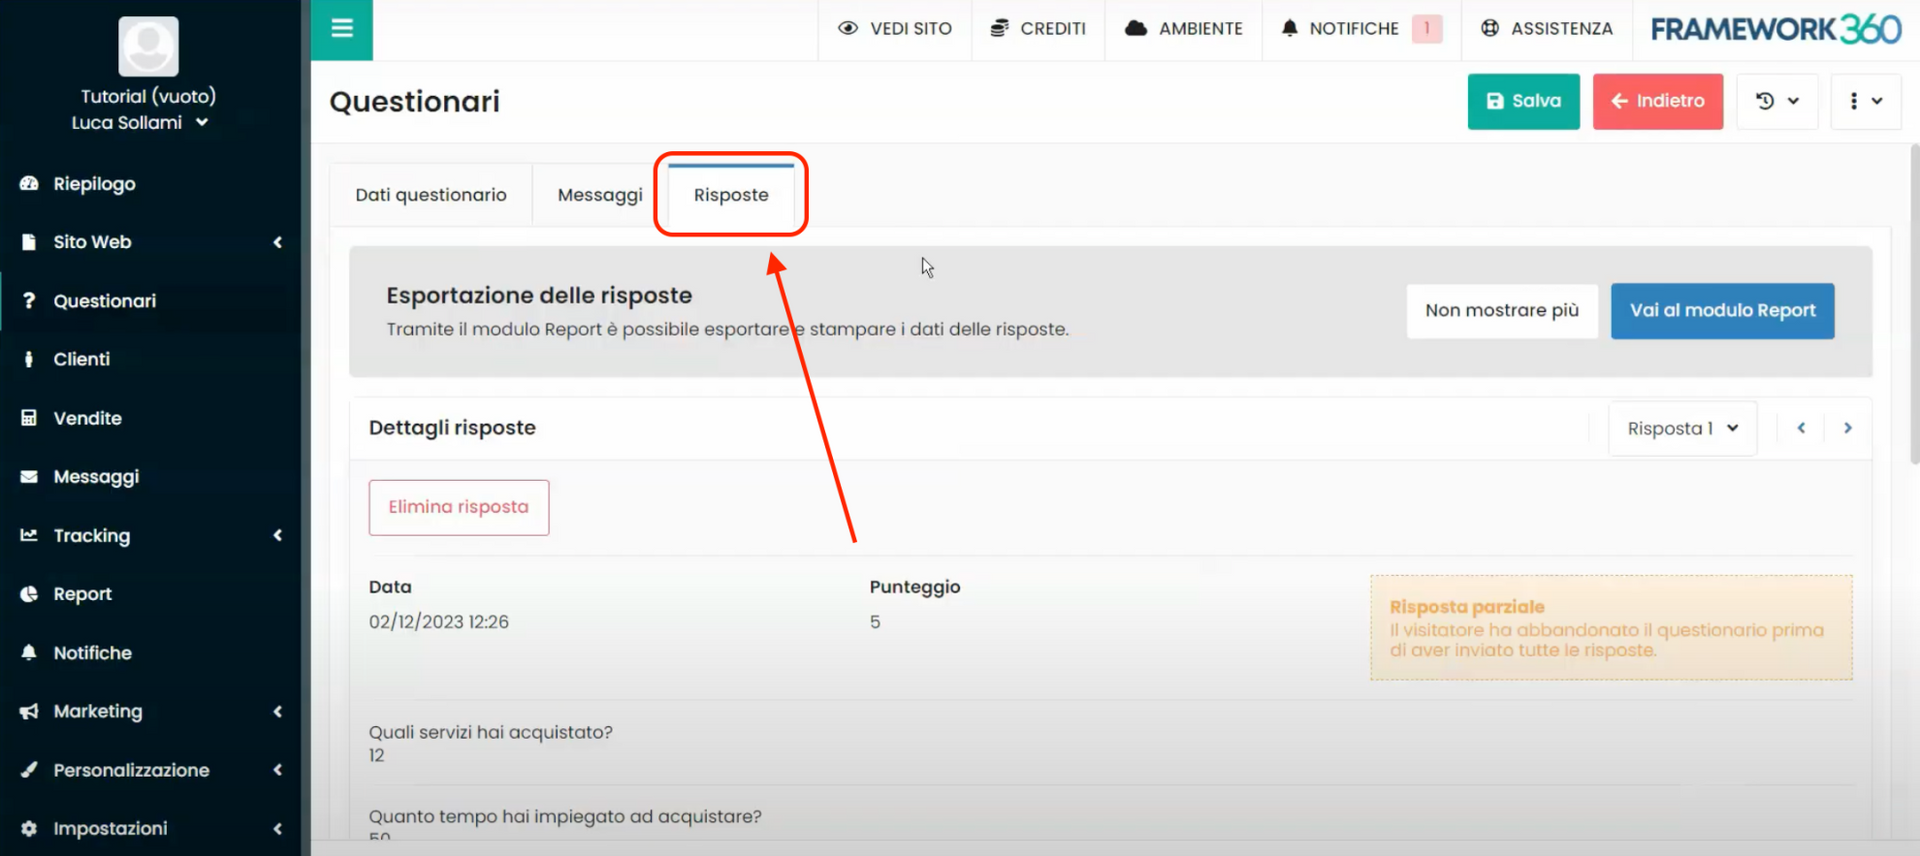
Once this is done, the questionnaire responses can be viewed:
- in the email we will automatically receive once the customer has filled out the form
- or within the questionnaire customization screen, where a third tab called “Answers” will have been created.