Selling on Glovo, one of the largest home delivery platforms in Europe, can be an excellent opportunity to increase your business's sales. If you're interested in selling on the platform, it's important to know some fundamental information and follow key steps.
Who is Glovo?
Glovo is a home delivery platform founded in 2015 and active in over 20 countries worldwide. The Spanish company focuses on the rapid delivery of food, medicines, and other products to end customers through its network of riders.
How does Glovo work?
Customers can use the Glovo app to order food or other products from local shops and have them delivered directly to their homes. Once an order is placed, a rider is assigned to the shop to pick up the product and deliver it to the end customer.
How to sell on Glovo?
To be able to sell on Glovo, the first step is to be registered as a store on the platform. After that, it will be necessary to create a Business account through which to manage the orders received from the platform.
- Step 1 - Registration: To register as a store on Glovo, it is necessary to visit Glovo's official website and fill out the registration form. It is possible to choose between different categories of stores, such as restaurants, pharmacies, and supermarkets.
- Step 2 - Business Account: After completing the registration as a store, it is necessary to create a Business account in order to manage the orders received from the platform. Through the account, it will be possible to view incoming orders, manage your store's menu, and set delivery and payment options.
In addition to these essential steps, to be successful in selling on Glovo it is important to be competitive in price and quality of products offered. Moreover, promoting your store through advertising campaigns on the platform can be useful.
How Glovo works for sellers

Glovo is an on-demand delivery service that specializes in bringing customers what they want in a very short time. But how does it work for sellers?
Registration and activation of the seller account
Before being able to use Glovo as a seller, you must register as one through the official website or mobile application. Once registered, you will be required to provide detailed information about your business, including the address, type of products or services offered, and accepted payment methods.
After completing the registration, the Glovo team will review the request and activate the seller account. This process may take several working days.
Adding products and managing orders
Once approved as a seller on Glovo, you will be able to add your products to the application's catalog. It is important to provide detailed descriptions of the products and high-quality images to attract customers.
Once a customer places an order through the application, the seller will receive a notification and will have the ability to accept or reject the order. If accepted, they will be able to view all the details of the order, including the customer's delivery address and the expected time of arrival.
After preparing the order, the seller must deliver it to the Glovo courier who will bring it directly to the customer. Throughout the process, it is possible to monitor the status of the order via the application.
Payments and fees
Glovo applies a commission on the price of products sold through its platform. The percentage varies depending on the product category, but generally hovers around 30%. The payment is made weekly into the bank account provided by the seller during registration.
Benefits of selling on Glovo
- Access to a large potential customer base;
- Possibility to offer fast and efficient delivery services thanks to the network of couriers at Glovo;
- Increased business opportunities due to visibility on a platform known and used by many users.
In conclusion, selling on Glovo can be an excellent opportunity for sellers looking to expand their business through digital channels and offer convenient delivery services to their customers. However, as with any digital platform, it is important to understand the rules and fees applied to avoid unpleasant surprises.
Requirements to become a seller on Glovo
To start selling your products on Glovo, you must meet certain requirements. Here is a list of what you need:
- VAT number: you must have an active VAT number.
- Legal products: the products you sell must be legal and comply with the regulations of the country where you intend to sell them.
- Product Photos: You must have clear and well-taken photos of your products to upload onto the Glovo platform.
- Competitive Pricing: As in any other market, competition is fierce. Make sure to have competitive prices to attract more customers.
- Availability for Delivery: You will need to be available to deliver your products within the time frame set by Glovo.
- Care of Goods: It's important that you pack and prepare orders carefully, because customers evaluate the quality of service based on the presentation of the received products as well.
- Customer Service: You will need to be ready to respond promptly to customer inquiries and complaints via the Glovo platform.
Remember that Glovo reserves the right to refuse a seller's registration if they do not meet the above requirements or if they do not guarantee an adequate service to customers.
To become a seller on Glovo, you must have an active VAT number and offer legal products, while simultaneously ensuring availability for delivery, care of the goods, and high-quality customer service. Make sure to have well-taken photos of your products and competitive prices to attract more customers. The goal is to provide excellent service to earn the trust of customers and grow as an online seller.
How to upload products on the Glovo platform
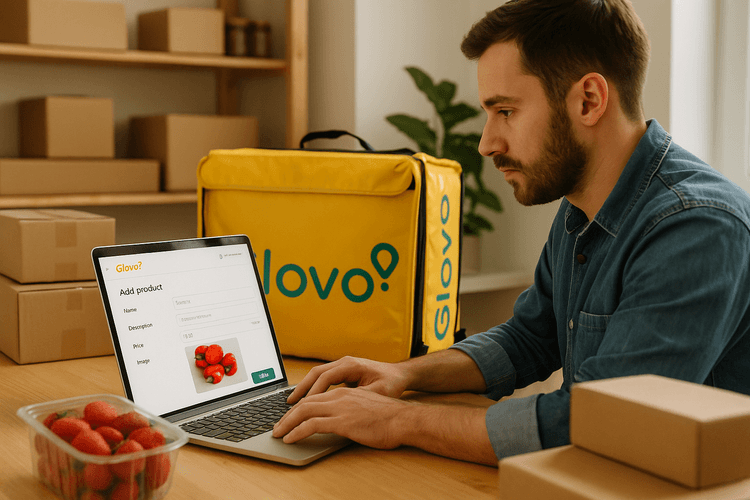
Uploading your products onto the Glovo platform is very simple and intuitive. Here are the steps to follow:
- Access your seller account: Once logged into Glovo Business Portal, click on "Products" from the main menu to access the product management section.
- Create a new product: Click on the "+ Add product" button to create a new product.
- Enter product information: Enter the Product name, a short description, the price, and the category it belongs to.
- Add images: Upload some images of the product to make it more appealing and give customers a better idea of the product.
- Publish your product: After completing all the necessary information, click on "Publish" to make your product available on Glovo's platform.
Remember that you can edit or delete your products at any time from the "Products" section of your seller account. Also, make sure that your prices are competitive and that the product descriptions are clear and detailed to attract more customers.
In summary, uploading your products to Glovo's platform is a simple and quick process. Follow these steps and start selling your products online on one of today's most popular marketplaces!
Managing orders and deliveries on Glovo

Once you have started your business on the Glovo marketplace, it is important to know how to manage orders and deliveries efficiently.
First of all, we recommend that you download the Glovo rider app on your smartphone. This app will allow you to receive notifications when a new order arrives and to accept or reject it directly from your phone.
Once you have accepted the order, you will need to prepare the product for delivery. Make sure to package the product properly to prevent damage during transport.
Afterwards, you will need to confirm the availability of the product on the Glovo platform. In this way, the rider will be informed that the product is ready for delivery and can come to pick it up at your business.
After handing over the product to the rider, you can follow the status of the delivery through the Glovo rider app. You will be able to see in real time where the rider is and when the delivery will be made.
It's essential to ensure a good shopping experience for your customers. For this reason, we advise you to always be available for any customer requests regarding orders and deliveries. Always try to respond promptly to your customers' questions and offer them excellent customer service.
Furthermore, if you want to provide an even faster and more efficient delivery service to your customers, you can opt for the Glovo Express service. This service allows products to be delivered in even shorter times compared to Glovo's standard service. We recommend activating this service if you have products that require urgent delivery.
Remember, managing orders and deliveries on Glovo is crucial for the success of your business on the marketplace. Make sure you are well acquainted with the procedures and always offer excellent service to your customers.
How to receive payments from Glovo

To sell on Glovo, it is important to know how to receive payments from customers. Here is a detailed guide on the available payment methods and how to set them up on your account.
Payment methods
Glovo offers several payment methods to its customers, including:
- Cash payment: the customer pays in cash upon delivery;
- Online payment with credit card or PayPal: the customer pays online at the time of ordering.
Additionally, for merchants selling on the Glovo platform, it is possible to also accept payments through the Glovo Business app.
Setting up payment method
To configure the payment method on your Glovo account, follow these simple steps:
- Login to your account on Glovo Business;
- Go to the "Payments" section and select the payment method you wish to accept;
- Follow the instructions to complete the setup of your payment method.
Remember that to use certain payment methods, you might be required to provide additional information, such as your credit card number or the email address associated with a PayPal account.
In any case, always make sure to check the fees applied to different payment methods and to choose the most cost-effective for your business.
For merchants selling on Glovo, receiving payments is easy and convenient thanks to the variety of available payment methods and the simplicity of setting them up on their account.
Pros and cons of selling on Glovo

Glovo is a very popular platform among consumers, especially for home food delivery. However, like all marketplaces, there are advantages and disadvantages to using it to sell your products online. Let's see what they are.
Advantages
- Popularity: As mentioned earlier, Glovo is very popular among consumers. This means you have access to a large potential audience without having to do much advertising.
- Fast Delivery: One of the major advantages of selling on Glovo is the ability to provide fast delivery to your customers. This can be a decisive factor in the end customer's choice.
- International Coverage: If you want to expand globally, Glovo allows you to do so easily thanks to its wide international coverage.
- Secure Payments: Glovo offers secure payments to sellers, ensuring that they receive payment for their products reliably.
Disadvantages
- High Commissions: Like all marketplaces, Glovo takes a percentage of sales made by sellers. Commissions can range from 15% to 35%, depending on the type of product sold.
- Competition: Being a very popular platform, the competition among sellers on Glovo can be very high. This means you might have to offer lower prices or have more unique products to stand out from the crowd.
In summary, selling on Glovo has its pros and cons. However, if you are looking for a quick and effective way to reach new customers and provide them with fast delivery, then it is definitely worth considering this platform as part of your online sales strategy.
Integration with Framework360.
But how can we manage all this information simply and effectively? The answer is Framework360.
Framework360 is a comprehensive cloud-based digital marketing platform that will help you create and manage your personal website with complete autonomy of choice and do digital marketing. It integrates perfectly with all the online sales marketplaces, including Glovo.
How does the integration work?
After registering on Framework360 and creating your environment, you will be ready to integrate your website with the Glovo marketplace. Let's see how to do it.
- Step 1: Go to the "Plugins" section within the navigation menu on the left side of your Framework360 environment.
- Step 2: Look for the "Glovo" plugin among those available and click on the "Install" button.
- Step 3: Once the plugin is installed, go to the "Plugin Preferences" section and set up preferences related to product synchronization and order management between your ecommerce site and Glovo.
Thanks to the integration with Glovo, every time a customer places an order through the platform, orders will be automatically synchronized with your ecommerce site backend on Framework360. This way, you will always have control over all sales activities on marketplaces.
Moreover, Framework360 offers numerous marketing features for customer loyalty, such as campaigns with automations and newsletters. You can use these functions to send special promotions to your Glovo customers and further encourage sales.
In short, thanks to the integration with Framework360, selling on Glovo will be even easier and more effective! Don't miss the opportunity to create your professional website and manage all your sales independently, with the ease and effectiveness of an integrated platform.
You can do it too, you just need a lot of commitment and an excellent marketing and sales platform.


