In this tutorial, we will see how to set up GDPR (General Data Protection Regulation) on a website built with Framework360. The GDPR is a European regulation concerning the protection of personal data of users.
Step 1: Install the GDPR plugin
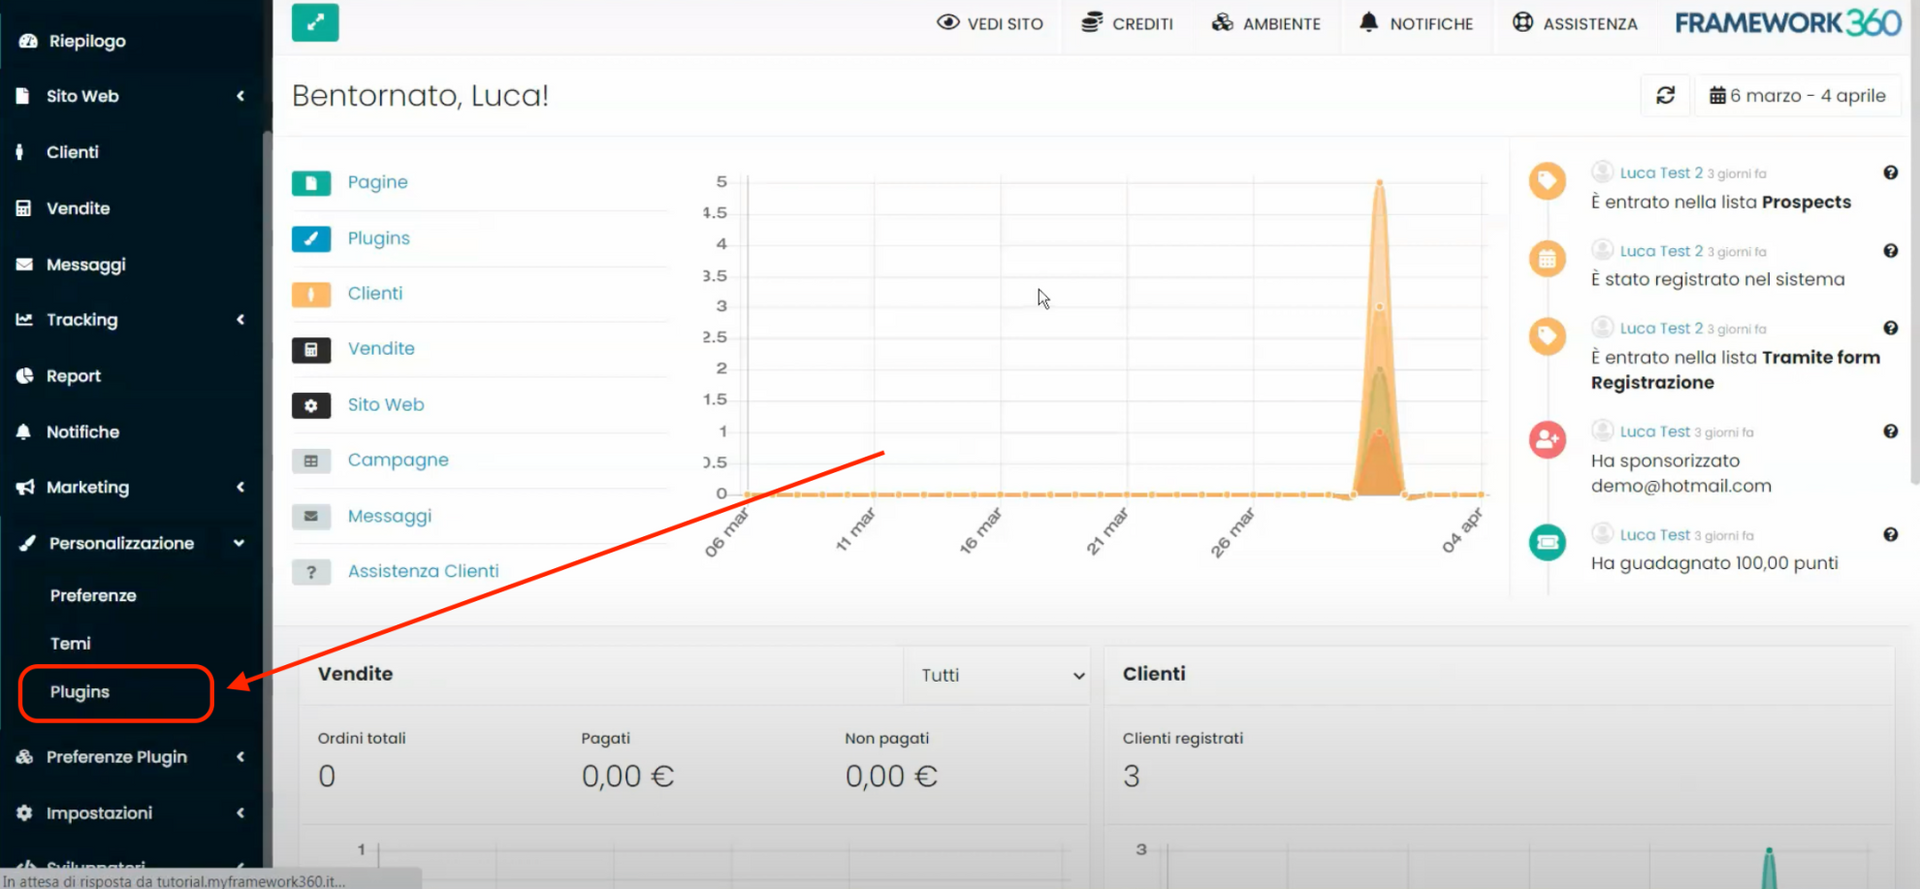
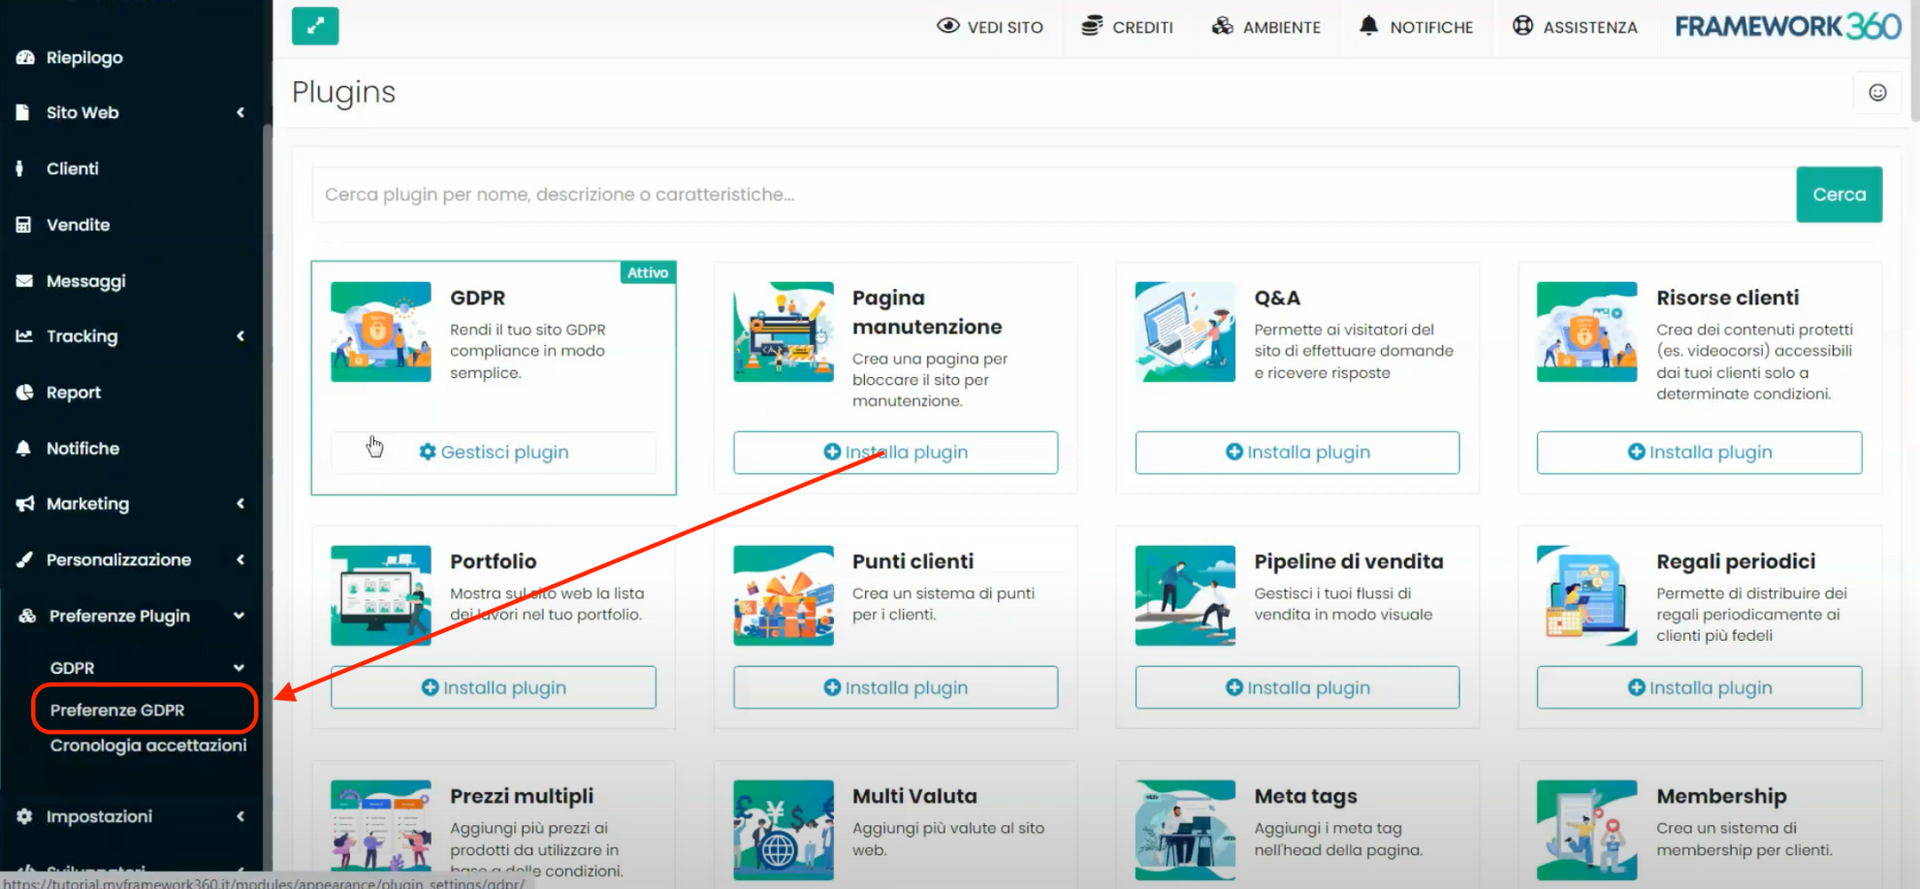
The first step is to access the control panel of our site and click on "Customization" in the left sidebar. Here we will find the "Plugins" section, which allows us to add or remove extensions that enhance the functionality of our site.
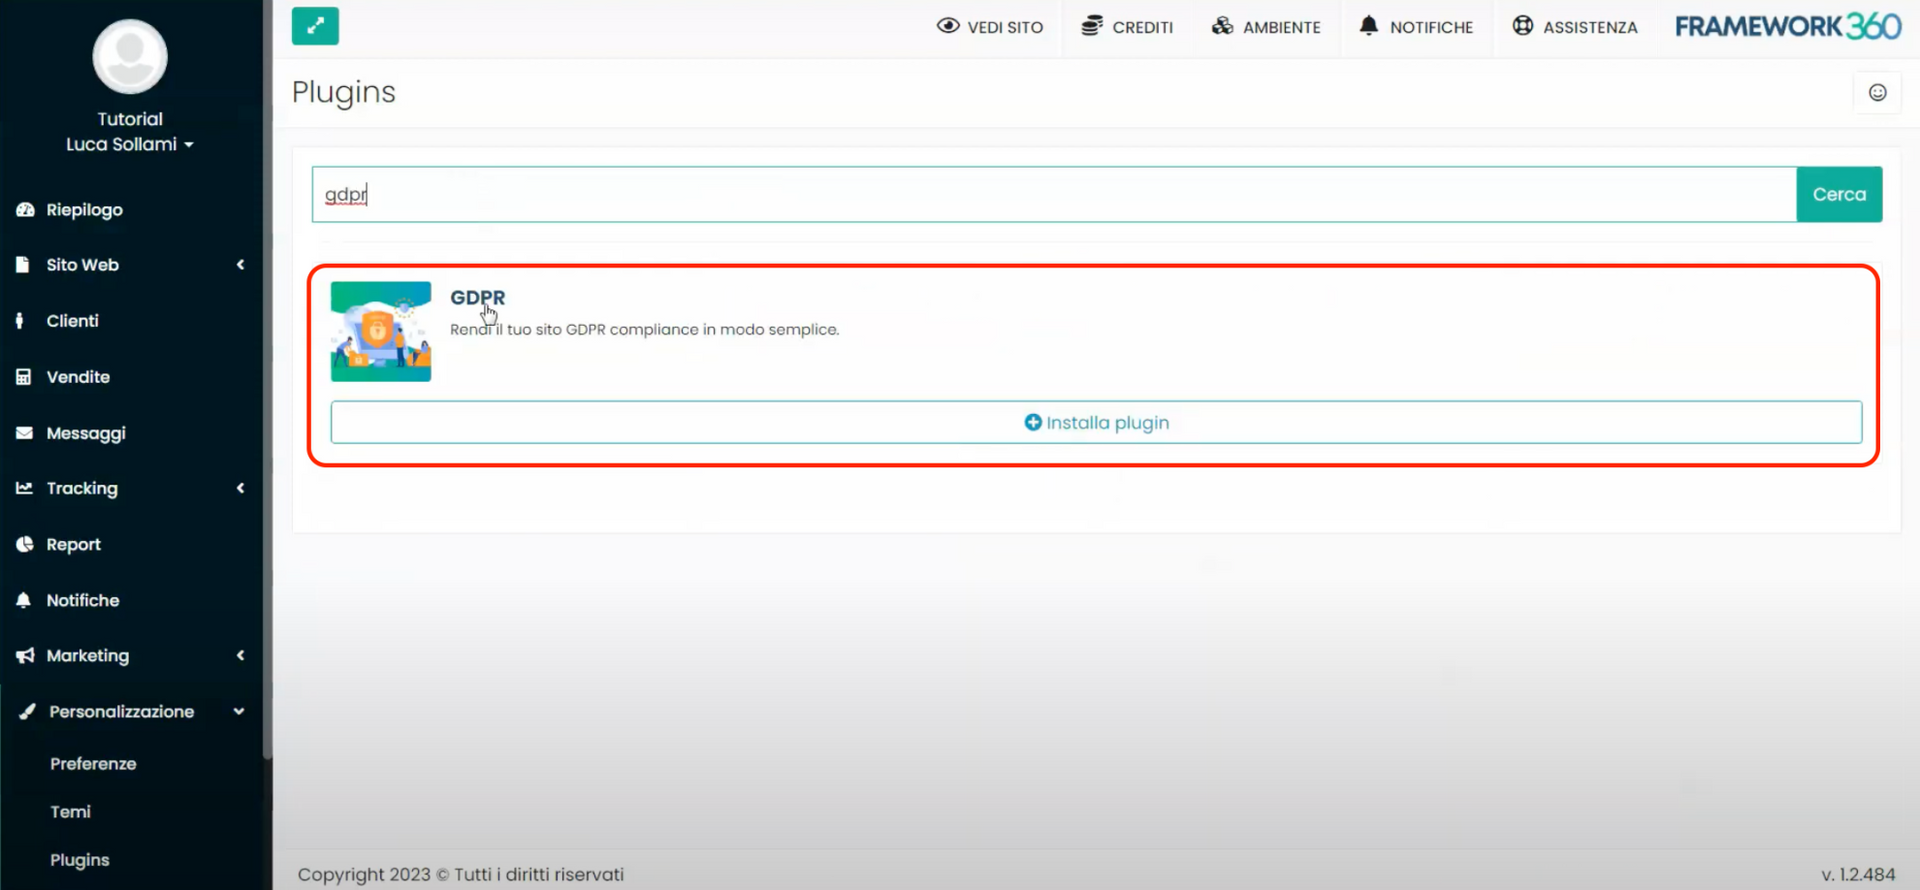
To find the plugin dedicated to GDPR, simply type "GDPR" in the search box. Once found, click on the "Install" button and confirm the installation by clicking "OK".
Step 2: Let's configure the settings of the "GDPR" plugin
Once the plugin is installed, we will find a new item in the left sidebar under "Plugin Preferences", named "GDPR". When we install a plugin, in most cases, a new section opens under "Plugin Preferences", where we can manage all the various settings of the plugin. Click on the "“GDPR”" and then "“GDPR Preferences”", as shown in the figure:
At this point, the "GDPR Preferences" customization skim will open, and the screen will be divided into four tabs: General, Cookies, Forms, and Video Overlay. Let's now see what we can do in each of these tabs.
"General" Tab
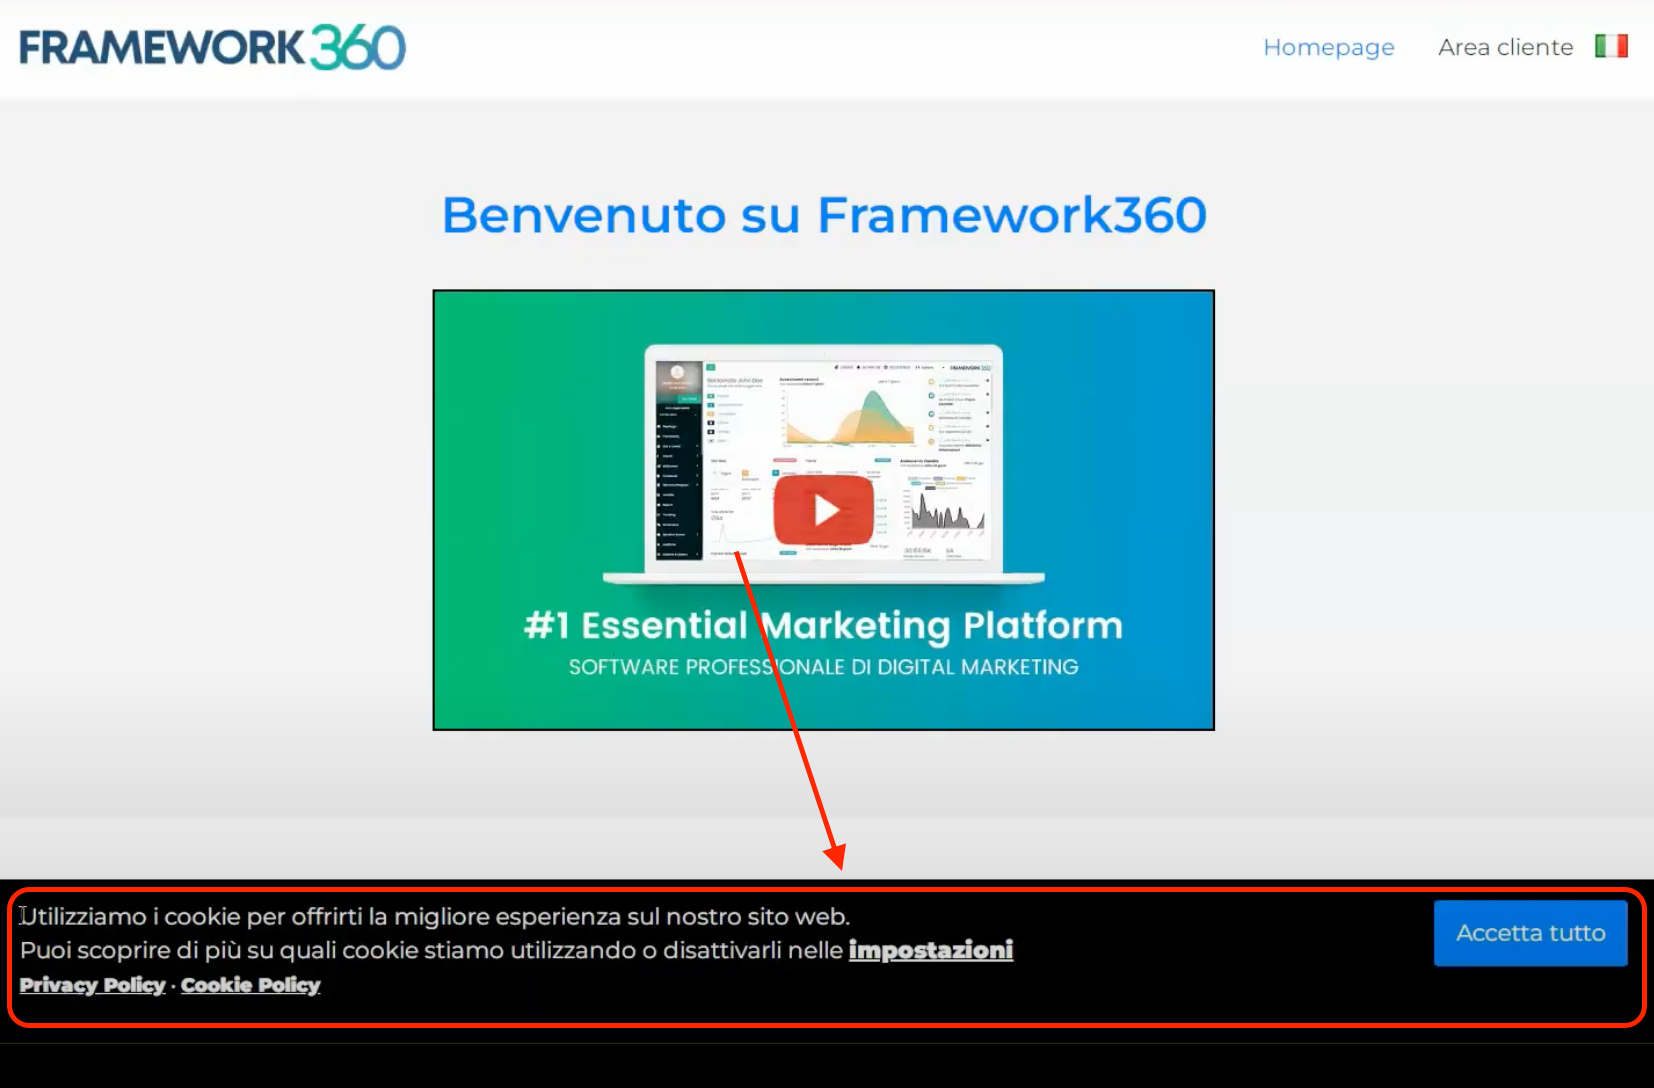
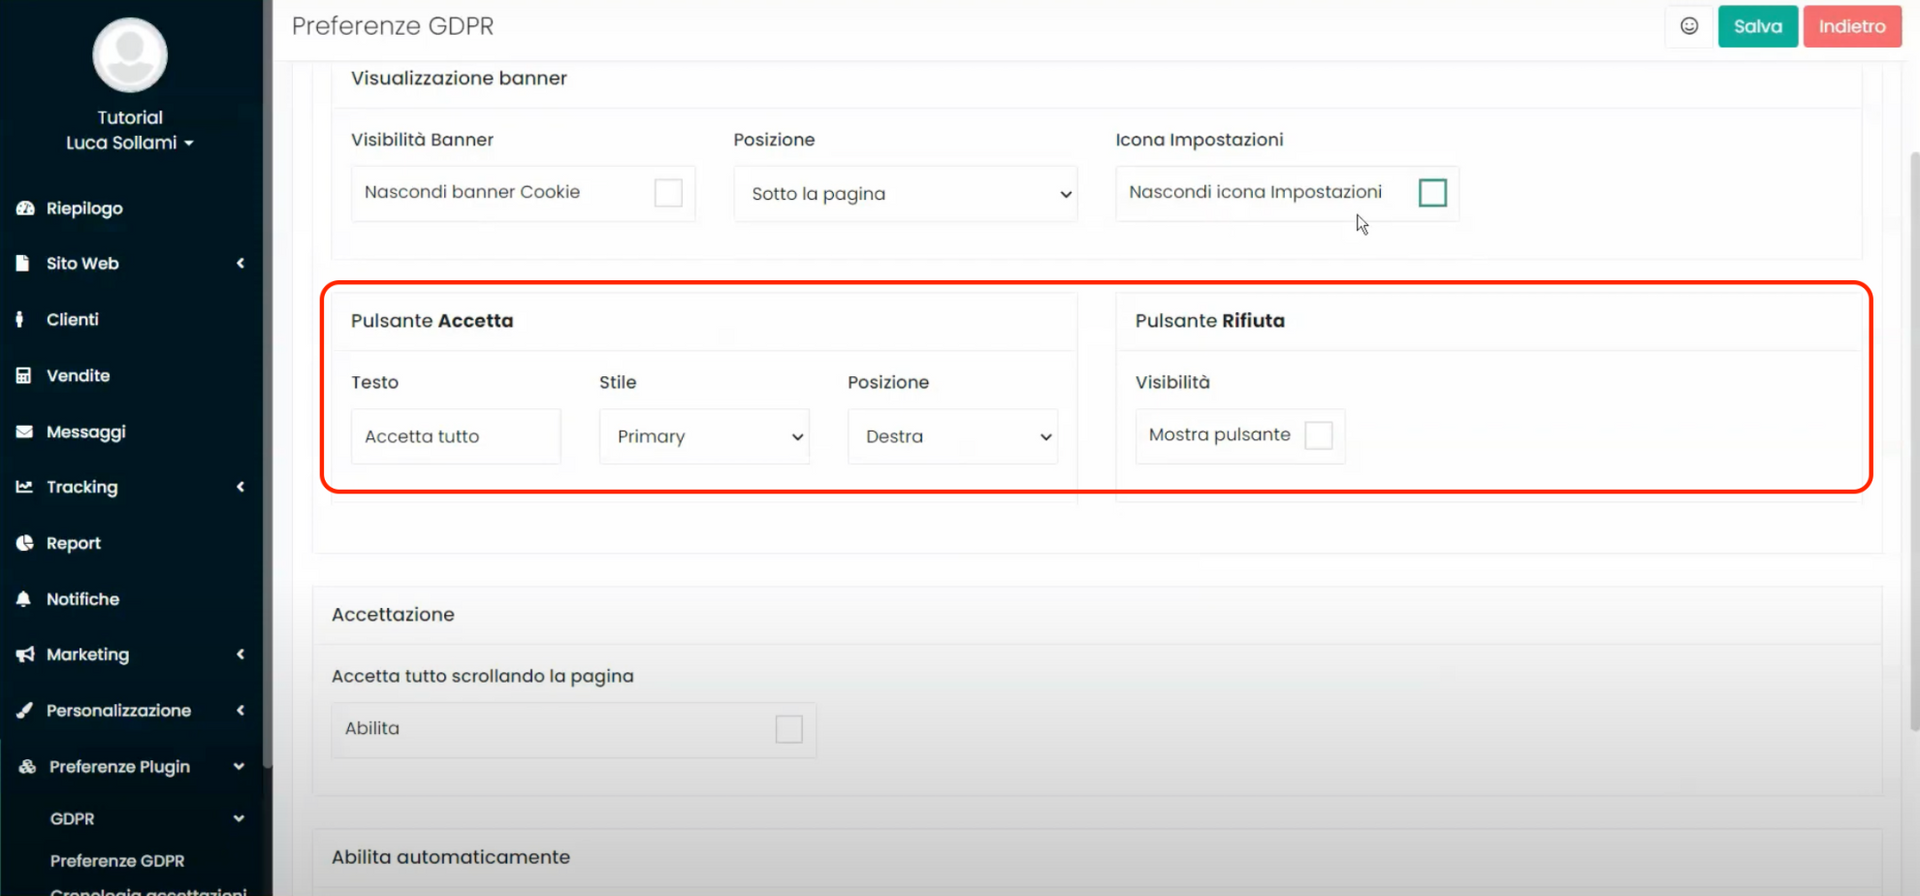
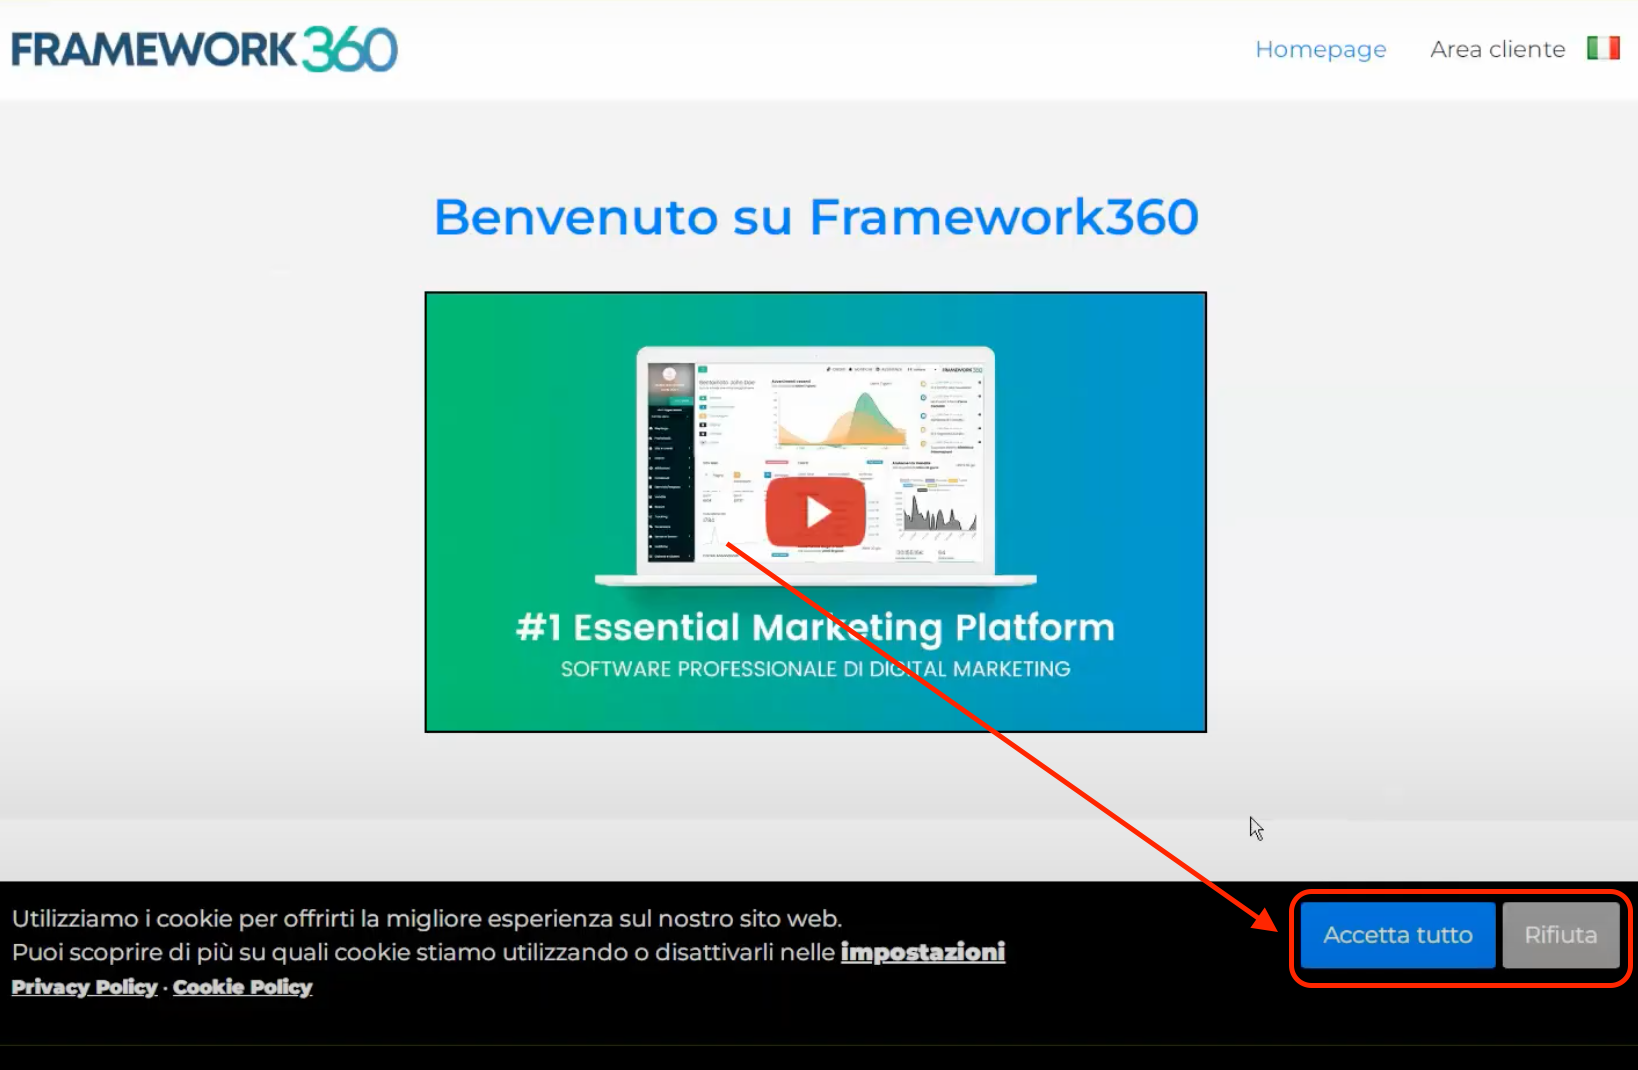
In the "Banner" section of the "General" tab, we can define all the graphic settings of the cookie acceptance banner that will appear within the pages of our website.
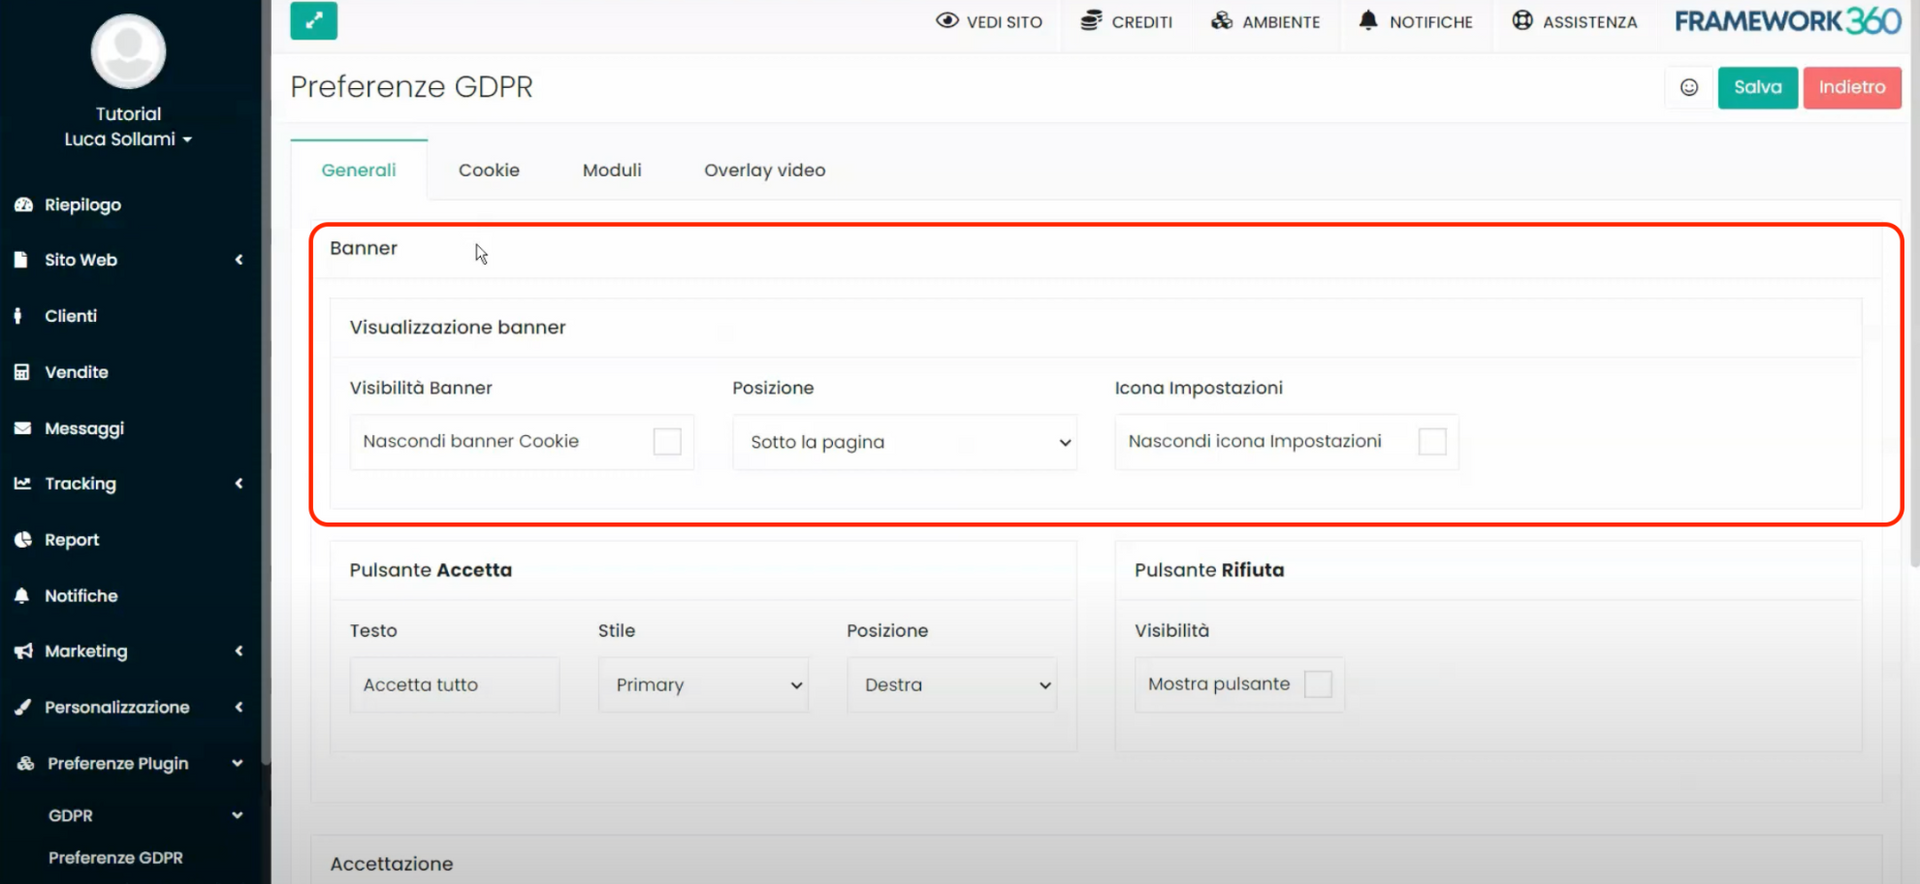
- With the "Hide Cookie Banner" option, we can choose not to display the banner; meanwhile, in the "Position" section, we can decide on the placement of our banner, whether it should appear at the top of the page, in the middle, or at the end of the page.
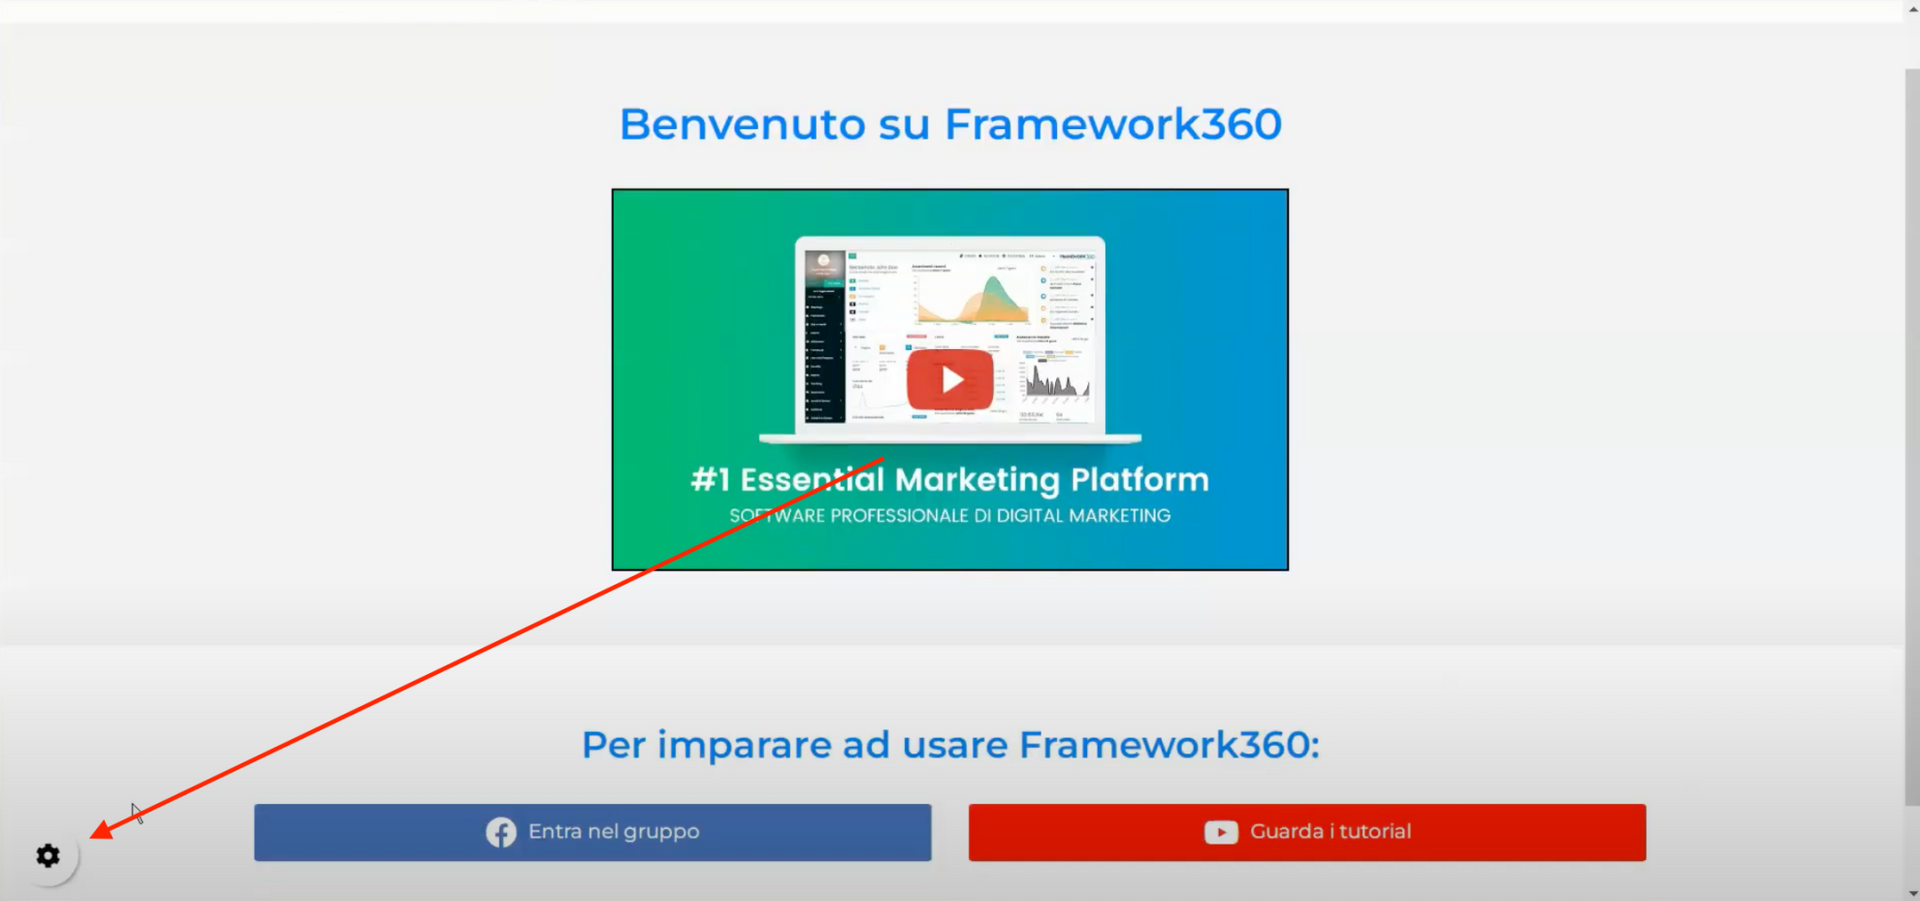
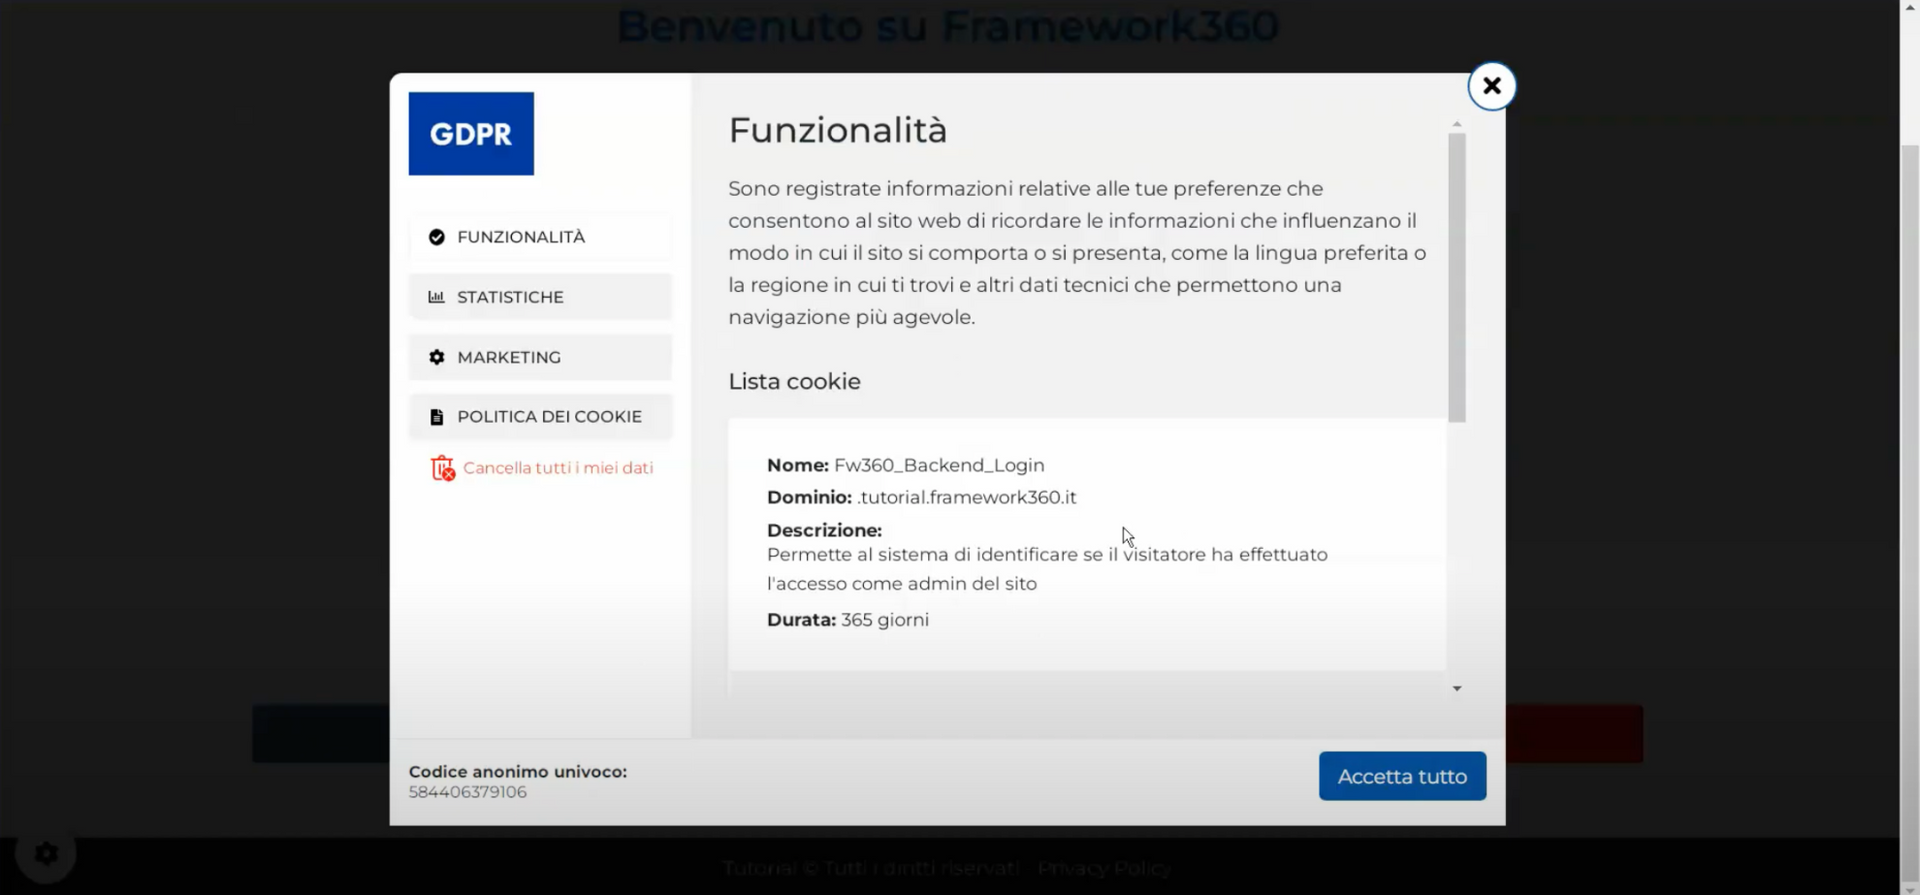
- With the "Hide Settings Icon" option, we can decide whether to hide or show the "Settings" icon. This icon gives visitors the ability to change their cookie preferences even after accepting the banner. The icon will always be visible in a corner of the page after accepting cookies; if clicked, a window containing all options related to cookies used on the site will open.
- In the "“Accept Button”" and "“Reject Button”" sections, we have the possibility to customize the accept or reject cookie buttons that will appear within the informational banner.
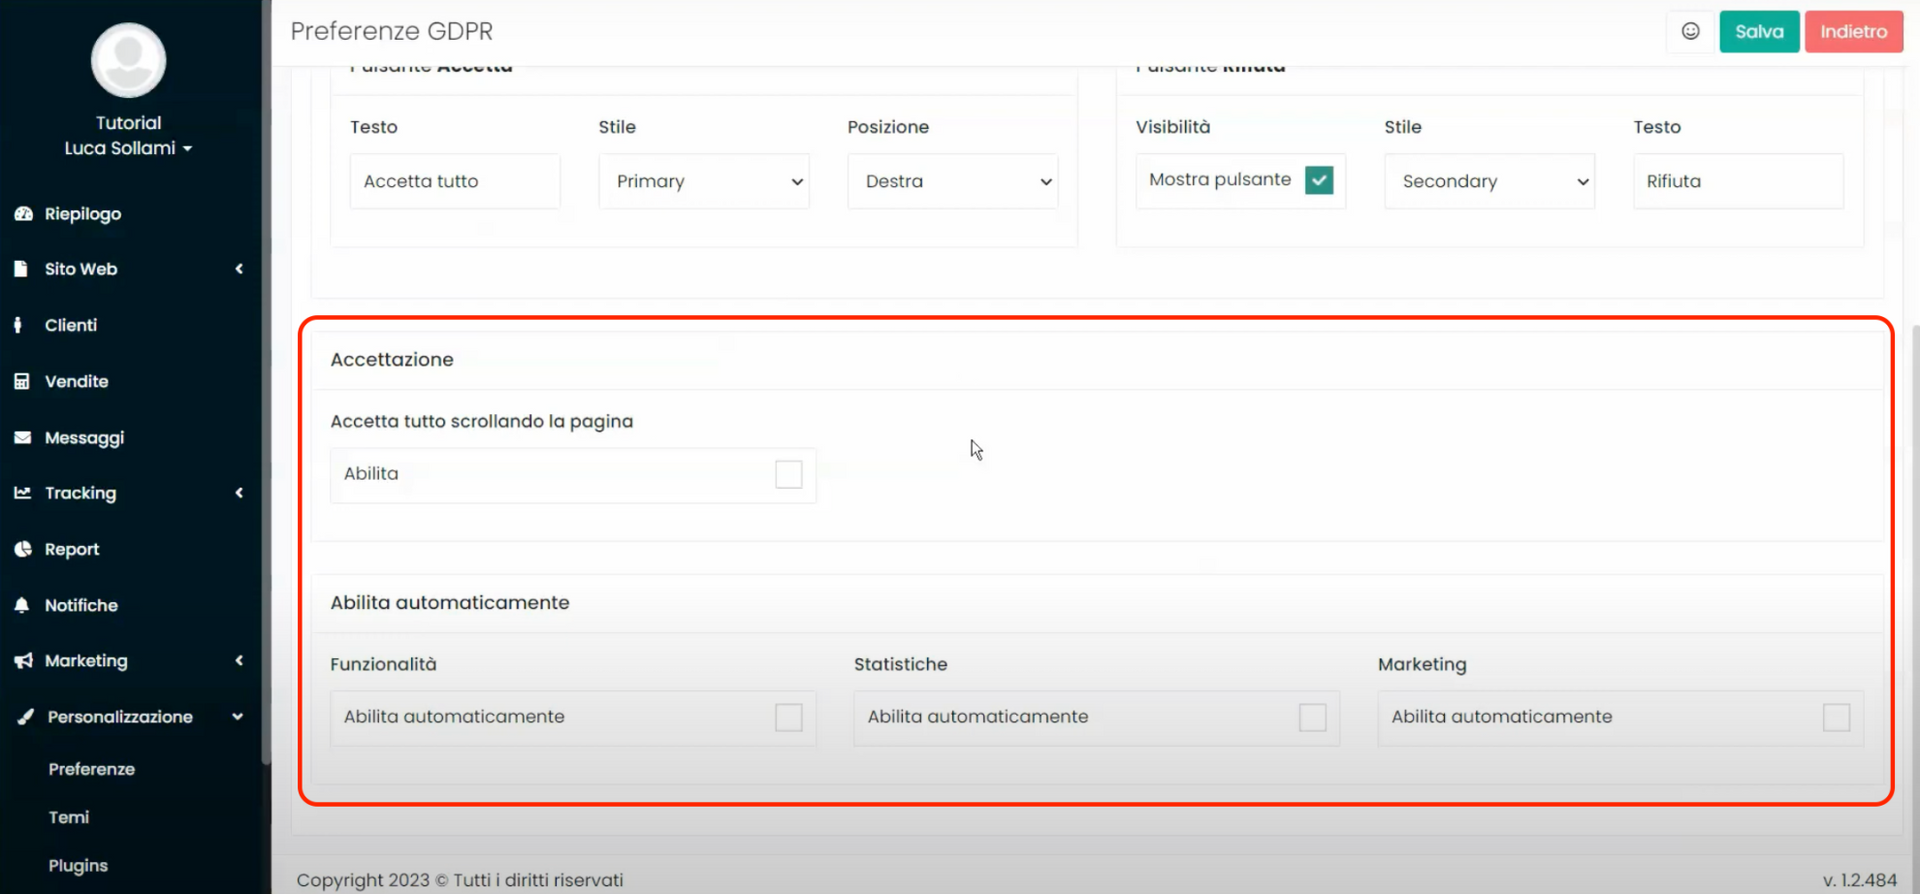
Scrolling within the “General” tab, we will find the sections “Acceptance” and “Enable Automatically”. With the “Acceptance” section, we have the possibility to have cookies accepted by the client simply by scrolling the page, while with the “Enable Automatically” section we can decide to enable cookies automatically even before the user accepts them with the appropriate button.
However, we must be aware that these last two functionalities are not compliant with GDPR regulations, which require explicit and informed consent from visitors. Indeed, when enabling them, the plugin warns us of this with an alert message. These functionalities may only be useful in certain specific cases, for example, when we need to test the functionality of certain tools like Facebook Pixel or Google Analytics, and the GDPR plugin could interfere with our tests. In these cases, we can temporarily activate automatic acceptance to facilitate our work.
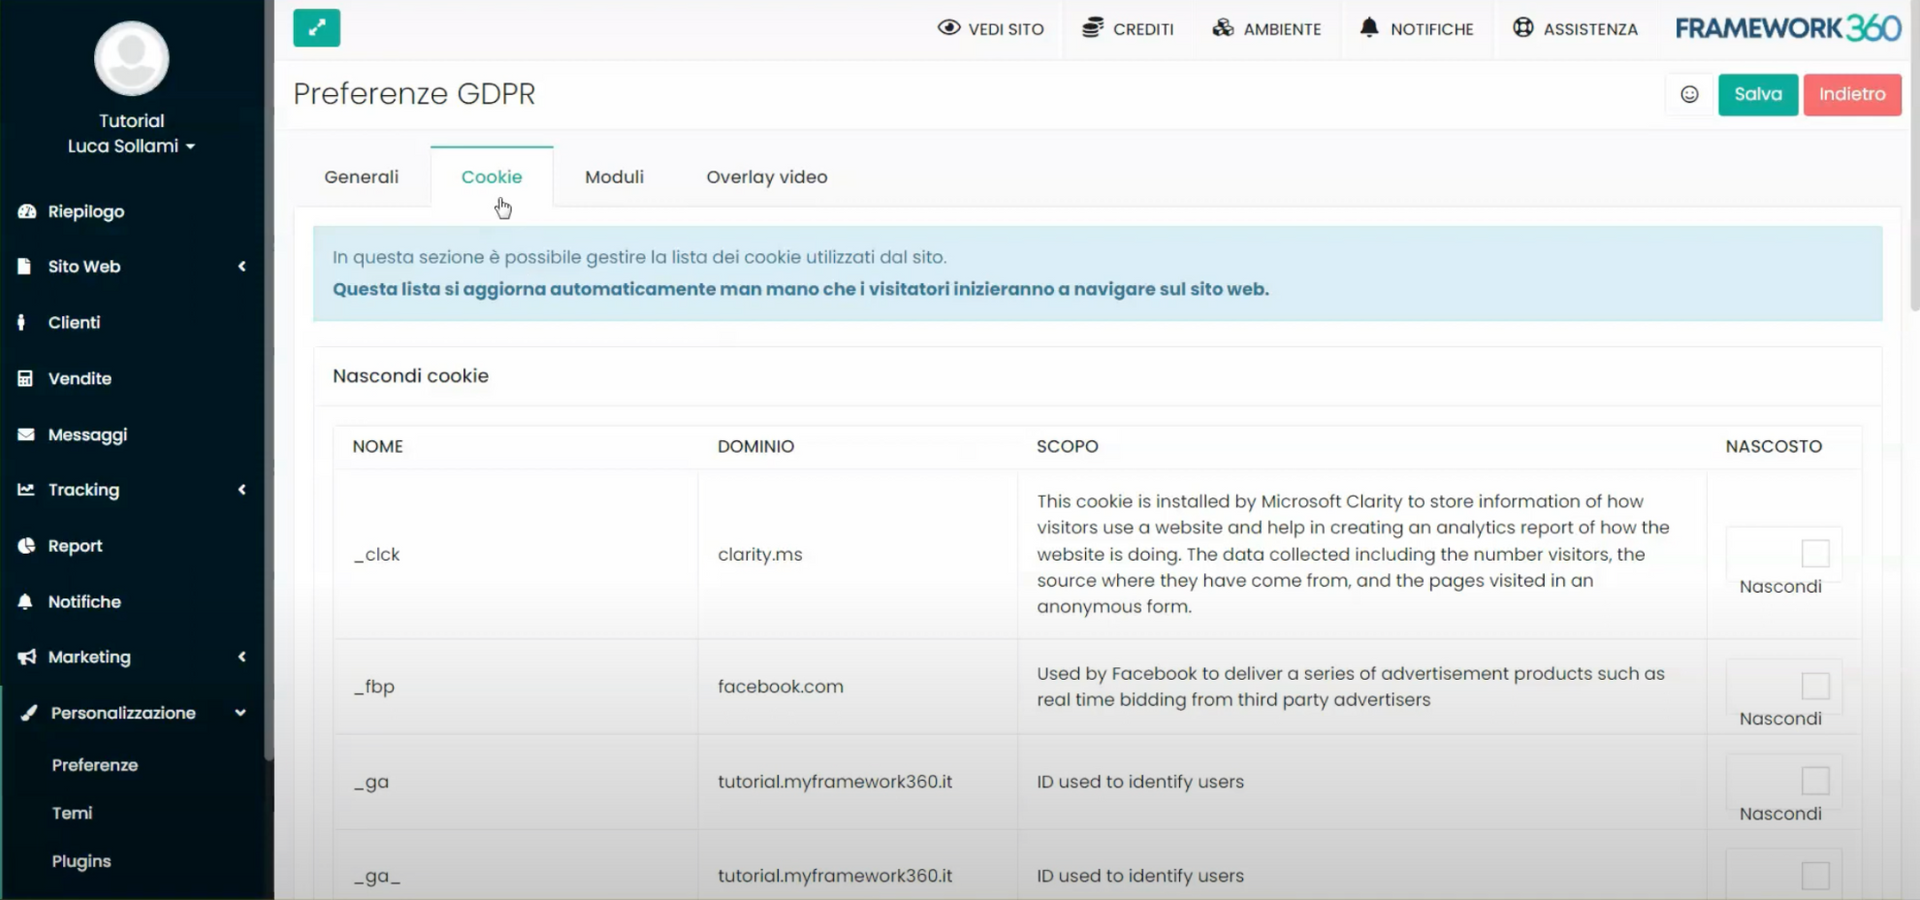
“Cookie” Tab
Moving on to the “Cookie” tab, inside it the GDPR plugin shows us all the cookies that have been activated on our website, this list automatically updates as visitors start to browse the site. Obviously, users will also have the ability to manage active cookies at any time during their navigation through the “Settings” icon we discussed earlier.
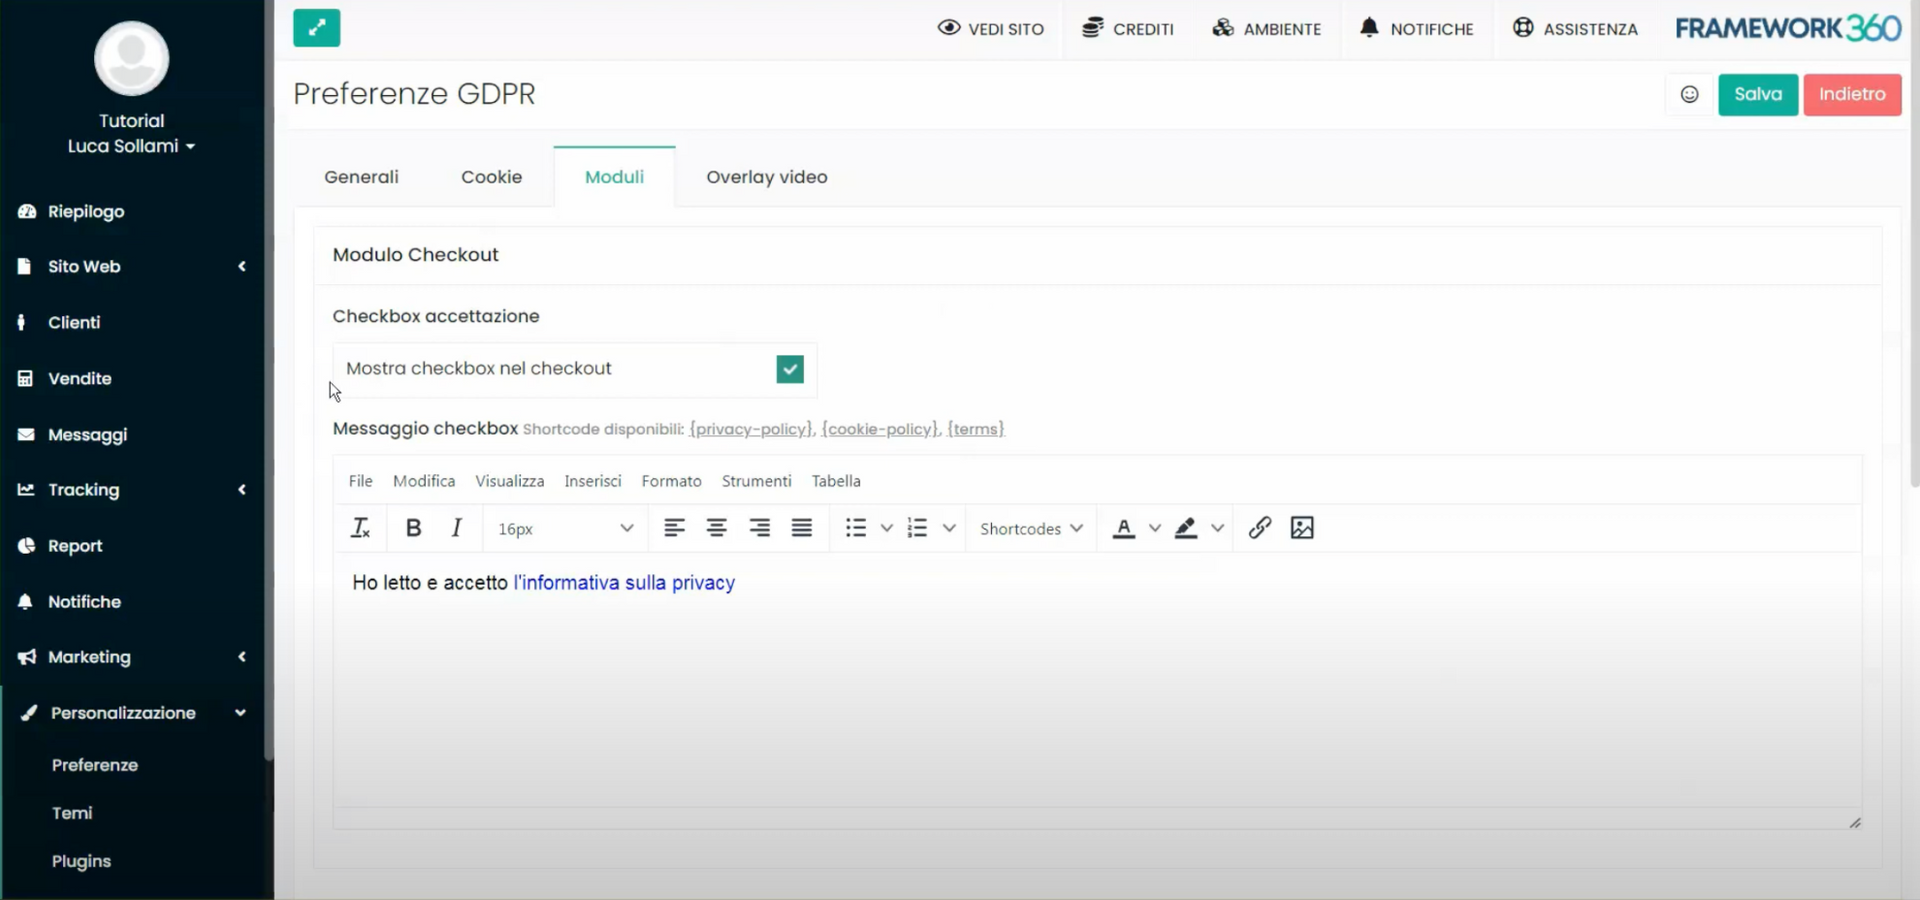
Tab “Modules”
In the tab “Modules”, the GDPR plugin allows us to customize the checkboxes that require visitors' consent for the processing of their personal data in various forms on the website. For example, we can modify the text accompanying the checkbox "I have read and accept the privacy policy" that appears during checkout.
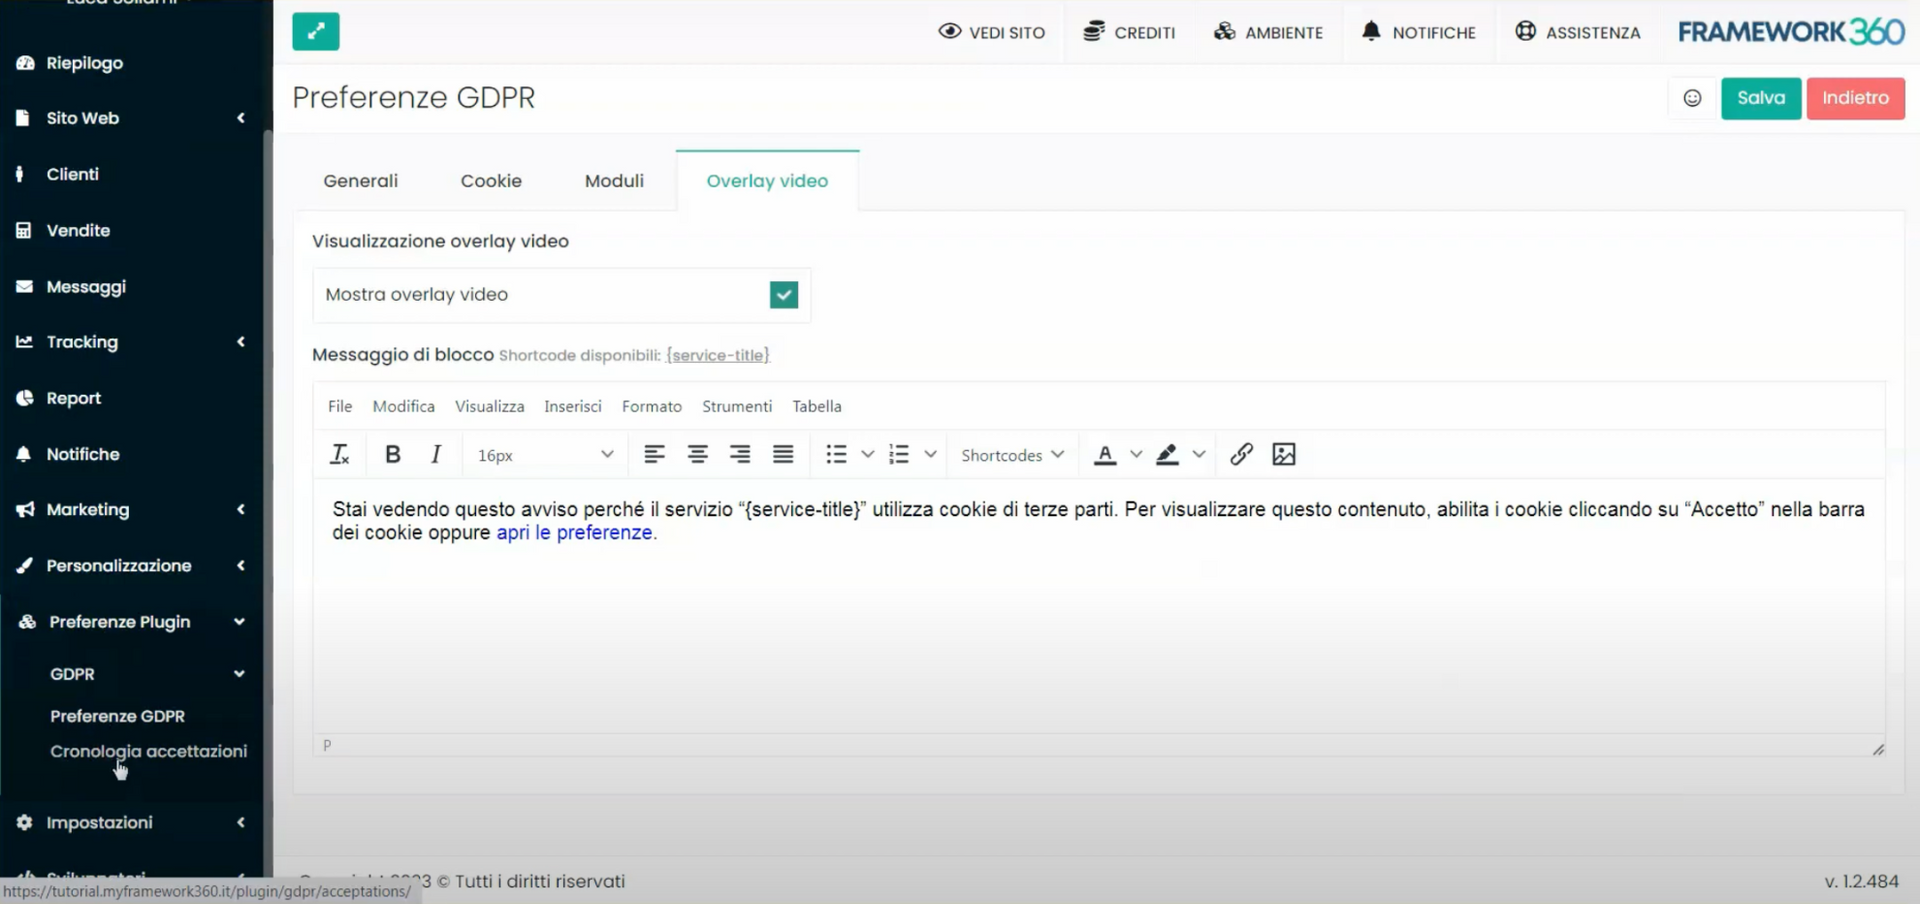
Tab “Video Overlay”
Finally, in the "Video Overlay" tab, the GDPR plugin offers us the possibility to manage cookies from video streaming services such as YouTube or Vimeo, which are not compliant with GDPR regulations as they are American companies. To prevent these services from injecting their cookies into our visitors' browsers without their consent, the GDPR plugin activates an overlay over the videos that blocks them and informs the user of the need to accept cookies to view the content.
When a visitor of our site clicks on the play button to watch an embedded YouTube or Vimeo video, they will be greeted with a box displaying the following message: "You are seeing this notice because the [service name] service uses third-party cookies. To view this content, please enable cookies by clicking on "Accept" in the cookie bar, or open preferences." If the visitor clicks on "Accept" or opens the preferences to accept the cookies from the service, the video will unlock and they will be able to watch it normally. The "Video Overlay" tab gives us the ability to activate or deactivate this feature and to customize the text that appears in the overlay.
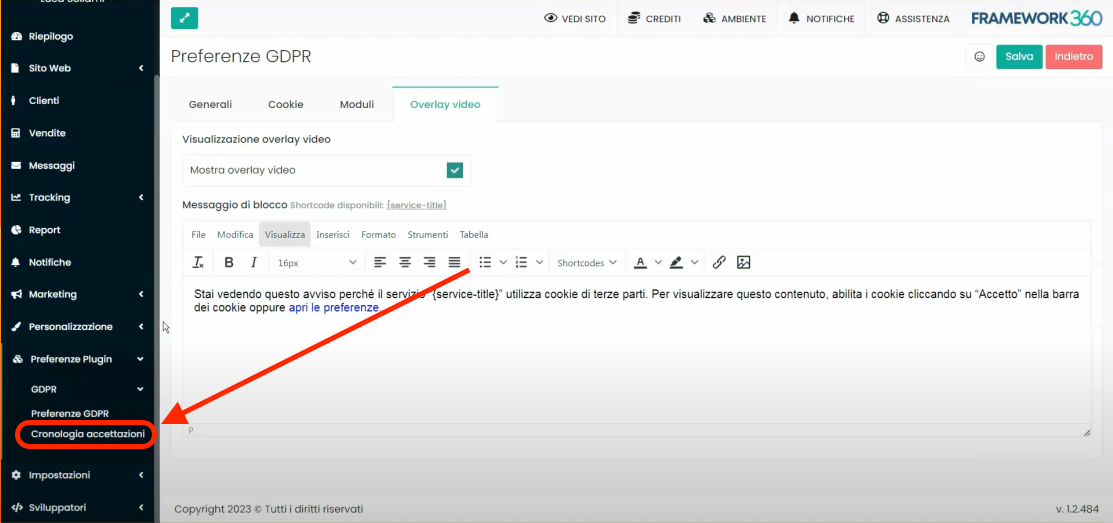
How to view the GDPR acceptance history?
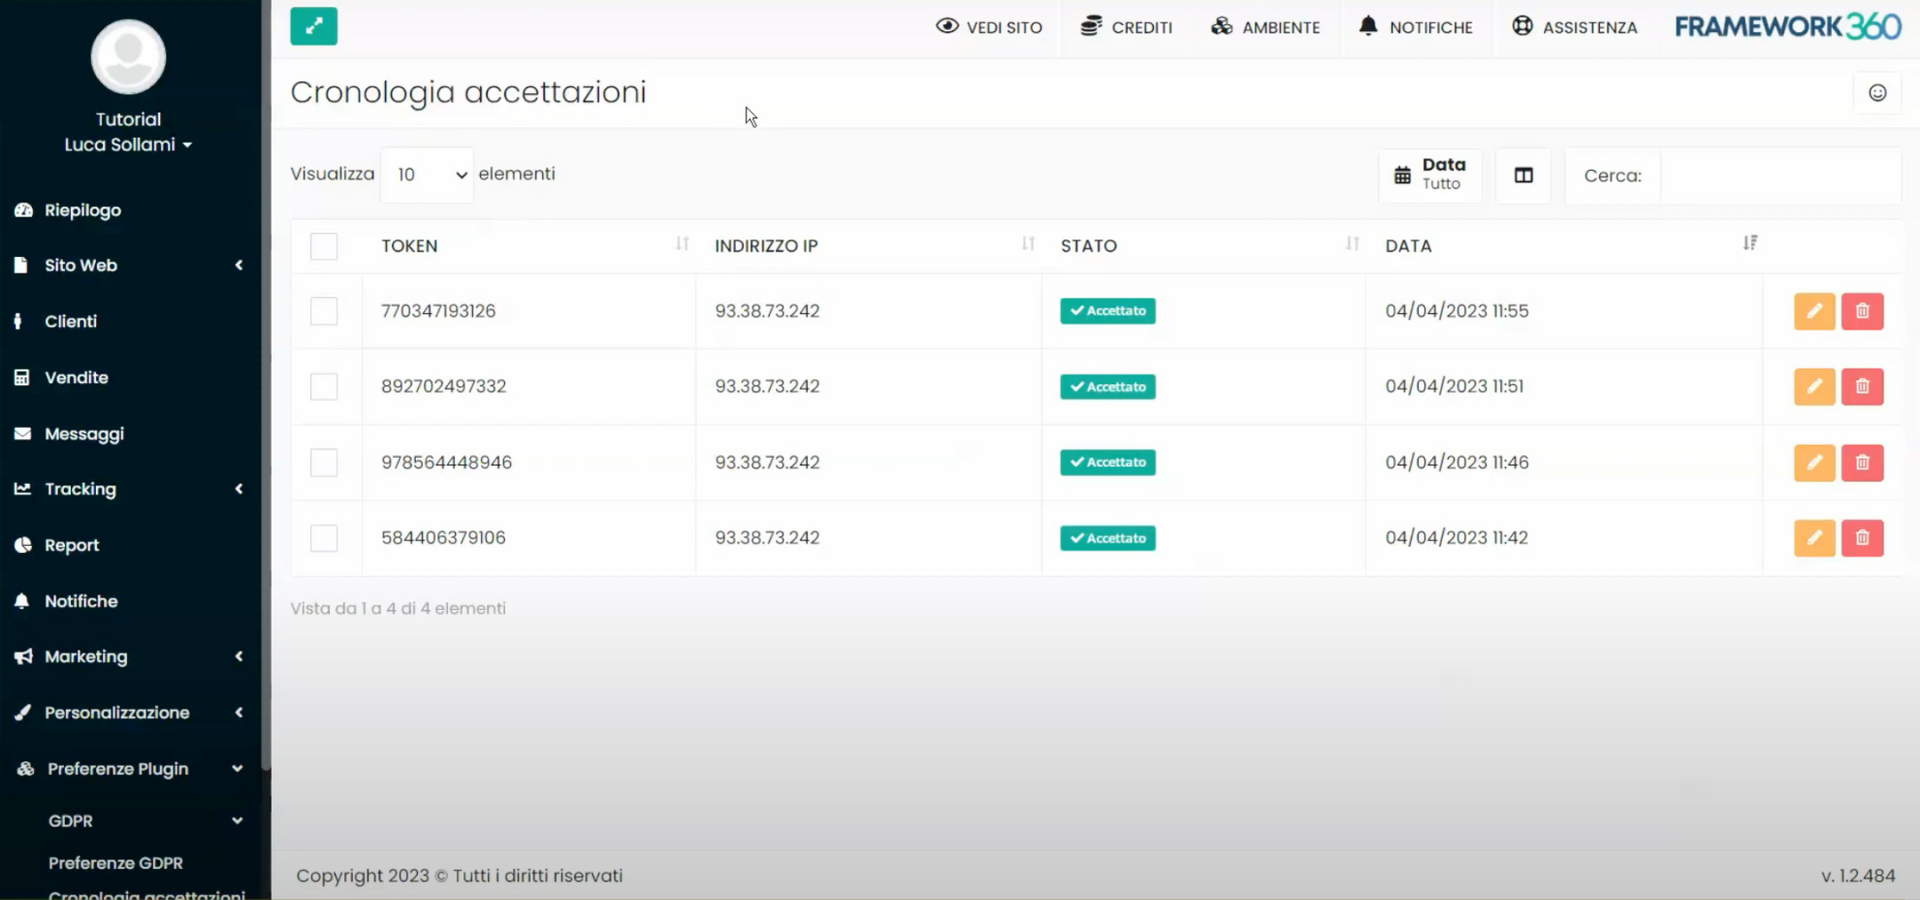
Also under the "GDPR" heading, found within the "Plugin Preferences" section located in the left sidebar, we will find the "Acceptance History" item. By clicking on it, we will enter the section that allows us to see who has accepted the cookies.
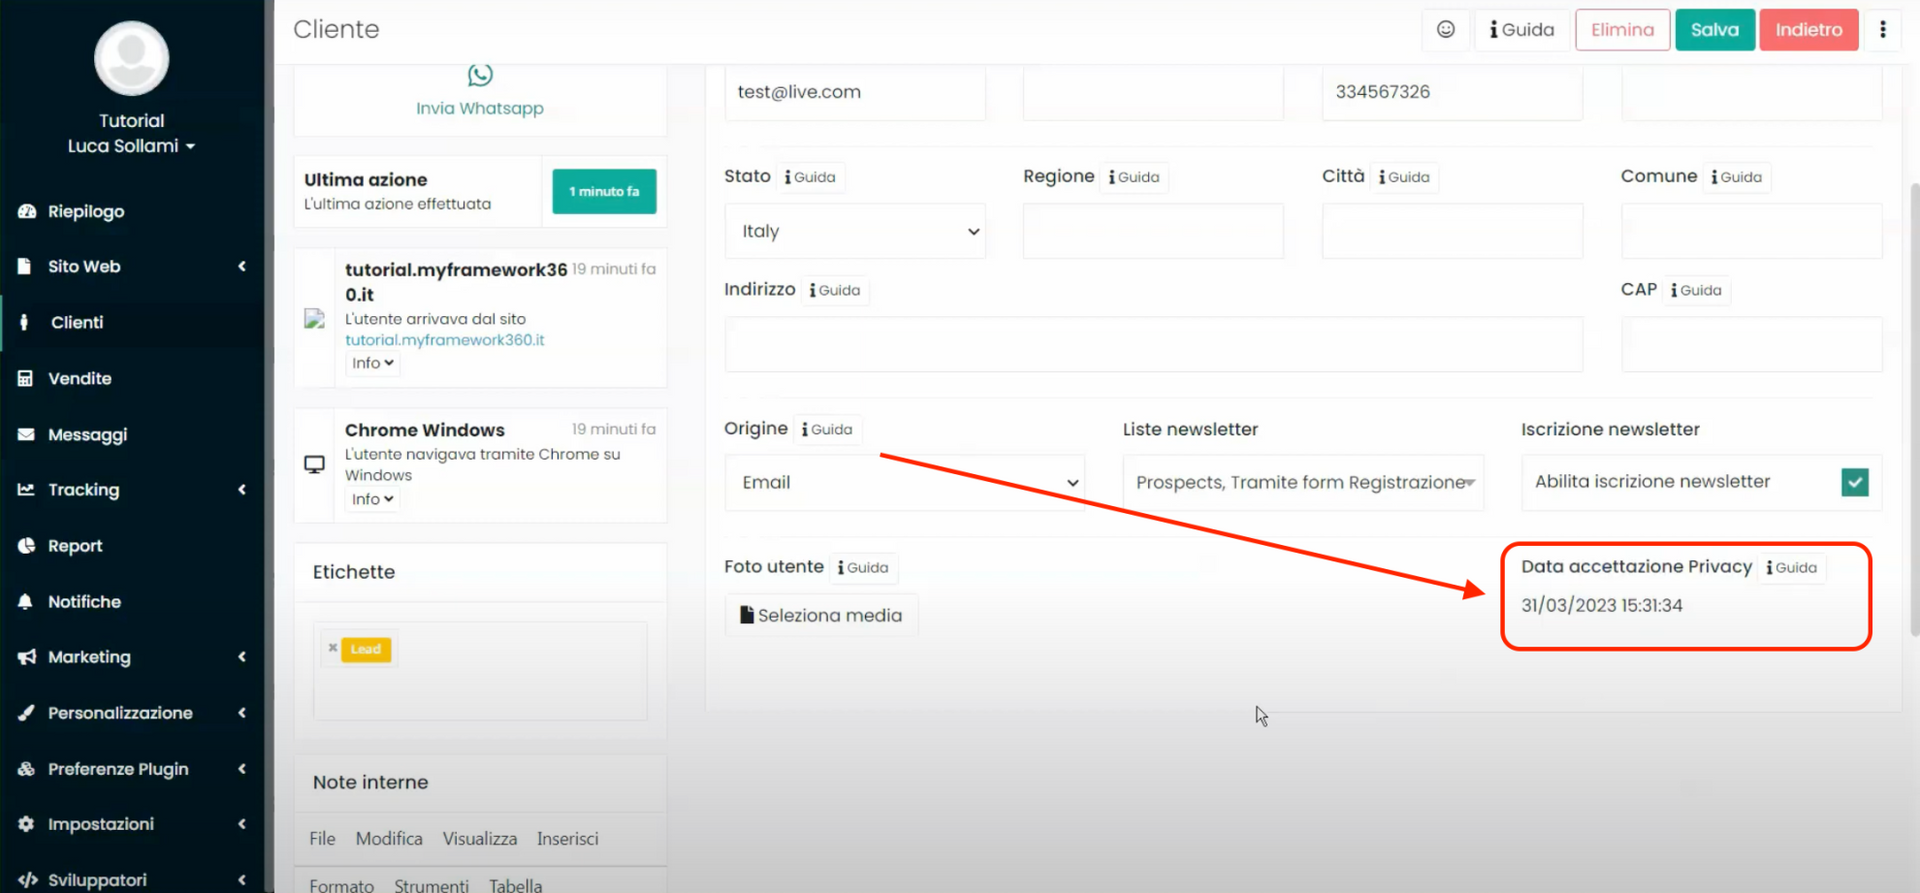
Furthermore, it is important to specify that when a customer accepts the privacy policy during registration, their record will show the date and time of acceptance.
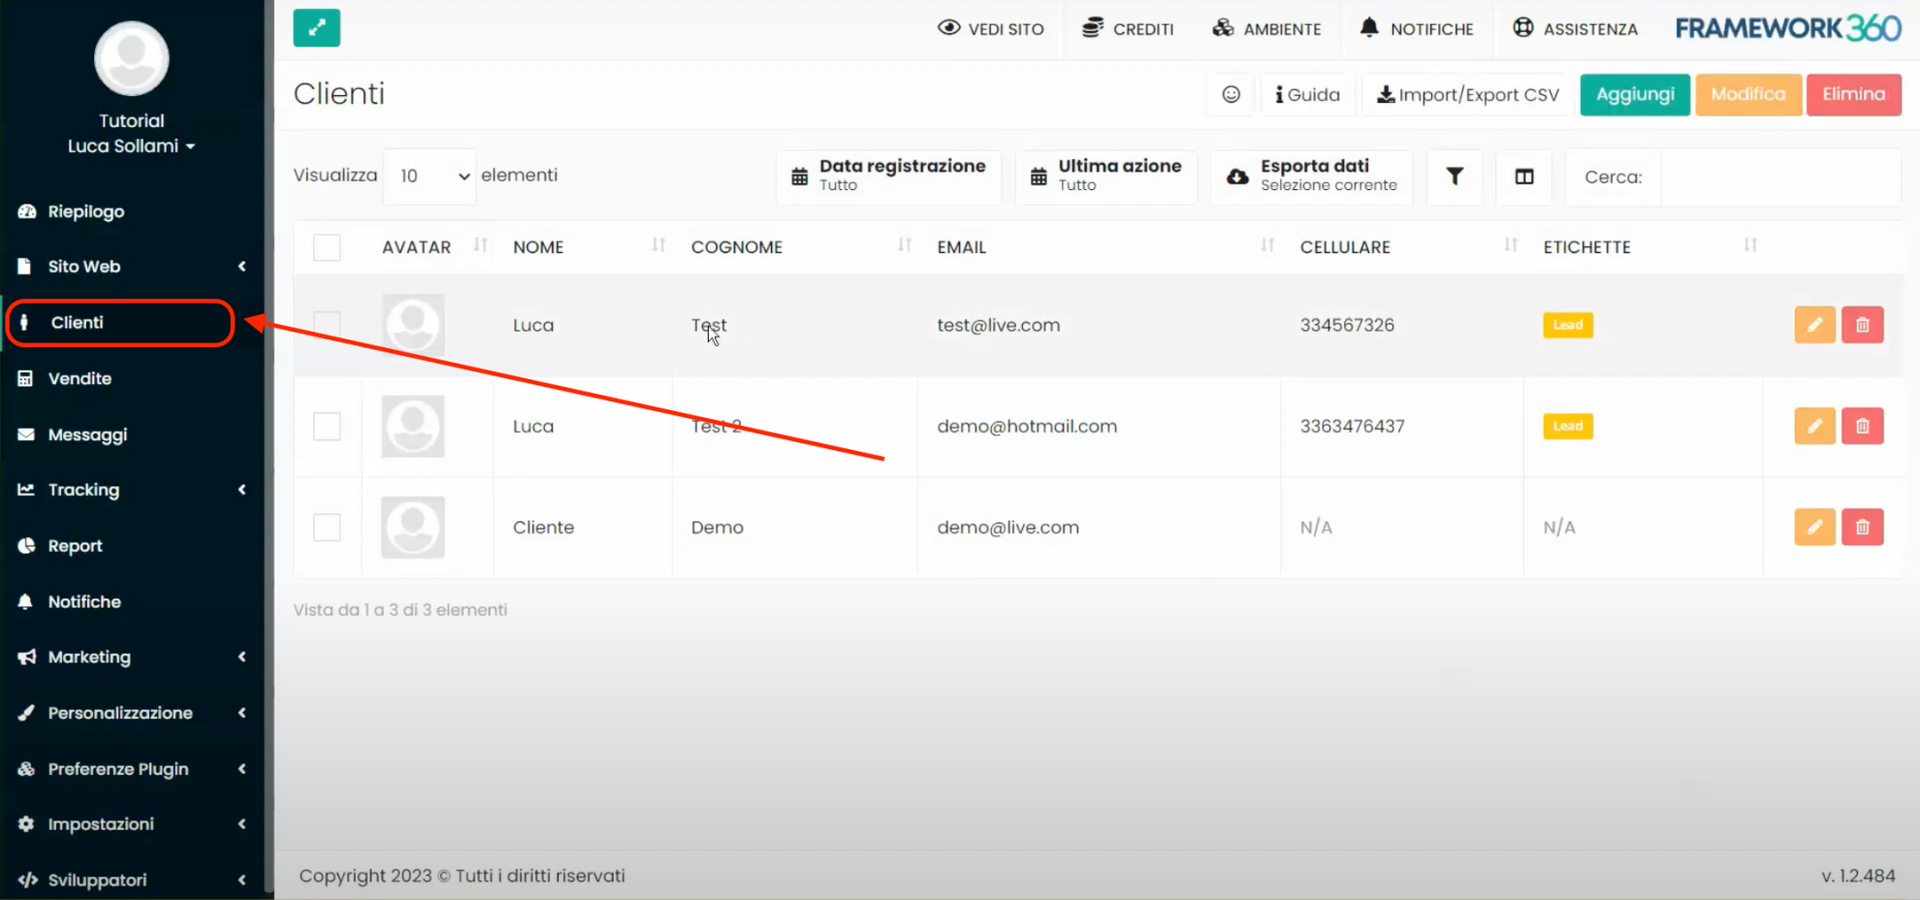
We can find customer records under the "Customers" section in the left sidebar of our environment, as shown in the figure:
How to customize the "Cookie Policy" and "Privacy Policy" pages?
If we want to manage the Cookie Policy and Privacy Policy pages, Framework 360 provides us with these two pre-set pages that we can easily modify to make them suitable for our business. To be able to modify them, we should go to the "Pages" section present in the left sidebar of our environment following these steps:
Website > Pages
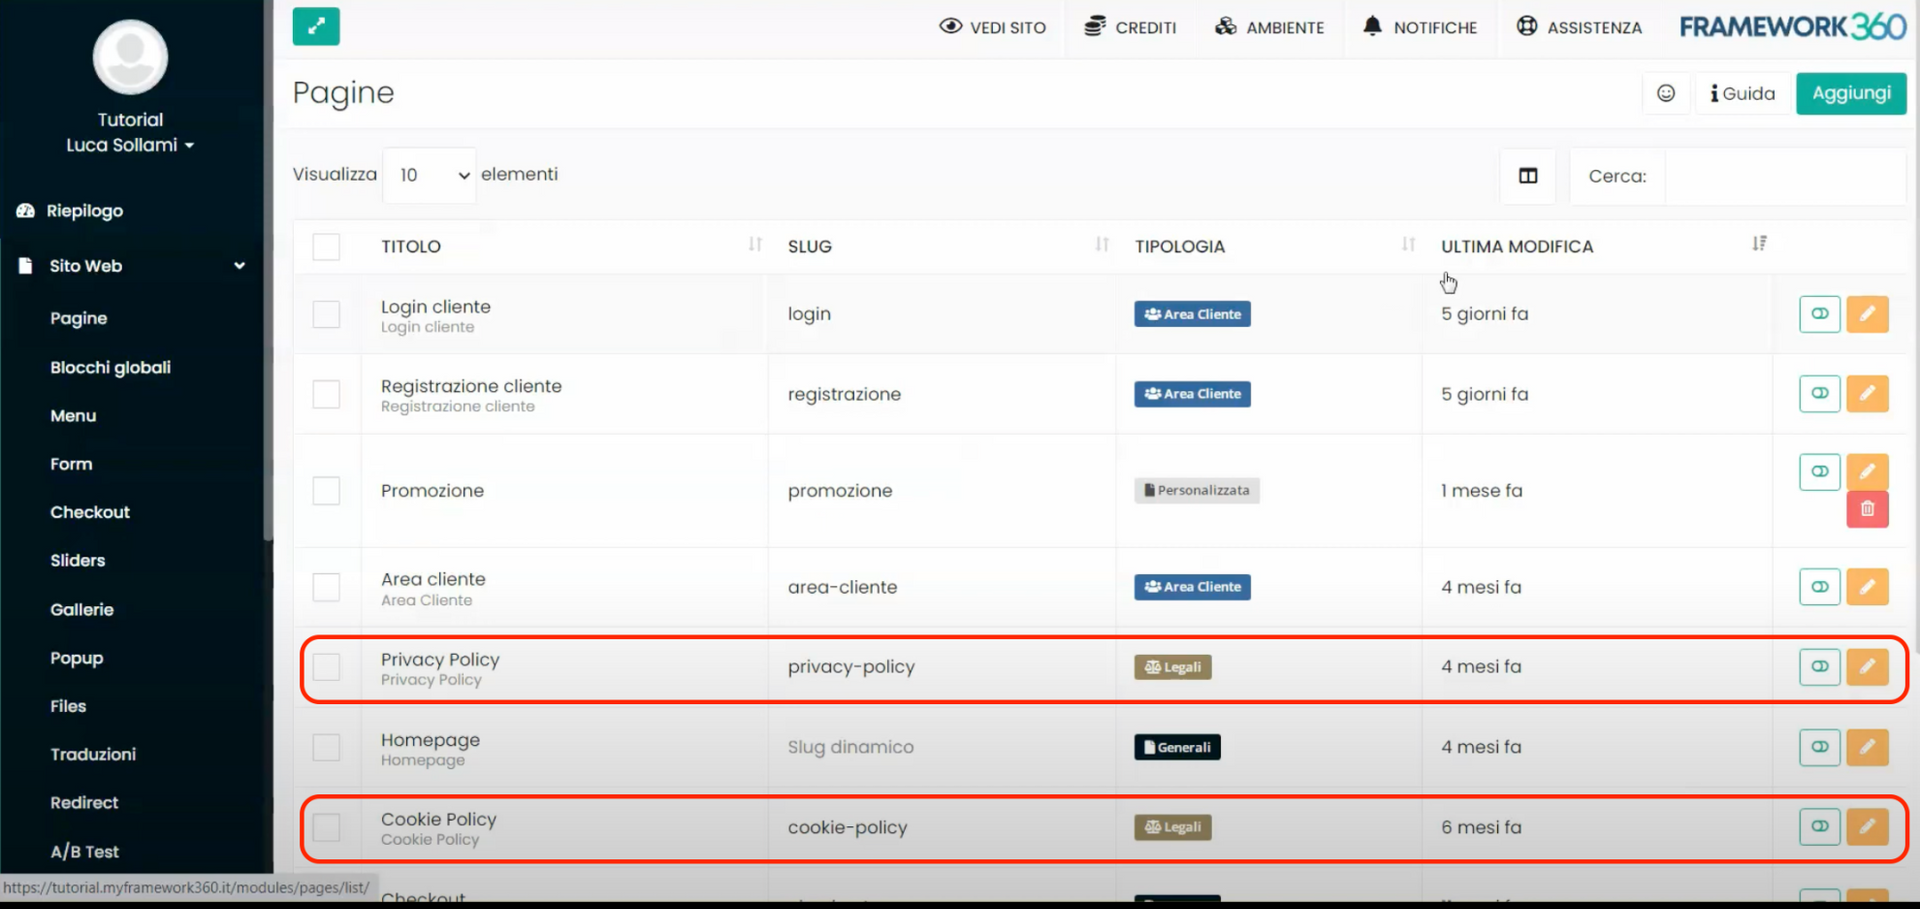
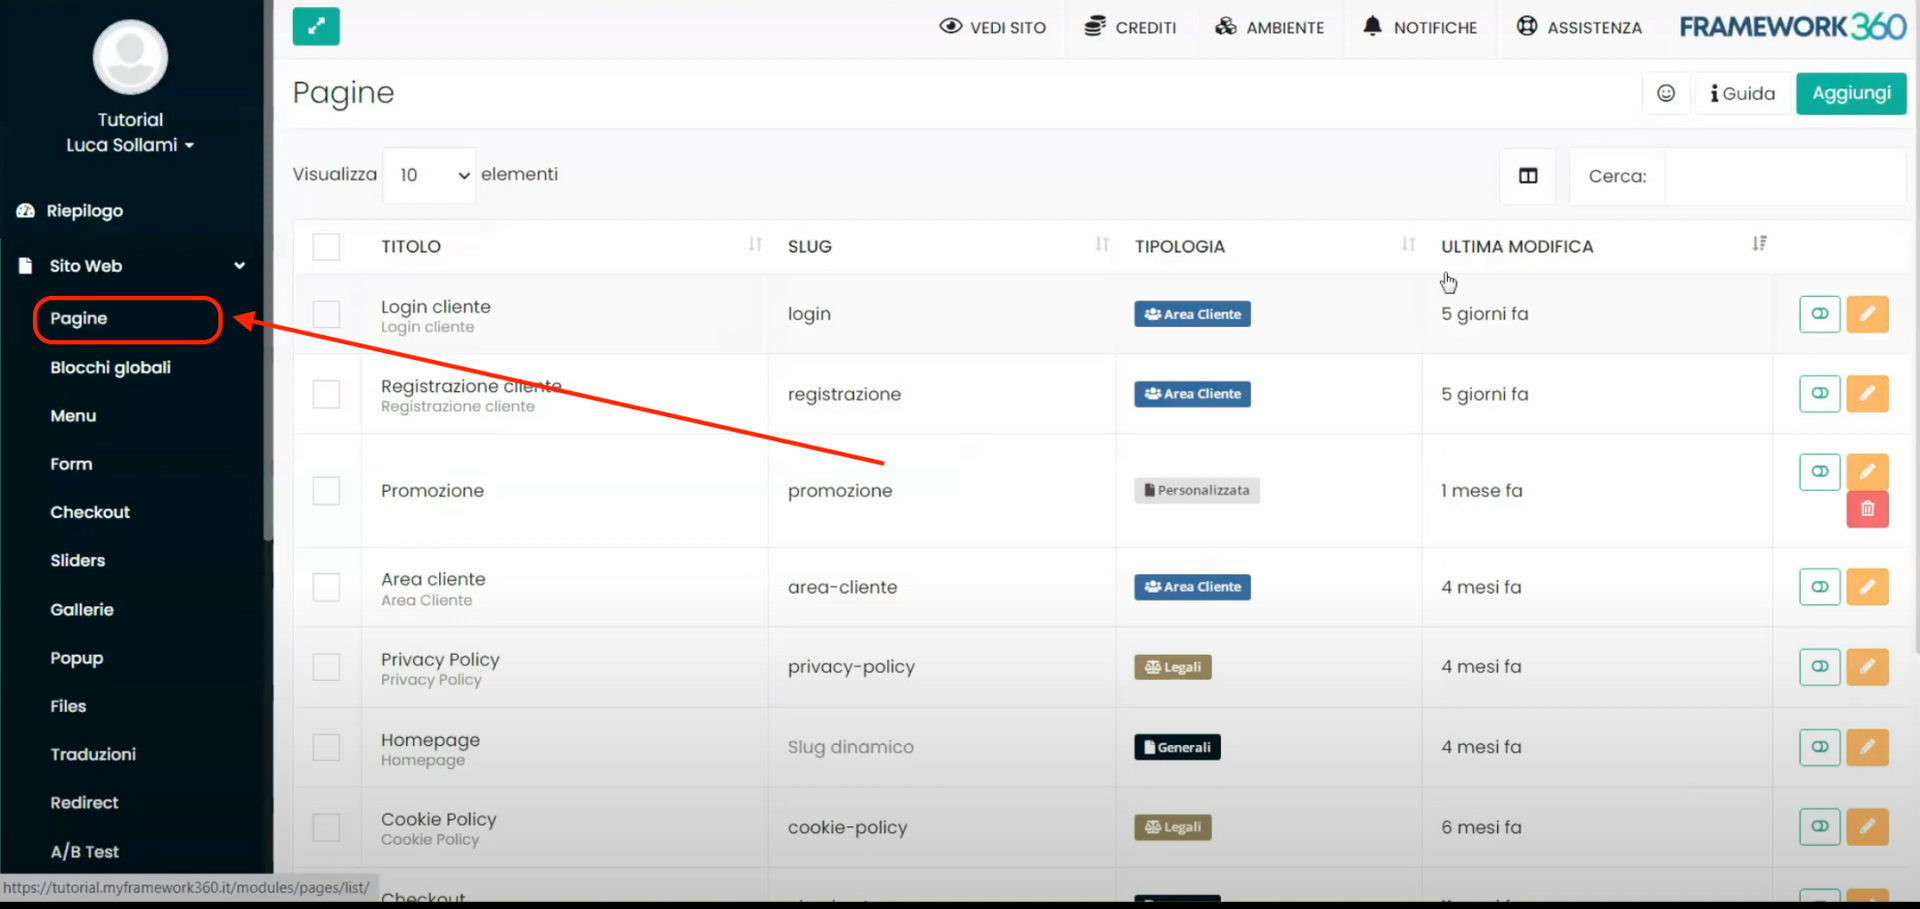 Within the "Pages" section, we will find all the pages of our website including the "Cookie Policy" and the "Privacy Policy". To modify them, we simply need to click on the page to open the editing screen.
How to insert the links for the "Cookie Policy" and "Privacy Policy" pages within the footer?
To add links to the "Cookie Policy" and "Privacy Policy" pages in the footer of our website, we need to modify the global block related to the footer. Global blocks are sections that repeat across all pages of our website, and the footer is one of these sections, namely, the last section displayed at the end of every page on our website.
This feature allows us to create content that appears on all pages of the site and that we can change from a single section. The footer is one of these contents: it is the part at the bottom of the site where we put links to informational pages.
To modify the footer, we must go to the "Global Blocks" section present in the "Pages" item of the left sidebar of our environment.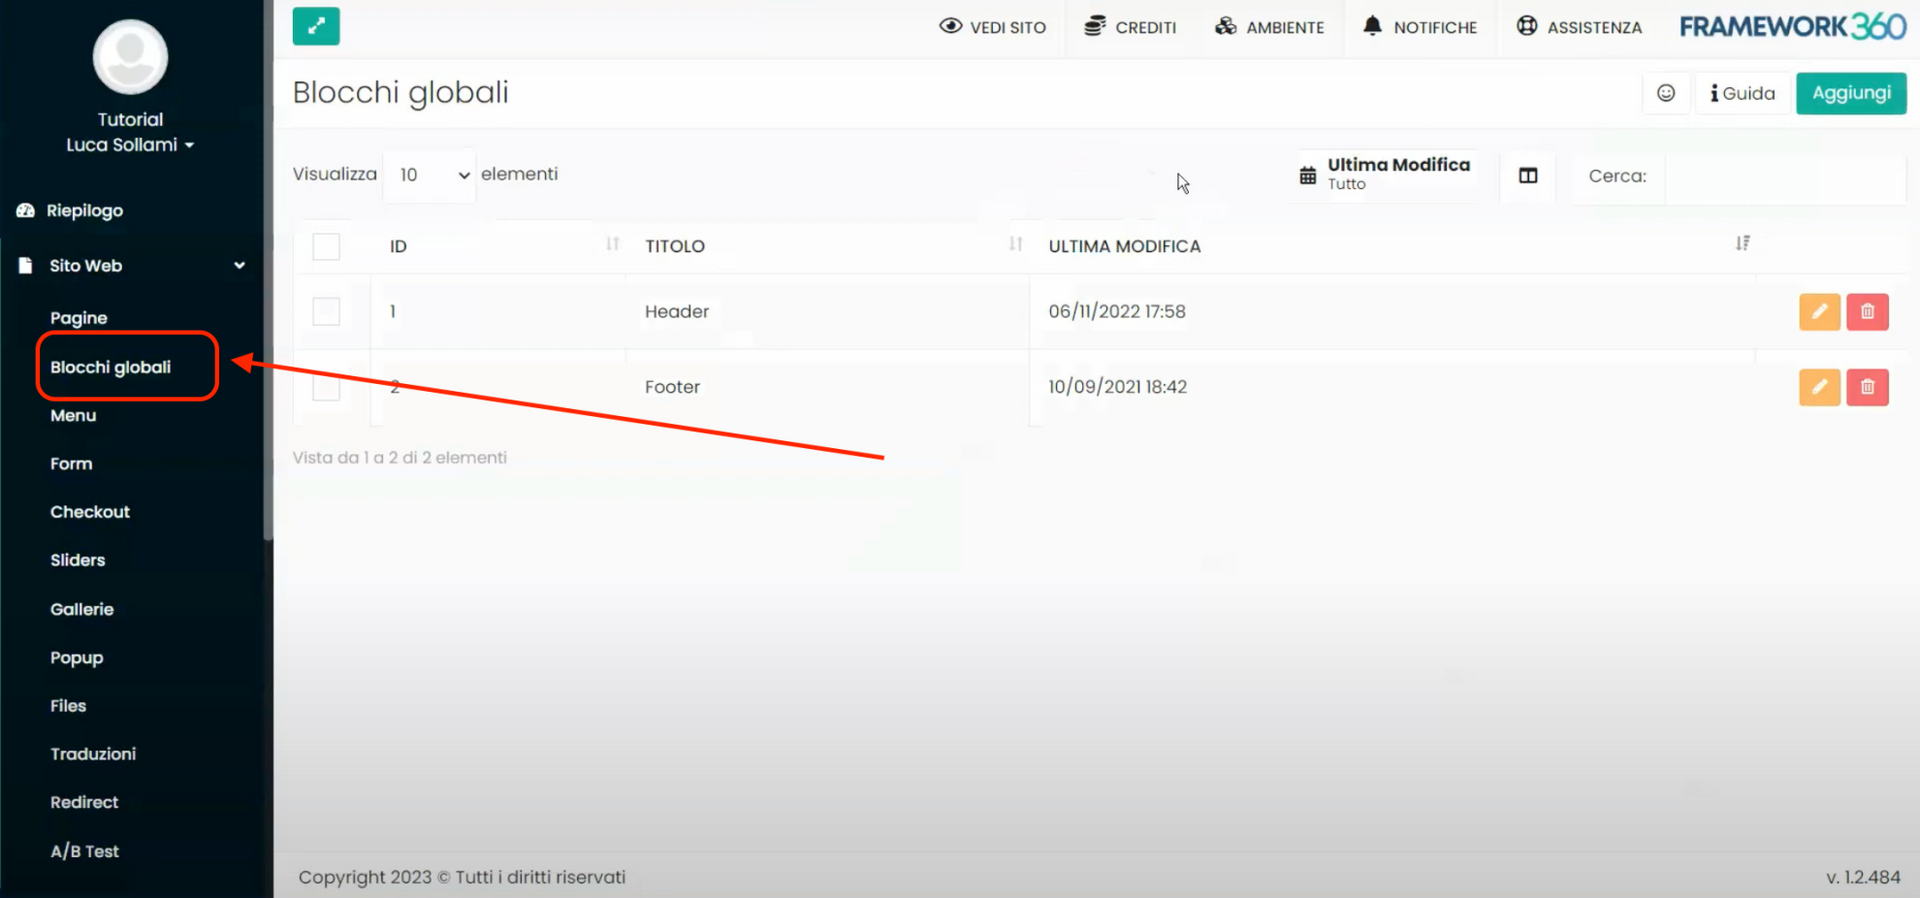
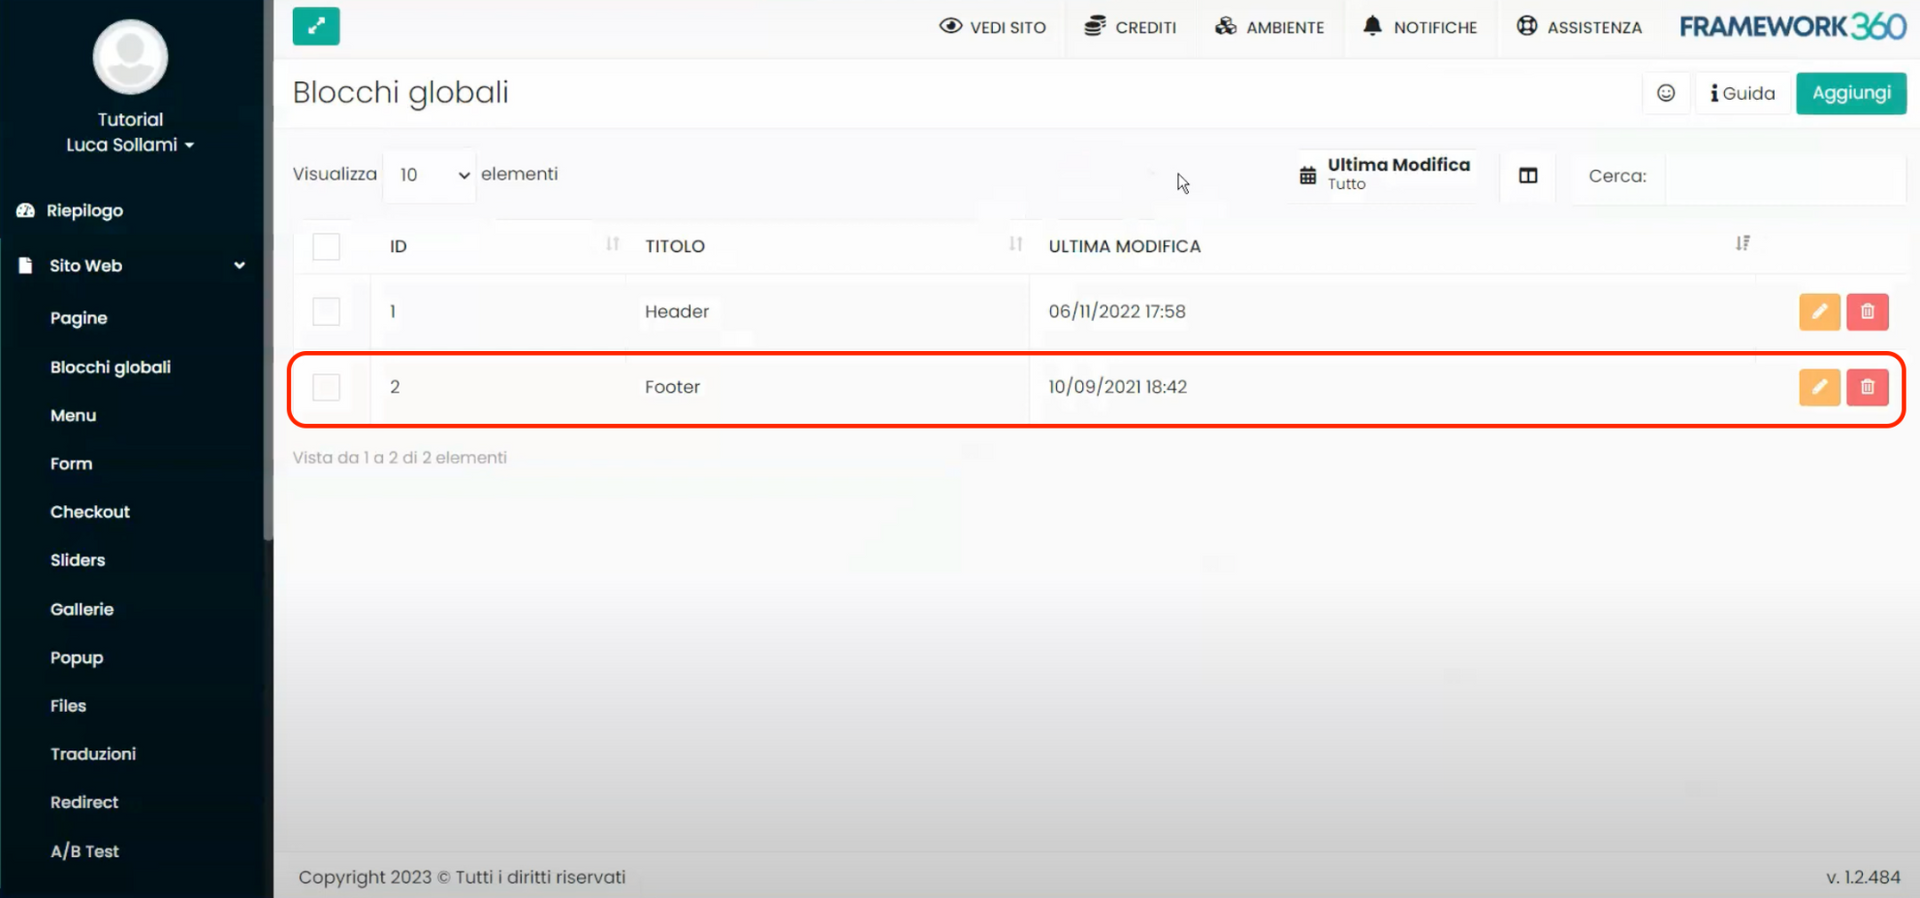
At this point, we need to click on the global block "Footer" to access the editing screen.
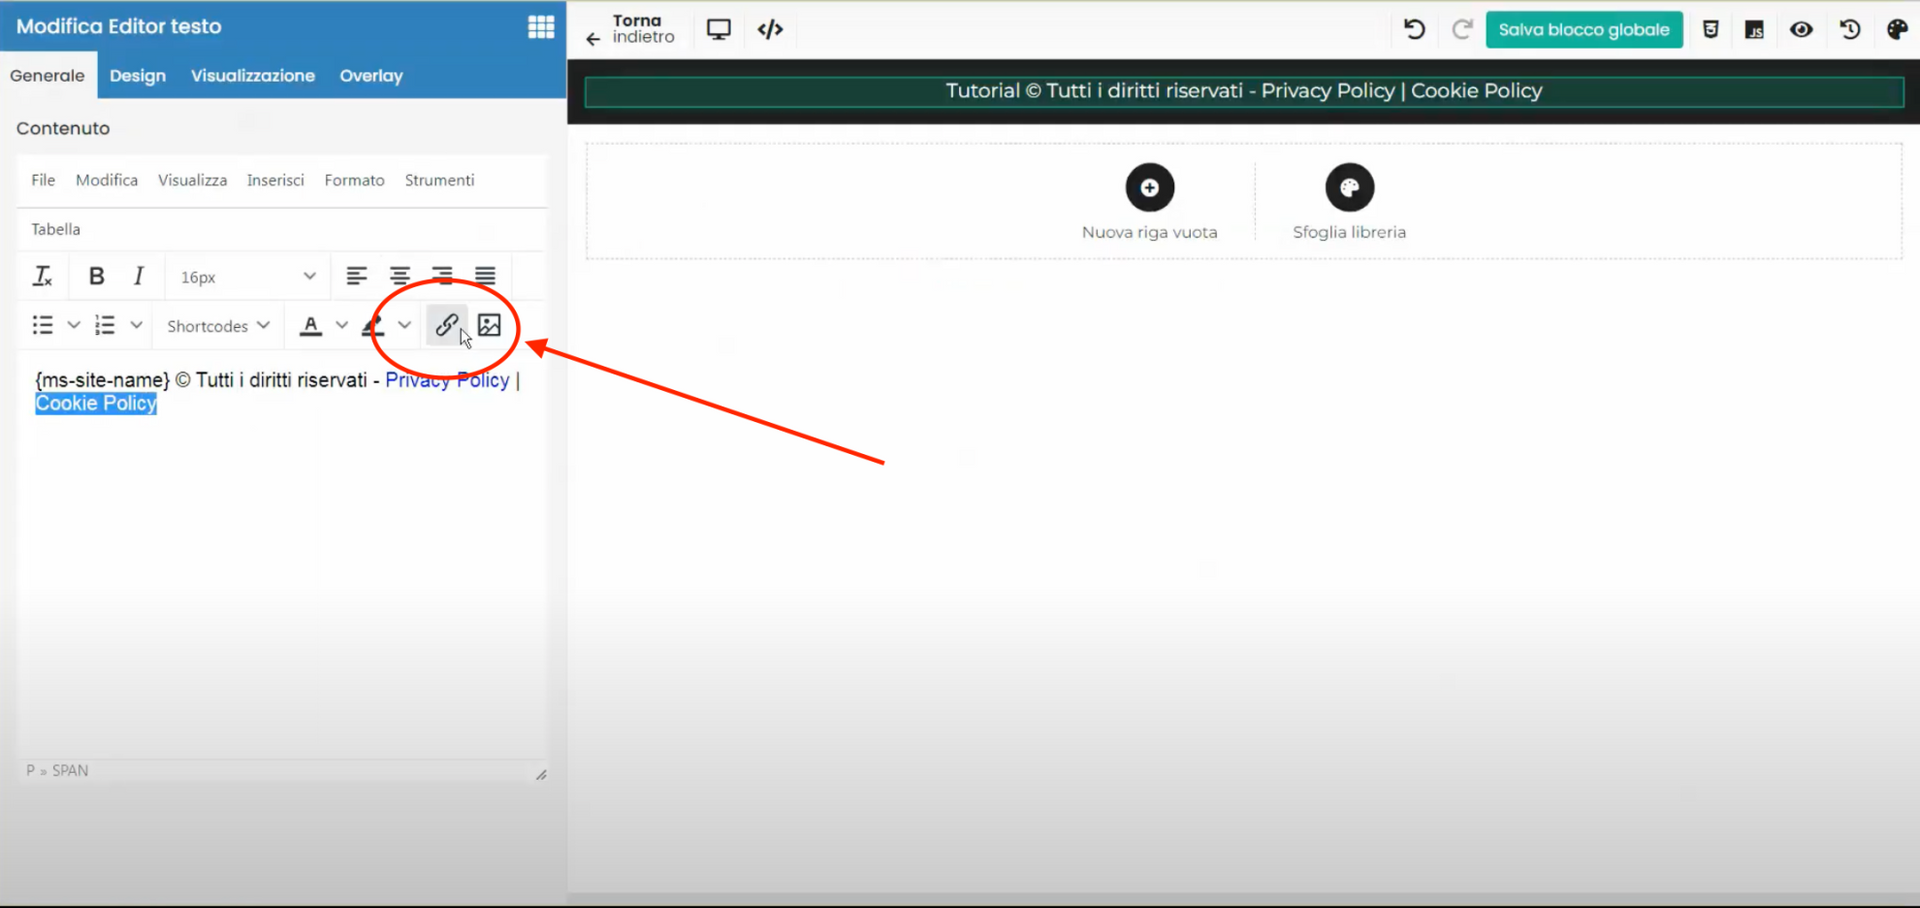
Within the footer editing screen, we can see the content of the footer and add or modify links to the information pages. To do this, we must follow these steps:
- Select the text we want to link to a page, for example "Cookie Policy" or "Privacy Policy".
- Click on the button with the symbol of a chain found at the top left in the text editor. This button is used to insert links (see following figure).
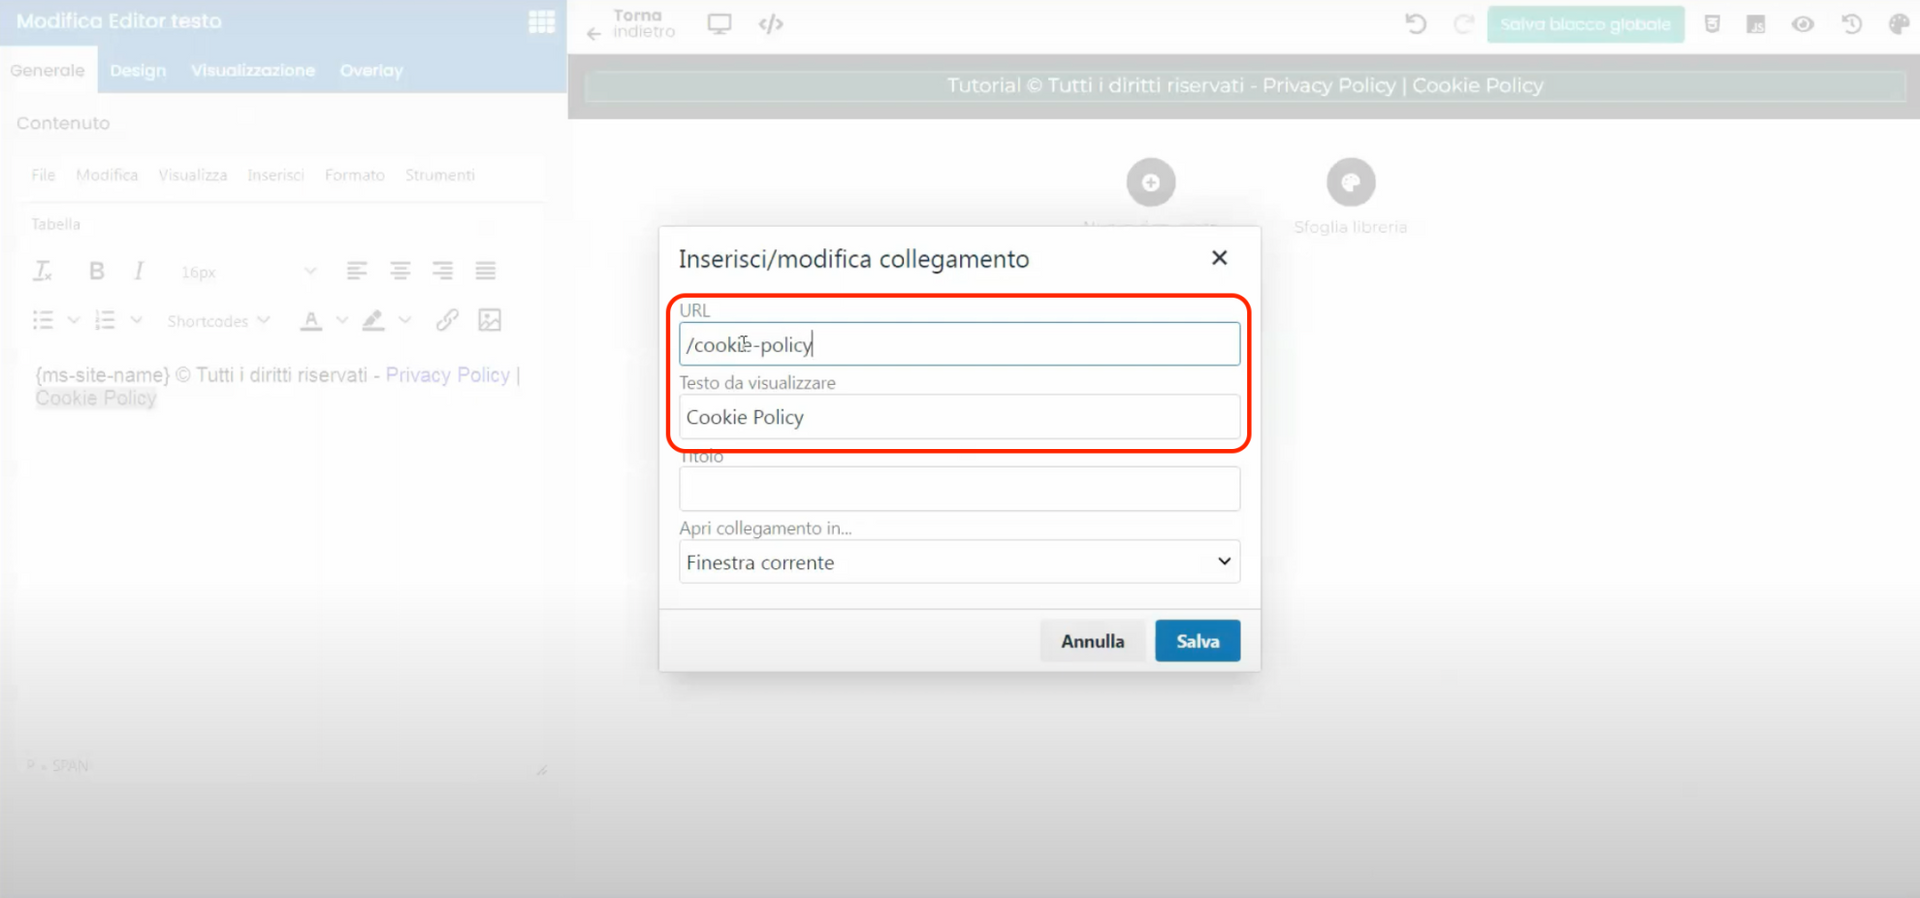
- Write the address of the page we want to link in the "URL" field. For instance, for the Privacy Policy, we would write "/privacy-policy", and for the Cookie Policy, we would write "/cookie-policy".