In this guide, we will see how you can create a form through the FRAMEWORK360 platform.
What is a Form?
Let's start with the basics, a form is a module that can be used as a contact form or as a quote request form, in other words, we are talking about the classic form where you enter your details such as, for example, name, surname, email or phone number.
Let's get started!
Great, now we're ready to see how to create our form!
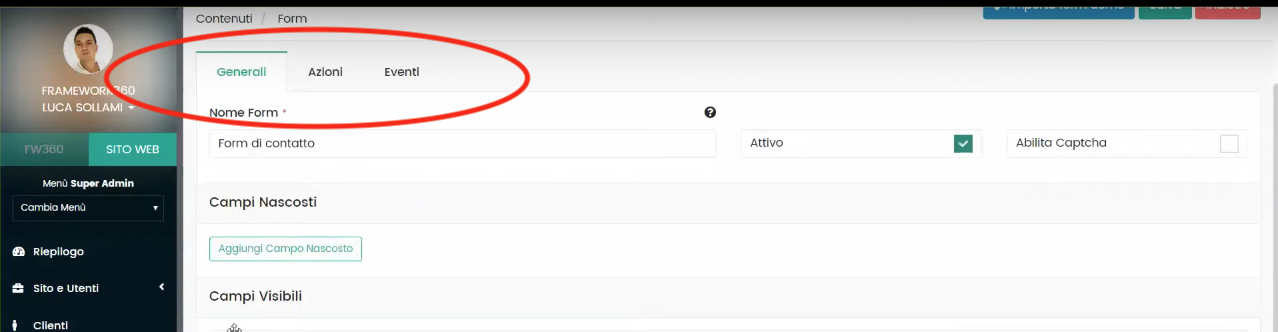
The first thing you need to do, as shown in the figure below, is to go to the menu on the left side of the screen, where you'll find the "Contents" item within which there will be the "Form" item; let's click on "Form".

Once you have entered the form screen, you will need to click on the “Add” button located at the top right corner.
After adding the form, we will be presented with 3 main sections (as shown in the figure):
- General
- Actions
- Events
We will now analyze each of these sections to understand what they are for and how to use them best for creating our form.
What can we do with the “General” section?
In the “General” section, the first thing we can do is give a name to our form, remember to check that there is a tick on “active” as shown in the figure below.

As we scroll down the page, we will set up the “Visible Fields”.
The “Visible Fields” represent the fields where the visitor will enter the data you wish to request.
Let's understand together the steps you need to take to create your fields using as an example the creation of the “Name” field where the visitor will enter their name.
First, we will add the name of the field which in our example will be “Name”. Then we will define the type of field, the field type will be “input”, and in the “Input Type” box, we'll specify what input we need, in our example, the input type will be “text” since our visitor needs to type their name.
In the figure below I illustrate how the page will appear once these first three simple parameters are set:
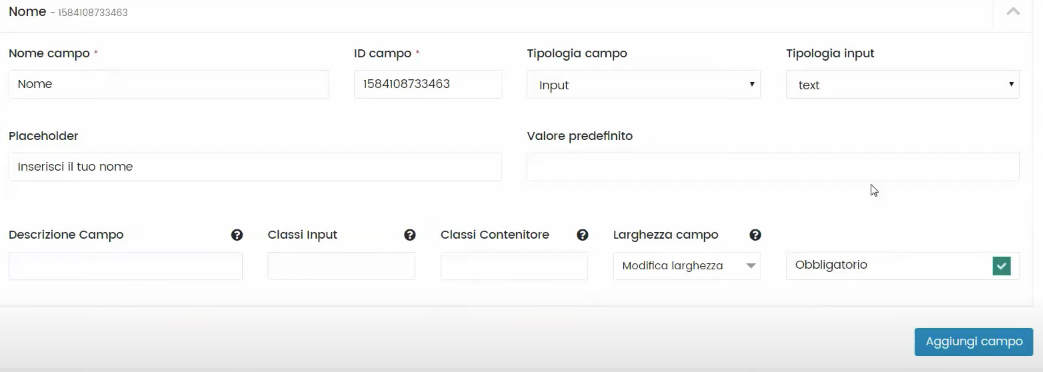
At this point, to complete the configuration of our field we could insert other parameters such as the "Placeholder", that is, the text that appears in transparency where your visitor will need to add their name, or we could make the field mandatory.
Once all the parameters of interest are inserted, we will click on the right-hand option "Add field".
Good, now proceed similarly for all the fields you're interested in, like Surname, Email, Phone number, etc…
What can we do with the "Actions" section?
At this point let's move to the macro-area "Actions". Once clicking on actions the system will give us the possibility to select different functions:
- Register Customer
- Newsletter Subscription
- Generic Inquiry
- Automatic Reply
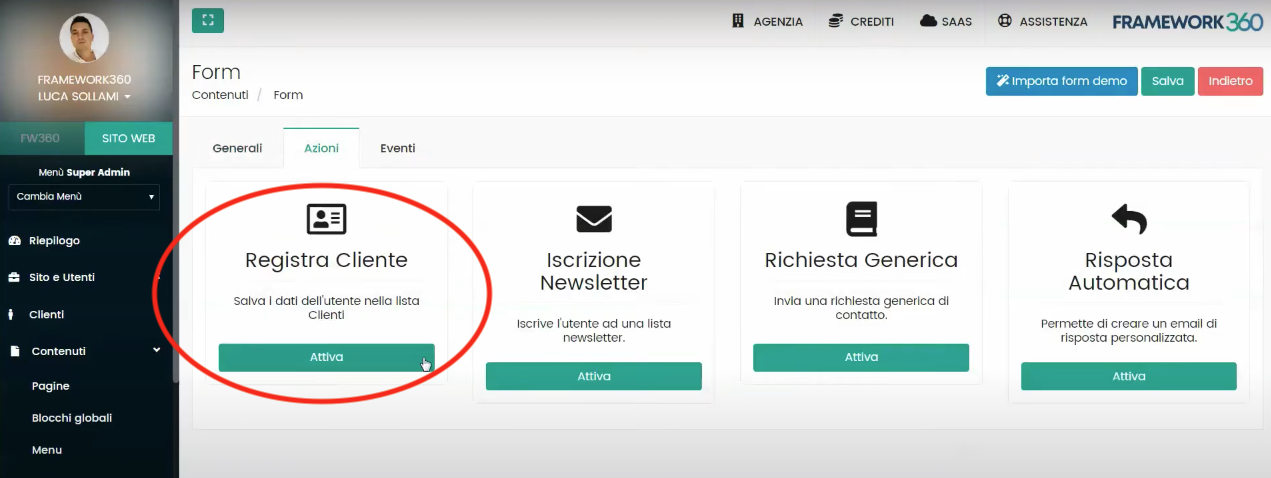
By activating the “Register Customer” function, as highlighted in the image above, you will have the opportunity to record the data provided by the visitor within the customer list (a list that can be found on the left side of the screen above the “Contents” item).
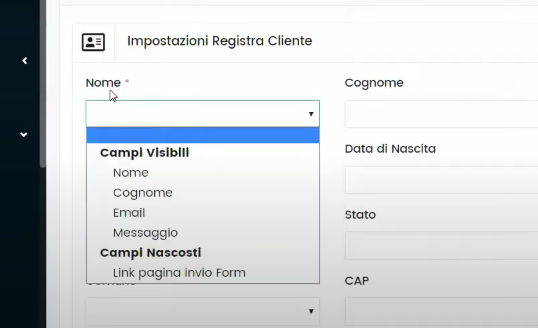
Clicking on “Register Customer” all you have to do is create a correspondence between the fields previously created in the “General” section with the data requested on this page; to be clearer let's make an example: the software in this area will ask you where to source the visitor's name from and through a drop-down menu, where the fields previously created are present, you will need to select the “Name” field.
Through the “Actions” section we can also decide to activate a “Generic Request”.
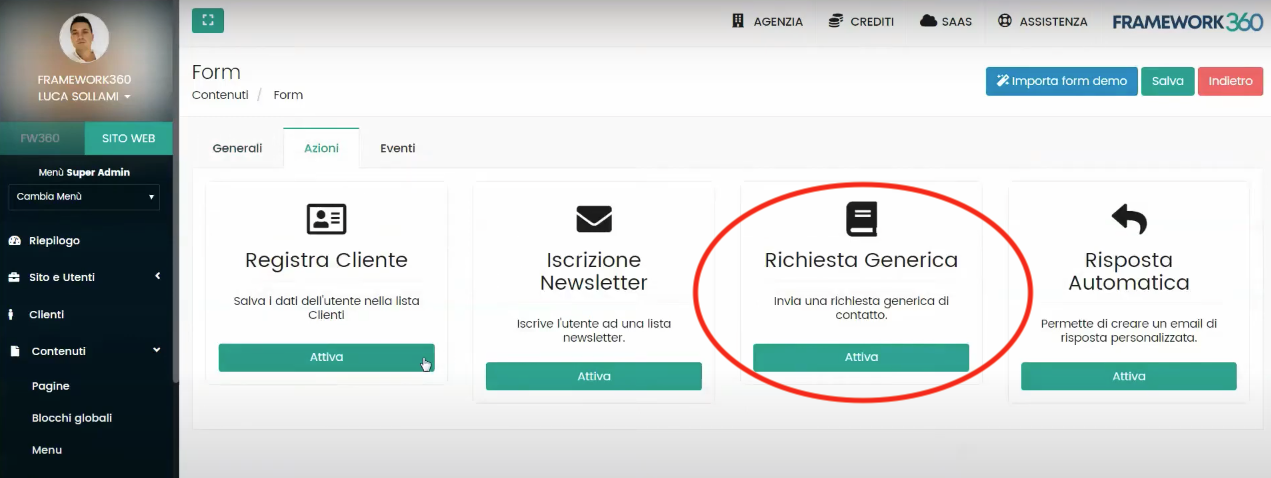
With the “Generic Request” section, we could have the automatic sending of an email when an event occurs, which could be a contact request or a quote request.
In this section, similar to what we saw with the “Register Customers” function, the software will require us to link the requested data with the fields visible in the form.
The software will also give us the possibility to customize both a success and an error email.
Another feature we can activate is the Newsletter Subscription.
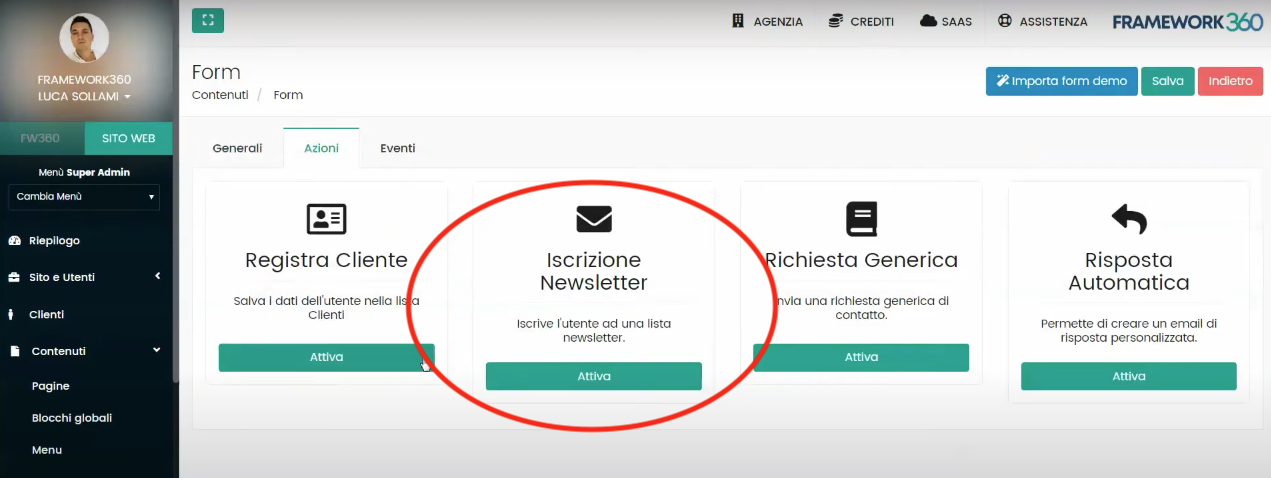
For the newsletter subscription as well, we must perform a field synchronization as seen previously and decide whether we want to draw from a static list (already created) or a dynamic list.

By activating the "Automatic Reply", instead, you can create for example a thank you page that will appear to your visitor once they have left their details; the software will allow you in a very easy way to create a template for your automatic reply screen.
What can we do with the "Events" section?
In the "Events" macro-area, we have the possibility to insert custom JavaScript before submission, after submission, on input value change, or before the confirmation message.

This area will allow those with programming language knowledge to create any content (such as a popup) through JavaScript at one of the aforementioned moments.
Let's look at the "Submission History"
The last feature we are going to look at is the ability to access the "Submission History" section, the access button for which is located in the top right corner as depicted in the figure:
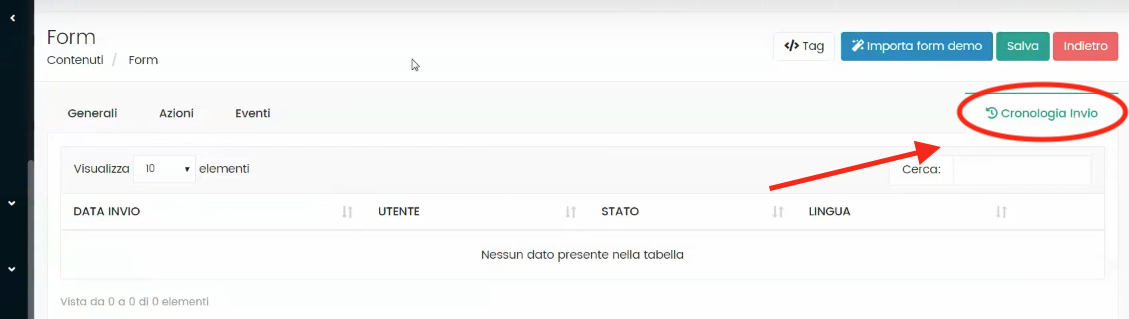
Through the “Submission History” we have the ability to see all the requests that have been sent from this specific form.
Important!
Once you have created the form, you will need to insert it into the page where you want it to appear.
First of all, you will need to save the form you created with its dedicated button:
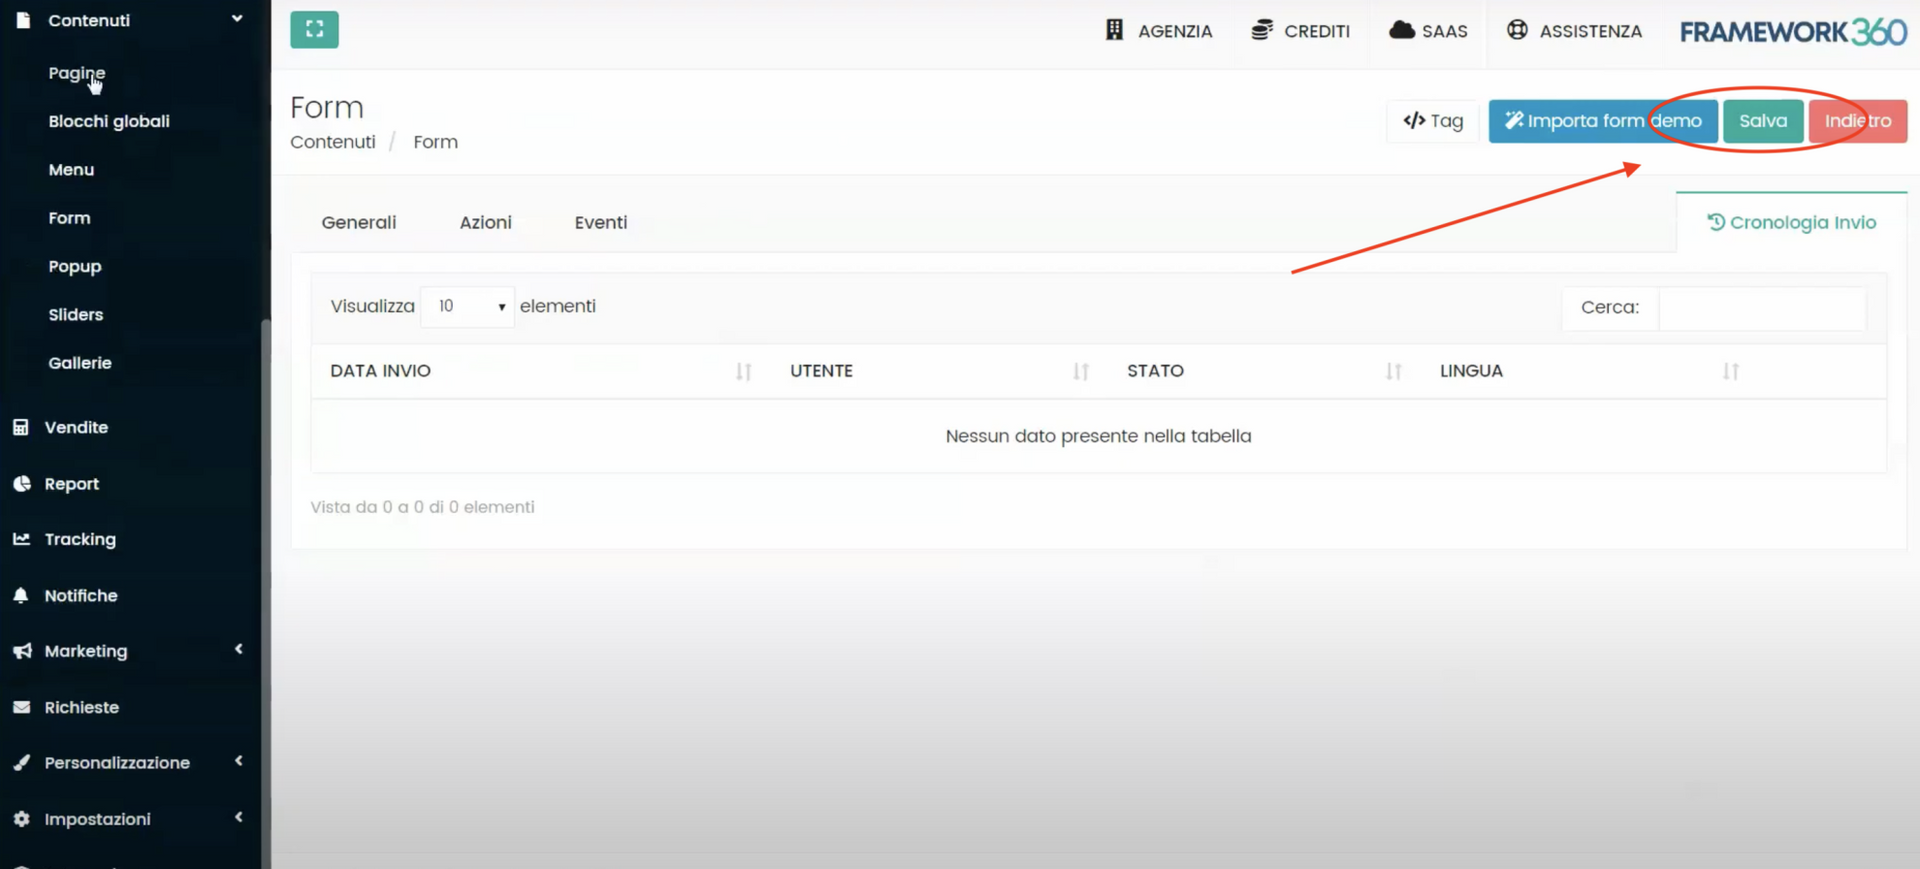
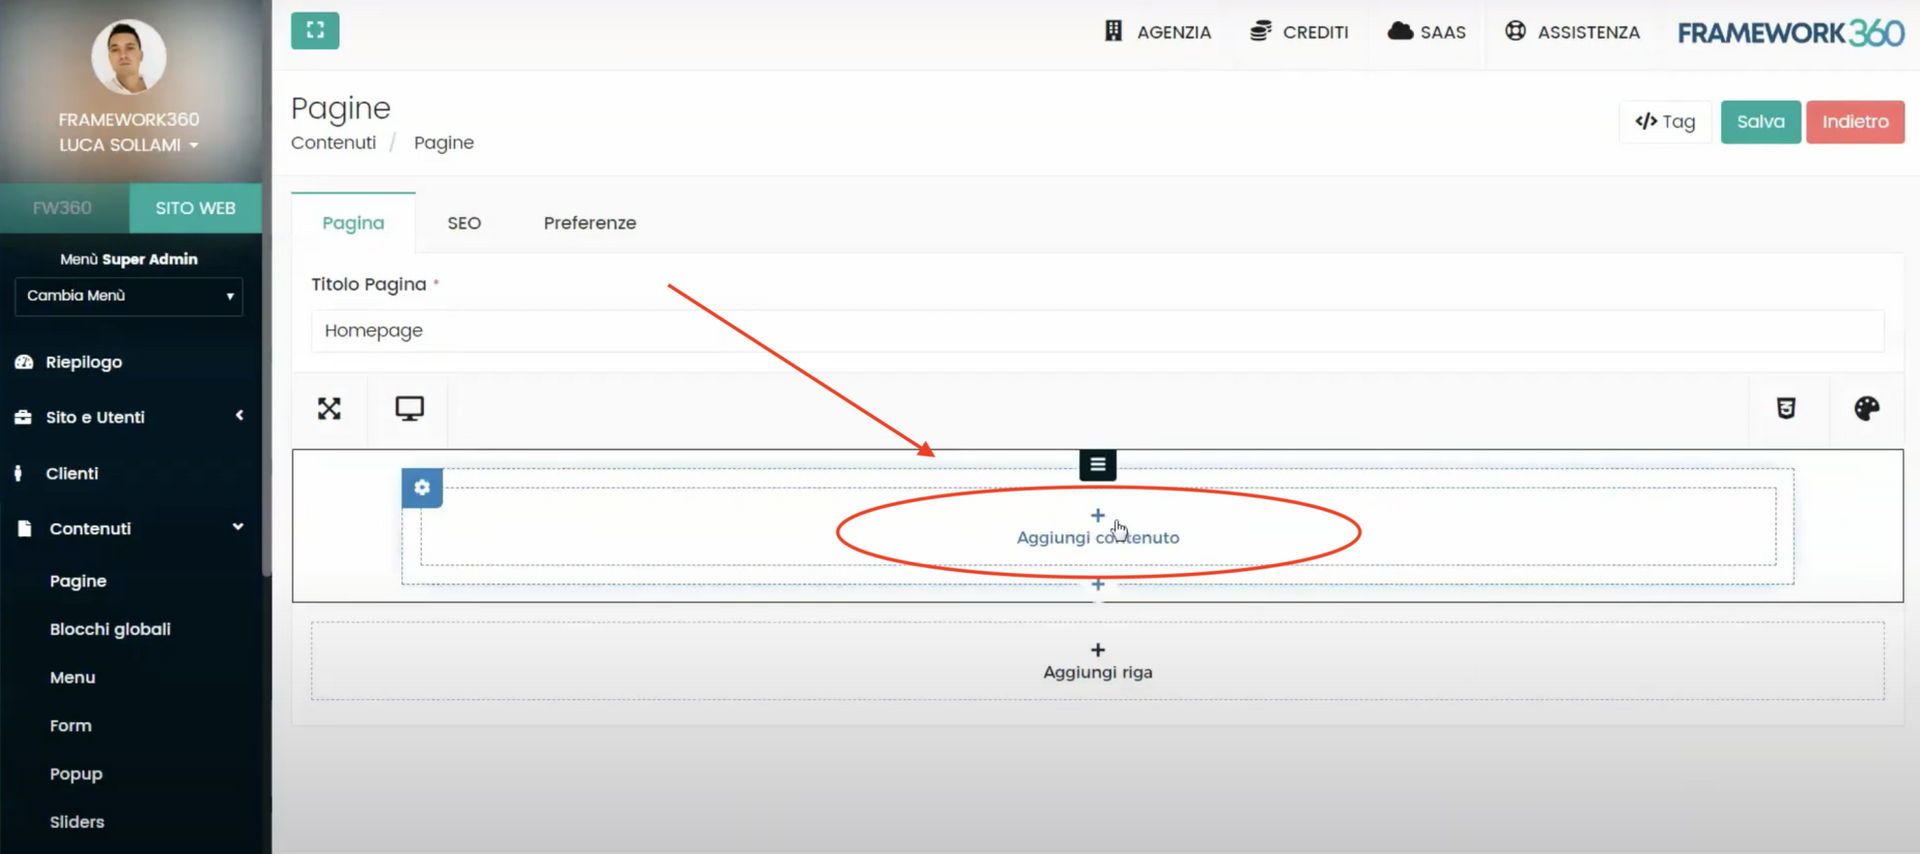
After saving the form, we must go to: Content -> Pages.
At this point, we will see a list of existing pages, now we will select the page on which we want to insert the form or create a new one.
Once we have selected the page, we will add content and select the form we previously created by following these steps:
We select on “Add Row”

We select on “Add Content”
Now we click on “Form”
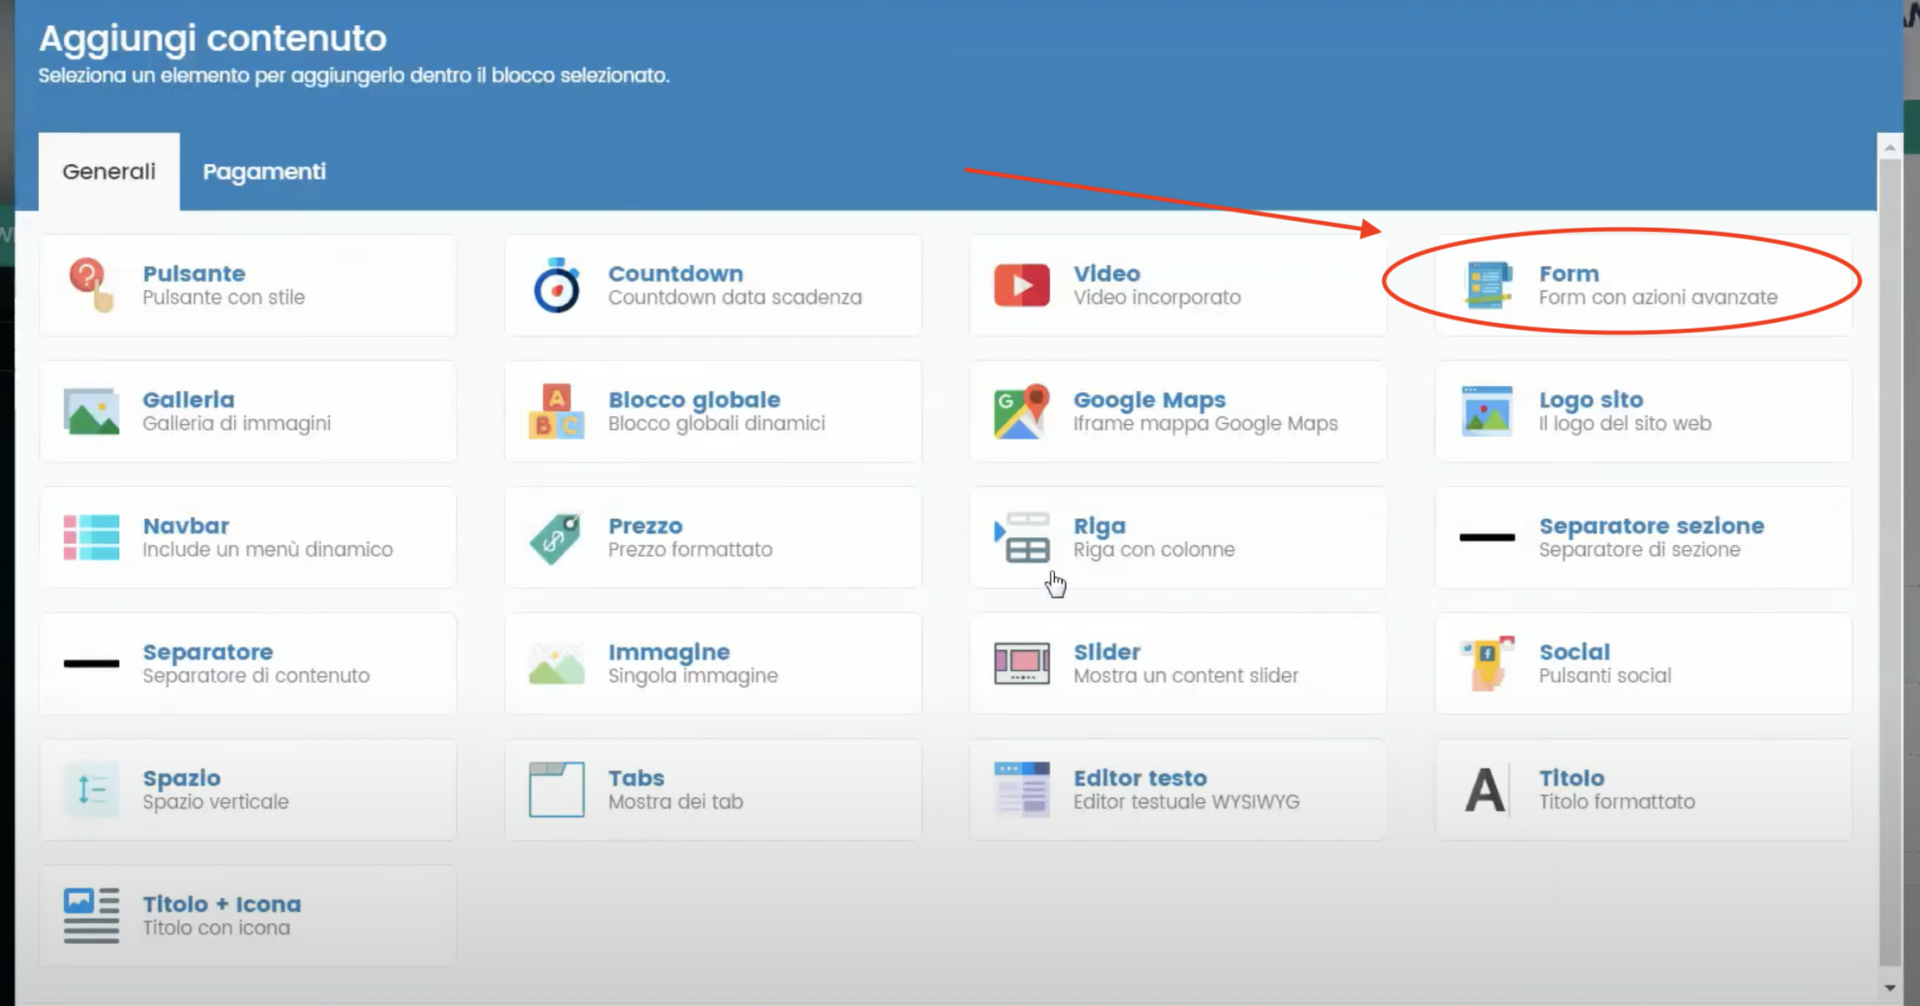
And we go to select the form that we have previously created


