In this article, we will see how to use the Extra Fields Manager plugin, which allows you to add custom fields (an input, a textarea, etc…) in any section of your Framework 360 environment, such as in the customer area or in the sales area.
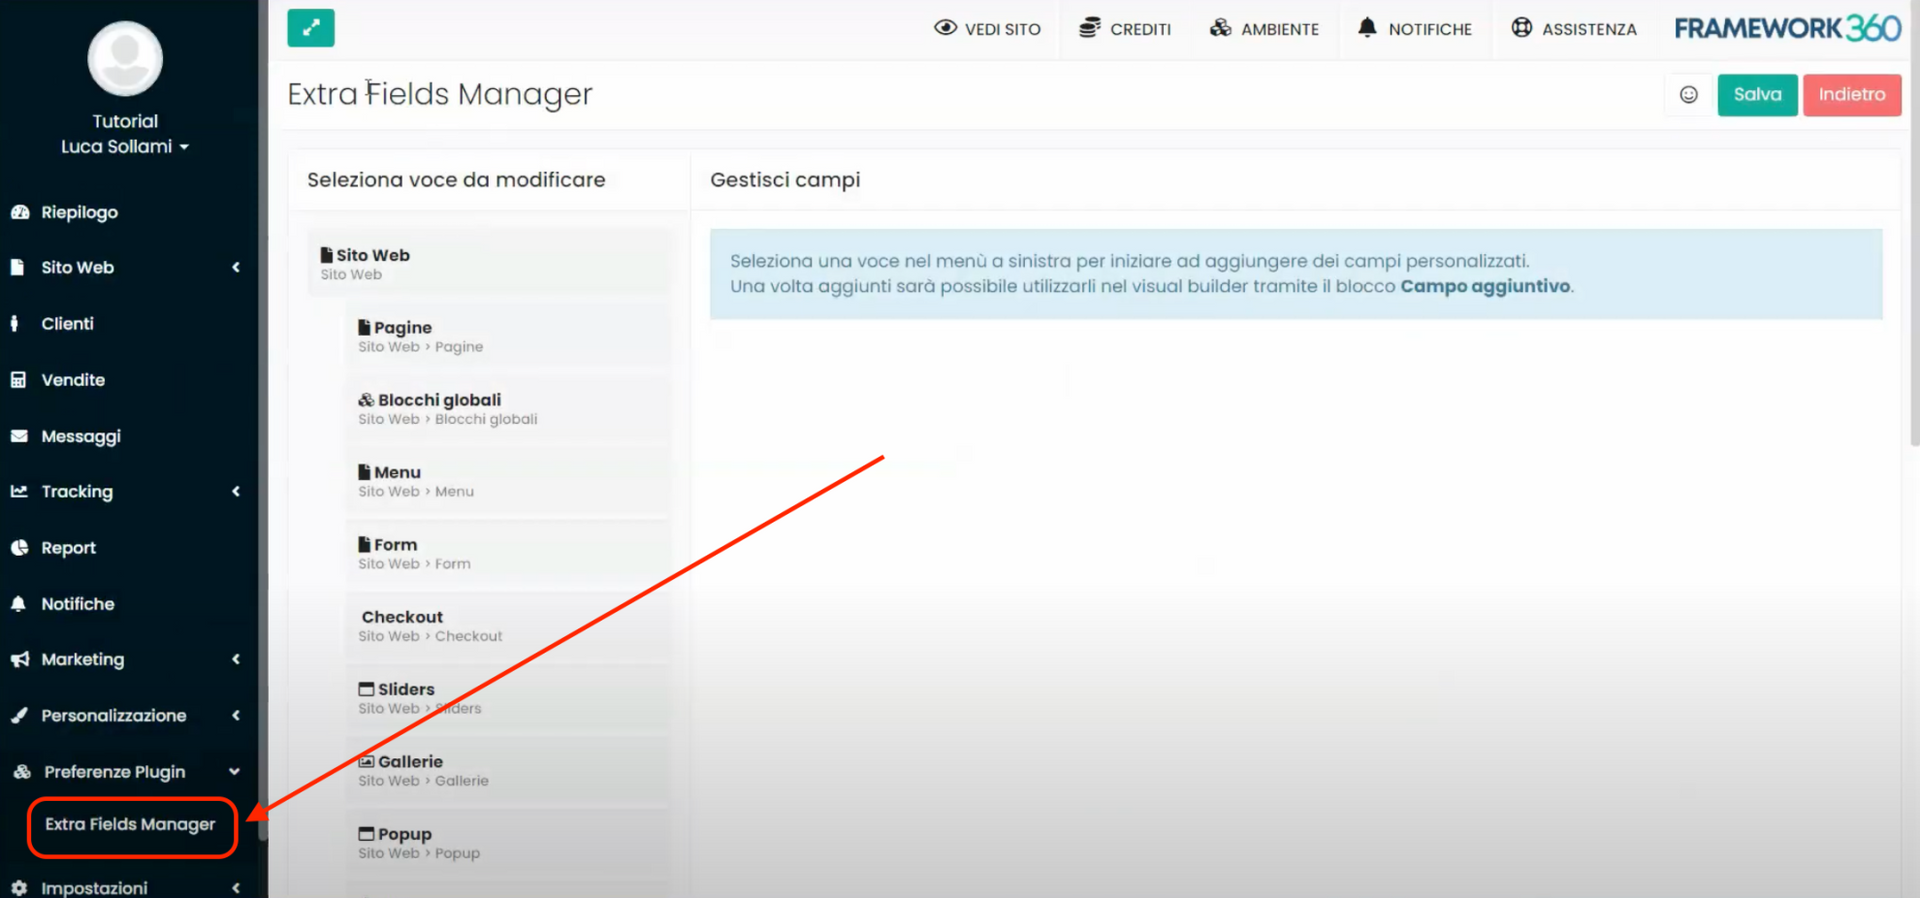
Step 1: Install the "Extra Fields Manager" plugin
First, click on the "Customization" and then on the "Plugins" items present in the sidebar on the left of our Framewok360 environment. Once inside the "Plugins" section, search for the "Extra Fields Manager" plugin in the search input and install it.
Step 2: Add a new custom field
After installing the "Extra Fields Manager" plugin, we can go to the plugin preferences section to manage the settings of each individual field we want to add. To access preferences, we need to click on the "“ Plugin Preferences” and then on the “Extra Fields Manager” item, located in the left sidebar of our Framewok360 environment.
Inside the customization screen, we will notice that all the items from our environment's sidebar are replicated on the left. We simply need to position ourselves on the item where we want to insert our custom field.
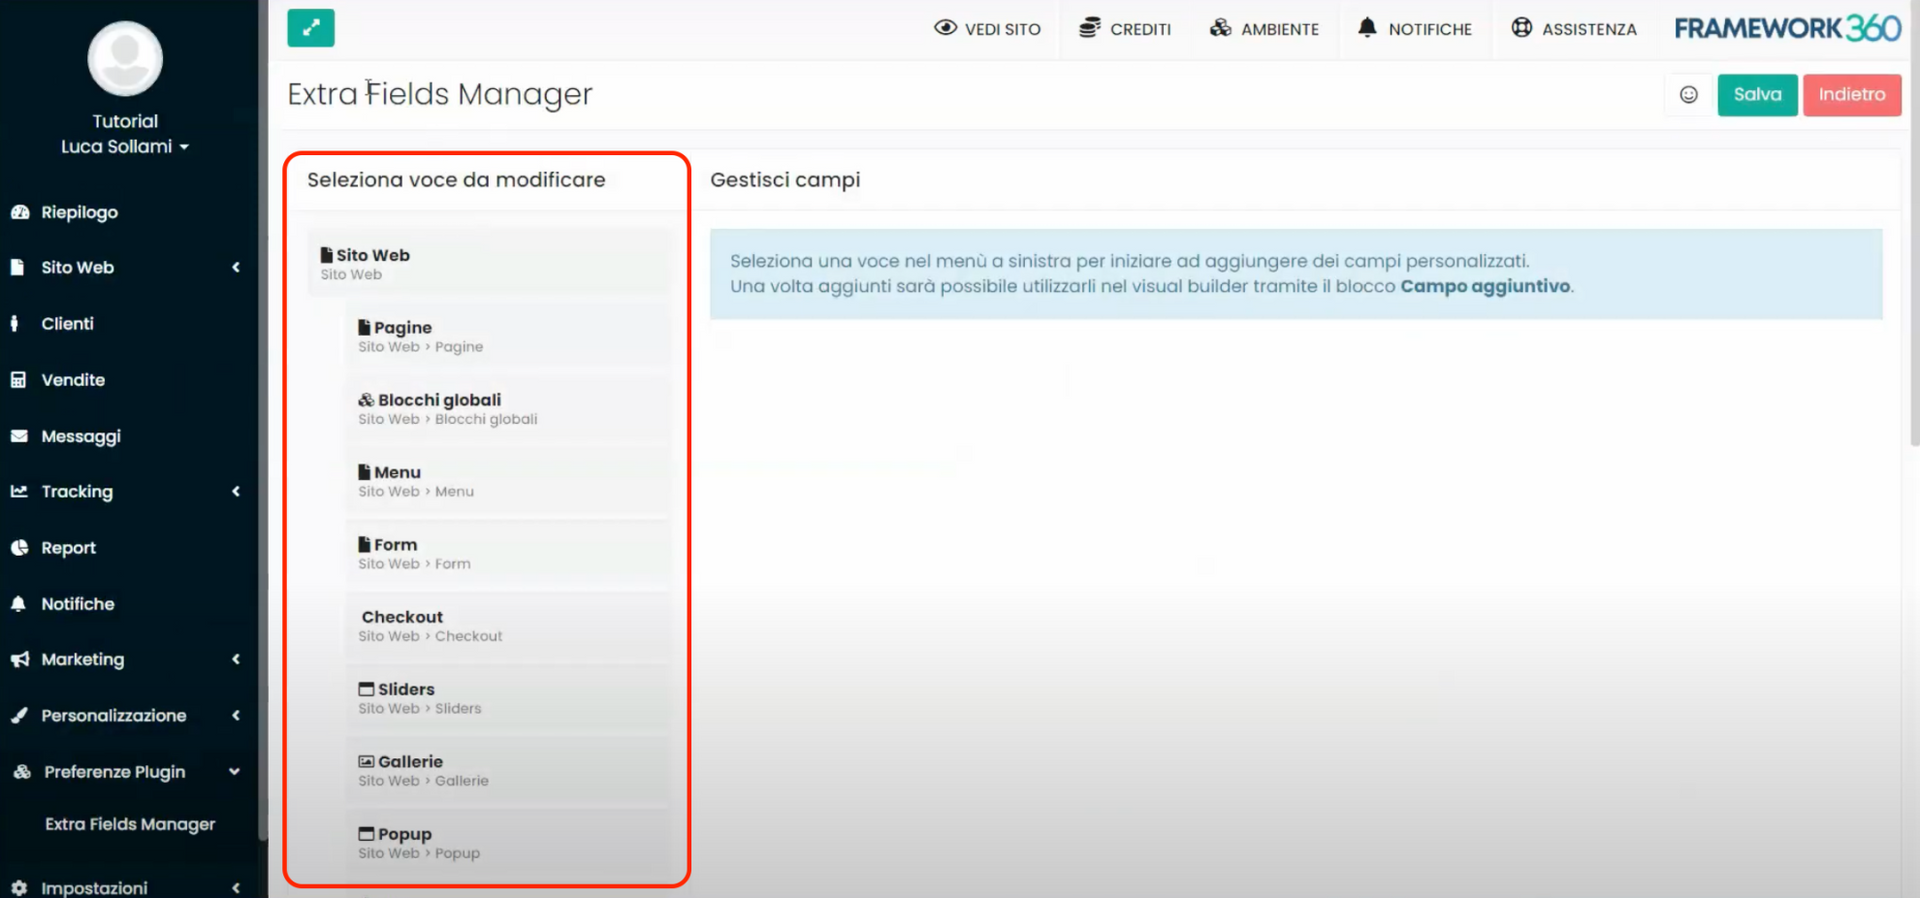
After positioning ourselves on the item, on the right side of the screen we will see the commands to add our custom field.
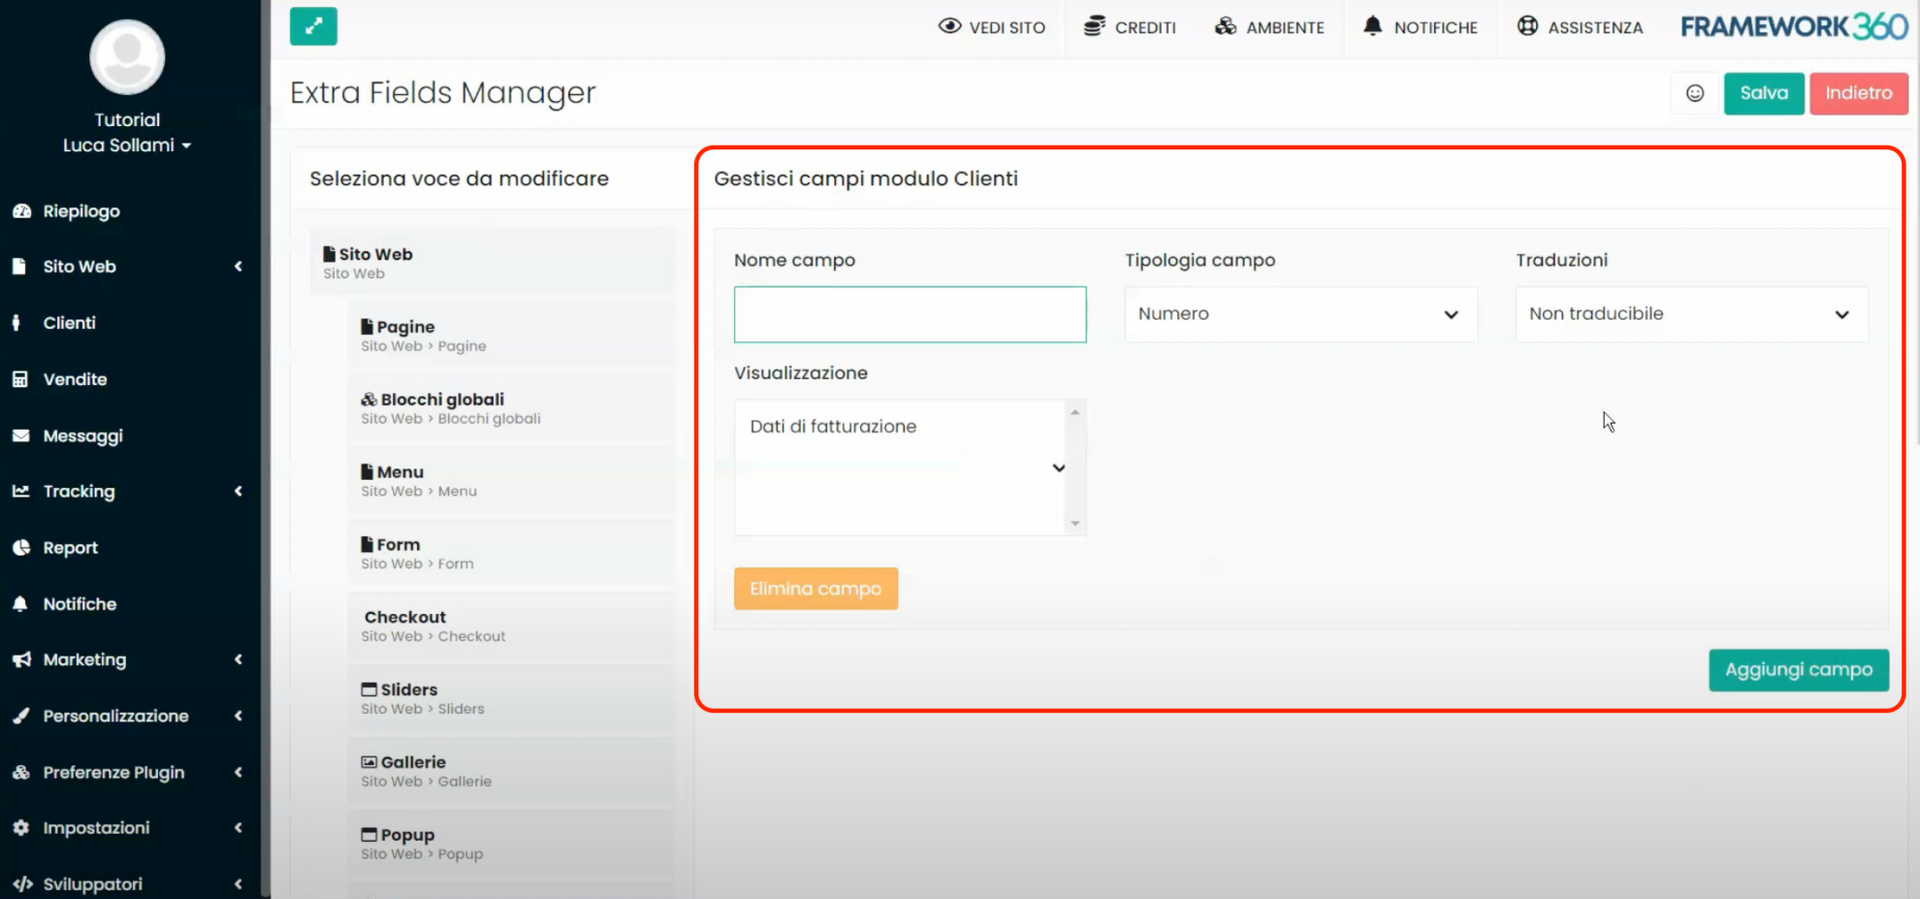
In this section, you will be asked to enter the name of the field, its type, and other options.
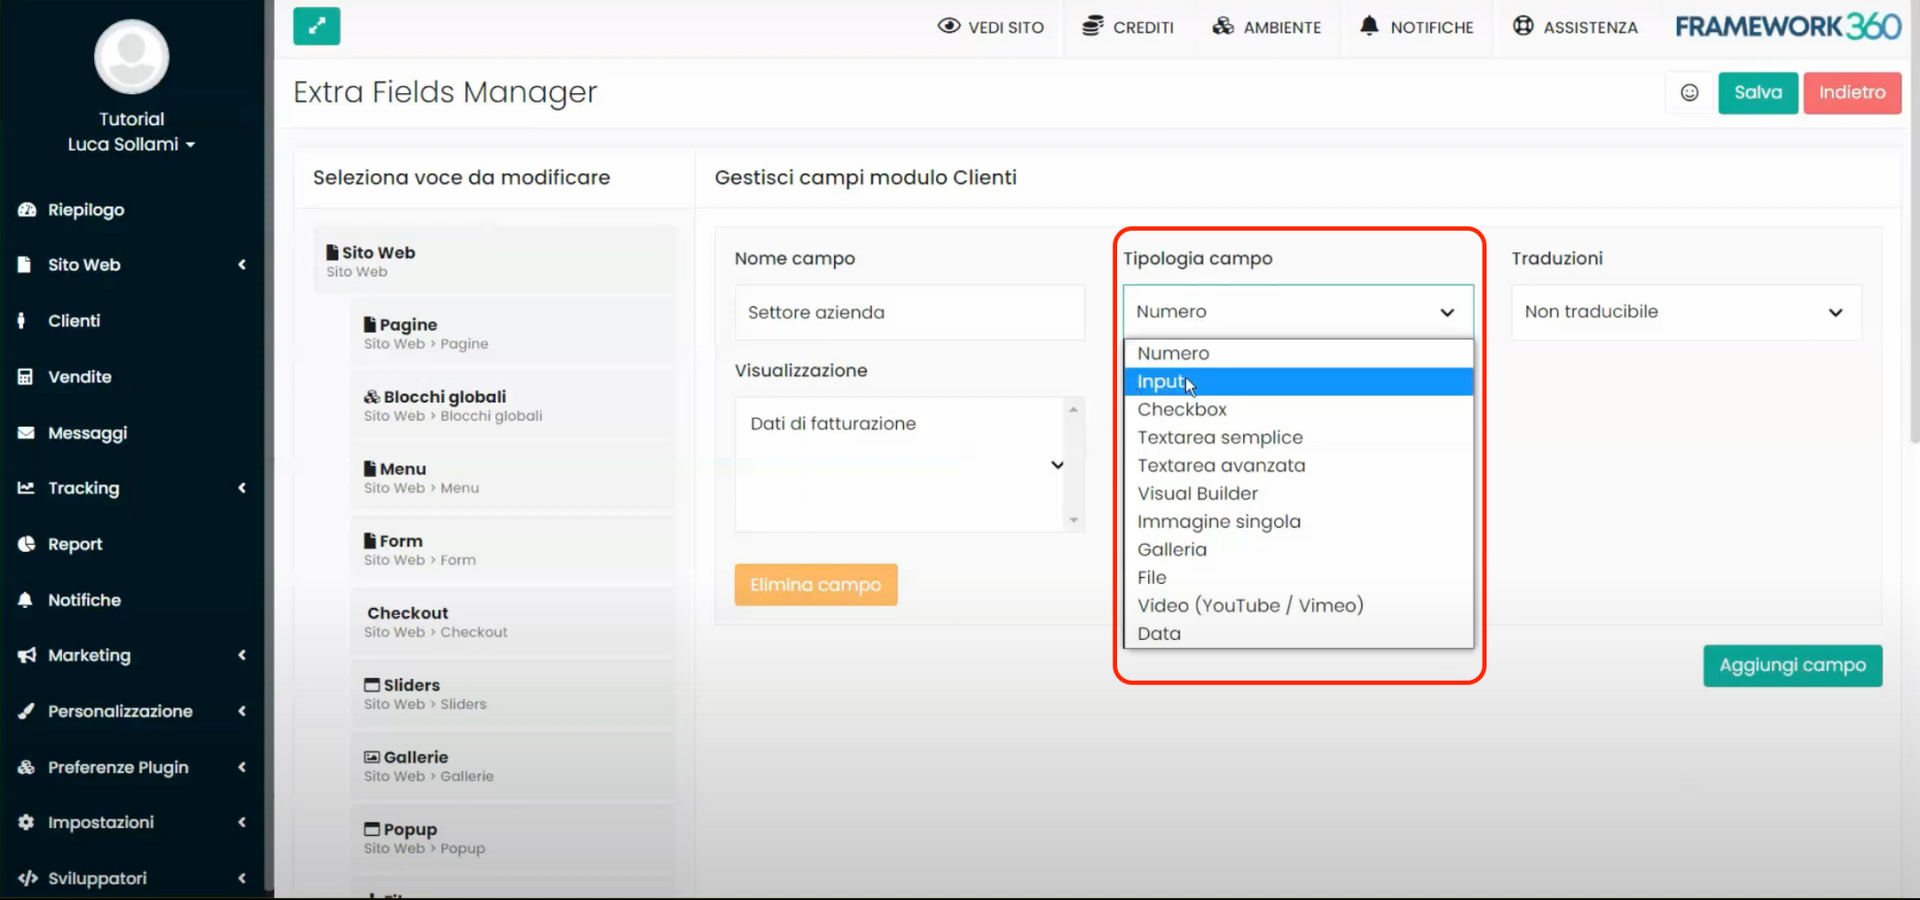
The field types that you can add are as follows:
- Input: a free text field where you can enter any type of content
- Number: a numerical field
- Checkbox: a multiple-choice field with one or more options
- Simple Textarea: a larger text field where you can enter text
- Advanced Textarea: a text field with a visual editor that allows you to also add elements like bold, underline, and others
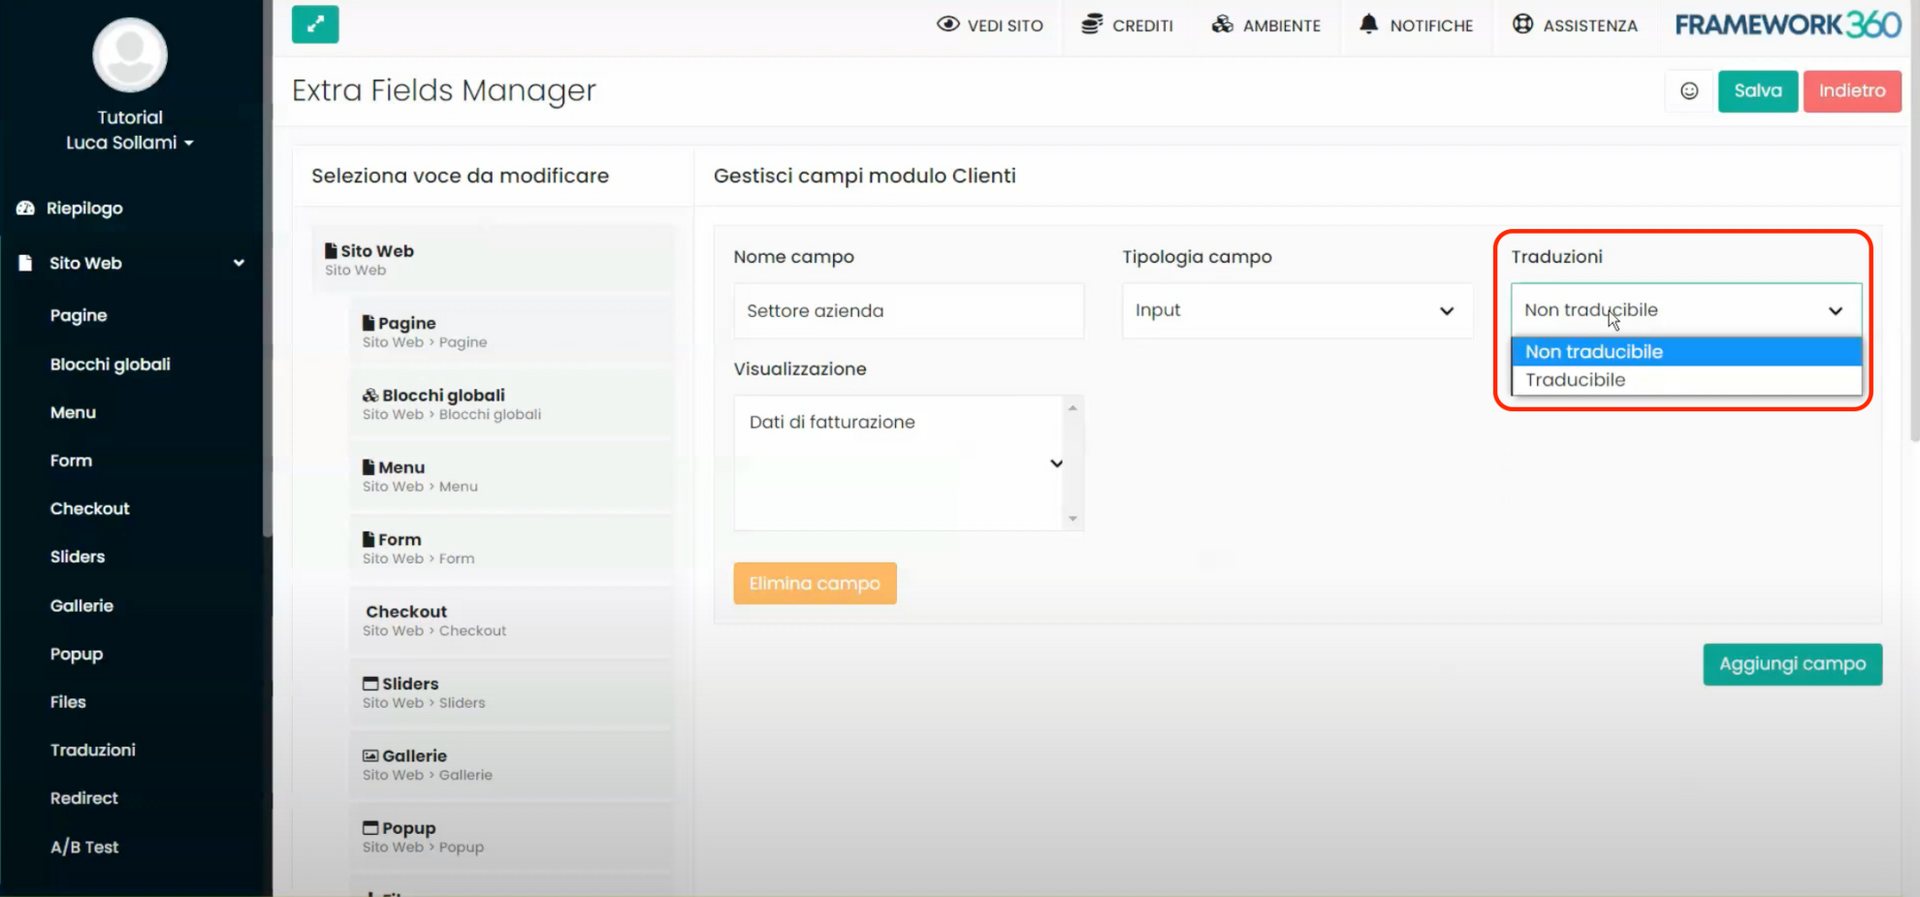
Within the "Translations" section, you can also decide whether to make the field translatable or not. To specifically learn how to perform translations, I invite you to consult the dedicated tutorial by clicking here.
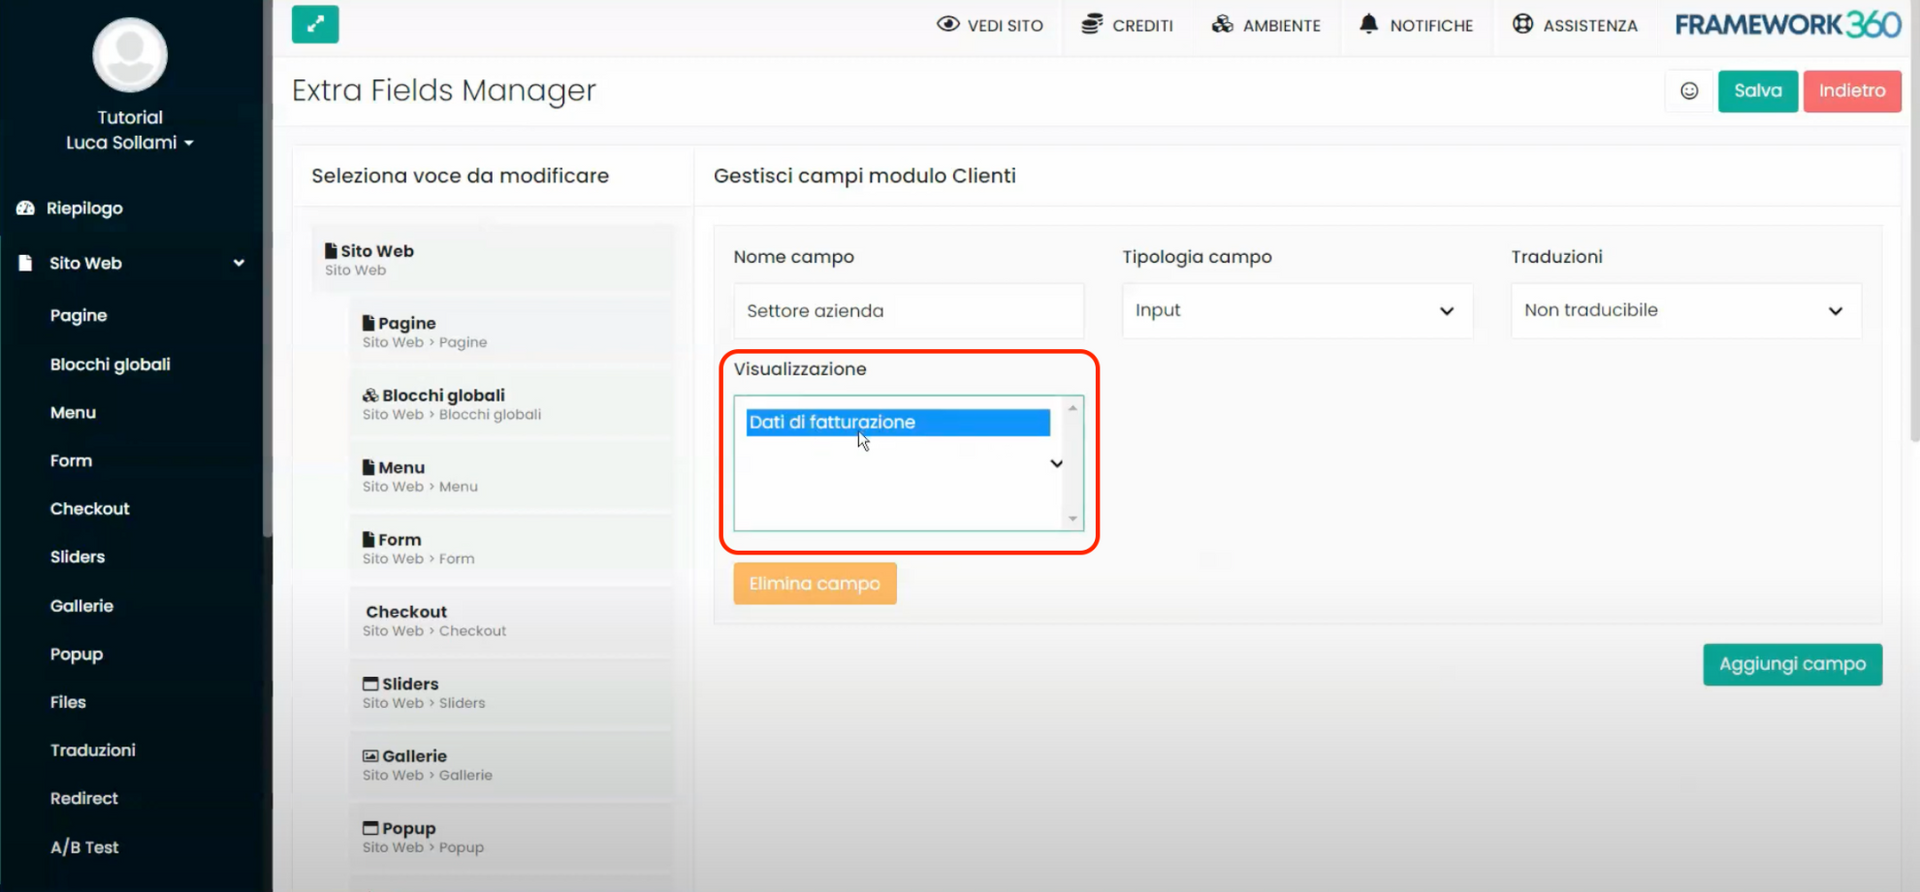
Finally, within the "Display" section, you can decide whether to show the field in other sections of your environment.
Once the field setup is complete, by clicking the green "Add Field" button at the bottom right, you will save the field and find it in the section of the environment where you initially decided to insert it.
Example: Adding the "Company Sector" field to customer information
Let's now look at an example of a field we might add to our environment: suppose we want to add a field that allows us to enter the business sector of each client's company that we register in our Framework 360 environment. To do this, we must follow these steps:
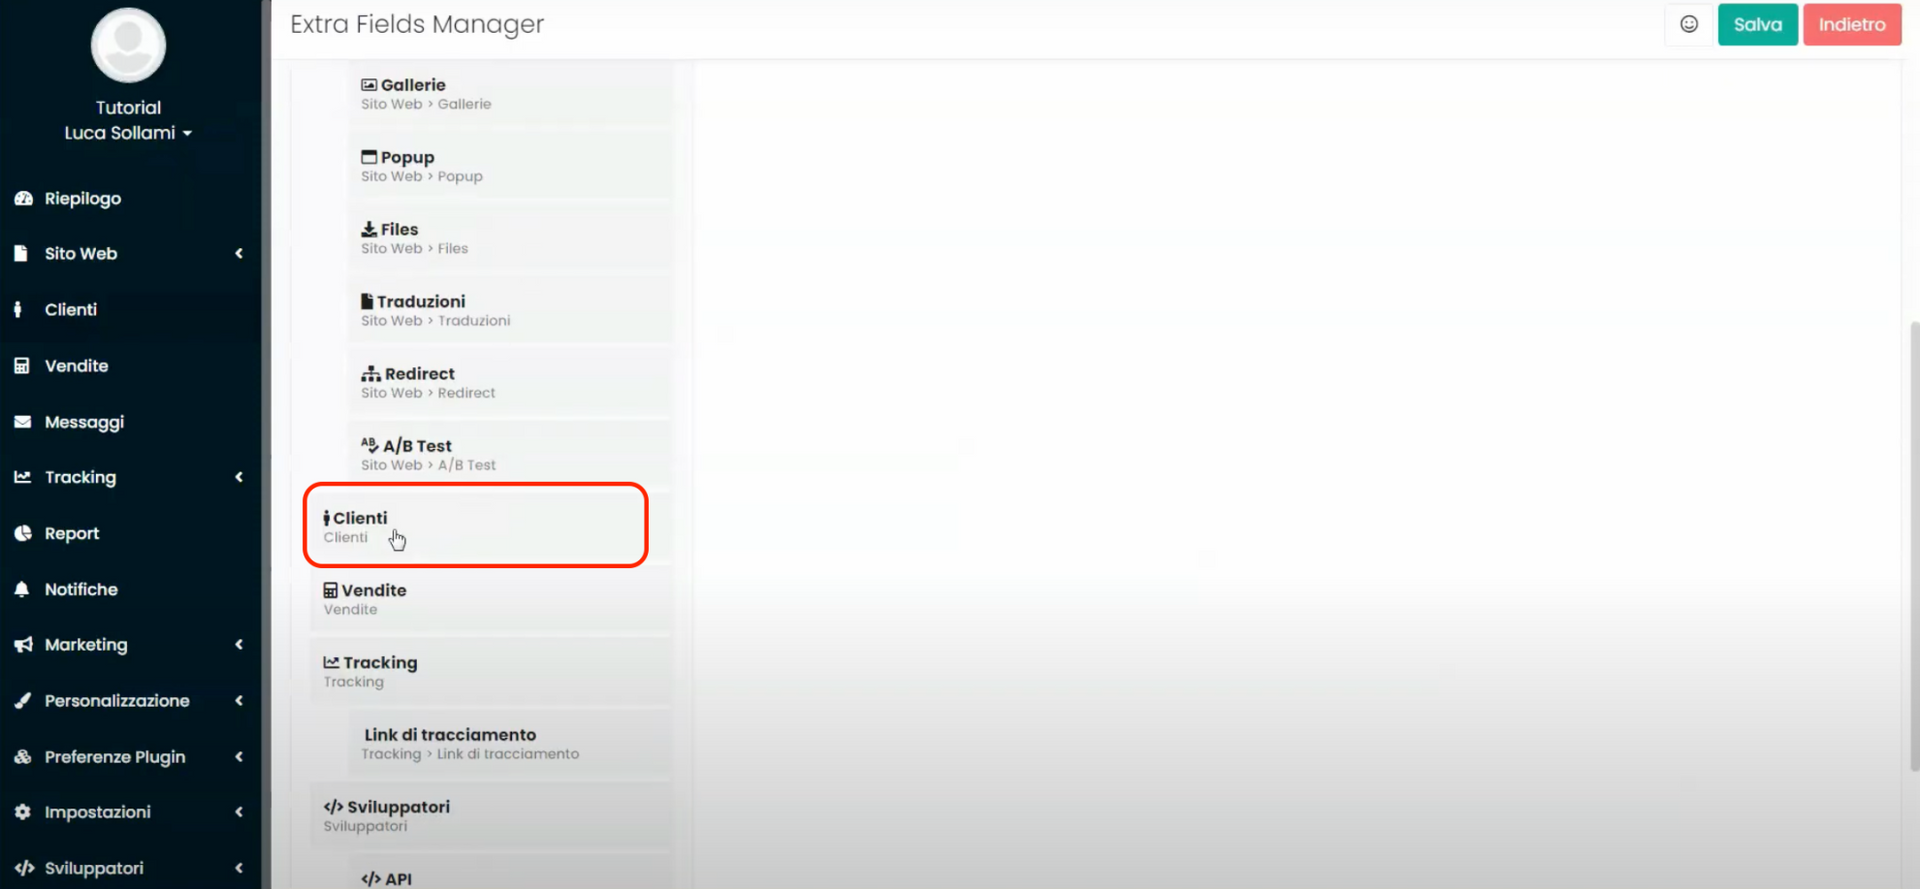
- Access the plugin preferences by clicking on "Plugin Preferences" and then on "Extra Fields Manager", located in the left sidebar of our Framewok360 environment.
- Within the customization screen, as mentioned before, we will notice that all the entries of our environment's sidebar are replicated on the left side, select the "Customers" entry.
- Let's now move to the right side of the screen and enter the name "Company Sector" within the "Field Name" entry.
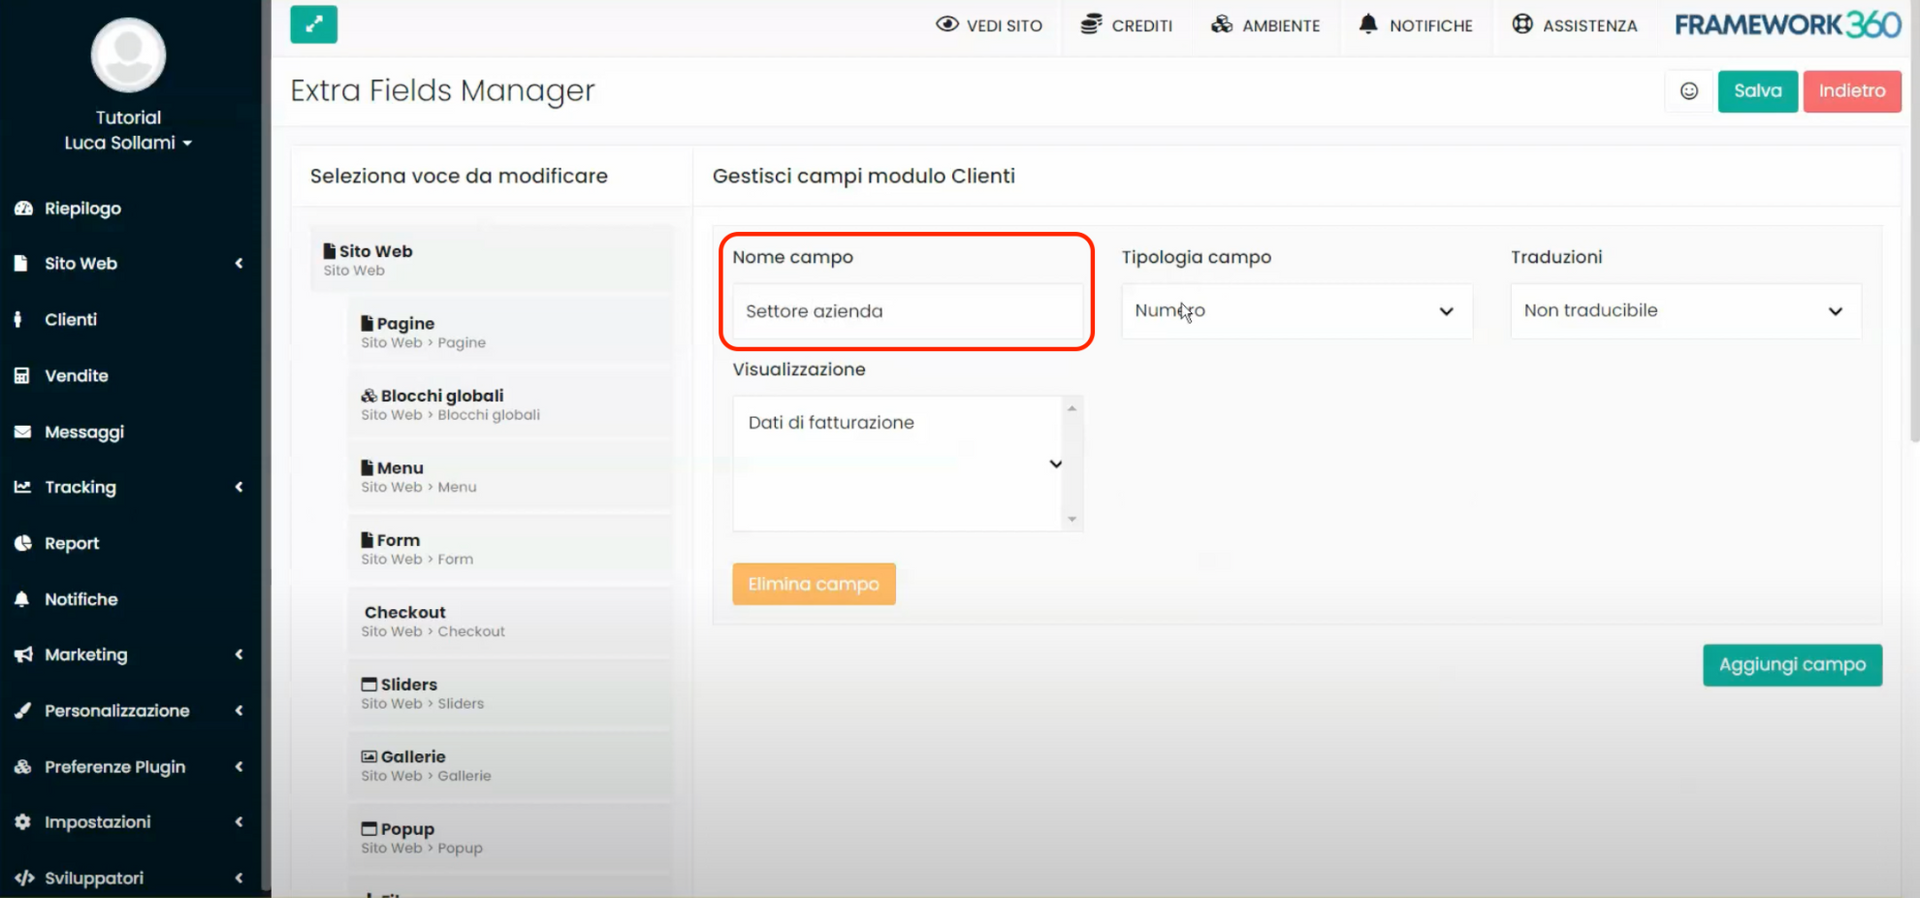
- Insert the field type, in our case we will enter “Input”.
- Set the field as "Not translatable".
- Within the "Display" item select the option "Billing Data", this will allow us to see the company's sector also under the "Billing Data" heading when a customer places an order from our website.
- Once the field is saved, if we go to the "Clients" section of our environment's sidebar and click on a client, within their profile we will find a new tab called "Additional fields". Inside this tab, there will be an item called "Company sector" where we can enter the industry of the client's company, as shown in the following figure. For example, if we have a client named Hotel Milano, we could enter "Tourism" or "Hotel" as the business sector.

This will help us keep track of the personalized information that we consider important for our business, should such information not already be present within the default environment.


