Within this guide, we will see how to enable a login for a customer who might be unable to register on their own.
Step 1: Manually add the customer's data
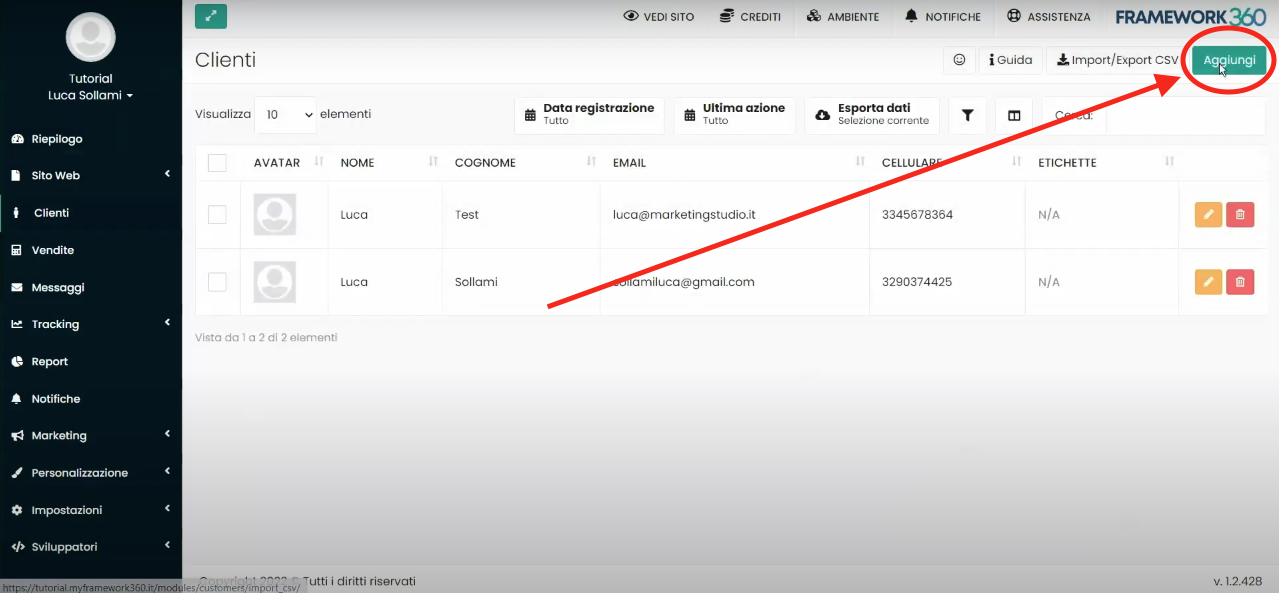
To enable a login for a customer, first, we must go to the Customers section in the main menu of Framework360.
Once inside the customer area, we click the green button at the top right Add and manually enter the customer's data.
Step 2: Enable Login
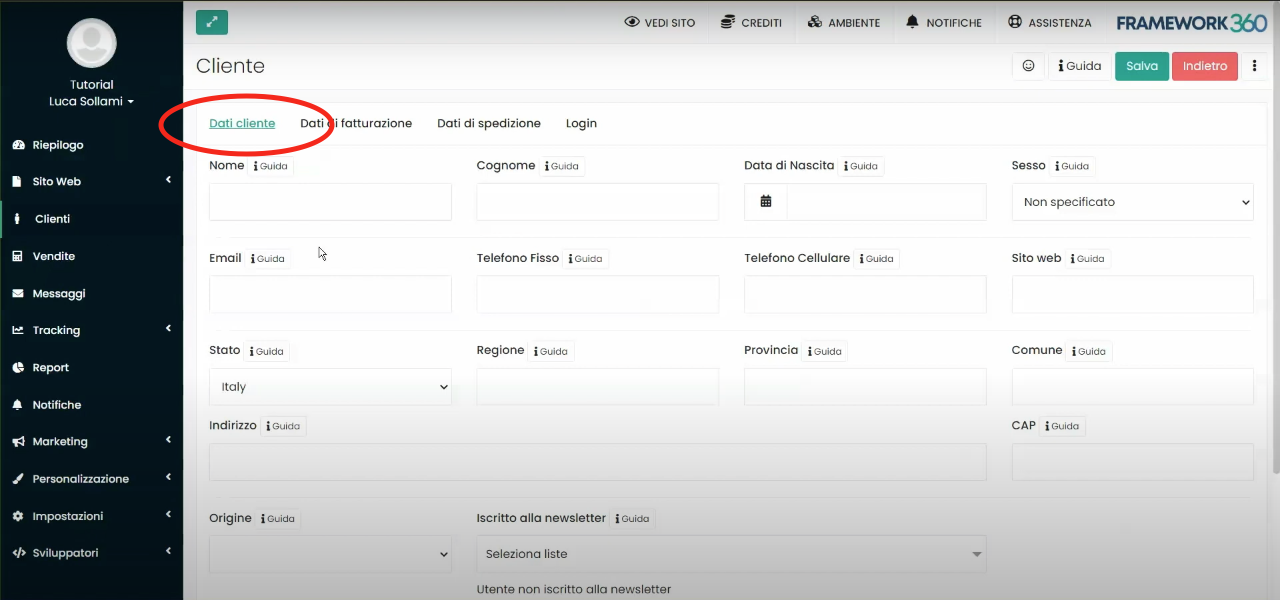
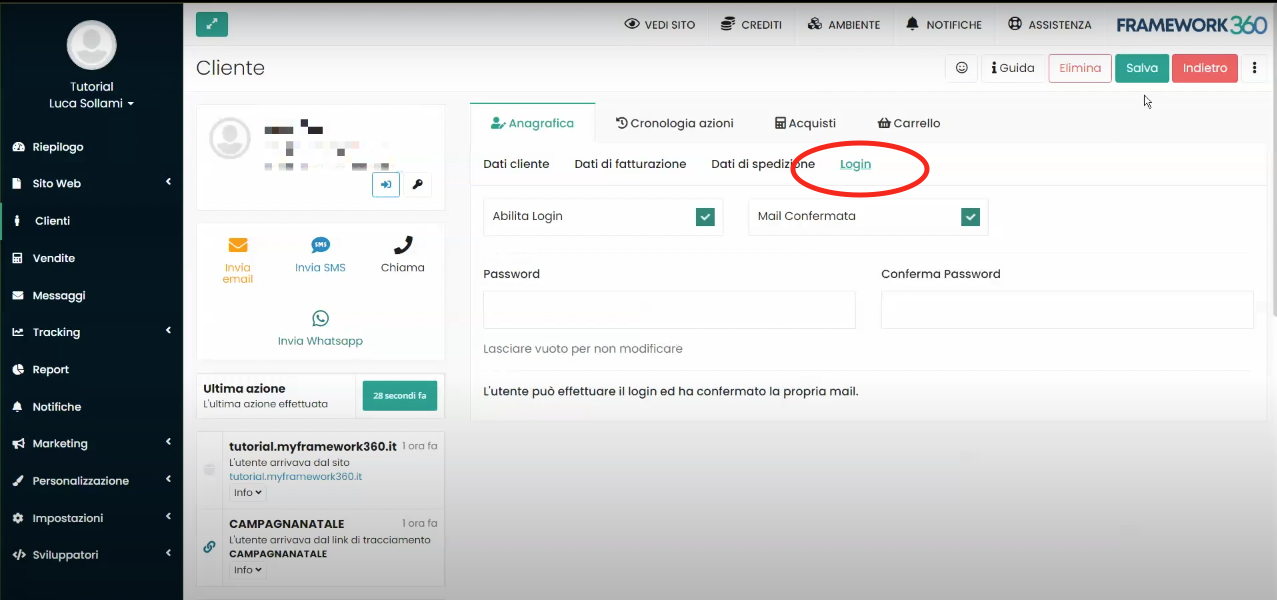
After manually entering the customer data in the Customer Data tab, as shown in the previous figure, we need to go to the Login tab and check the box for Enable Login to actually enable the login.
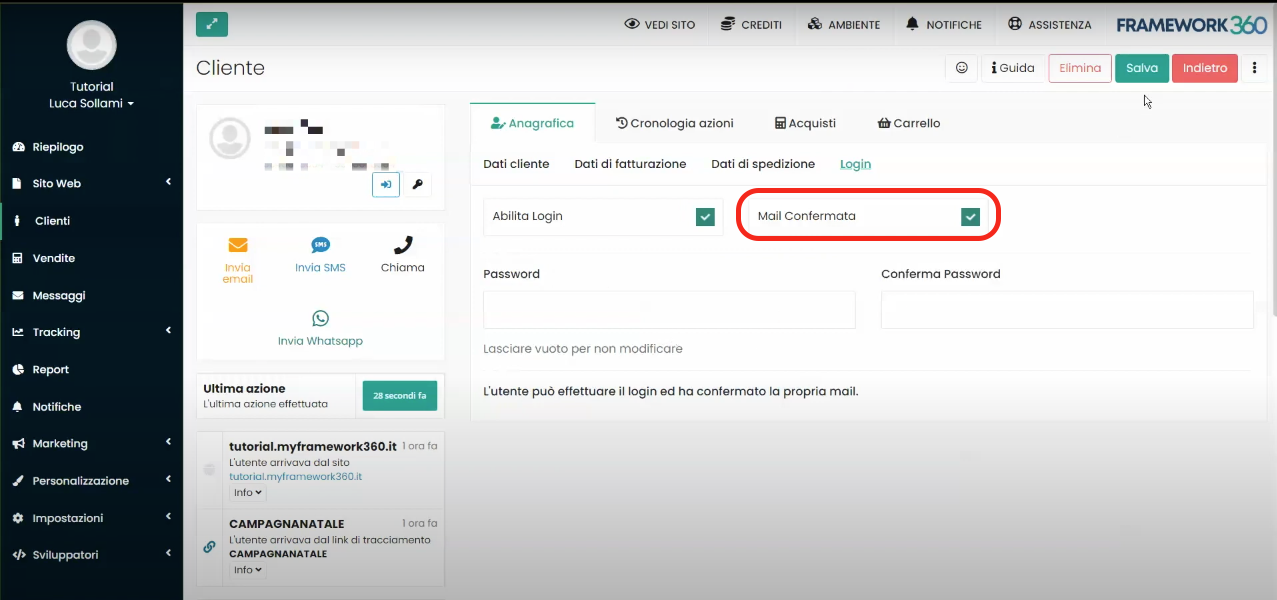
Step 3: Confirm the Email
Still within the Login tab, we need to confirm the customer's email.
To confirm the customer's email, tick the Confirmed Email box as shown in the following figure:
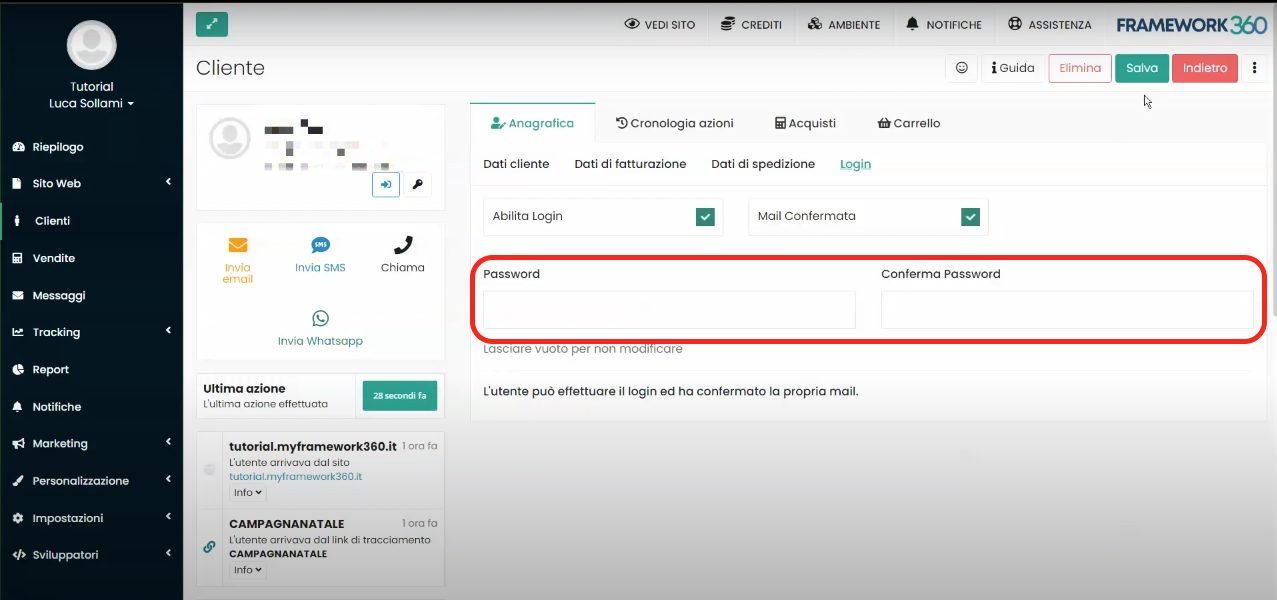
Step 4: Enter the Password
Finally, still inside the Login tab, we must enter the password through which our customer will be able to access their personal area.
The password must be entered in the Password and Confirm Password fields.
Once the above steps have been correctly completed, we click on the green button at the top right Save to save the customer's personal details entry into the system.


