In this guide, we will take a look at what the Customer Resources plugin is and how it works.
The Customer Resources plugin allows us to add a tab in the Customer Area where it's possible to insert documents or files that customers can download for free or for a fee.
Step 1: Install the Customer Resources Plugin
To install the plugin, we need to go to the Plugins section through the main menu of Framework360 following these steps:
Customizations > Plugins
Once inside, we search for our Customer Resources plugin and install it.
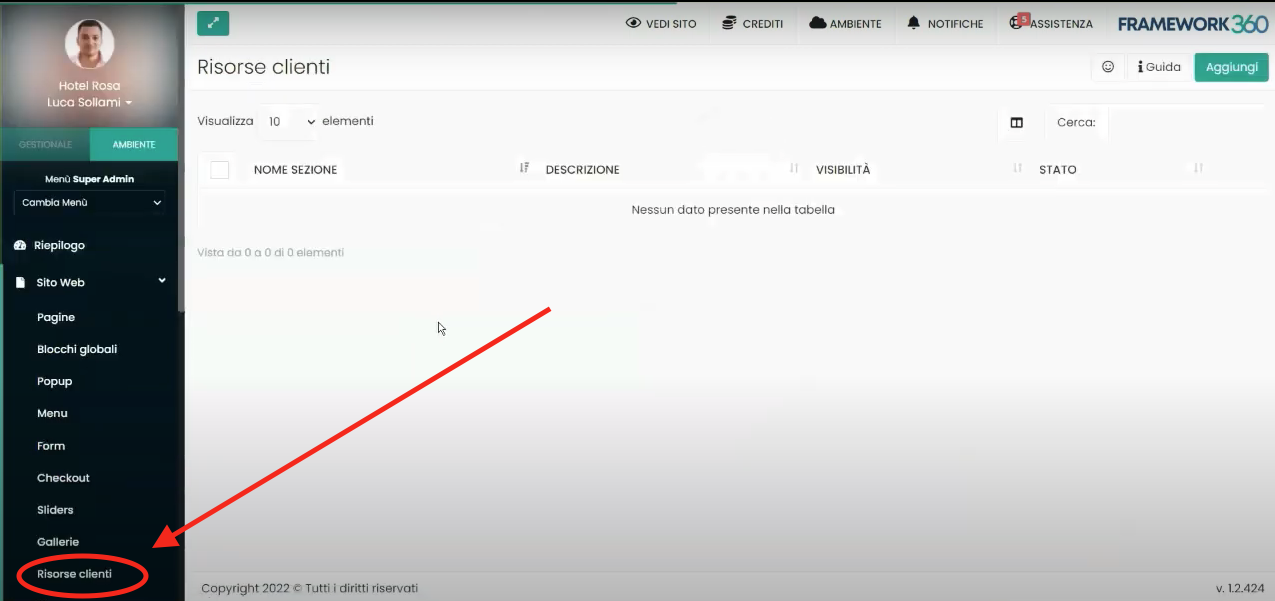
Upon completion of the installation, we will find the plugin within the main menu under the Website item as shown in the figure:
Step 2: Adding the User Area
Now let's make the User Area available within the main menu of our website.
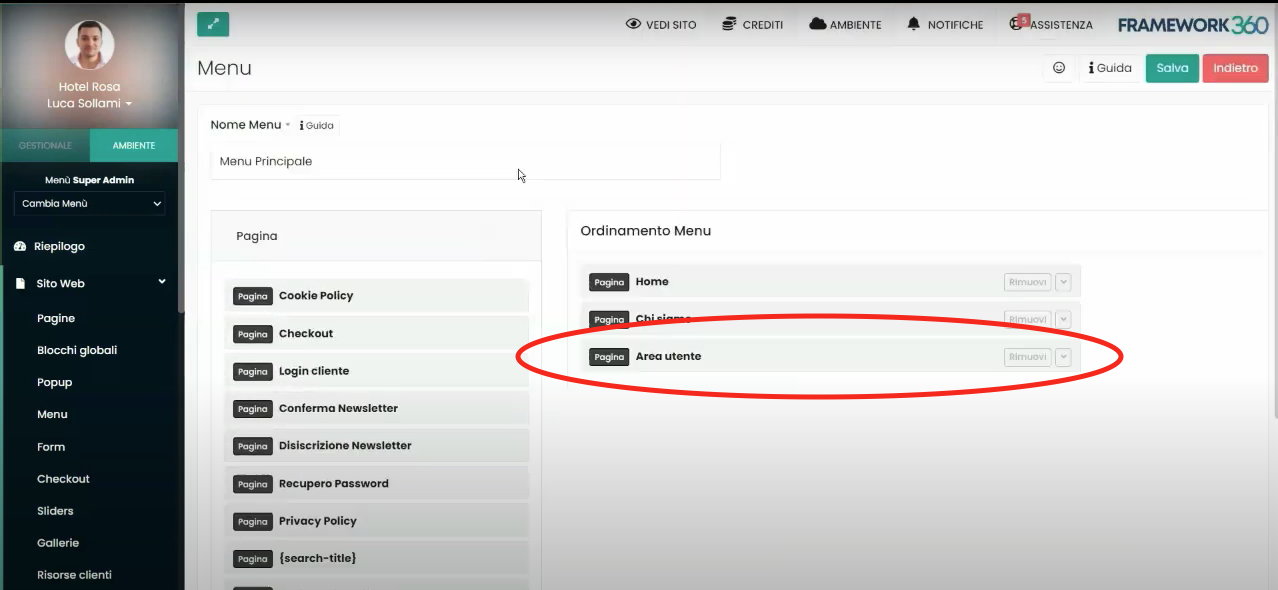
To do this, we should navigate to the submenu Menu within Framework360's main menu by following these steps:
Website > Menu
Once inside, click on the item Main Menu and proceed to add the User Area into the menu:
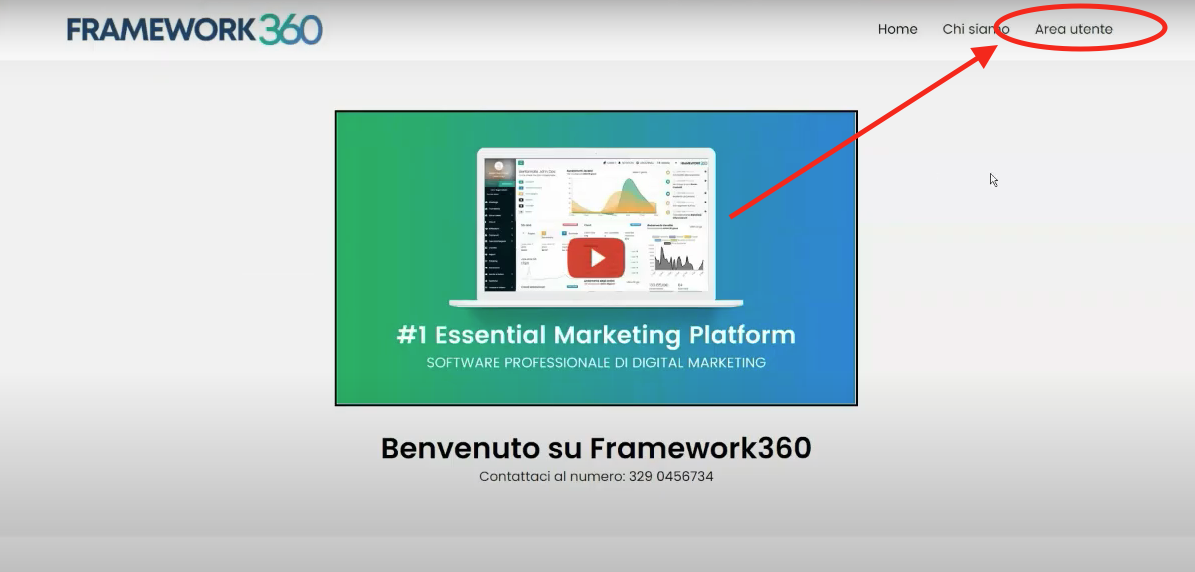
Done! Now the User Area will appear within the main menu on our website as shown in the following example:
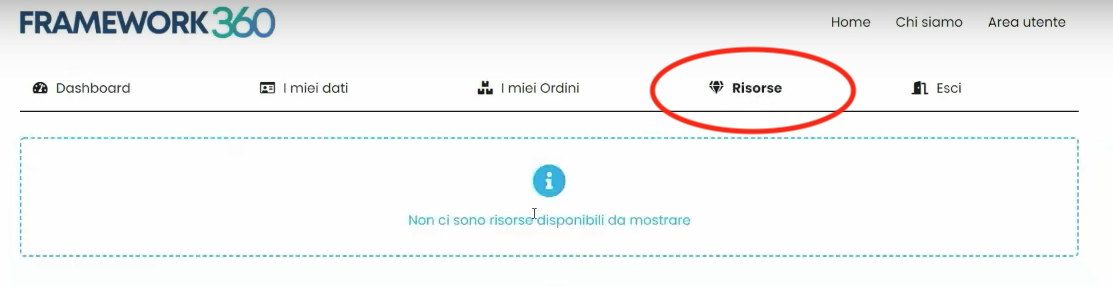
By clicking on the User Area, our visitor, after logging in, will find a new tab called Resources:
Within this tab, the resources that we decide to make available will appear. Let's now look at two examples of resources we can create: in the first example, we'll see how to insert a video, and in the second example, we'll see how to insert a file.
Let's Insert a Video into the Resources
Let's see how we can insert a video into the Resources tab that we have previously added to the User Area.
Let's go back inside the submenu of the main menu Client Resources and click on the button at the top right Add to add our video as a resource. At this point, we will be faced with the following screen:
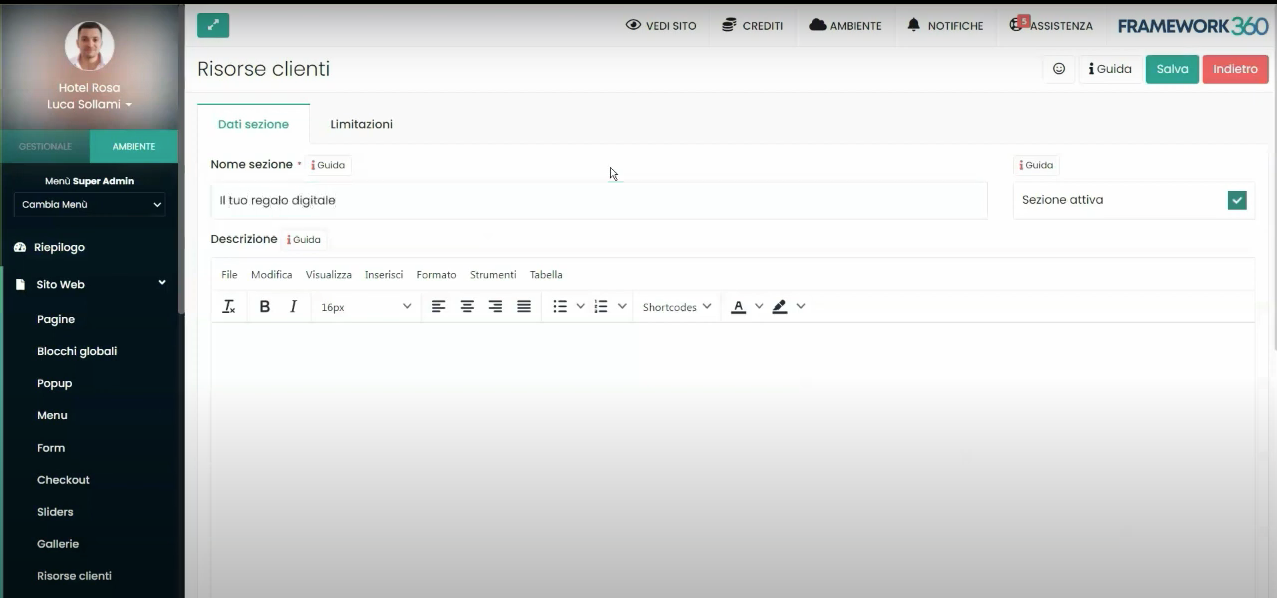
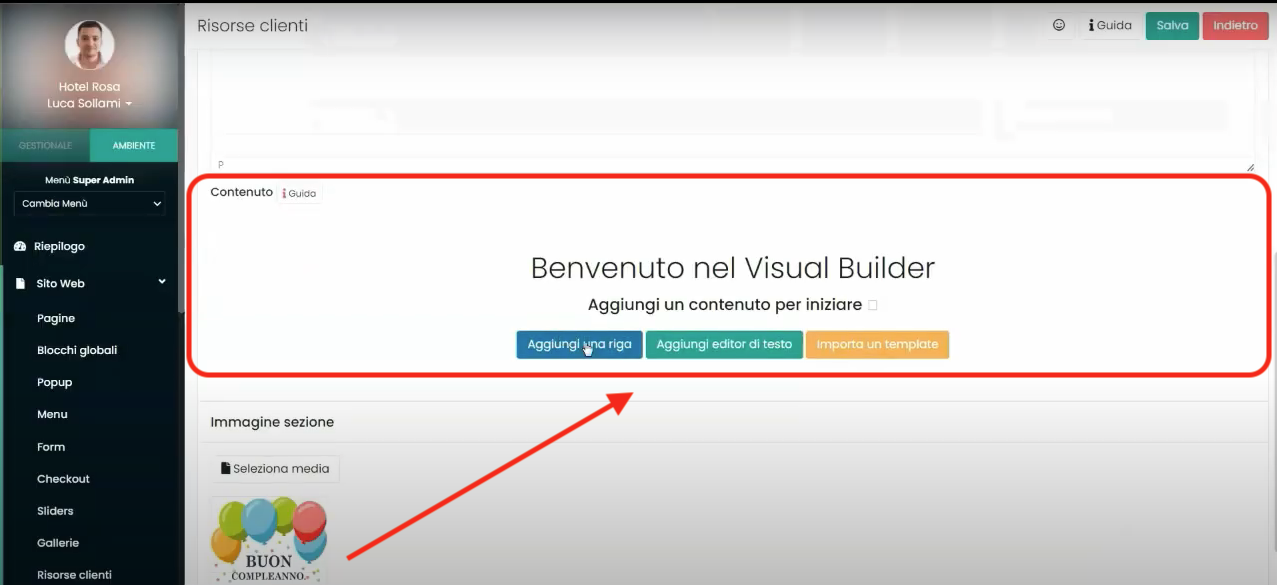
In this screen, we will add a name, a description, and an image for our resource.
At this point, we will add within the Content area a row containing a video through the Visual Builder.
At this point, after clicking the Save button at the top right, we will find the video resource inside the Resources tab that we previously inserted into the User Area.
Let's insert a PDF into the Resources
Another example of a resource to be included could be represented by the insertion of a PDF that our user will be able to download.
To insert the PDF, first we need to go to the submenu under Framework360's main menu Files following these steps:
Website > Files
Once inside, we should add a new file.
After adding the file, we could return to the Client Resources section and create, similarly to the previous example, a new resource. However, this time through the Visual Builder in the Content area, we would not insert a row containing a video but rather insert a row with a button inside that allows the user to download the PDF.
How to restrict a resource?
Well, after seeing how to insert resources into the User Area, the last thing we need to look at is how we can possibly restrict access to the resource to certain clients based on specific variables that Framework360 allows us to set (time, date, device, product purchase, etc.).
To do this, when we are creating the resource, we should go to the Restrictions section as shown in the figure:
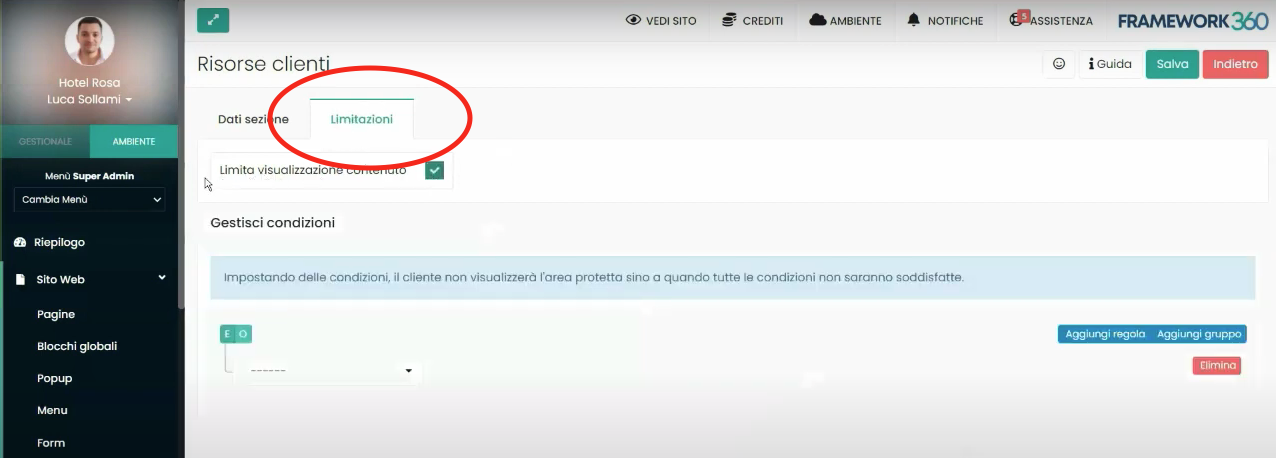
Where we could customize our limitation conditions through the option Limit content display.


