Within this guide, we will see how to create a category and a subcategory on our Ecommerce website.
Before proceeding, I remind you that to be able to manage all the Ecommerce functionalities on our site it will be necessary to install the corresponding plugin. To install a plugin on Framework360 we should go to the submenu Plugins in the main menu of Framework360 by following these steps:
Customization > Plugins
Once inside the Plugins submenu we can search for and install the desired plugin.
Step 1: Let's create a new category
Once the Ecommerce plugin is installed, we should navigate to the submenu of Framework360's main menu Categories by following these steps:
Ecommerce > Categories
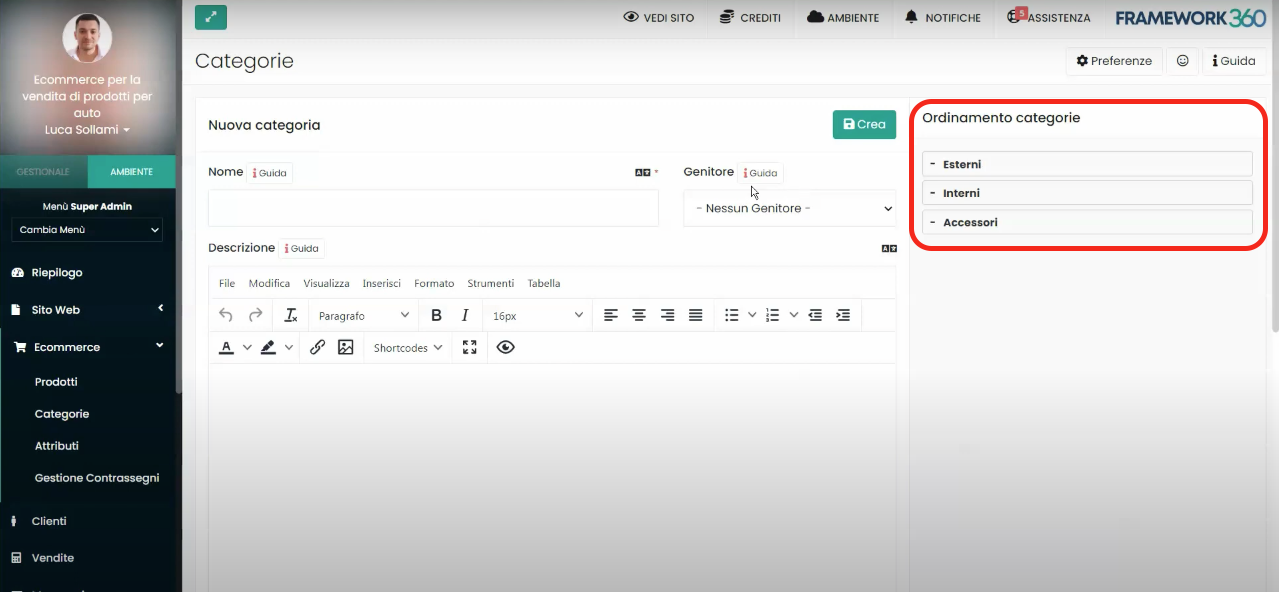
Once inside the categories area, we will find on the right all the categories and subcategories already present on our site as shown in the figure:
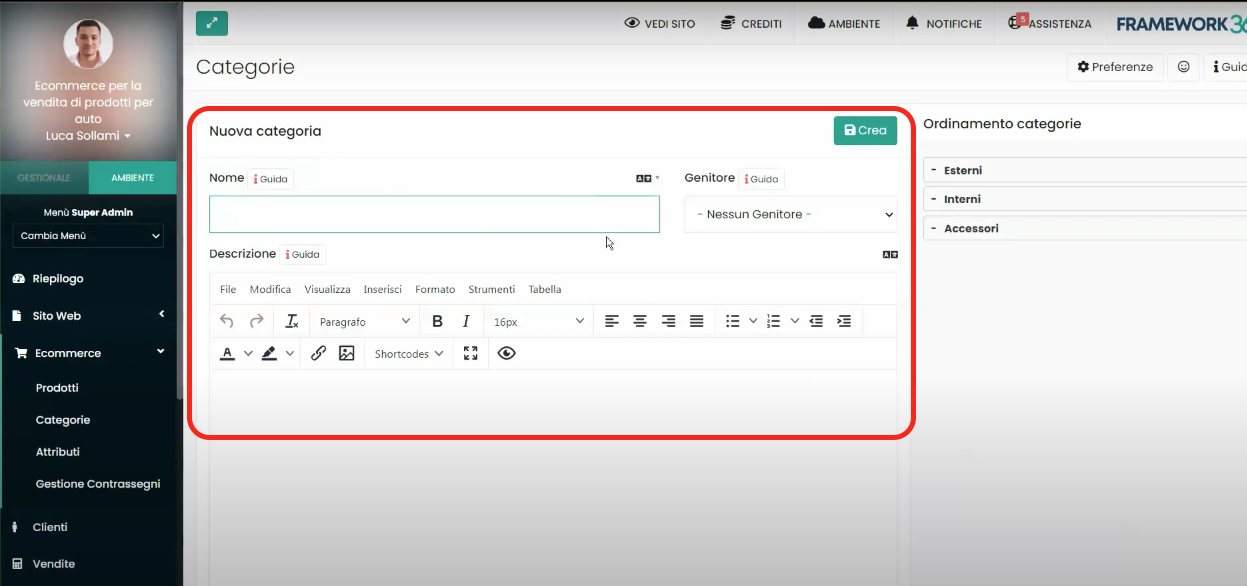
If we wanted to create a new category, we would simply have to go to the section of the page called New category, enter the name of the category and click on the green button at the top right Create.
Step 2: Let's Create a New Subcategory
In the previous step, we saw how to create a new category. Now let's look at how to create a new subcategory.
The process for creating a new subcategory is very similar to that of creating a new category. Similarly to what we've seen before, we should go to the section of the page called New Category and enter the name of the subcategory.
At this point, to make it clear to Framework360 that we are creating a subcategory, we should indicate in the entry Parent what is the parent category of the subcategory we want to create, as shown in the figure:
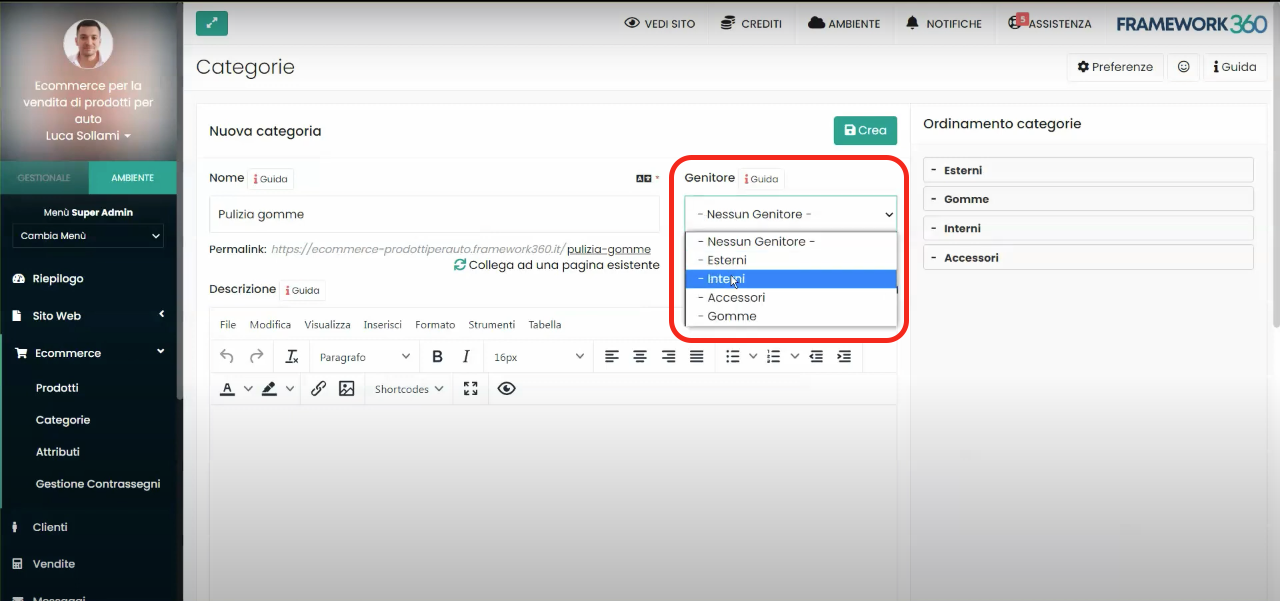
At this point, all we have to do is click on the green button at the top right Create.
Step 3: Insert the created categories and subcategories into the main menu
To insert the created categories and subcategories into the main menu, we just need to go to the submenu of Framework360 Menu by following these steps:
Website > Menu
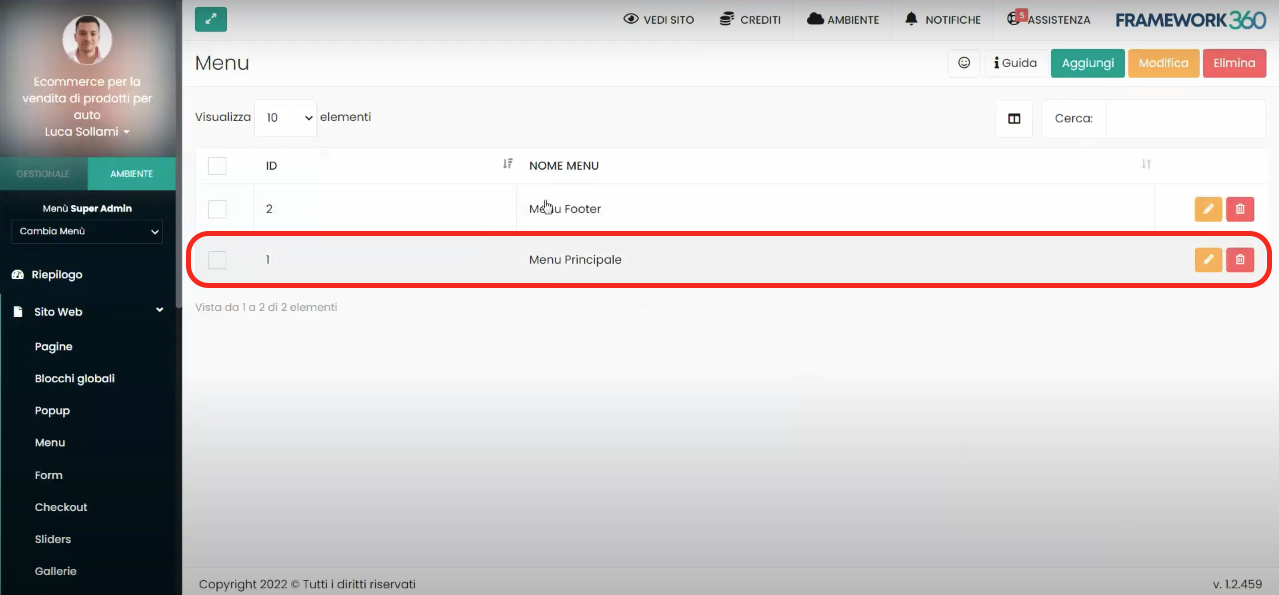
At this point, we must click on the Main Menu to modify it.
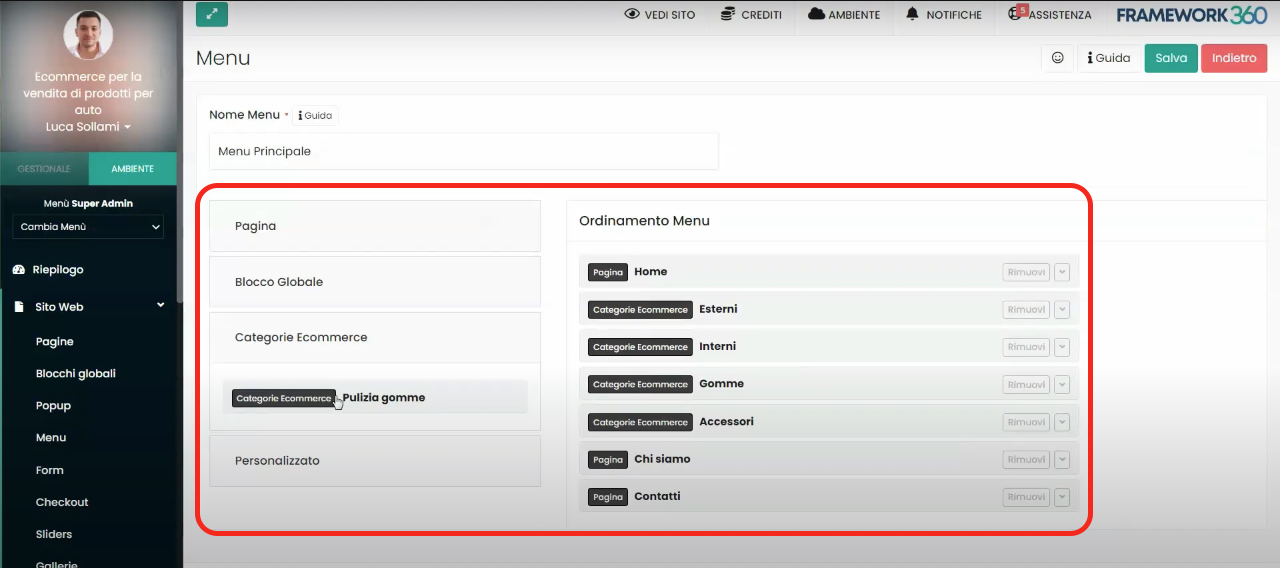
Once inside the main menu editing screen, we will find two columns: in the left column, under the heading Ecommerce Categories, there will be website categories and subcategories that do not appear on the main menu, while in the right column there will be website categories and subcategories that do appear on the main menu. All we have to do is move to the right column those categories and subcategories previously created that we wish to make visible on the main menu.
Step 4: Add the reference category or subcategory to the products
Finally, we just need to assign the relevant category or subcategory to the products present within our website.
To do this, we simply have to go to the submenu Products in the main menu of Framework360 following these steps:
Ecommerce > Products
Now let's click on the product to which we want to assign a category or subcategory.
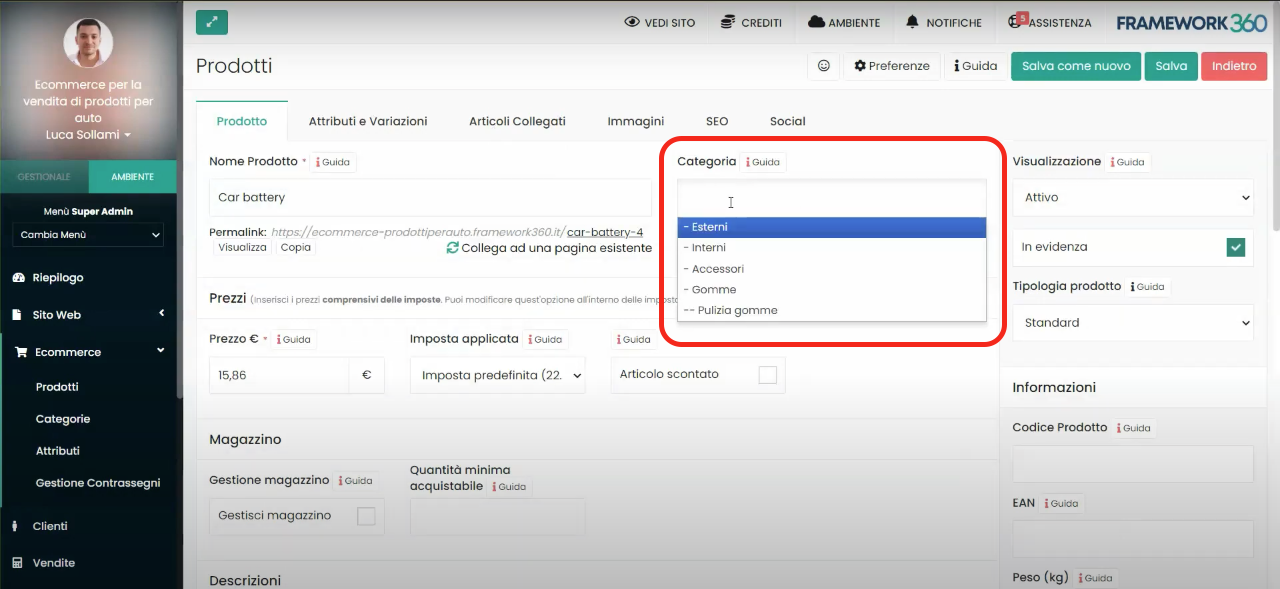
Once clicked on the product, the product editing screen opens up, let's go under the section Category and through the dropdown menu provided we go on to select the category or subcategory relevant to the product as shown in the figure:
