Within this guide, we will look at how to create a video course and sell it using the features of Framework360.
To make learning the process easier, we will divide this tutorial guide into two sections:
- Creating the video course
- How to sell video courses
Well, let's not wait any longer to find out how to create our video course!
1. Creating the video course
Framework360 gives us the ability to sell video courses posted on Vimeo or YouTube, and we recommend using these platforms as they are most suitable for streaming video playback.
After creating the video course on one of the previously mentioned platforms, we need to create and segment the video course on our website through Framework360.
STEP 1: INSTALL THE VIDEO COURSES PLUGIN
Let's head inside the main menu voice of Framework360 Plugins by following these steps:
Customization > Plugins
At this point, let's look for the Video Courses plugin and install it.
Once the plugin is installed, the section Video Courses will appear within the main menu of Framework360, where we will find all the video courses we have created.
To create a new video course, click on the button at the top right Add, which will take us to the customization page, where there are two tabs:
- Tab Video Course Data
- Tab Restrictions
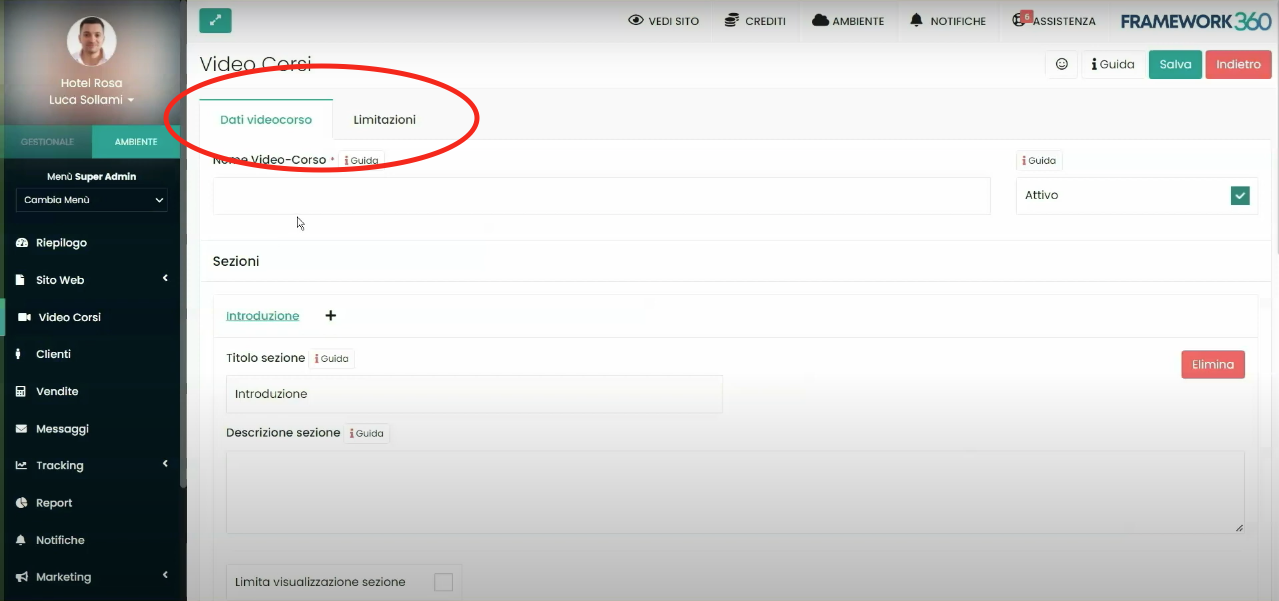
Let's now see what we can do within the two aforementioned tabs.
STEP 2: TAB VIDEOCOURSE DATA
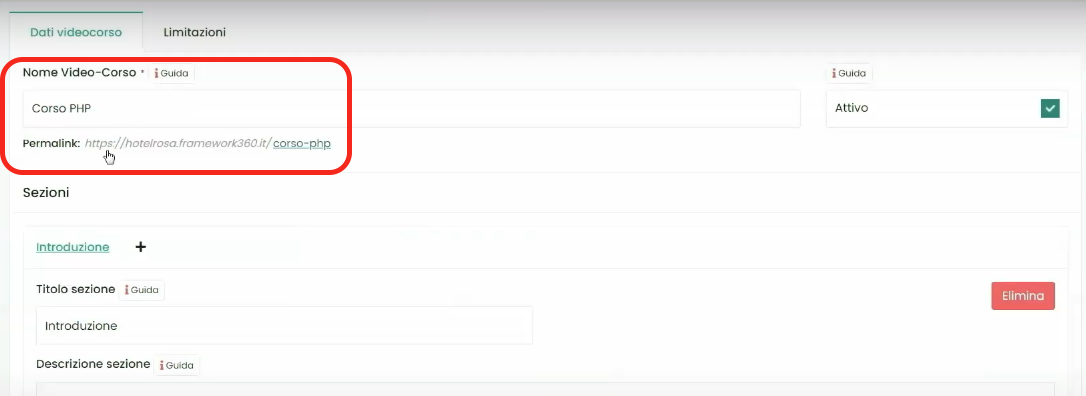
Within the Videocourse tab, first we will give a name to our Videocourse and then, under the heading Sections, we can go on to create the various sections of our videocourse.
We'll create the first section by entering the name of the section (in our example, we'll call it Introduction) and its description.
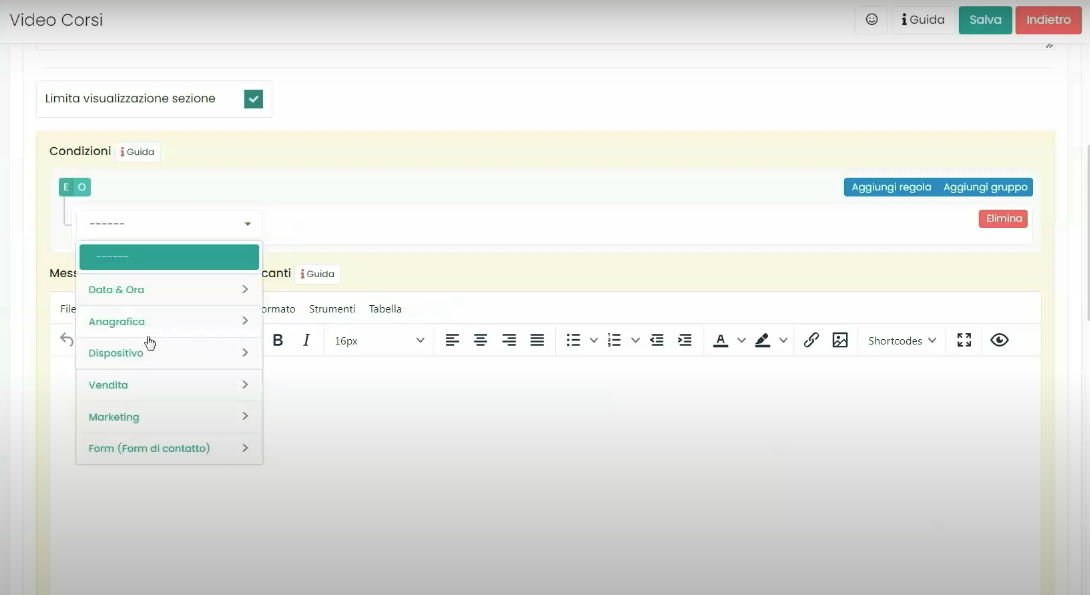
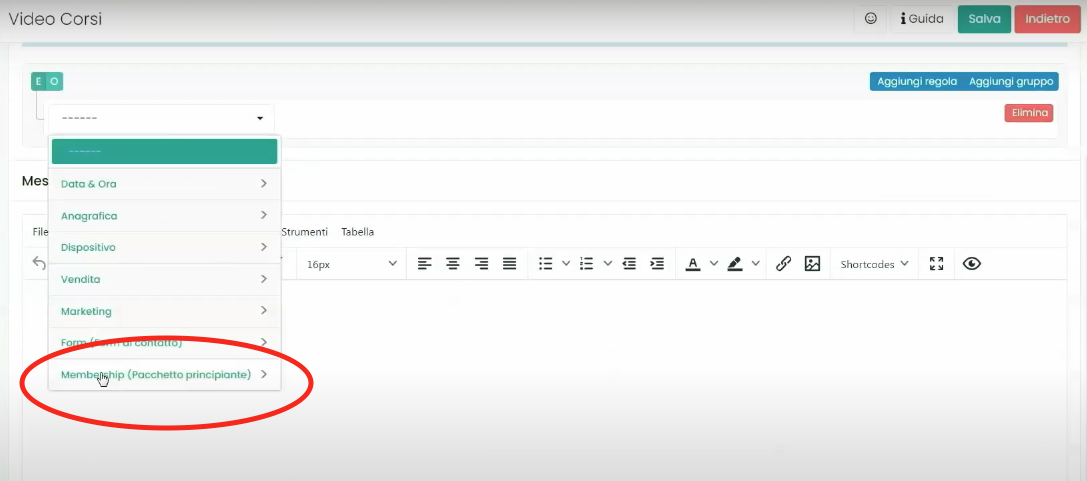
Continuing to scroll through the customization page, we could insert a limitation for viewing our section by enabling the option Limit section view, based on various parameters that Framework 360 provides us with, such as access date and time, user demographics or type of device used for access.
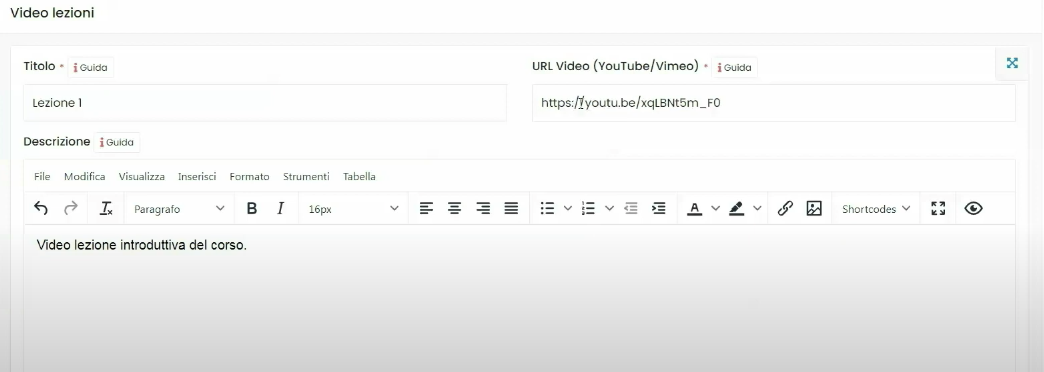
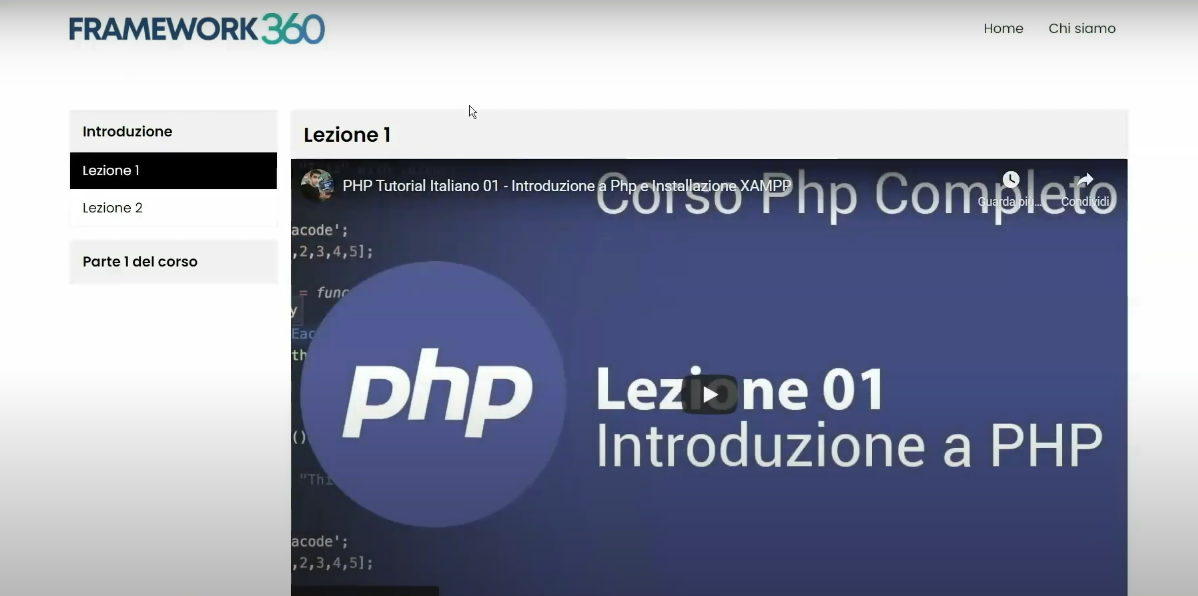
Continuing to scroll, we will find the item Video lessons where we can add all the lessons of the section. To create the video lessons, we should insert the link of the video uploaded on Vimeo or YouTube, the name and description of the lesson as shown in the figure:
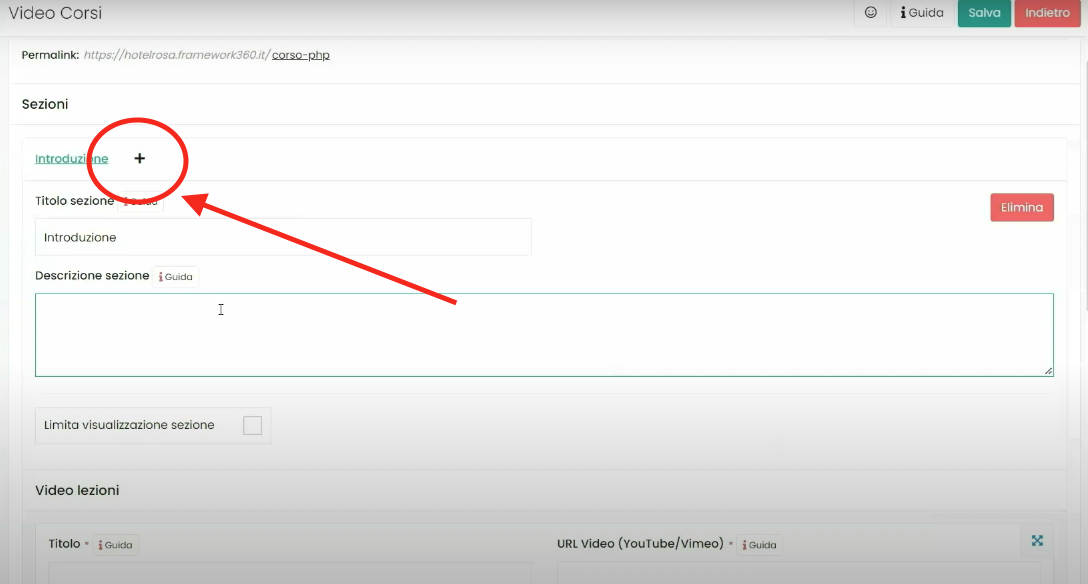
Once all the lessons of the section have been added, by going back to the top of the customization page, we could insert the next section through the + symbol next to the name of the just created section as highlighted in the following figure:
Similarly to what we did for the first section, we will insert the lessons into the newly created section.
Once all sections of the video course are completed, we could define viewing restrictions for the video course as explained in the next step.
STEP 2: TAB RESTRICTIONS
Within the Restrictions tab we could go on to limit the viewing of the video course to certain users based on various parameters that Framework 360 provides us with, similarly to what we saw earlier with the entry Limit section view in the Video Course Data tab, except that the entry Limit section view allows us to limit the viewing of a single section, whereas, the Restrictions tab allows us to limit viewing of the entire video course.
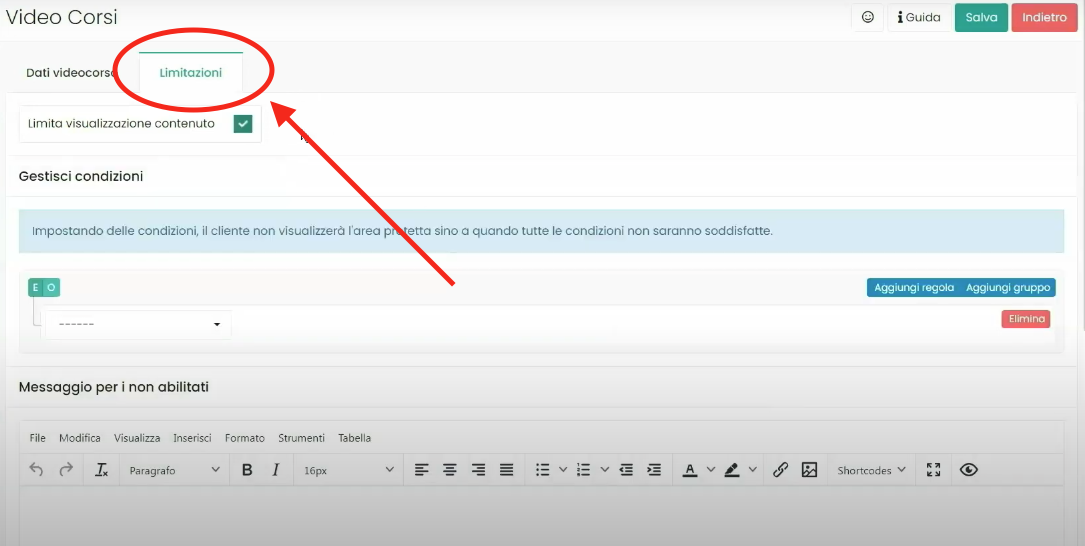
The use of this feature is very interesting at the moment when we want to sell our video course and thus limit viewing only to subscribed users as we will explain later.
Once the video course has been created, all that's left is to save it and access it through the Permalink generated under the name we have given to the video course in the Video Course Data tab:
2. How to Sell Video Courses
Now we're going to look at how to sell the video course we've just created in a few simple steps!
STEP 1: CREATE A MEMBERSHIP
To be able to sell a video course on our website, the first essential step is to create a Membership, which will allow us to make the video course available only to those who purchase the subscription.
Firstly, let's install the Membership plugin on our Framework360 environment. Go to the main menu item of Framework360 Plugins by following these steps:
Customization > Plugins
At this point, search for the Membership plugin and install it.
Once installed, the Membership section will appear within the main menu of Framework360 where we will find the entry Plan List.
Through the Plan List we could create bundles or one-time purchase packages by clicking on the button at the top right Add. Once inside, we could go on to customize all the information about the plan we want to create.
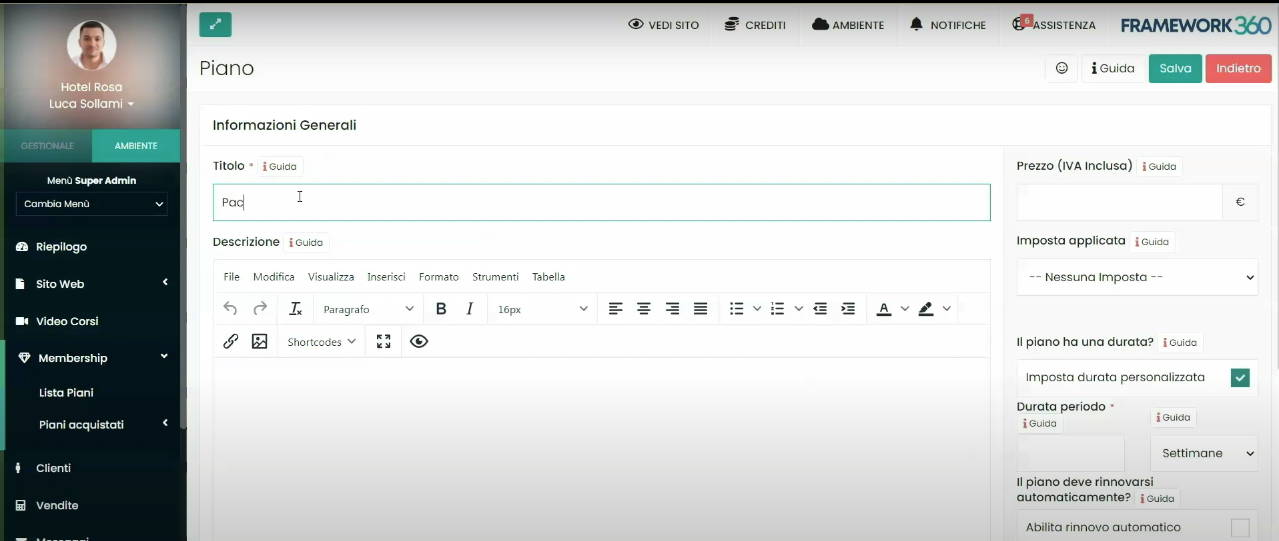
We could define the name of the plan, the description, the price, any tax (such as VAT), the duration of the plan, the possibility of automatic renewal and even a trial period if applicable.
Once our plan is created, we will need to make the video course accessible only to users who have purchased the plan; to do this, we will need to go to the Restriction tab (which we talked about in step 2 of section) Creation of the video course of our video course and activate as a limitation the newly created Membership.
STEP 2: CREATION OF THE PLAN LIST
So far we have seen how to create the video course and how to make it accessible only to those who have paid for a plan, but in order to sell a video course we must also go on to create a page on our website where all the purchasable video courses are present, so that the customer can access this page to purchase our video courses.
To do this, we will create a new page on our website by going to the voice Pages inside the main menu of Framework360 following these steps:
Website > Pages
At this point, we click on the top right button Add to create a new page.
Once in the creation screen of the new page, we will give a name to the page and through the Visual Builder of Framework360 we will insert the content List Plans as shown in the figure:
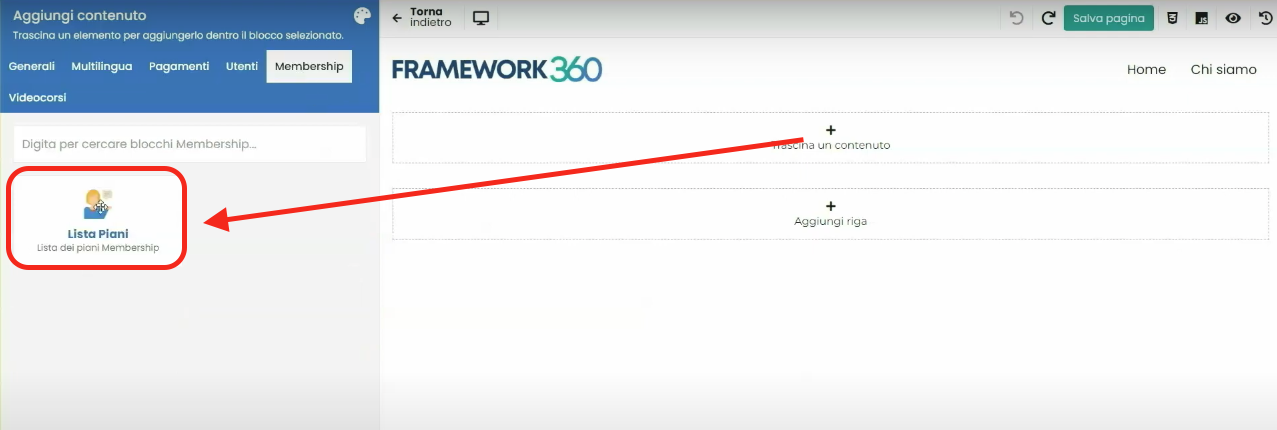
After inserting and customizing the content List Plans to our liking, all we need to do is click on the top right button Save Page.
Once the page is created, we could also make it visible within the Main Menu present in the Header of the website, to do this we go to the voice Menu of the main menu of Framework360, once inside we go to modify the Main Menu and we proceed to insert into it the newly created page where the various packages of our video courses are present.
STEP 3: MAKE THE COURSE AVAILABLE WITHIN THE CUSTOMER RESOURCES
The last thing we have left to do is to make the video course available after purchase within the Resources section of the customer area.
First, we need to install the Customer Resources plugin. To install the plugin, let's go to the Plugins section through the main menu of Framework360 by following these steps:
Customizations > Plugins
Once inside, let's search for our Customer Resources plugin and install it.
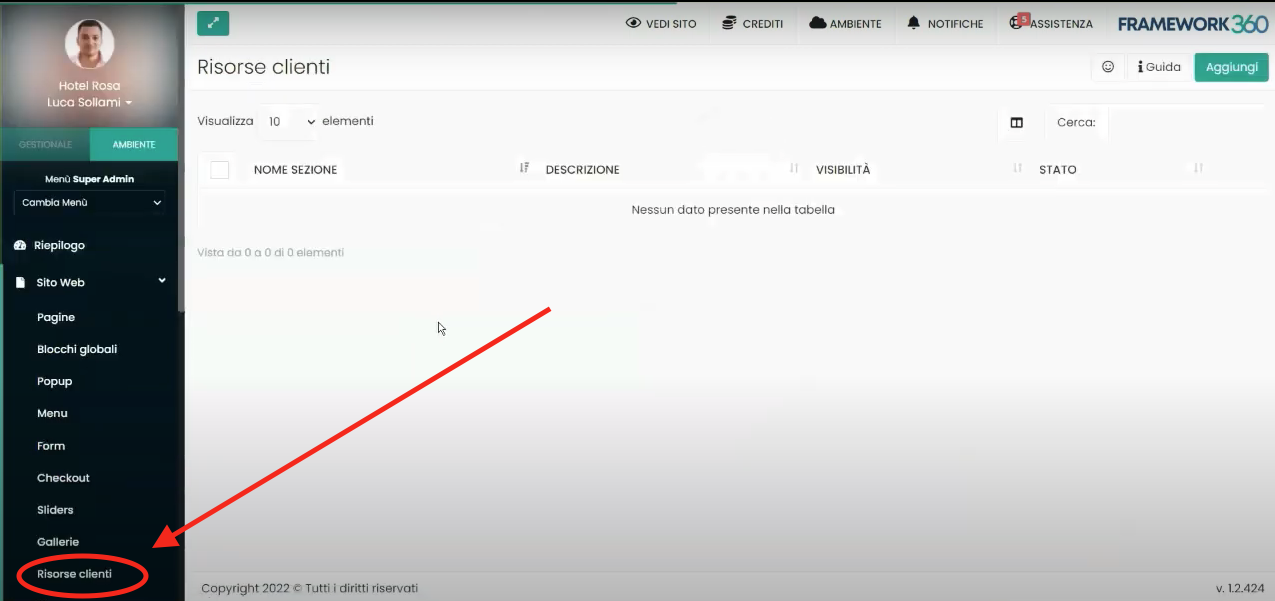
Upon completion of the installation, we will find the plugin within the main menu under the Website section as shown in figure:
After installing the plugin, before creating the resources we want to make available to our users (in our case, the resource will be the purchased video course), we should make the User Area available within the main menu of our website.
To do this, we go inside the Menu subsection of Framework360's main menu following these steps:
Website > Menu
Once inside, we click on the Main Menu item and proceed to add the User Area to the menu:
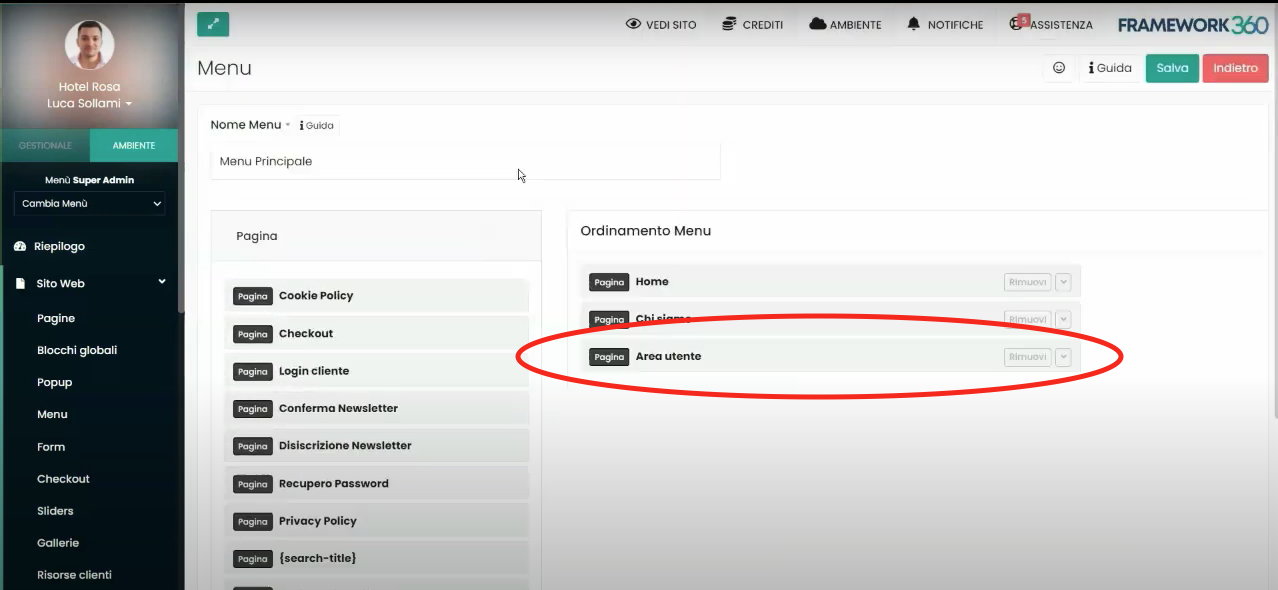
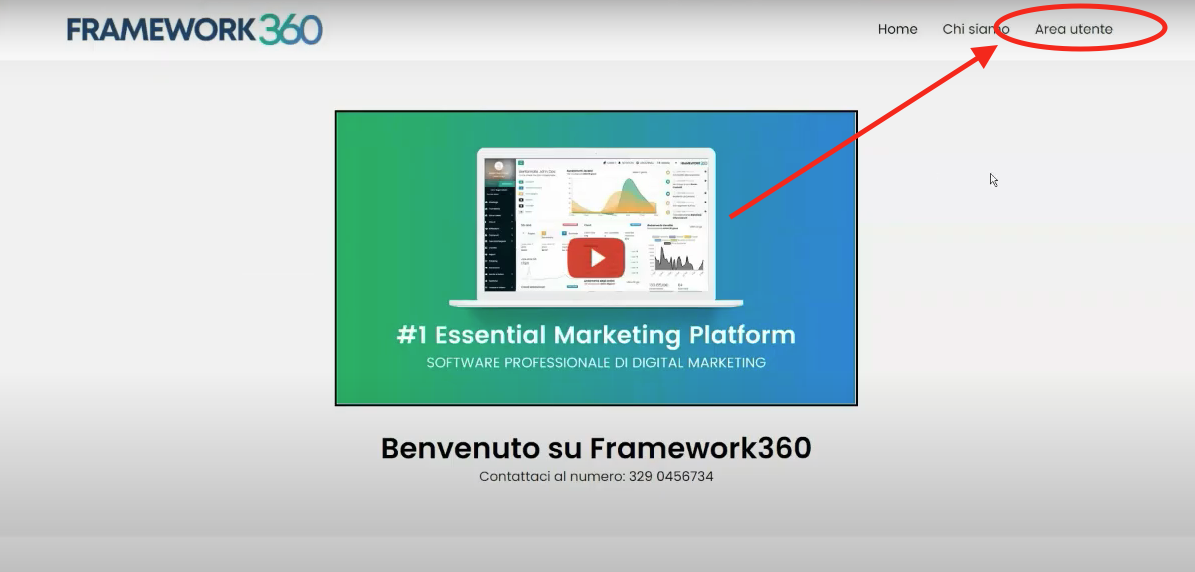
Done! Now, within the main menu of our website, the User Area will appear as shown in the following example:
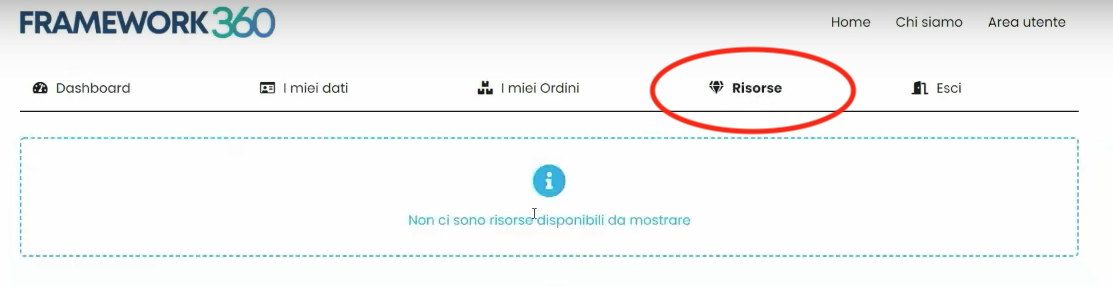
By clicking on the User Area, after logging in, our visitor will find a new tab called Resources:
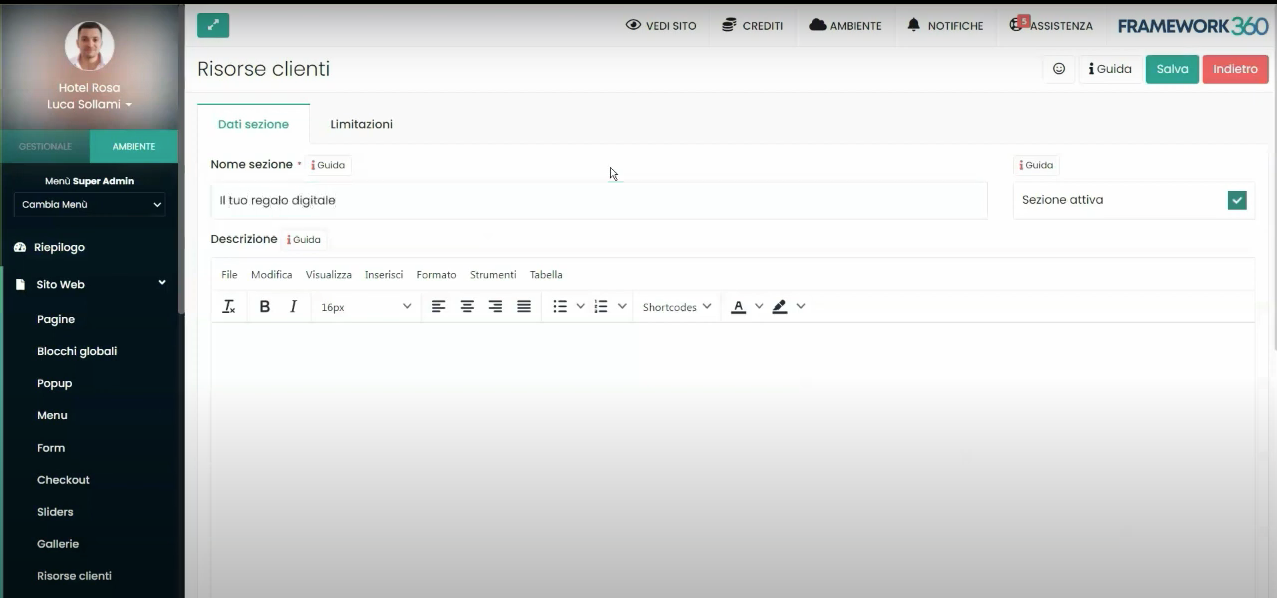
Within this tab, resources that we decide to make available will appear. In our case, we should make the purchased video course available. To make the video course available, let's go back again inside the submenu of the main menu Client Resources and let's click on the top right button Add to add our video as a resource. At this point, we will be faced with the following screen:
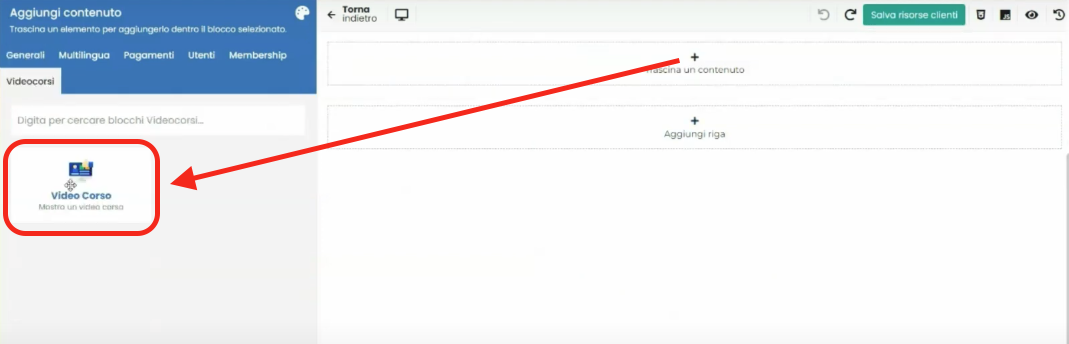
Once inside the resource creation screen, we give it a name, a description, and an image for the resource, finally, through Framework360's Visual Builder, proceed to insert the content Video Course as shown in the figure:
In conclusion
Within this guide, we have seen how to create our video course using the Video Courses plugin, how to make the video course available only to those who have purchased a subscription through the Membership plugin, how to create a page where all our video courses that can be purchased are available and, finally, how to make the purchased video course visible within the User Area through the Client Resources plugin.
Last but not least, it should be specified that during the purchase phase, the customer is taken to a checkout where they will enter their personal details and payment method in order to purchase the video course. If you want to know how to configure a checkout and the subscription payment method, click on the following links to consult the dedicated guides:
- Setting Up a Checkout Sure, here is the translated text with HTML tags preserved:
- Configure Subscriptions.


