In this guide, we will see how you can create an anchor link with scroll through the FRAMEWORK360 platform.
What is an Anchor link scroll?
Anchor link scrolls are links or menu items on a page that, when clicked, perform a scrolling action to move down to a specific section of the page.
Now let's take a look at a few simple steps on how you can create your own anchor links with the FRAMEWORK360 platform.
Step 1: Add a menu inside the page
The first thing to do is to insert a menu within the page that we can populate with items which, when clicked, will make the page scroll down to the section we wish to view.
For example, we could create a Header, that is, a section that we want to repeat on all pages of our site.
To create our Header we must go to the main menu of FRAMEWORK360 and follow these items:
Contents > Global Blocks
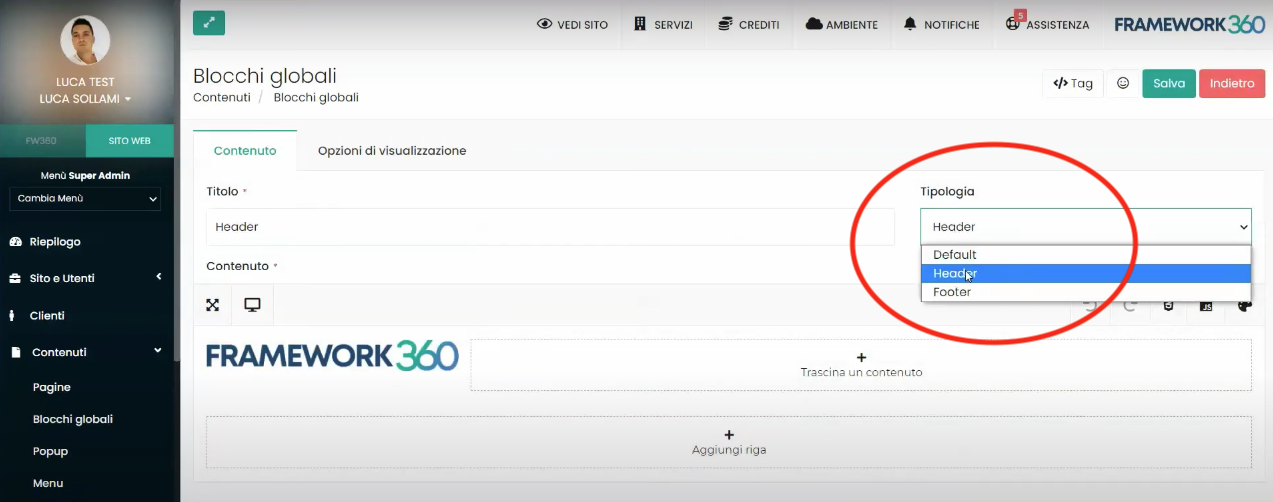
Within the Global Blocks section, we will create a block by selecting the Header block type as shown in the figure:
Good, now that we have created our Header, all that's left is to add our menu inside the Header we created.
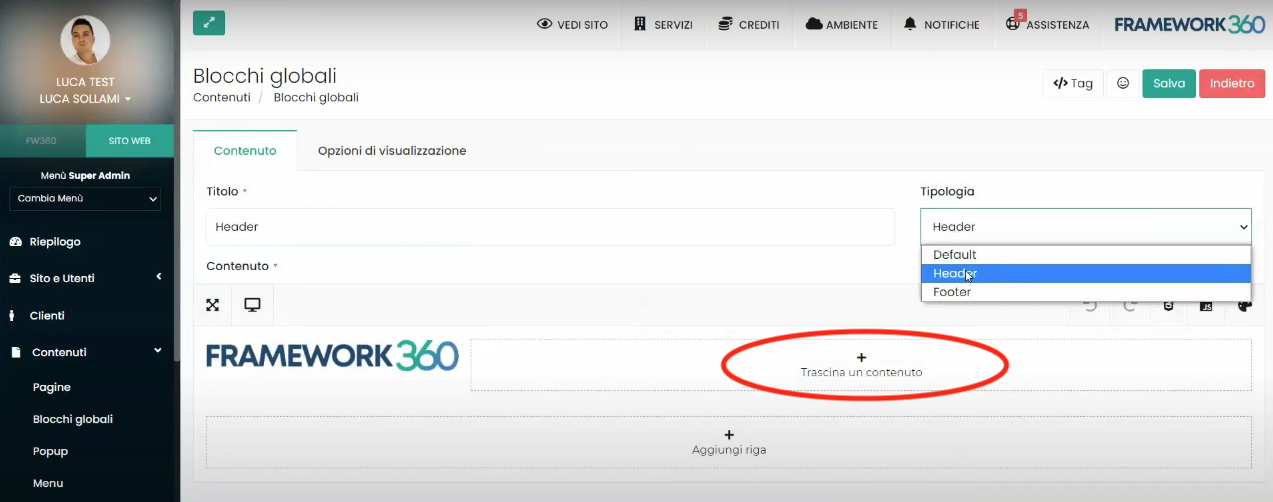
First, we should click on the item Drag a content present in our Header.
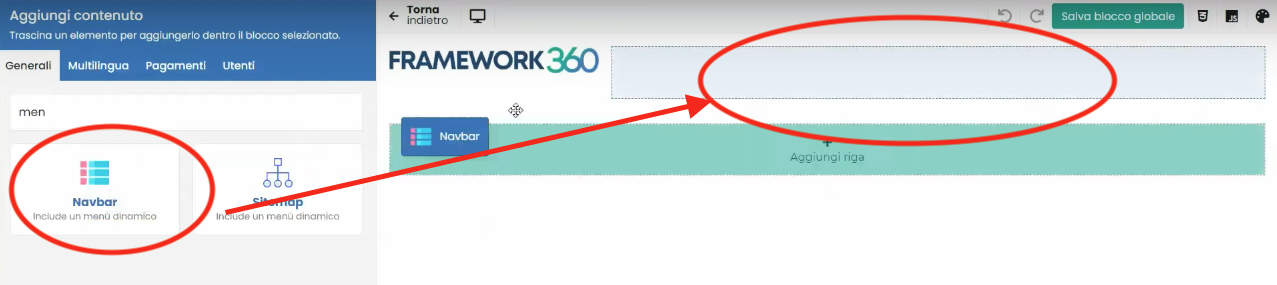
Now we will see the screen where we can choose the block to insert, we will select the Navbar block and drag it inside.
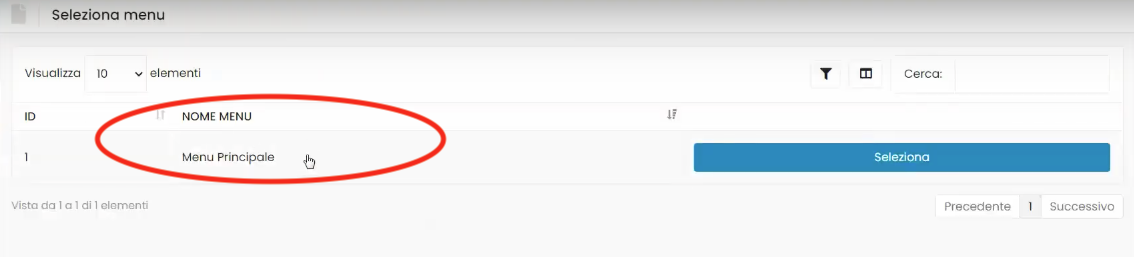
Once we have dragged the Navbar block, we will go on to select the menu, previously created, to be inserted within the block.
Step 2: Let's Add Entries Inside Our Menu
To add entries inside our menu, we need to access the Menu option from the main menu of the FRAMEWORK360 platform and then go to the menu that we have selected in the previous step within the Navbar.
Great, now we are inside the menu that we want to populate. Next, we will insert our Anchor links into the menu.
IMPORTANT!
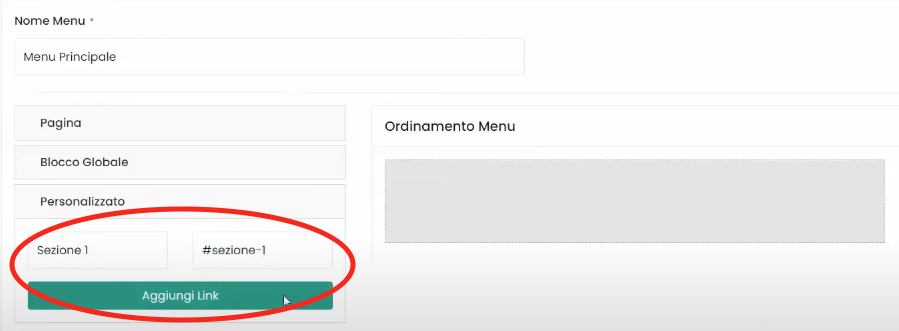
When creating an anchor link, we are asked to insert a link (as shown in the figure), here we should enter the link of the section to which the link should take us, preceded by inserting a #.
The choice of name for composing the link is at our discretion; in our example, we used the following link: #section-1.
Keep in mind the link you're entering as this link will be needed again in the next step!
Once all the Anchor links we need have been inserted, the only thing left to do is save.
Step 3: Connect the Anchor link to the section
After creating our link, to complete the process we must ensure that when the link is clicked, the page scrolls until it reaches the desired section.
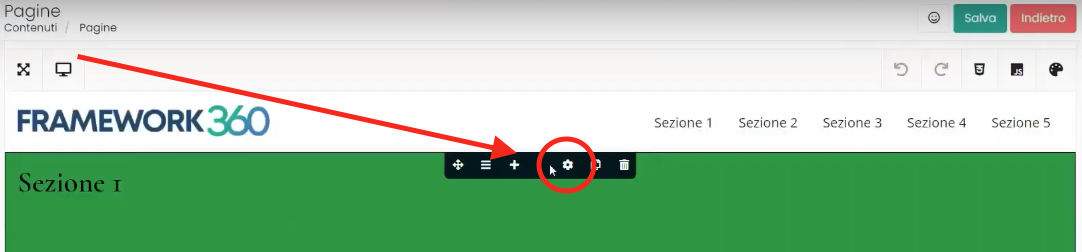
To do this, we need to go to the page and click on the settings wheel of the section row we want to link our Anchor link to as shown in the figure:
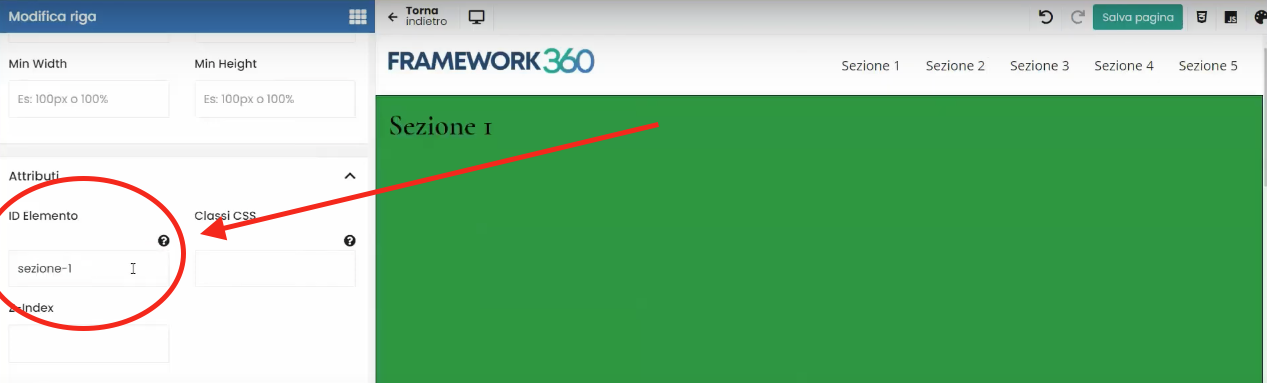
Now we have entered the menu that will allow us to modify the line we selected. We should go to the Design, section, once inside the Design section we scroll down in the menu to Attributes where we will find the ID Element entry. To summarize, you will need to follow these steps:
Design > Attributes > ID Element
At this point, we must enter within the ID Element entry the same link that in the previous step we inserted for creating the Anchor link, also in this case the link must be preceded by #. In our example, let's remember that the link was the following: #section-1.
Now the game is on!
We have created our Anchor link scroll, so, every time we click on the link in the Header, the page will scroll to the desired section.


