Within this guide, we will explore how to create a private area on your website to allow your customers to access it and find, for example, a summary of their orders or downloadable products. This section will be called User Area.
Step 1: Modify default pages created by Framework360
Firstly, let's go to the submenu of Framework360's main menu Pages by following these steps:
Website > Pages
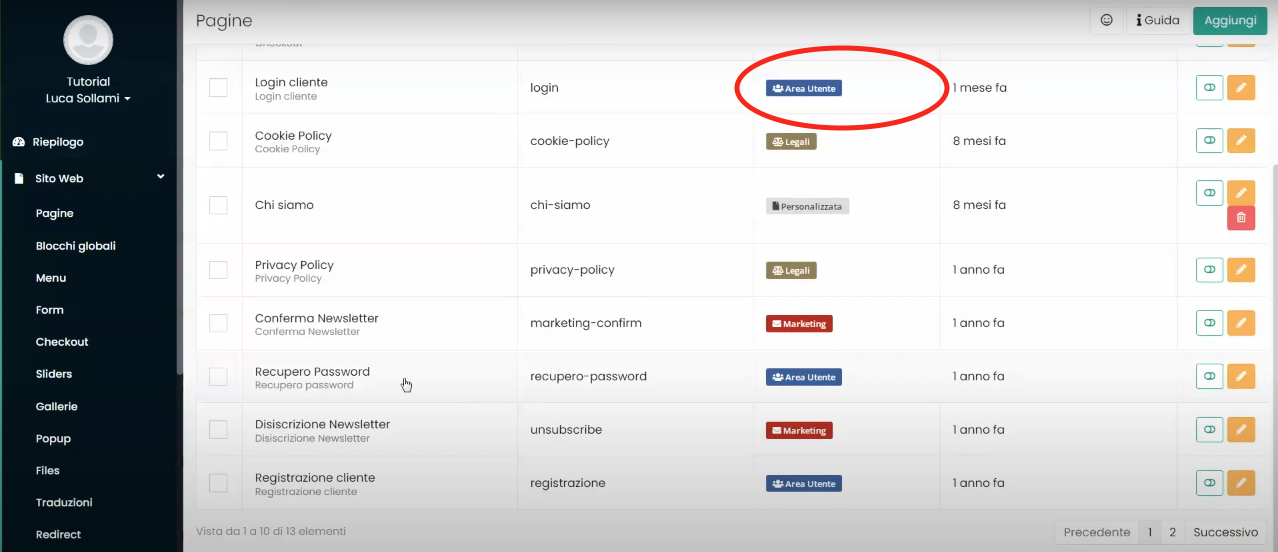
Within this section, we will find all the pages present on our website, among which there are several pages created by default by Framework360 marked with the label User Area, as shown in the figure:
If we wanted to modify one of them, we would simply have to click on it and edit it through the visual builder.
Among the pages created by default by Framework360, we will find a page called User Area, this is the page where the user will find all the information reserved for him. In the next step, we will see how to add the User Area page to our website's menu so that it can be easily reached by our users.
Step 2: Add the User Area to the website menu
Now let's make the User Area available within the main menu of our website.
To do this, we should go under the sub-item Menu of Framework360's main menu following these steps:
Website > Menu
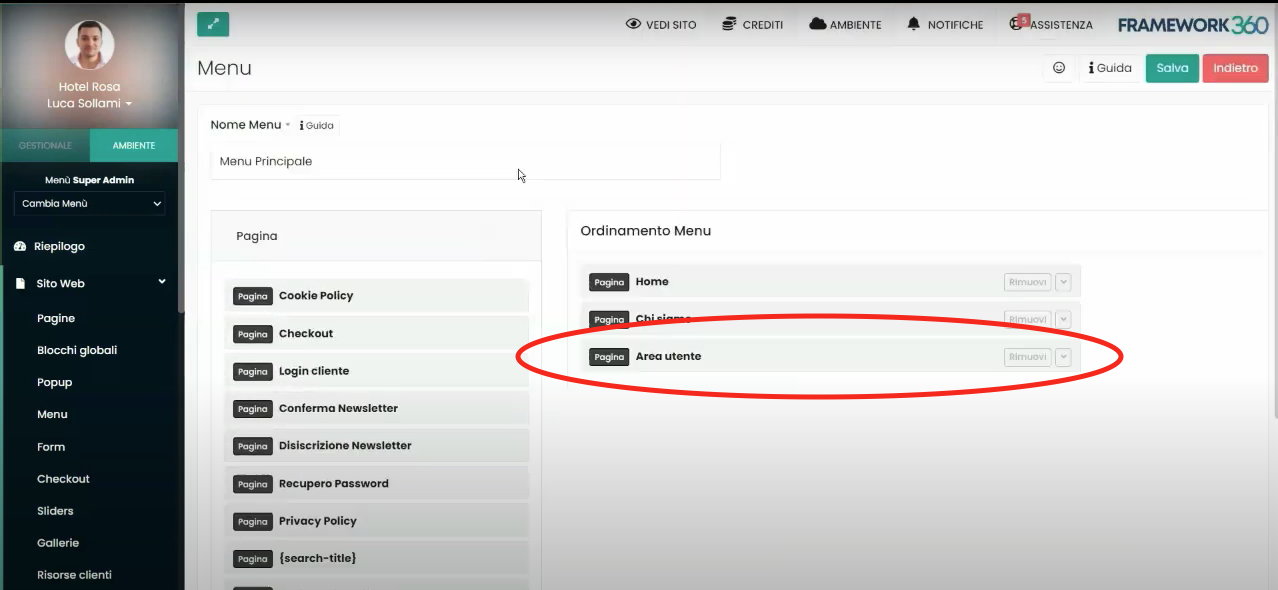
Once inside, we click on the Main Menu and proceed to add the User Area within it. Once we are in the main menu editing screen, we will find two columns: on the left column there will be pages of the website that do not appear on the main menu, while on the right column there will be pages of the website that do appear on the main menu. All we need to do is move the User Area page to the right column to make it visible on the main menu.
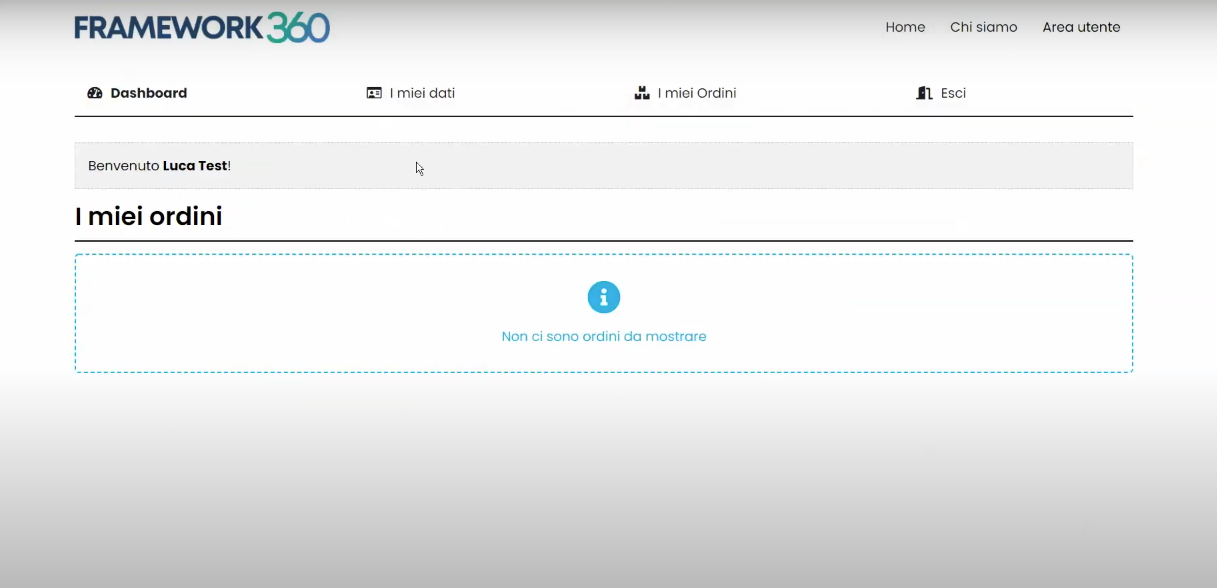
Done! Now, within the main menu that appears on our website, the User Area will be displayed as shown in the following example:
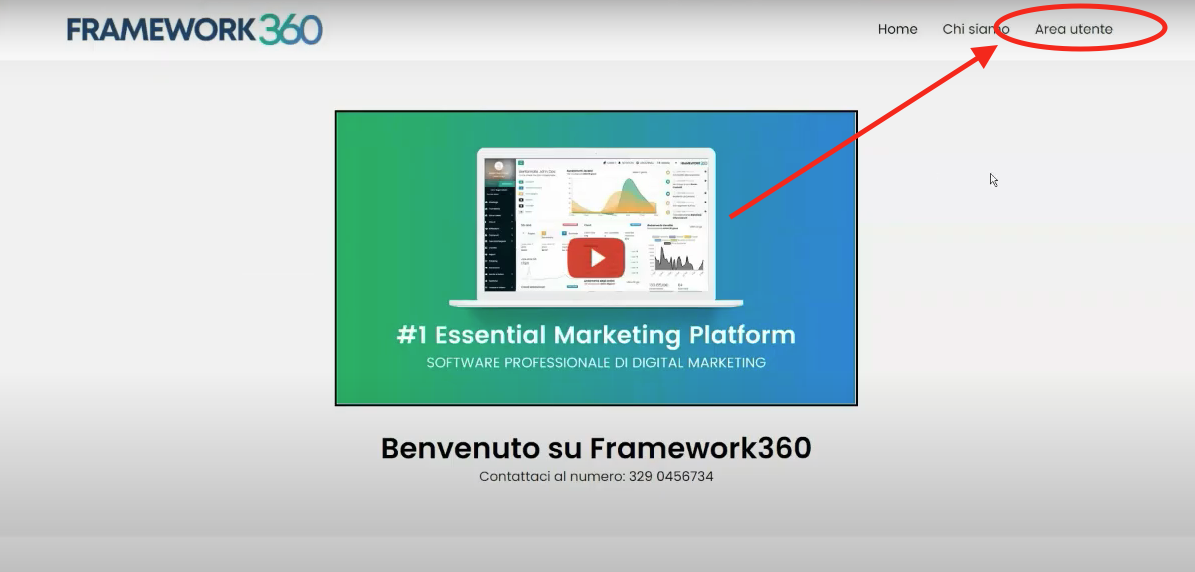
By clicking on the User Area, after logging in, our visitor will find several sections where they can manage their personal information and orders.
Step 3: Interactions with the Customers module
For every customer registered on our website, Framework360 will automatically create a profile that we can find in the Customers module.
To access the Customers module we should go to the main menu of Framework360 and click on the Customers item.
Once inside the Customers module, clicking on the desired customer's name will take us to their profile.
Within the customer profile, we can perform various operations, below we will look at the main ones.
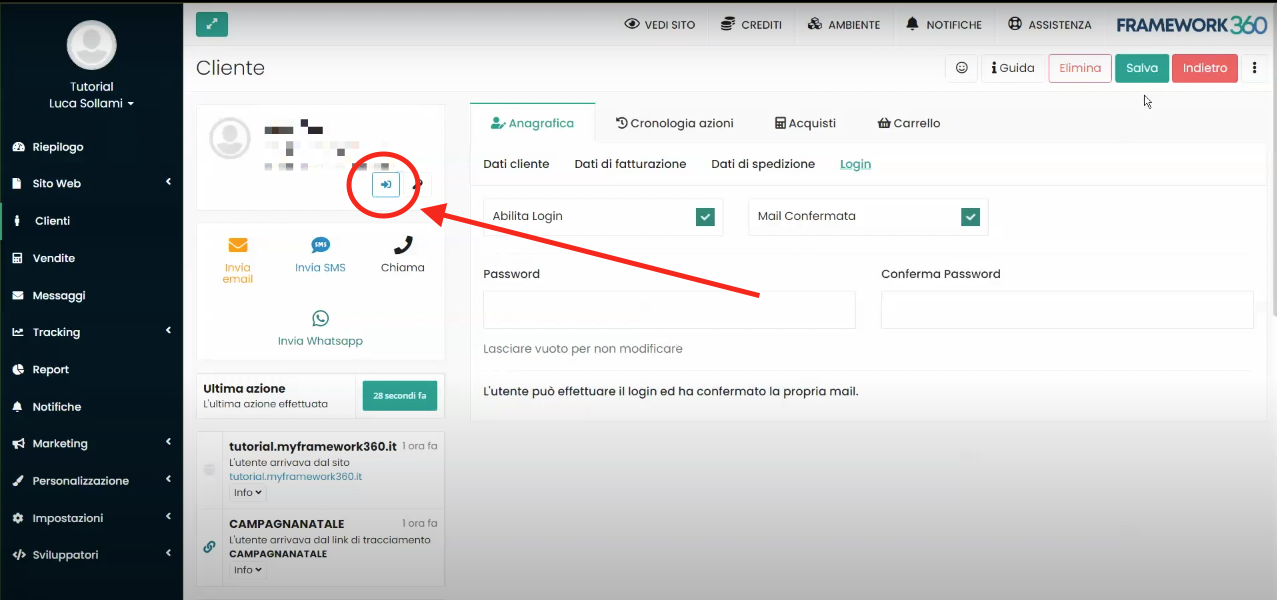
VIEW THE CUSTOMER'S USER AREA
Using the button shown in the figure, we can go to view the screen of the customer's user area.
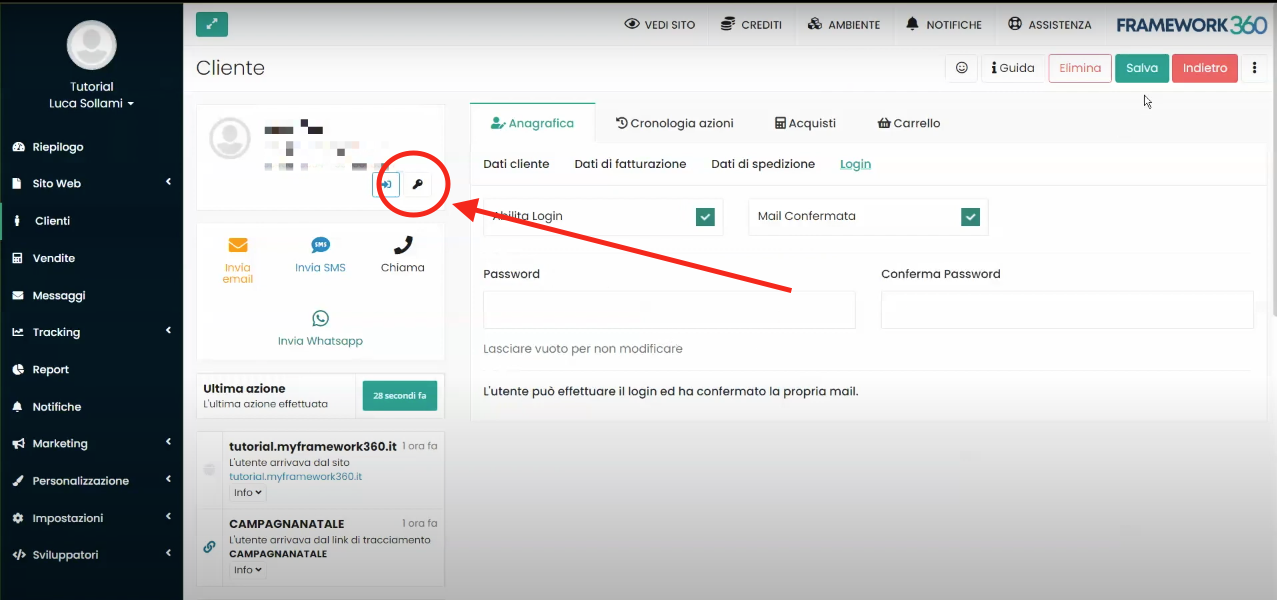
GENERATE PASSWORDS AUTOMATICALLY
Using the button shown in the figure, we can go to automatically generate passwords for the customer, this function might be useful if the customer is not familiar with the procedure to recover their password.
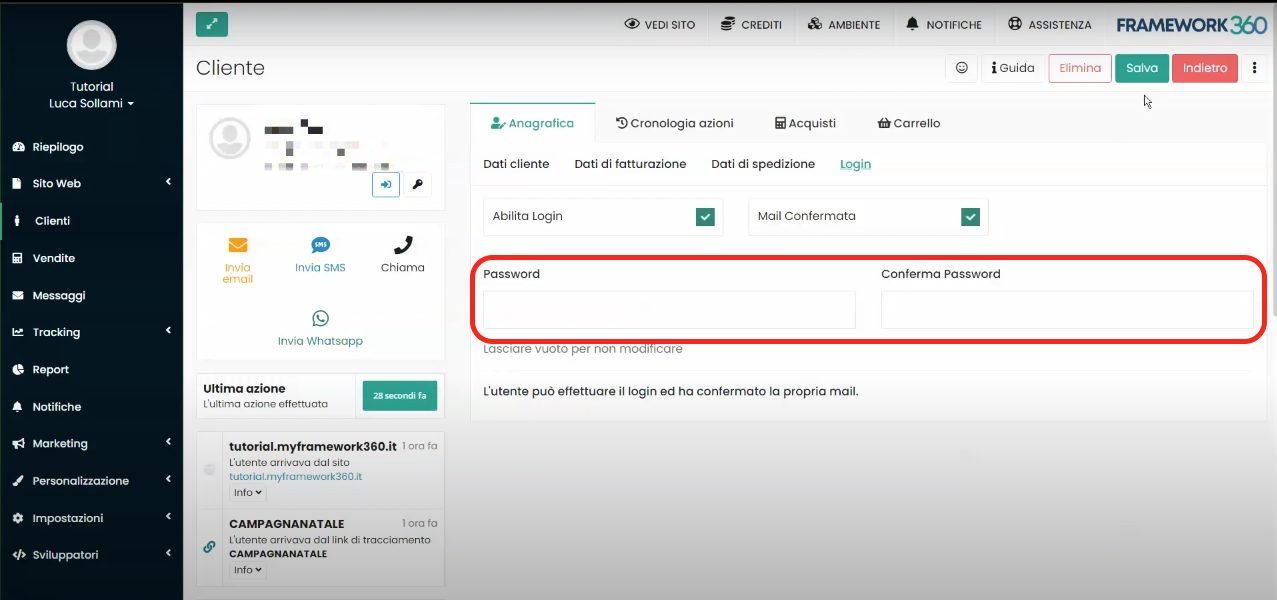
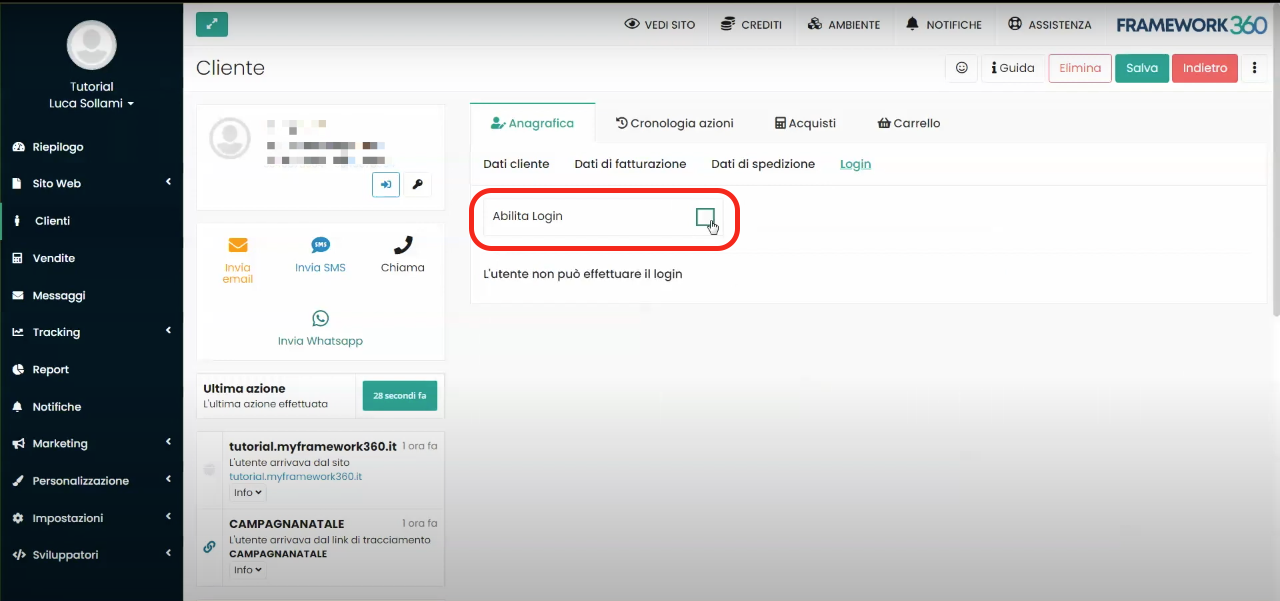
LOCK THE USER
Beneath the Login area, highlighted in the figure, we could go on to lock our user's login.
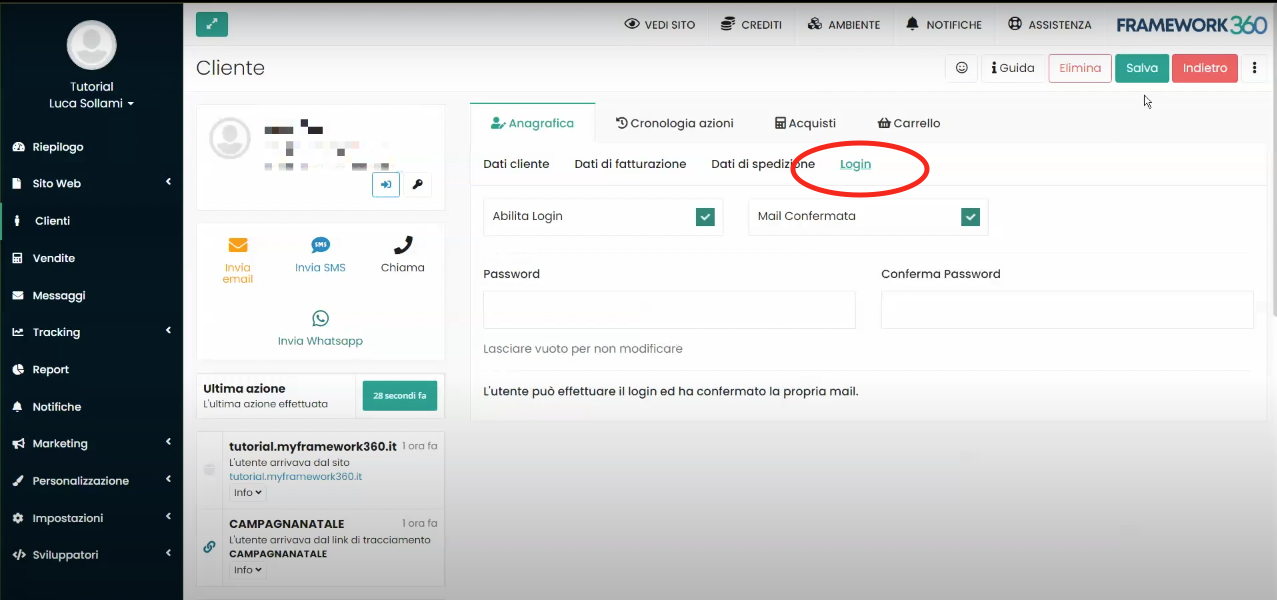
To lock the login we should remove the check from the Enable Login.
CONFIRM THE CUSTOMER'S EMAIL
Always below the Login area we could go to confirm the customer's email.
To confirm the customer's email we should check the option Mail Confirmed.
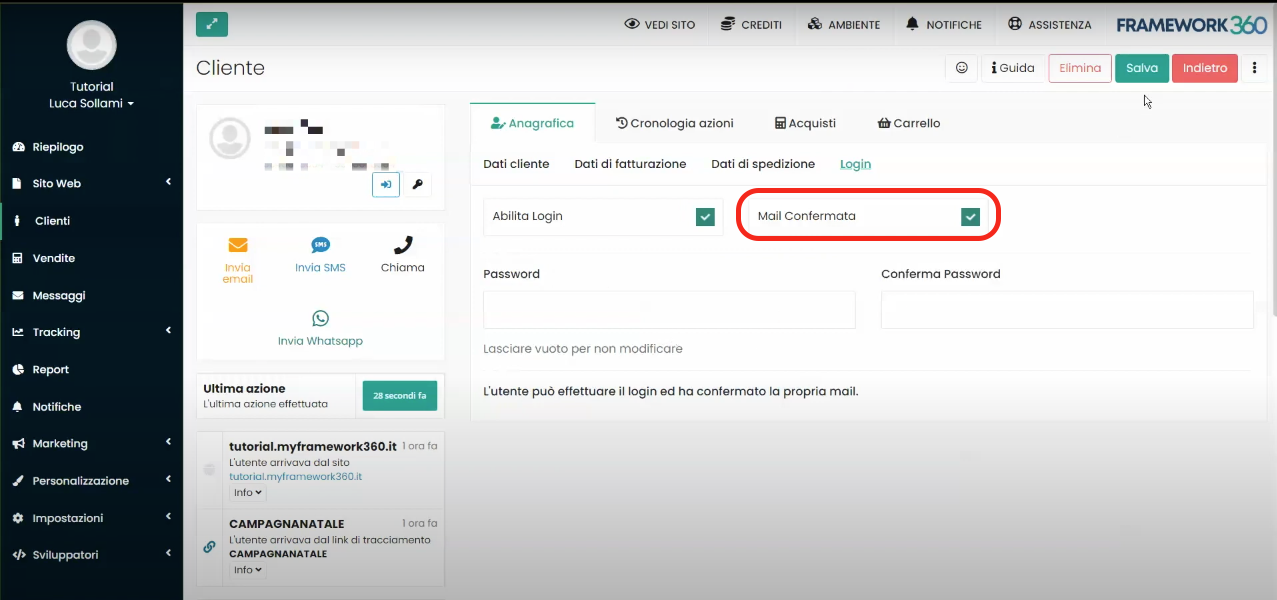
CHANGE THE CUSTOMER'S PASSWORD
Another operation that Framework360 allows us to perform below the Login area is to change our customer's password through the entries Password and Confirm Password.