Within this guide, we will see how to create an image gallery that we can add to our website.
Step 1: Let's create the image gallery
To create the image gallery, we should go to the submenu of Framework360's main menu Gallery following these steps:
Website > Galleries
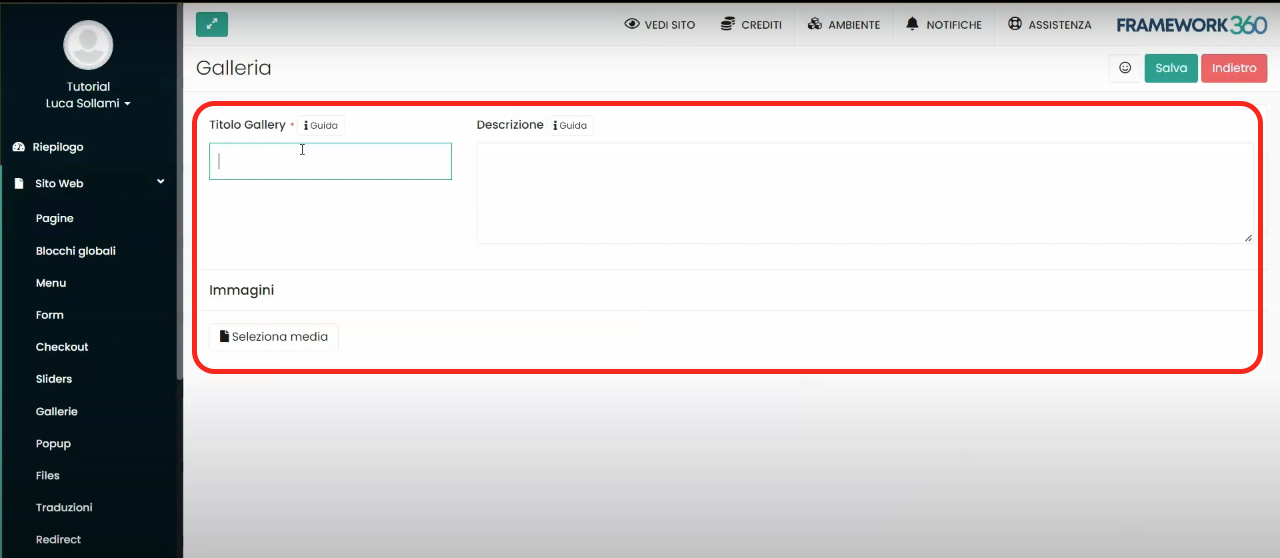
At this point, click on the green button at the top right Add to go and create a new gallery.
In the creation screen of the new gallery, Framework360 gives us the possibility to give a title and a description to our gallery and decide which images to include in it.
Step 2: Insert the gallery into a web page
Once we have created our gallery, we need to add it to the web page where we want it to be displayed. To do this, let's go to the submenu of Framework360's main menu Pages by following these steps:
Website > Pages
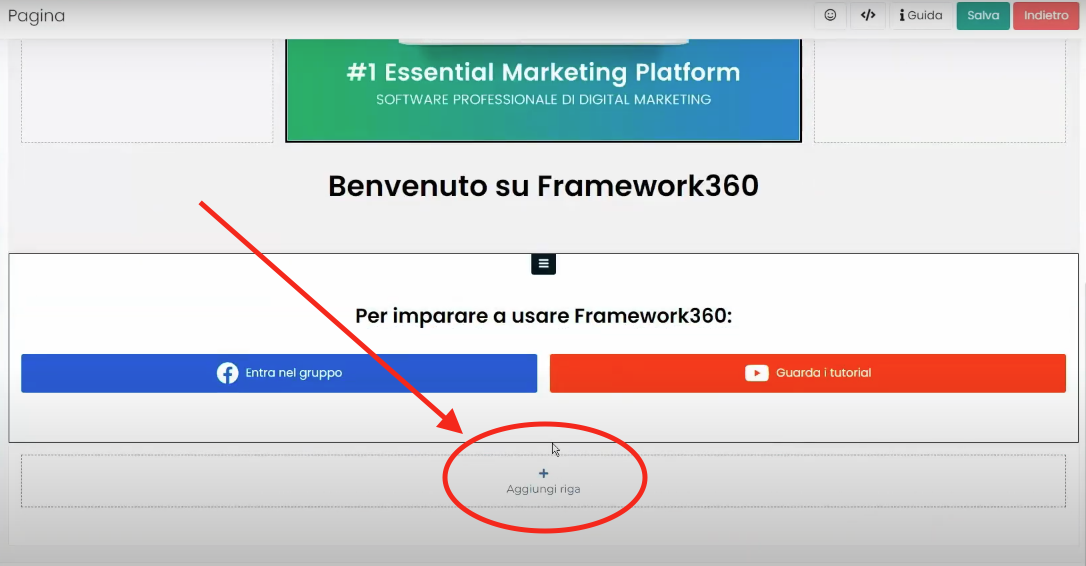
Now let's click on the page where we wish to insert the gallery to modify it.
Once inside the page editing screen, scroll down to the point where we want to insert the gallery and add a new row.
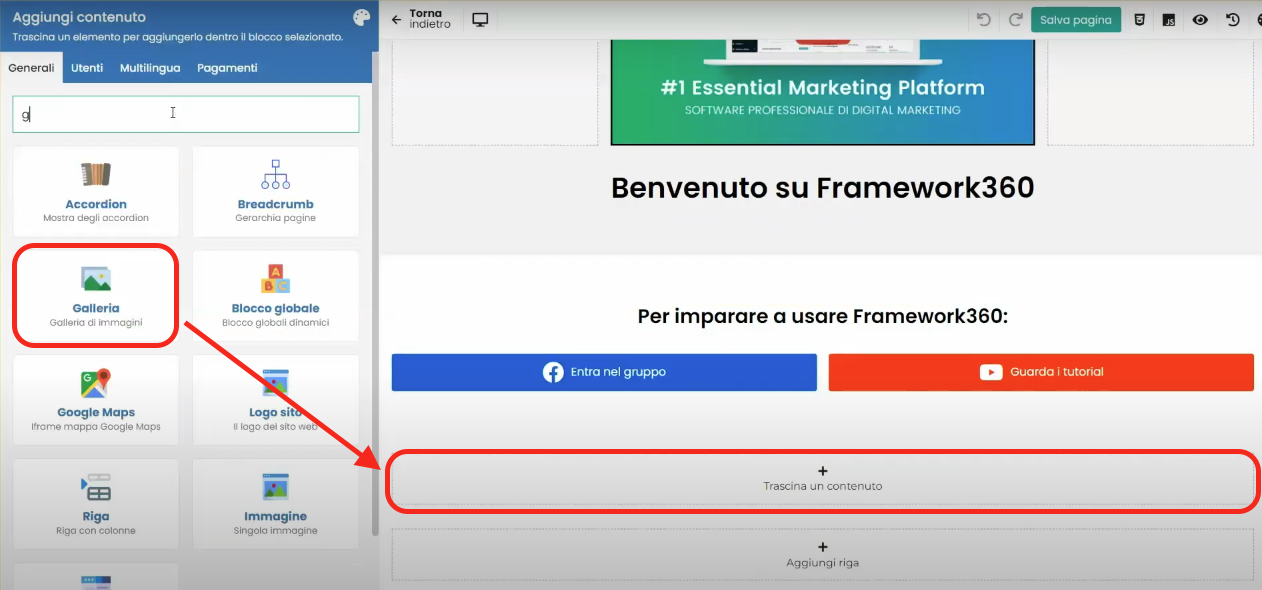
At this point, using the visual builder of Framework360, we proceed to add the Gallery block inside the row and select the gallery that was previously created.
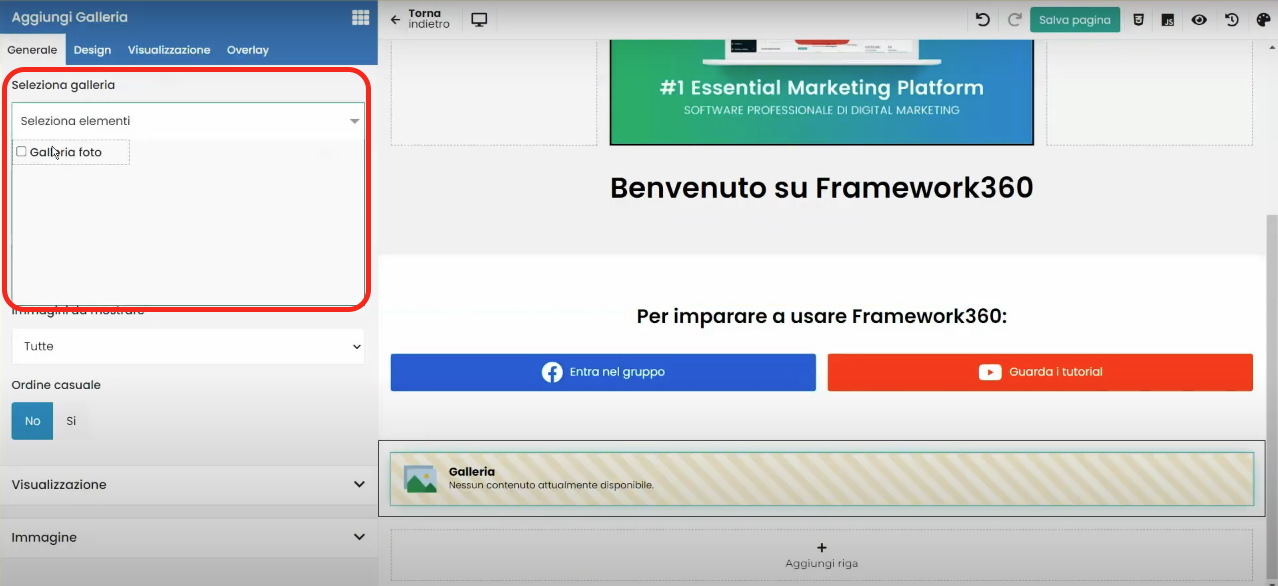
Now all that's left is to customize the appearance of our gallery, again through the visual builder of Framework360, and finally, click on the green button at the top right corner labeled Save.


