Within this video, we will see how to change the domain of the site for your website on Framework360.
Step 1: Update the domain
Firstly, we should navigate to the Domains tab which is located within the submenu of Framework360's main menu Settings, by following these steps:
Settings > Configurations > Domains
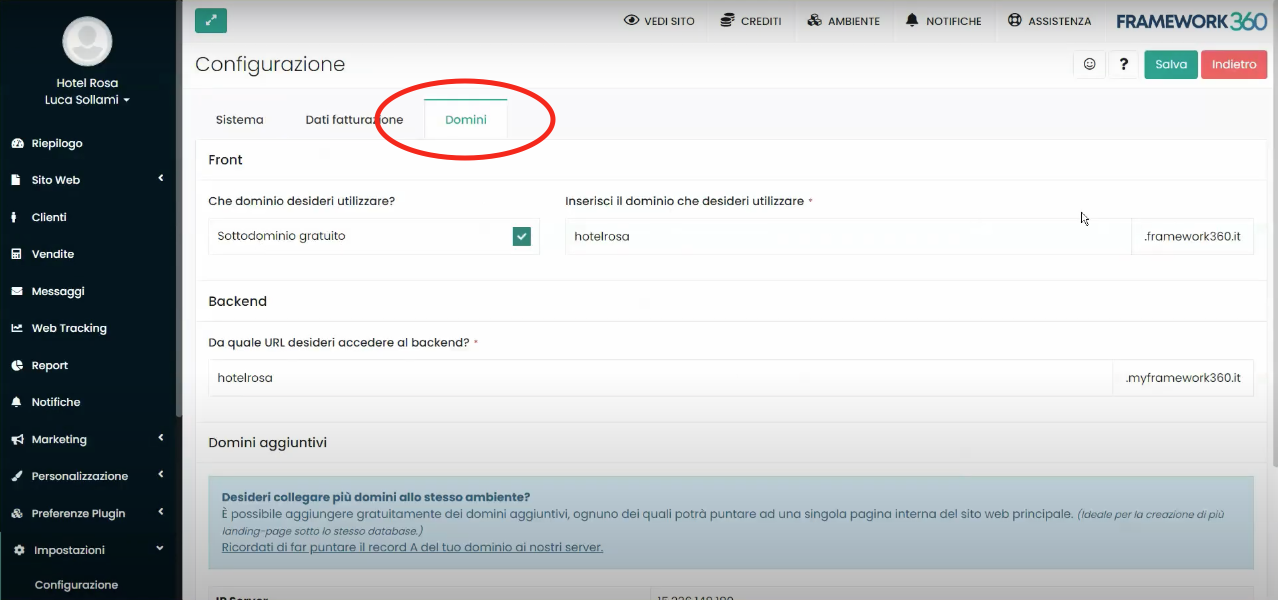
At this point, we could go on to modify the name of our free subdomain (be aware that the free subdomain will always end with .framework360.it), or, by unchecking the box next to Free Subdomain, we could go on to insert the previously purchased domain on companies such as, for example, register.it.
The purchased domain must be entered in the field Enter the domain you wish to use as shown in the following figure:
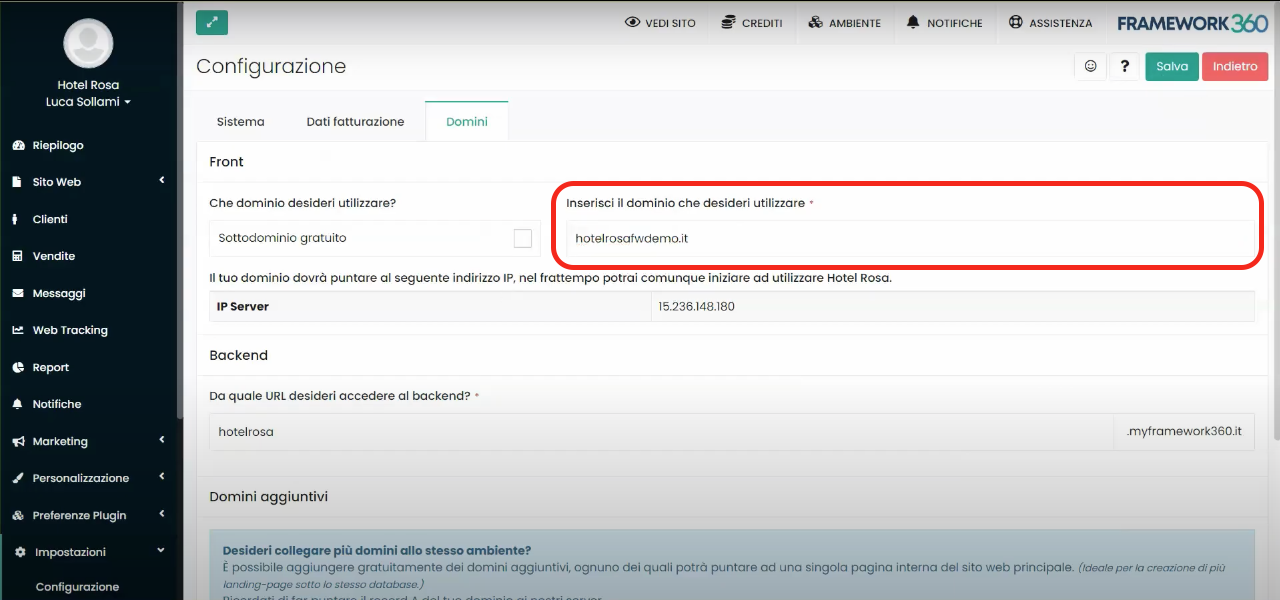
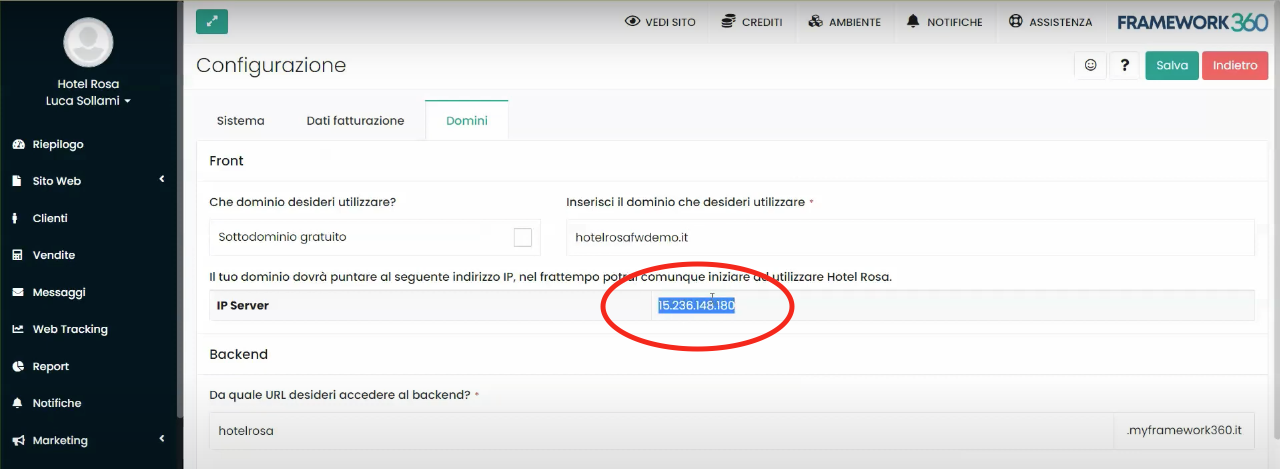
Step 2: Point the A Record to Framework360's IP address
After entering the purchased domain, you need to go inside the domain's DNS and enter the IP address of Framework360 into the A Record field that we will find under the IP Server entry as shown in the following figure:
Step 3: Change the Backend Domain
At this point, if we wanted to change the domain of the Backend, that is, the domain through which we access our area, all we would need to do is go under the Backend section always present in the Domains tab. In the Backend entry, we insert the name we want to give to our Backend domain (generally, it's the same name as the domain we have purchased).
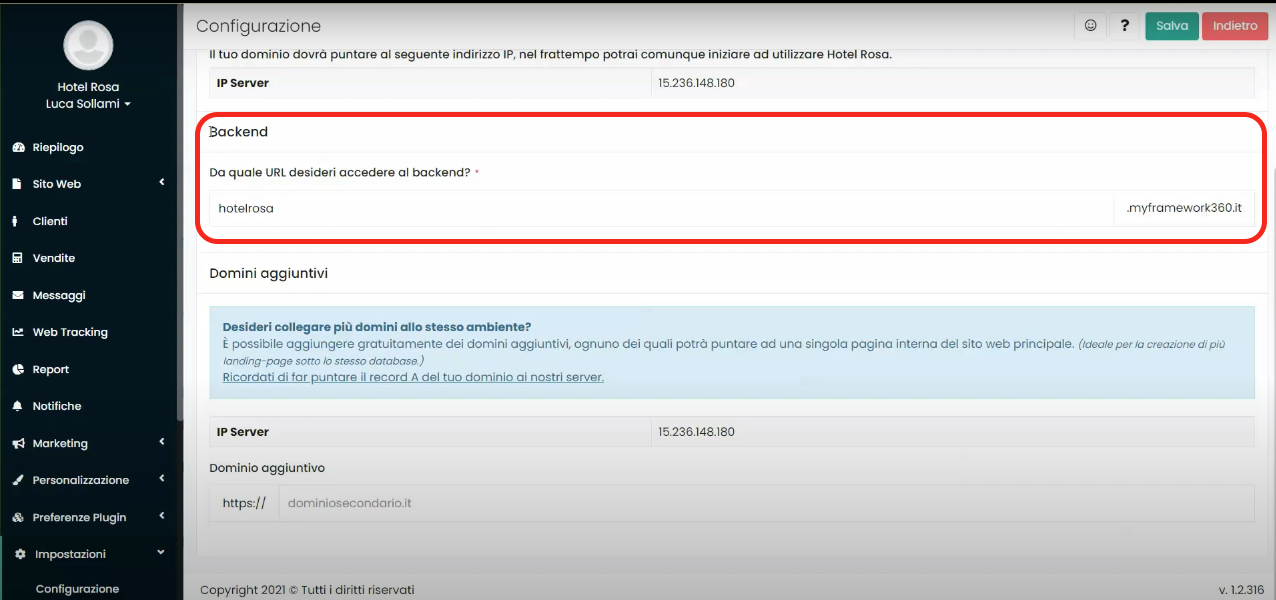
Step 4: Add Additional Domains
Last but not least, still in the Domains tab, we have the opportunity to enter additional domains under the corresponding section,
Additional domains.Let's remember that for the additional domains as well, the A Record must be pointed to the IP address of Framework360 just as we have seen for the main domain.


