In this tutorial, we will see how to install an affiliate system on your website built on Framework360. This system will allow customers to resell our products and services, enabling them to earn points or credits which can be converted into rewards or euros, depending on the adopted business model.
Step 1: Install the "Affiliation" plugin
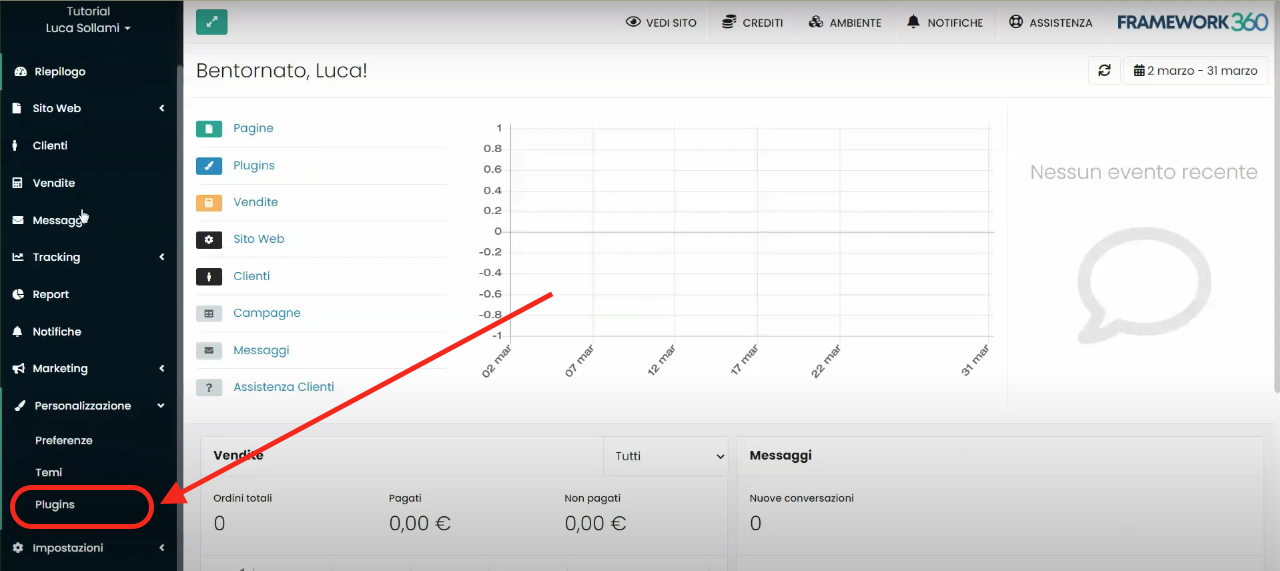
Firstly, let's install the "Affiliation" plugin. To do this, go to the "Customization" section in the left sidebar and then click on "Plugins".
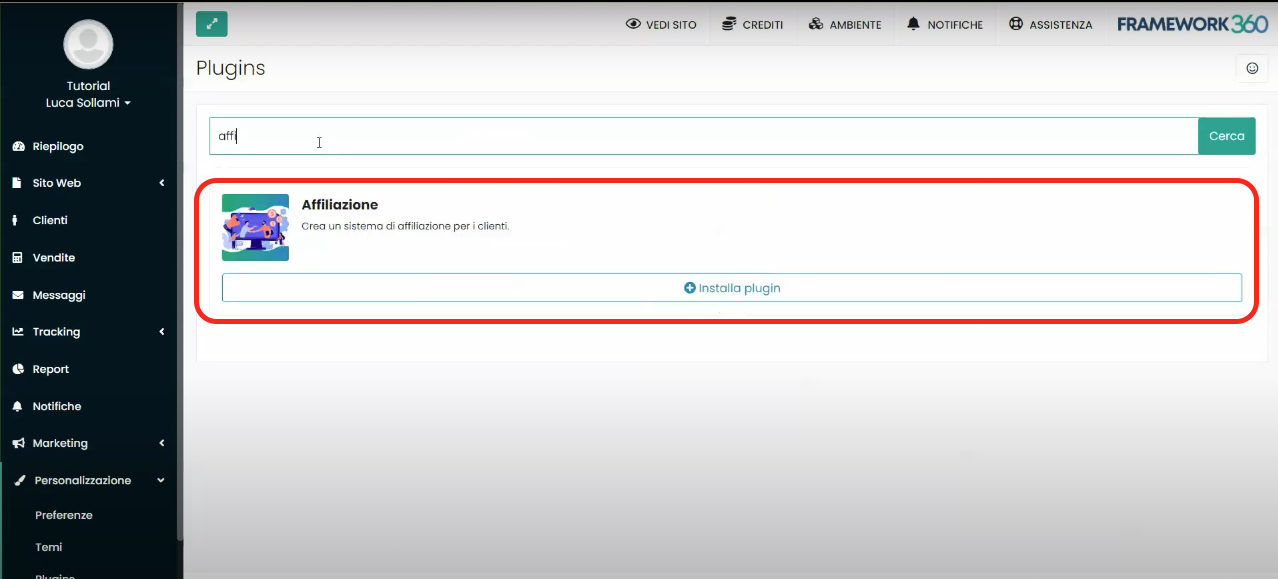
Look for the plugin named "Affiliation" and install it.
Step 2: Configuring the "Affiliation" Plugin Settings
Once the plugin is installed, we will find an entry called "Plugin Preferences" on the left sidebar, and under it, the "Affiliation" option. When we install a plugin, in most cases a new section appears under "Plugin Preferences", where we can manage all the various settings of the plugin.
Click on "Affiliation" to customize the functionalities of the affiliation system according to our needs.
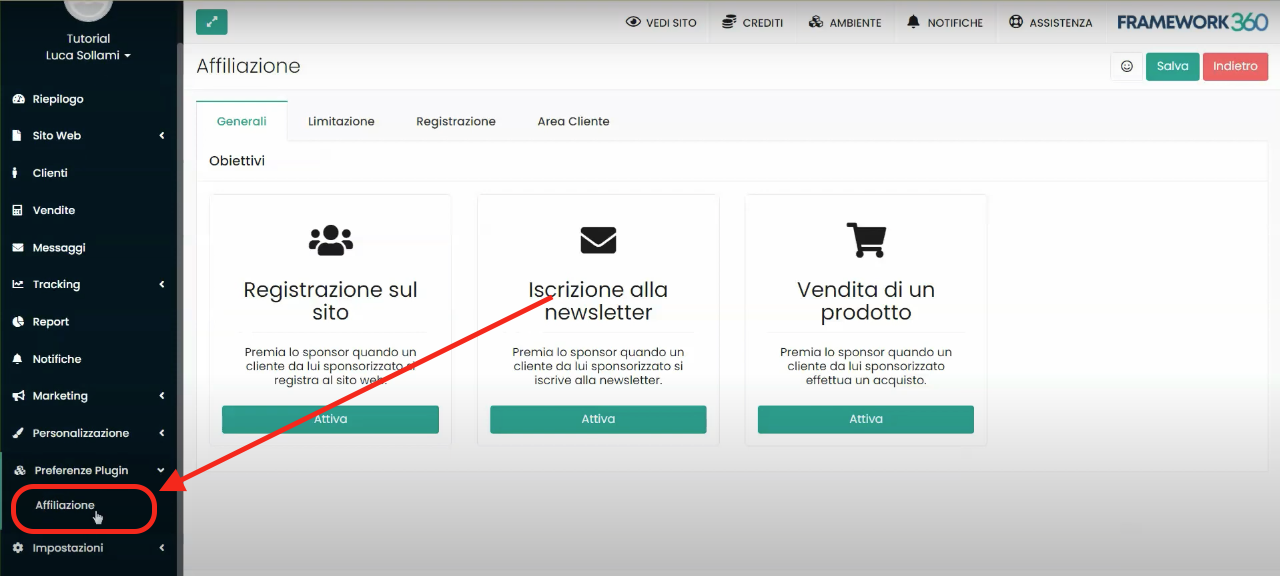
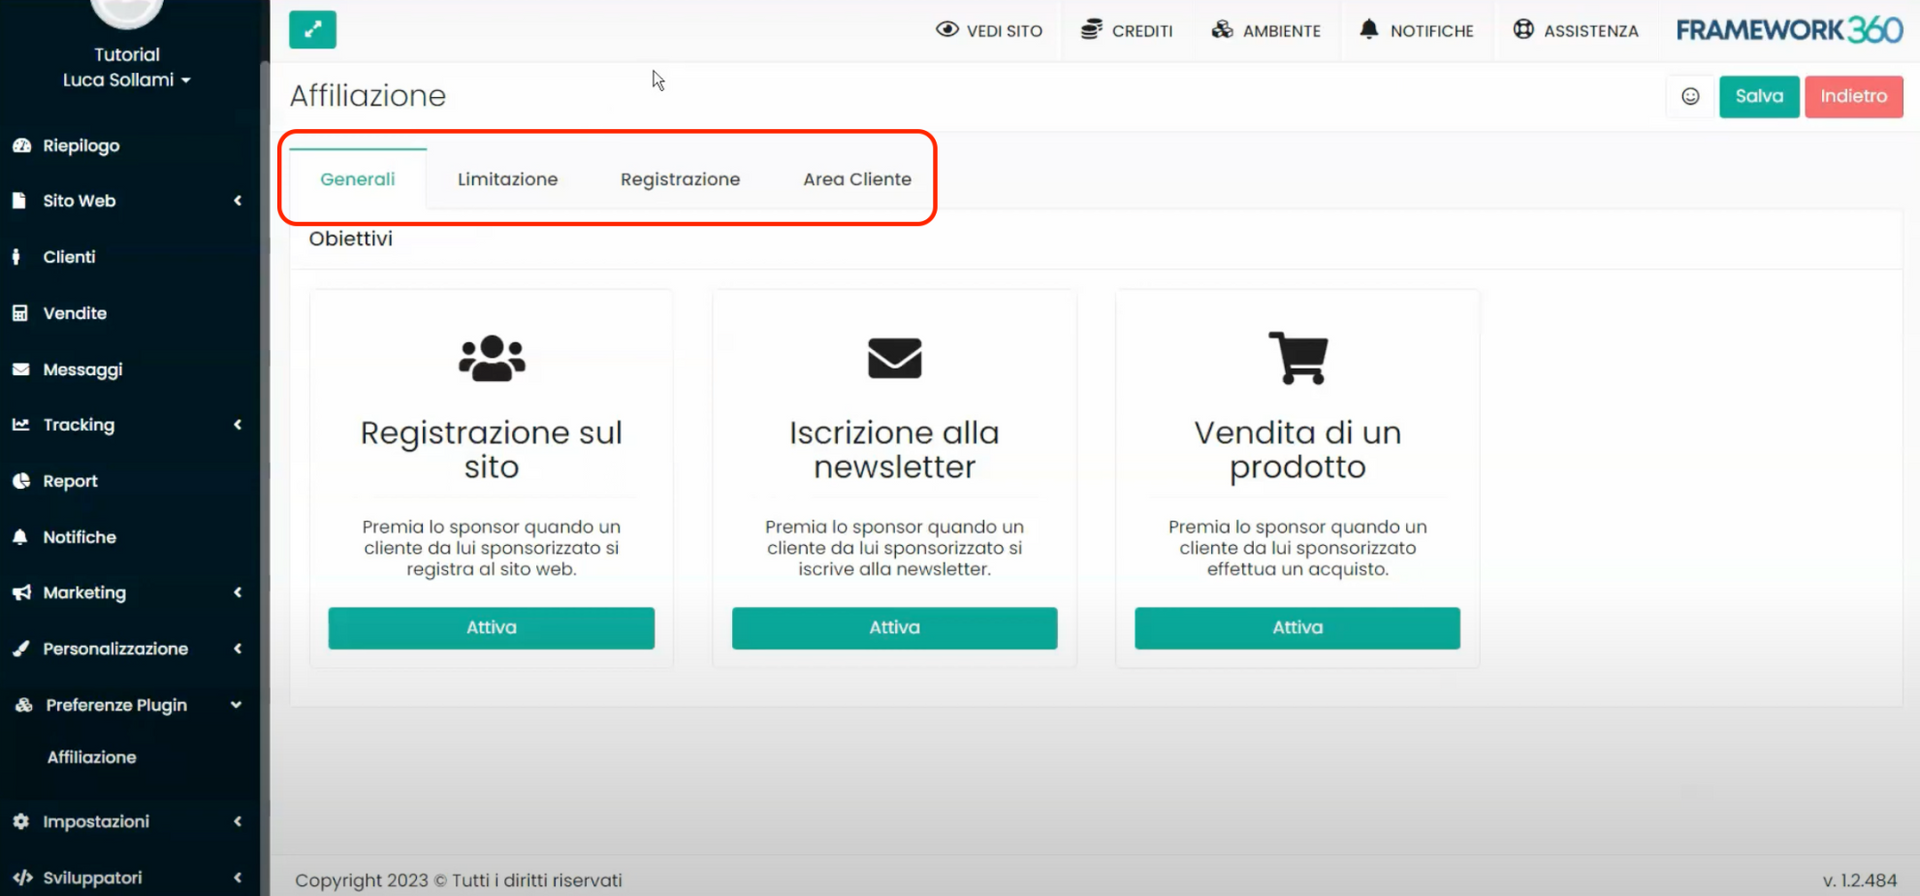
Once we open the settings screen of the "Affiliation" plugin, we will notice that it is divided into four tabs: General, Limitations, Registration, and Client Area.
 In the following steps, we will analyze the customization options available in each of the tabs just mentioned.
Step 3: Setting up the "General" tab settings of the "Affiliation" plugin
Within the first tab, namely the "General" tab, we can activate an affiliation program that will allow our customers to receive points or credits, which they can use to redeem rewards set by us, when they do the following through their sponsor code or affiliation link:
- register new users to our website
- or sign up new users to our newsletter
- or purchase products sold by us.
The "General" tab gives us the possibility to activate each of the goals just listed by clicking on the appropriate item.
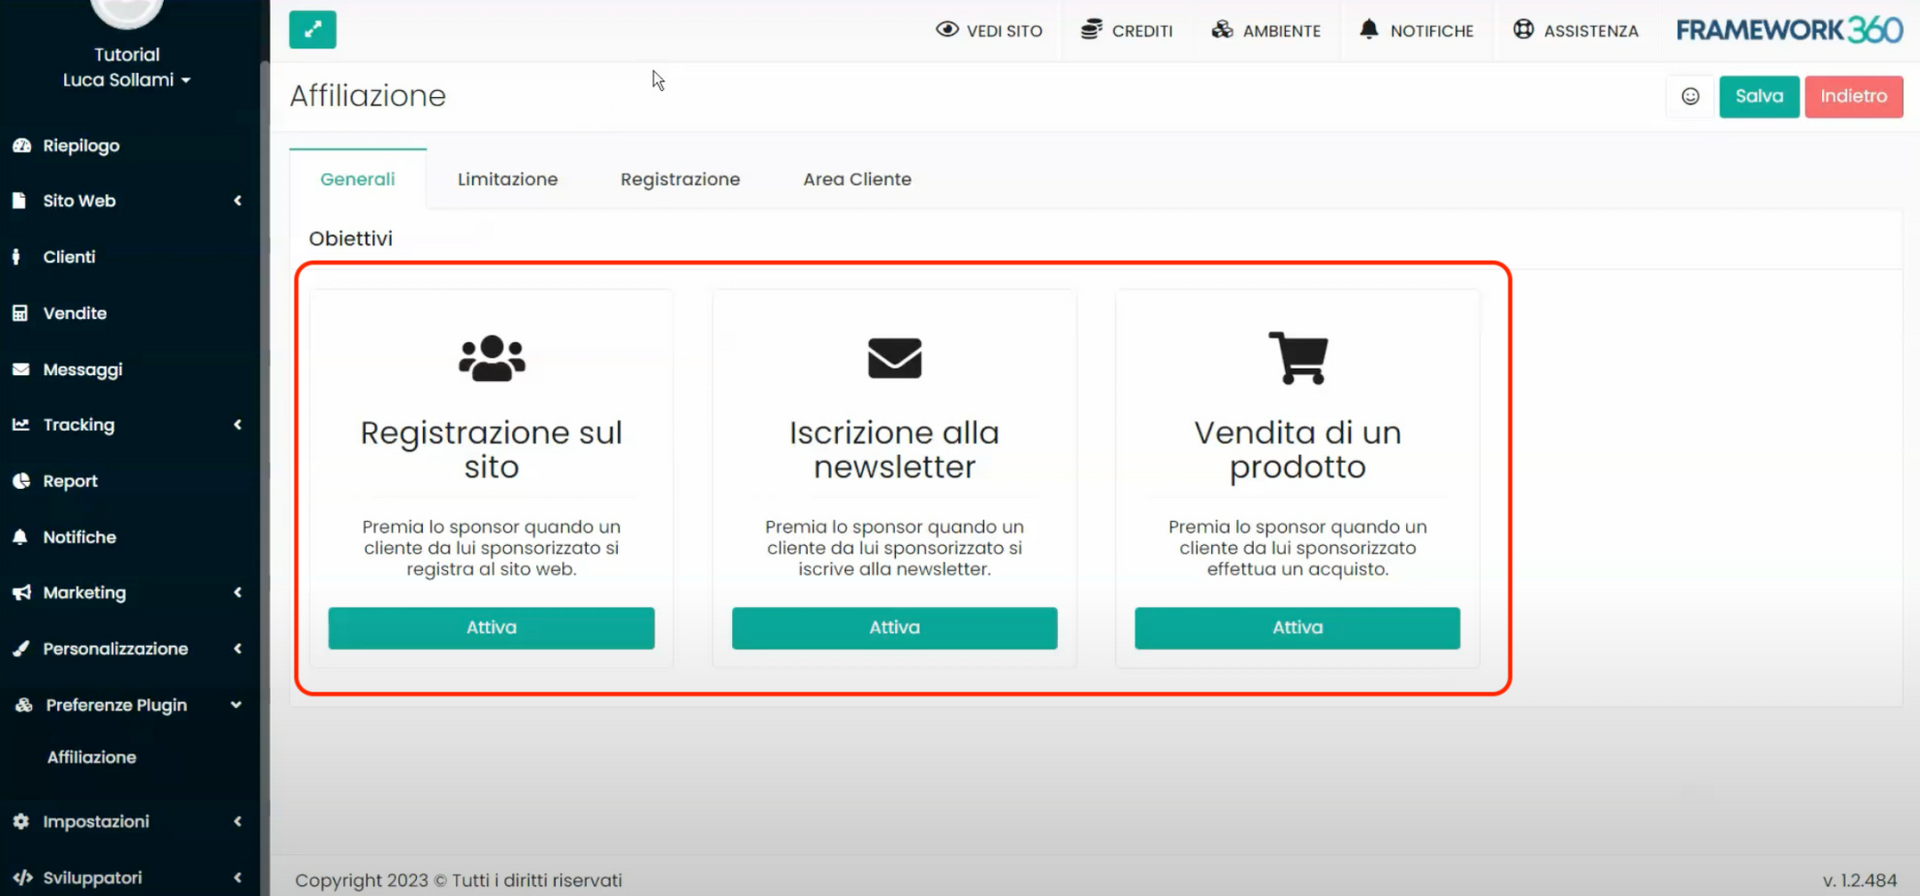
For example, if we click on the "Registration on the site" item, a screen will open that will allow us to assign points or credits to the sponsor and, if applicable, also to the sponsored individual when they register on the website using the sponsor code or affiliate link.
In the "Site Registration Settings" screen, the system asks us to install the "Customer Points" plugin to manage the assignment of points, or alternatively the plugin Customer Balance to manage the allocation of credits.
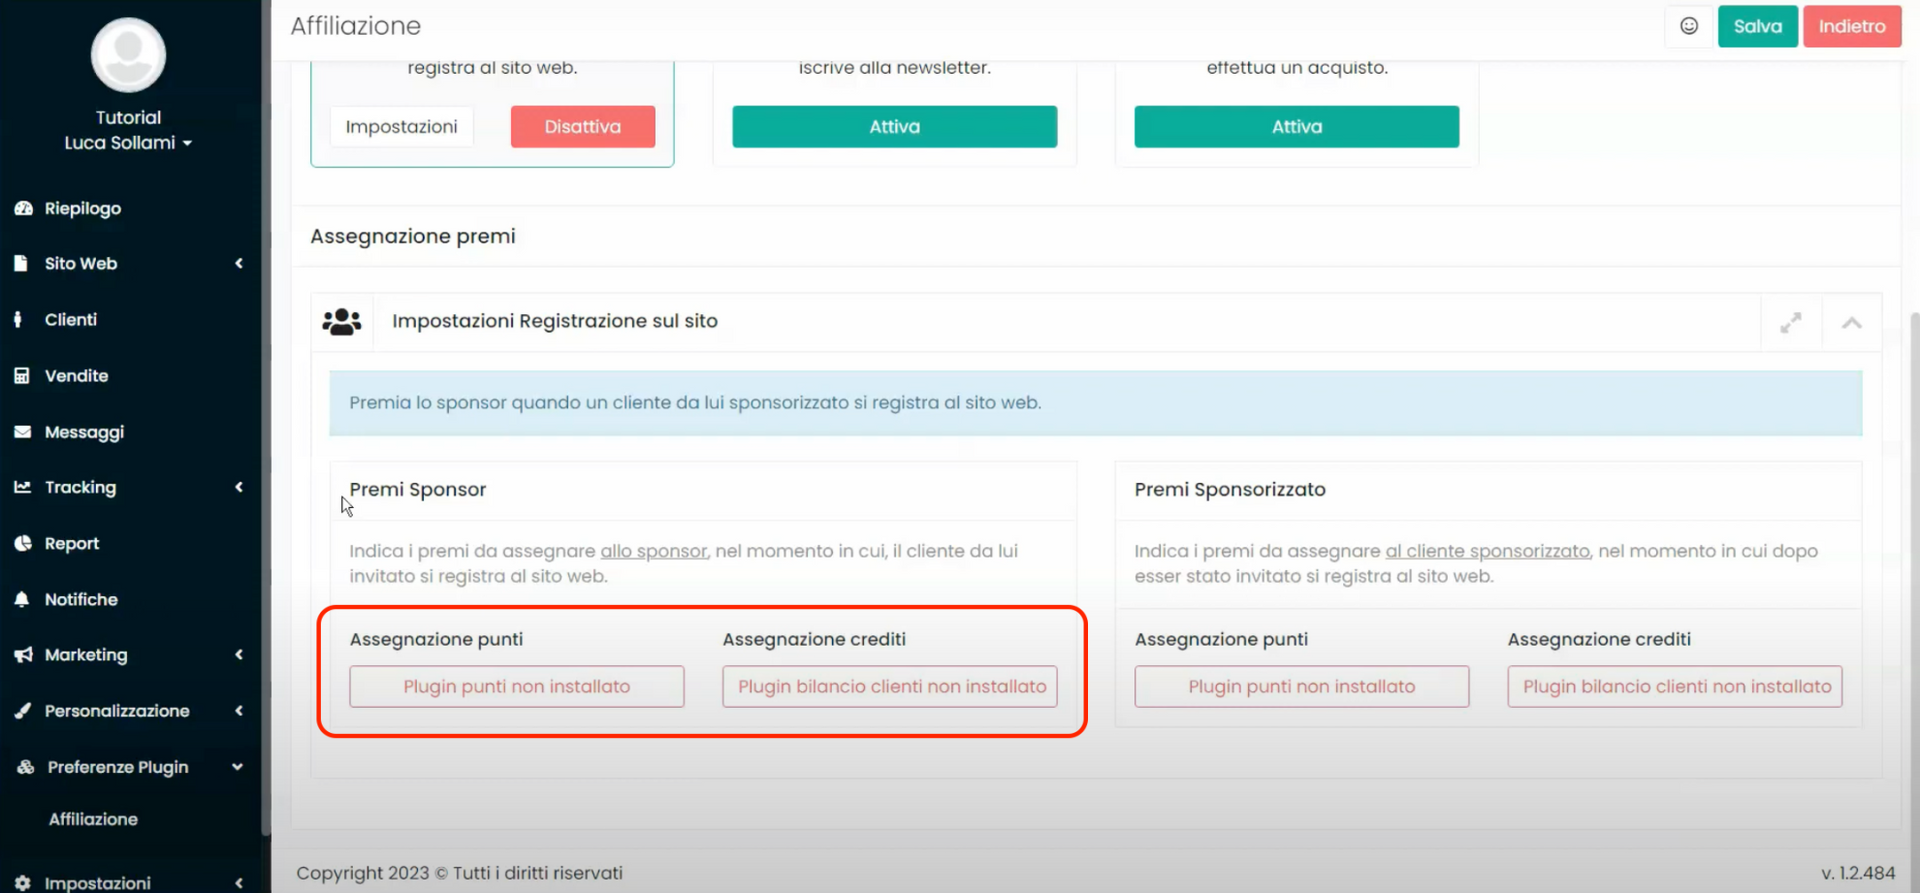
Once the plugin is installed, we will be able to proceed with defining the points or credits we wish to assign to the sponsor and the sponsored individual.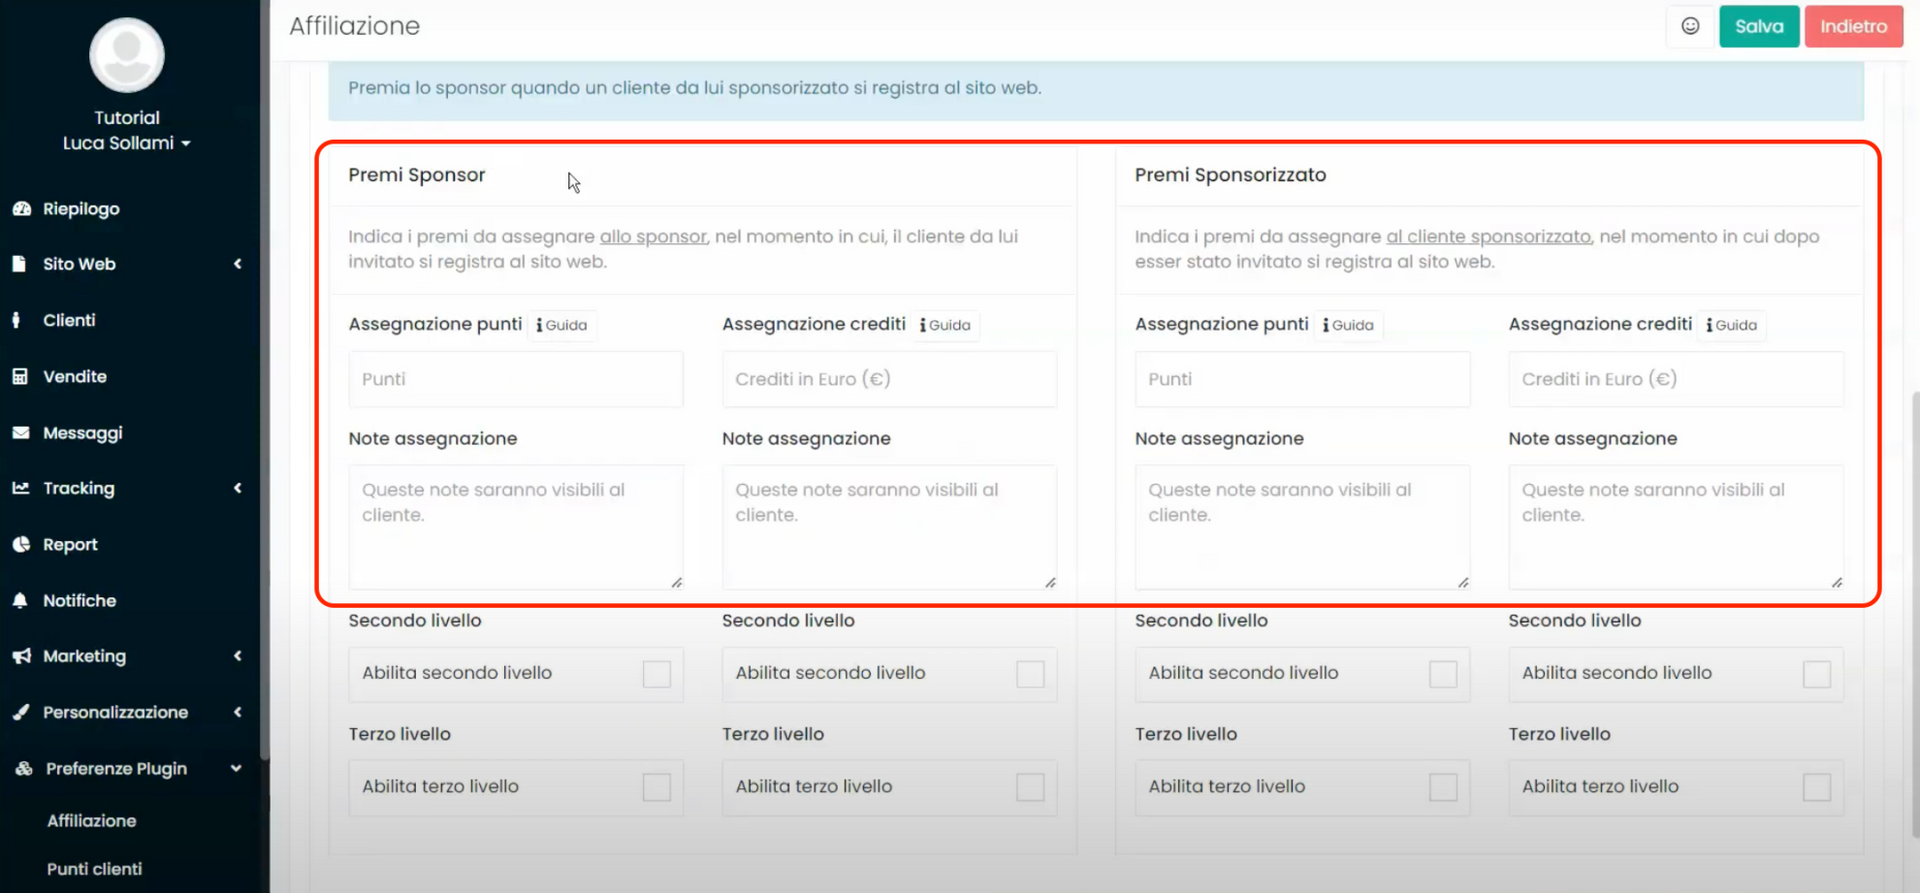
We specify that the system not only allows us to assign points at the first level of affiliation but also offers the possibility of enabling a second and third level. This means that when a sponsored individual becomes a sponsor themselves and invites new users to sign up for our website, points or credits will be credited both to the sponsor and the sponsored at the time of registration. This operation can be carried out up to the third level of affiliation.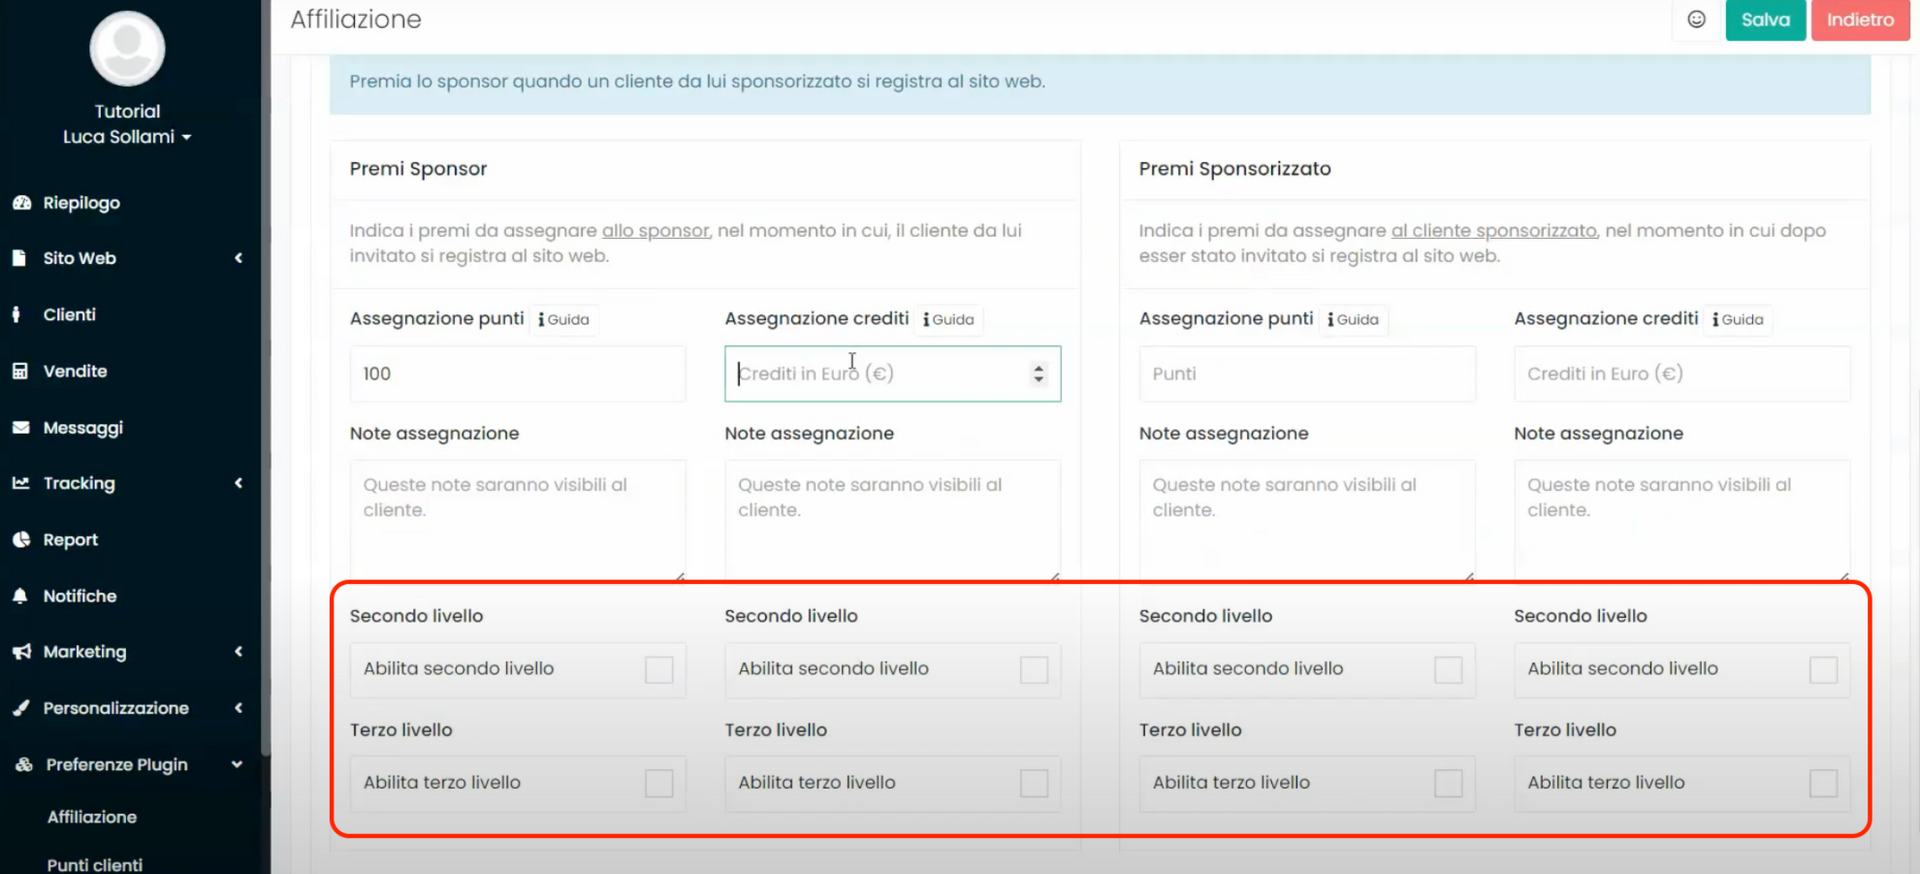
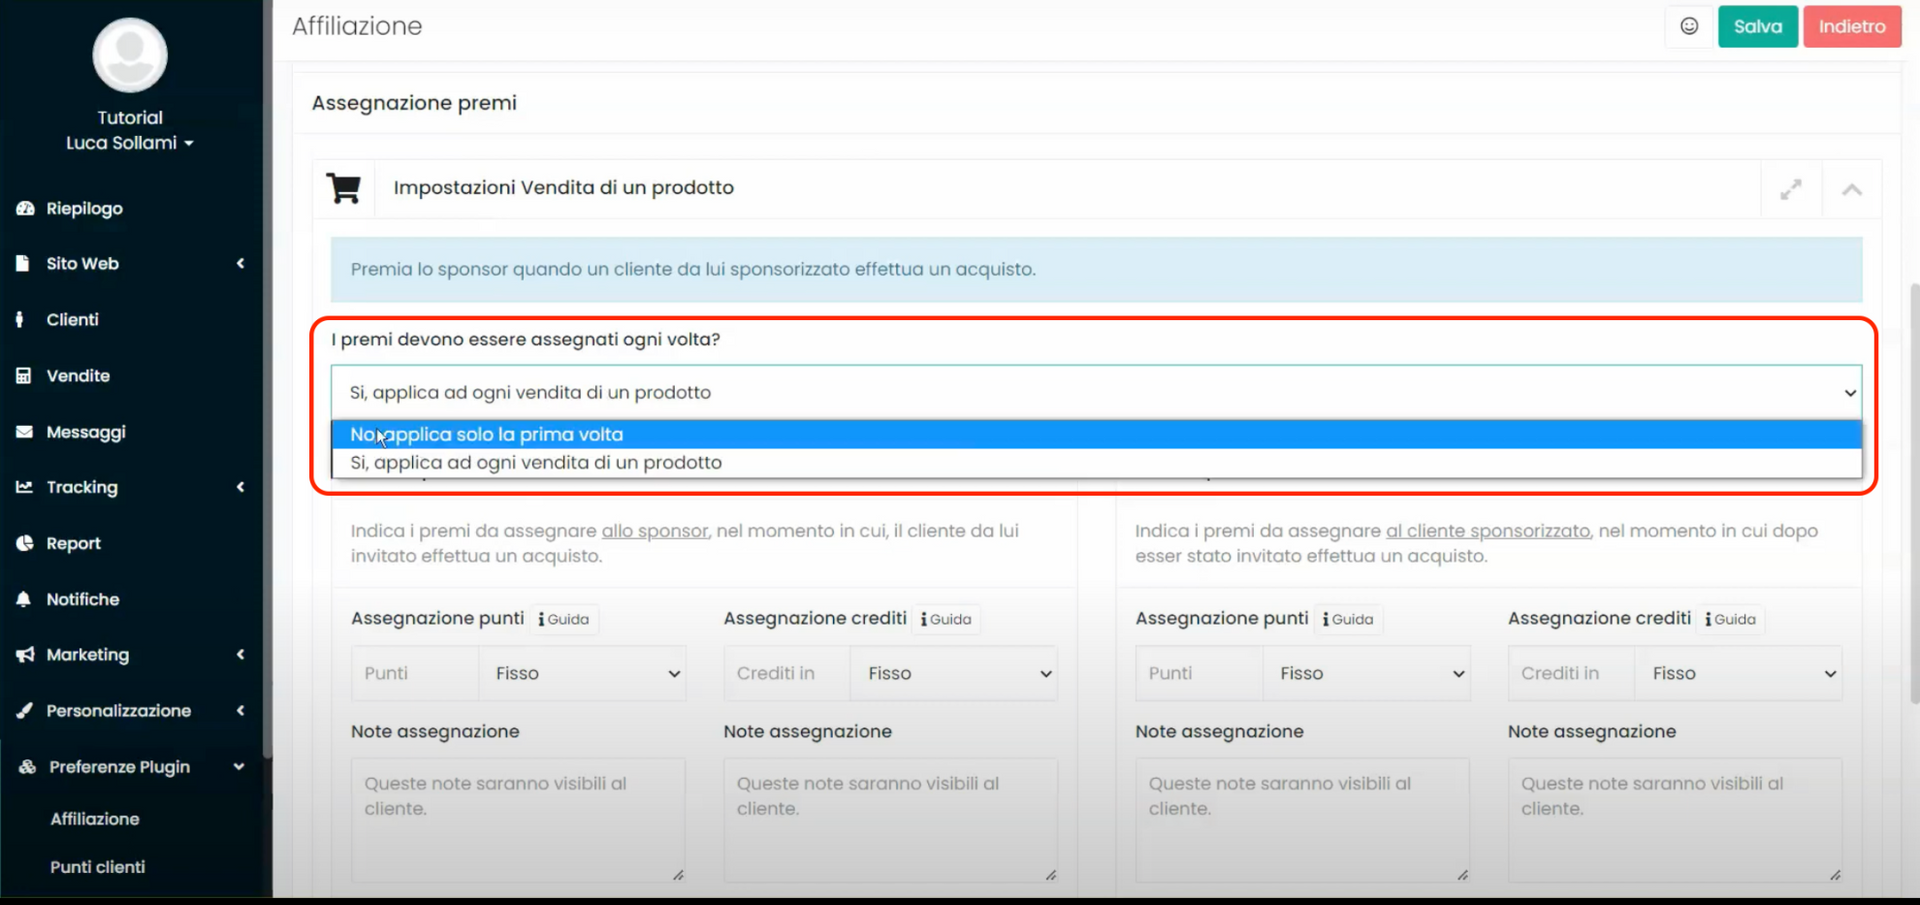
The customization options we've just seen for the "Website Registration" goal are similar for the other two goals, namely "Newsletter Subscription" and "Product Sale". For this last goal only, the system gives us two additional possibilities:
- The possibility to decide whether to award prizes when the product is sold for the first time or to assign rewards for every sale of a product.
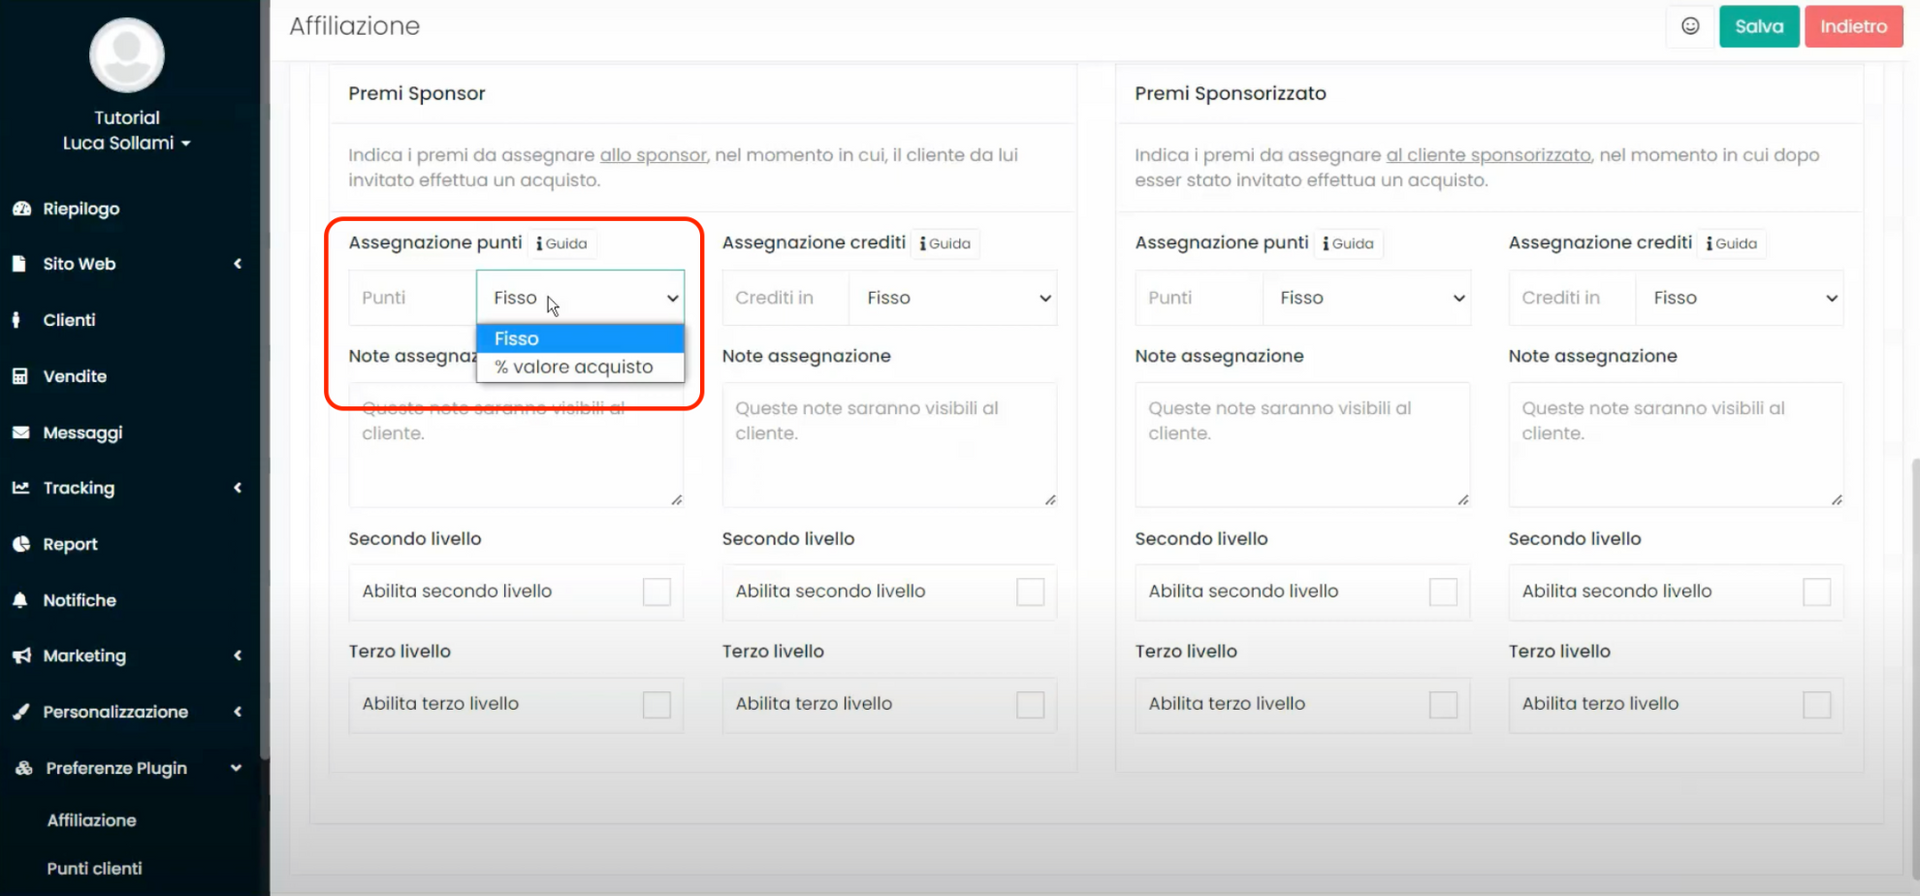
- The possibility to choose whether the allocation of points or credits should be fixed or based on a percentage of the purchase value. For example, if we want to set it at 10% of the purchase value, it means that if a product is sold at a price of 100 euros, the affiliate will earn 10 points or 10 credits, depending on whether we are defining a points or credits allocation.
![Image containing screenshot, text, softwareAutomatically generated description]()
Step 4: Set the settings of the “Restrictions” tab in the “Affiliation” plugin
If we want to limit access to the affiliation system to certain users only, we can do so through the "Restriction” tab. We can choose to enable the affiliation system for select users based on certain criteria such as gender, email, date of birth, or having previously purchased our products.

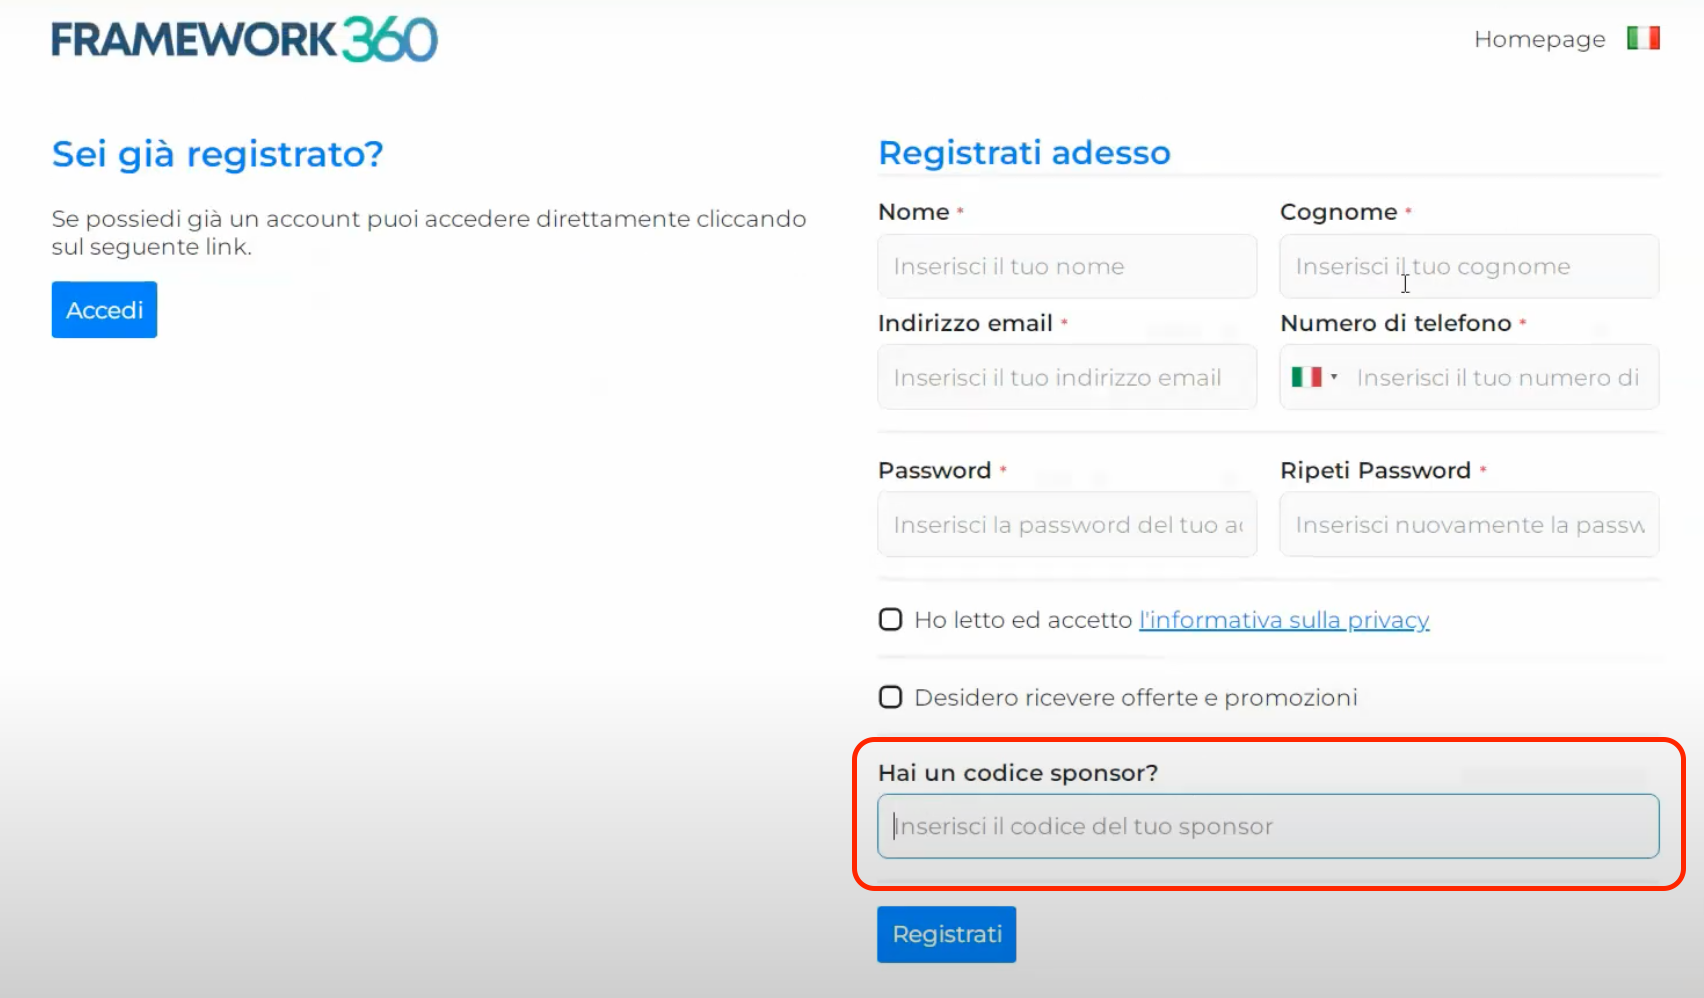
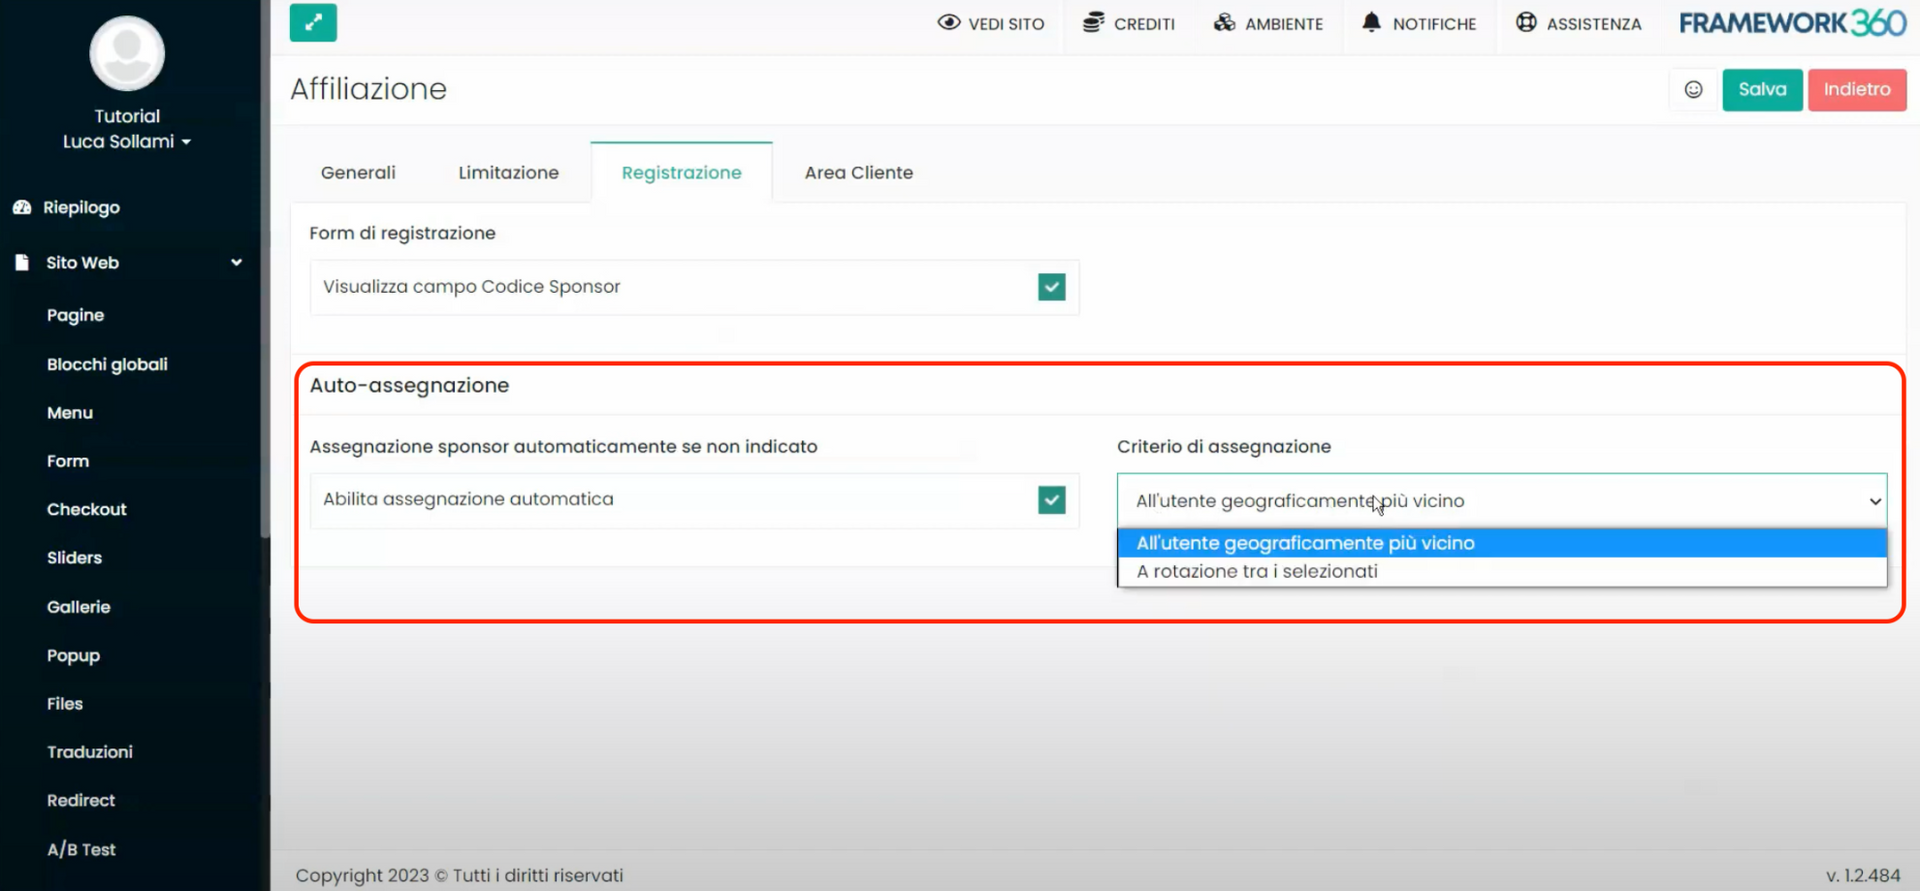
Step 4: Set the settings of the “Registration” tab in the “Affiliation” plugin
In the "Registration" tab, by enabling the option Display Sponsor Code Field, we could offer our new users the opportunity to enter a sponsor code during registration on our site.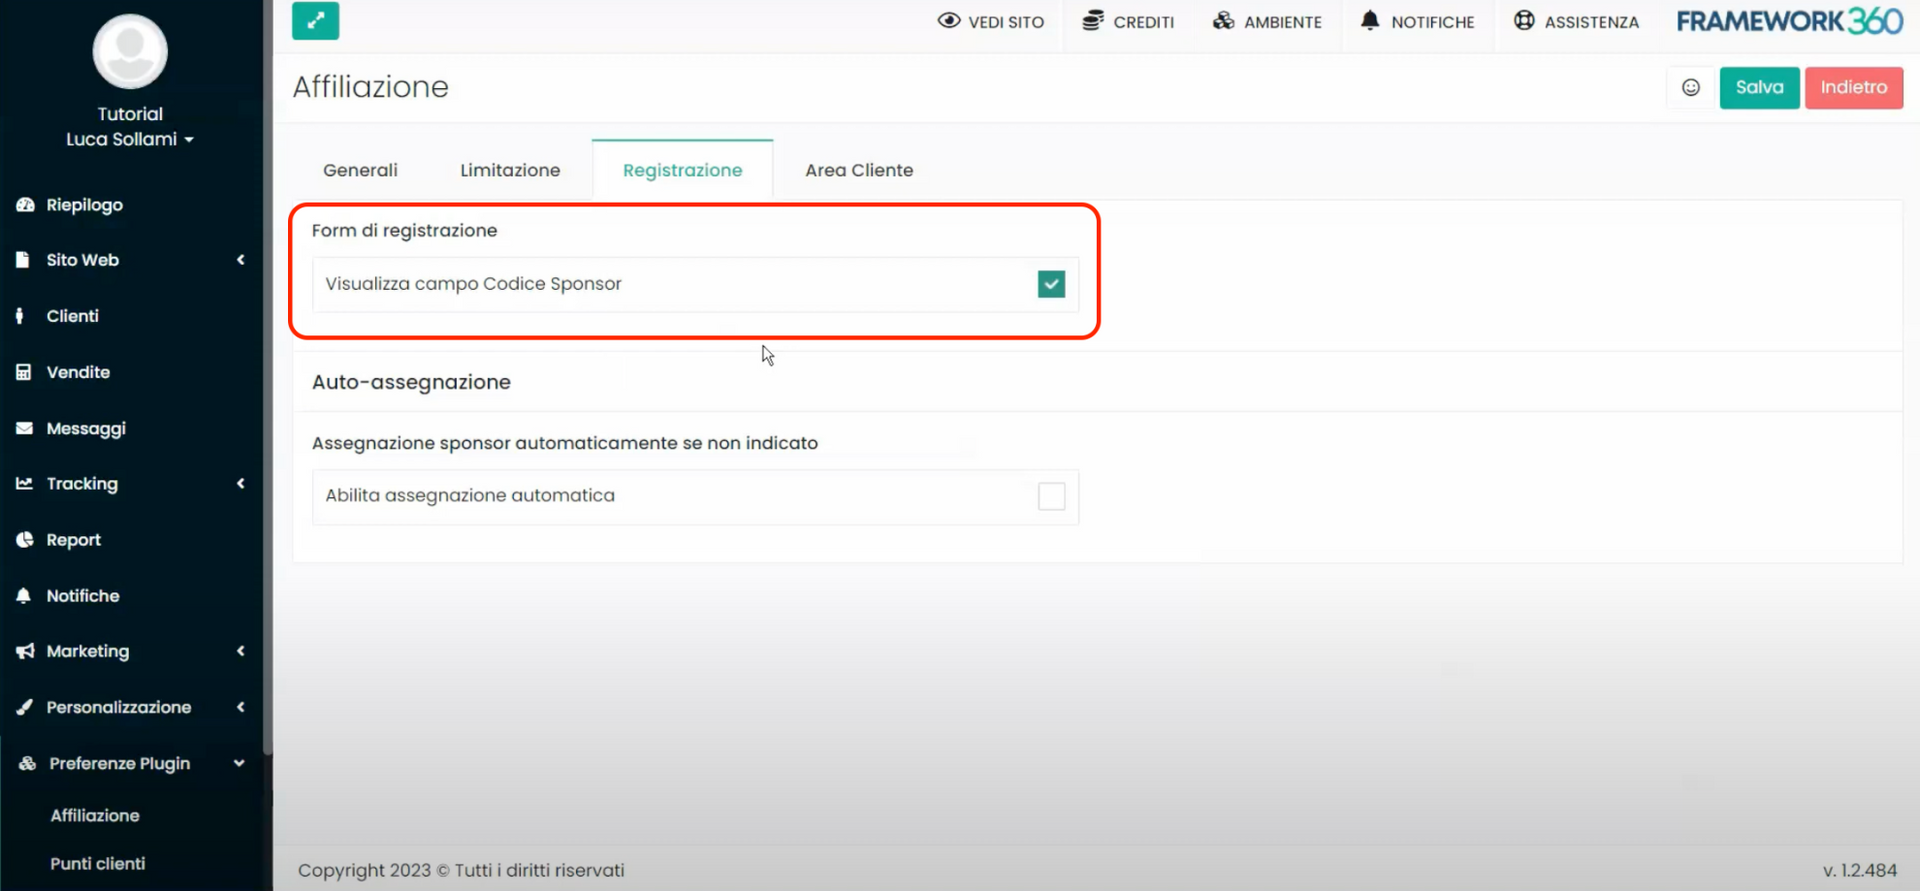
Furthermore, by activating the option "Enable Automatic Assignment", we could automatically pair all new users who register on the site with a sponsor. We can decide whether the system should match the new user with the geographically closest sponsor or randomly assign a sponsor from a selection of sponsors chosen by us.
Step 5: Set the settings of the "Client Area" tab of the "Affiliation" plugin
Within the "Client Area" tab we can manage the sections and messages that will be displayed inside the "Affiliations" tab of the Client Area. If you want to know how to enable the Client Area, I invite you to consult the dedicated guide by clicking here.
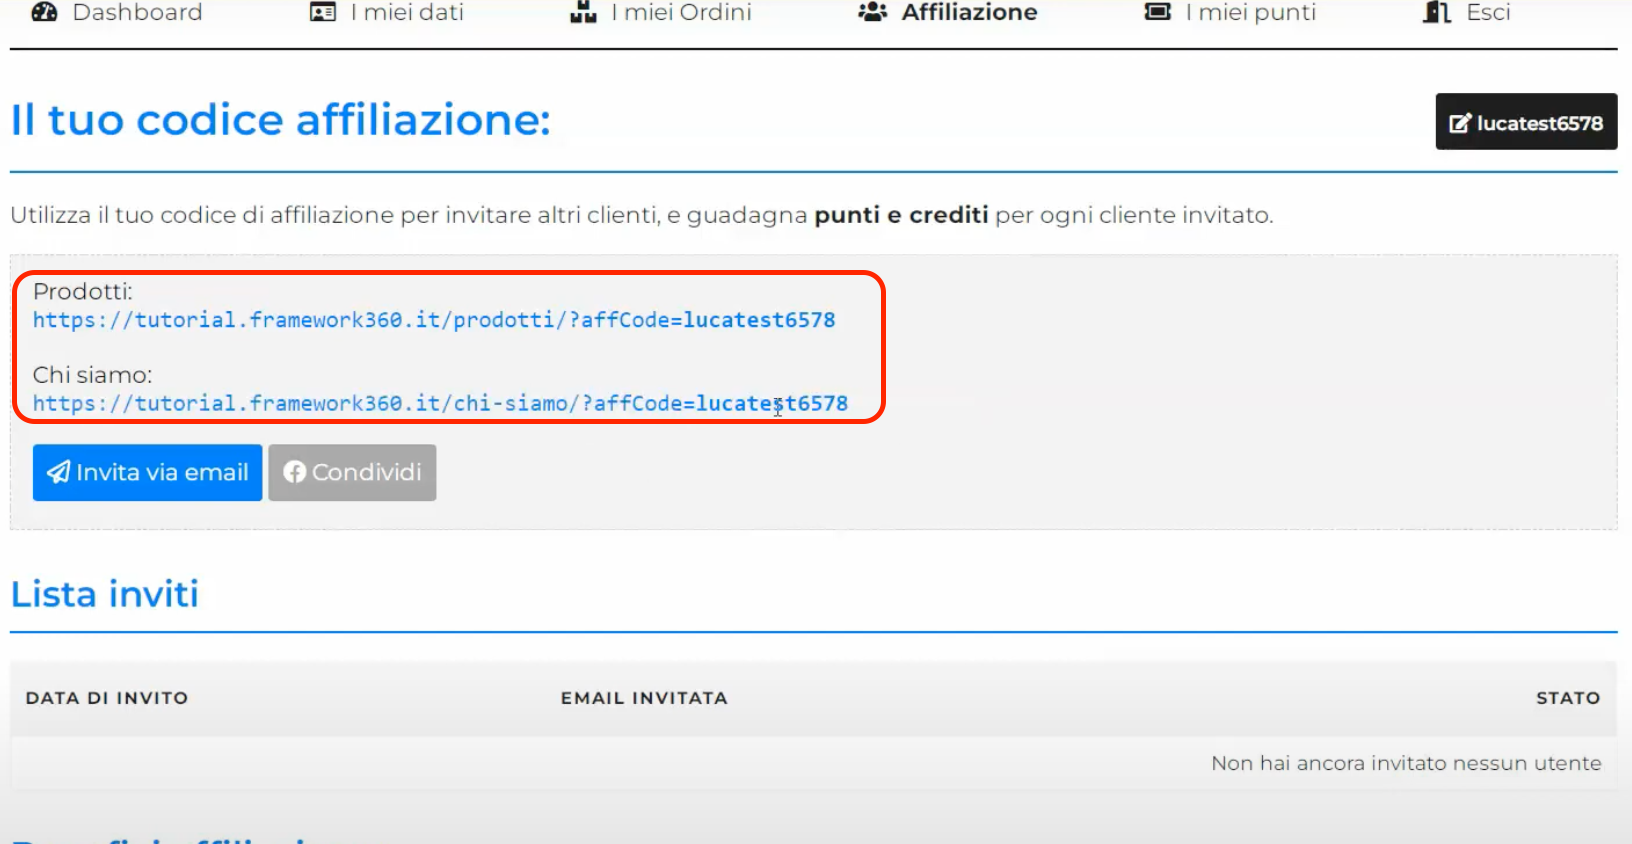
By default, the "Affiliations" tab in the Client Area will report your personal affiliation code, your affiliation link, and a list of sponsored users:
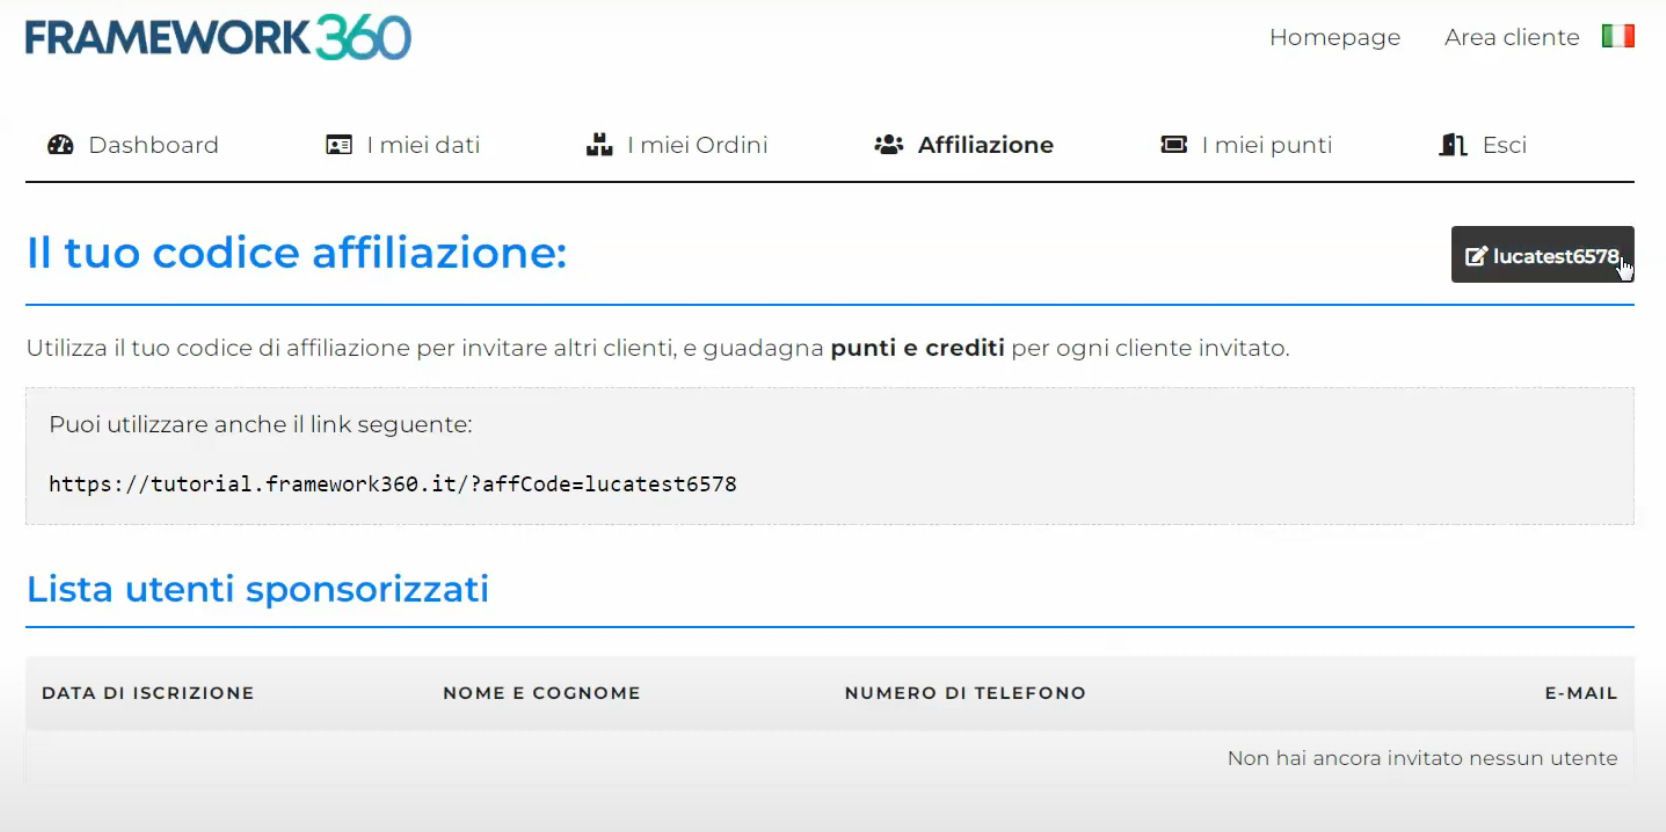
The difference between an affiliate code and an affiliate link is as follows:
- An affiliate code is a sequence of characters that identifies an affiliate and can be entered manually by a new user during registration to be assigned to that affiliate.
- An affiliate link is a web address that contains the affiliate code and can be shared by an affiliate through various channels. Anyone who clicks on this link and registers on the site is automatically assigned to that affiliate without having to enter the code manually.
In both cases, the goal is the same: to let the system know who has brought in the new registered users and to reward affiliates with points and credits.
Returning to the changes we can make within the "Customer Area" tab of the "Affiliation" plugin, we will have the possibility to modify the initial message of the "Affiliations" tab in the Customer Area or to add new sections, also pertaining to the "Affiliations" tab in the Customer Area, such as the section that allows inviting new users via email.

We can also add several sections where different affiliation links for various pages of our site are displayed, since by default the affiliation link takes us back to the home page of the site, but we could create additional affiliate links that redirect, for example, to the "About Us" page or to the product catalog.